In this article we will learn how to lengthen a drywall profile or, in other words, increase its length. In previous lessons, we learned that the frame for a suspended ceiling is made from profiles 27x28, 60x27 and U-shaped suspensions (“crocodiles”). The fact is that the size of ceilings can be completely different. It’s one thing to make a suspended ceiling in a small children’s room, where the length of the profile is enough for the entire length of the room, and quite another thing to make the same ceiling in a large hall. And if the 27x28 profile can not be increased, but precisely leveled and sequentially attached to the wall, then as for the main 60x27 profile to which the drywall is attached, then here it is necessary to have a full-fledged long profile for the entire length or width of the room where the ceiling is planned to be made. What if the length of the profile we purchase in the store is not enough? In this case, you need to know how to increase it, obtaining a full profile of the required length.
The profile extension technology can also be useful if, for some reason, you do not have enough standard length profiles, but have several shorter pieces left.
How to lengthen a drywall profile
Published on 22 Jul 2016, 6:00
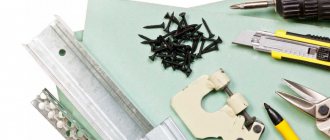
Materials for installing drywall from Petrovich - goo.gl/vGfw82 How to lengthen a profile for drywall! In our hectic life, however, as, for example, in all aspects or types of any repair there are unique features, everyone’s favorite drywall (GKL) is also present, and these features do not always lie on the surface of the repair, and we frantically remember about them, these little things, only when absolutely necessary and sometimes too late. As, for example, about building up and extending a metal profile, be it a widespread ceiling one (60*28) or a specific rack-mount for gypsum plasterboard partitions. Not the point! For your consideration, the Guys from Stone, that is, Maxim and I, are in a hurry to present video lesson No. 84 - “How to lengthen a plasterboard profile”! To be honest, it’s not that difficult to carry out this action. In the case of the ceiling metal profile of the Knauf system, we only need an extension (connector) for the 60*28 profile and a screwdriver with a suitable bit. When it comes to a wider rack profile, any 50*50 or 100*100, and its extension, it is worth preparing a cutter (stapler) for the profile and a piece of a guide profile from a suitable ruler. Everything else will be shown by those same Volgograd Guys from that very Stone!
The public construction-positive channel “Guys from Stone” talked about how to correctly and in a short time extend your profile for all types of imaginable work - youtube.com/channel/UC5wB9-FFt2hmPmRq5ge... And a find page in my native VKontakte, where it is already presented not the first video about profiles for drywall - vk.com/guysstone We also follow the development of Instagram, where there are our photos from the scene and it is clearly visible how exactly we want to build up our profile - instagram.com/guysstone
There are also a number of cool videos where you may need knowledge in lengthening the profile for gypsum boards and not only it: No. 32 How to make a frame for drywall - youtu.be/GCup5TkBoHo No. 52 How to make a partition from plasterboard - youtu.be/qMx7CityNxg No. 57 How to use profile cutter - youtu.be/GbhOWgHivCQ
To summarize, if you need to lengthen a profile for drywall, no matter rack or ceiling, watch this video, friends.
General information about the profile components of the frame
The galvanized profile for plasterboard and the installation of prefabricated partitions, suspended ceilings and cladding are inextricably linked with a number of components that make up a single structure.
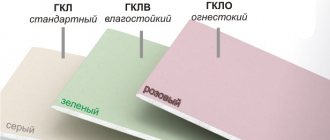
At the moment, the industry produces four main types of profiles :
- rack-mount – 50x50, 75x50, 100x50 mm;
- rack guide – 50x40, 75x40, 100x40 mm;
- ceiling – 60x27 mm;
- ceiling guide – 28x27 mm.
The standard length of profiles is 3 meters .
Rack and ceiling elements have special sides for rigidity; the guides do not have this.
There are two more types of similar products, beacon and corner, but now we will not talk about them, but about what fasteners are needed to assemble the frame.
Standard profile sizes for drywall: 5 types
An extension cord will help you!
How to extend the profile for drywall! As in every other work in drywall there are things that do not always lie on the surface, and we remember them only when absolutely necessary. How, for example, build the profile, whether ceiling 60 * 28 or blade for partitions. For Your consideration GuysStone in a hurry to introduce video No. 84 - “How to extend the profile of plasterboard”! Make it frankly is not difficult. In the case of ceiling metal sheets, we need only the extension (connector) to the profile of 60 * 28, and screwdriver. When it comes to rackmount profile and its extension, you should prepare for stapler profile and guide profile piece. Everything else is show the GuysStone!
Profile connection for plasterboard
Content:
Profile frame
Installation of this material is carried out on a frame previously prepared from profiles. And on how accurately the connection of the drywall profile . depends on the strength and reliability of the entire structure. If you plan to do all the work yourself, you need to familiarize yourself with the basics.
The length of the guide elements is usually about 2.5 - 3 meters. When working with large areas, it is necessary to connect them together.
There are several basic connectors that can be used during installation.
Crab connection
When preparing the frame for attaching plasterboard sheets to the ceiling, a crab joint is used, shown in the photo below. Some experts call them single-level connectors.
As a rule, they are located on the inside of the aluminum profile and are held in place by antennae. Fixation is carried out using special screws (“bugs”, “seeds”). It is necessary to work with the antennae carefully, using minimal physical force.
T-joint
The use of a T-shaped or longitudinal connector implies a slightly different fastening technology.
Part of the profile side is cut off, and guides are placed in the resulting hole, fixed with self-tapping screws. Under no circumstances should you cut it off completely, as this will affect the rigidity and strength of the structure.
Frame installation
Having finished preparing the frame, you can proceed to its installation. We discussed in more detail how to install a ceiling frame under plasterboard in this article, but here we will only briefly describe the necessary sequence of actions.
At this stage, you can use two types of suspensions, taking into account the working conditions and the result you are striving for. A direct suspension is a plate on which stiffening ribs are applied. Allows you to install the future structure at a distance of 10-11 cm from the ceiling. Used for minor differences. Its use allows you to hide electrical wiring.
An anchor suspension equipped with a clamp can be used in conjunction with the rod. It is mainly used in the preparation of multi-level ceilings, multifunctional partitions equipped with shelves and recesses. The maximum distance in this case is 80 centimeters.
The final result of the work
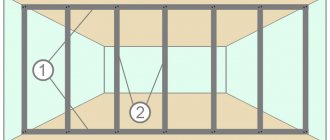
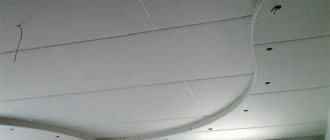
Below in the pictures you can see the elongated profiles obtained by the first and second methods:
That's all. In this article we learned how to lengthen a drywall profile and in what cases this may be necessary.
Drywall is the most popular material for renovation of premises, used for covering walls, ceilings, and creating partitions. GVL 10, 12 mm (or drywall) can be mounted in different ways. Therefore, it is better to consider all the options in order to choose the most suitable one for each specific case. Plasterboard sheets are attached mainly using a frame profile structure. Sometimes special glue is used to fasten sheets, but fastening to a profile is more reliable.
This method also allows you to implement design ideas: arches, niches, figured elements. The type of frame will depend on the purpose of the entire structure and the materials that will be used for it. Fastening elements for them are selected taking into account the future load on the structure and the strength expected from it.
The metal frame for fastening GVL consists of guides, or starting, and load-bearing, or rack-mount elements. To choose the right materials for making a frame, you need to consider all their types.
Connecting profiles for drywall
Having dealt with the profiles, the next question arises: how to connect these profiles with each other?
If we install plasterboard ceilings with a single-level frame (i.e., all profiles are located in the same plane), then the fastening of the lintels to the main load-bearing aligned profiles is carried out using a single-level connector - more simply, a crab. He really looks like him. It is intended for connecting PP profiles 60x27. For a stronger frame, it is recommended to twist the crab into each hole intended for this purpose. Still, it was not for nothing that the Germans, the technologists, invented them.
Your room measures more than 3m x 3m. How to connect a standard PP 60x27 profile together along the length if you do not have the opportunity to order a profile of the required length. The complex KNAUF system provided a profile extension 60x27. It is inserted into the grooves of each of the profiles up to the limiting lug, which regulates the uniform distribution of length in the connected profiles and is fixed with metal-to-metal screws (press washer) to prevent them from spreading and more securely fixing them.
Having fastened all the profiles together, all that remains is to attach the frame to the existing ceiling. For this, two types of fasteners are used:
— straight suspension. Perforated plate with stiffening ribs in the middle and holes for dowel-nails. This suspension allows us to lower the frame by no more than 11 cm.
— anchor suspension with clamp . It is used in conjunction with a suspension rod and allows us to lower to a height of up to 800 mm.
In the case when we use a two-level frame (PP profiles are located in two planes), a two-level connector is used. It fastens two levels together, the first of which is leveling and is secured using a suspension system, and the second is intended directly for installing drywall with the appropriate alignment of the cells.
I will tell you what fasteners the frame is used to attach in the article Fasteners for drywall installation.
Calculation of a ceiling frame made of gypsum plasterboard
The ceiling frame is calculated in the same way as the wall frame. Namely, a scaled drawing with the location of each element is drawn on a blank sheet of paper.
The guide (PN) profile is attached to the wall around the perimeter of the room. Consequently, the length of all the walls will be the value that we take as the total length of the ceiling profile.
PN for ceilings = total length of walls
The ceiling profile is inserted into the groove of the ceiling profile. It is recommended to place it parallel to a short wall. The distance between each element is 40-90 cm, depending on the design load. A large step (90 cm) can be taken if the load on the ceiling does not exceed 0.15 Nm. In practice, you never know for sure whether such a load will be fair to your ceiling. Therefore, builders always play it safe and take a step of 40-60 cm, no more.
In increments of 40-60 cm, jumpers are attached to the ceiling profile - cut pieces from the same PP profile. Crabs are used for fastening. The number of crabs will be equal to the number of intersections of the PP profile with the jumpers.
It is also important to calculate the suspensions. These are elements for attaching the ceiling profile to the ceiling. Typically, the suspension mounting step is 0.6 meters. When installing two-tier ceilings, this distance is reduced to make the structure more rigid. In general, the drawing should look something like this:
When the schematic diagram of the ceiling frame is transferred to paper, the required amount of all materials is calculated from the drawing. Then they are purchased and the most interesting process begins - assembly.
We extend the profile for drywall in different ways
It is difficult to imagine renovating a modern apartment without using such a popular building material as drywall. Even the most inexperienced and lazy developers have learned to construct partitions, ceilings and niches from it. But not everyone knows how to connect a profile if there is not enough length. And they become confused when a standard metal profile is not enough, for example, to mount a ceiling frame in a long corridor or a spacious living room.
In fact, this is not difficult to do. There are several options for connecting the profile along the length.
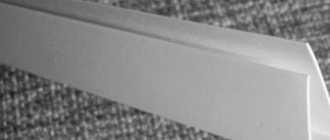
Option one. Using a special connector
If you don’t know, #8212 is a metal part with holes for fastening, reminiscent of a small section of a regular profile. Ask a salesperson at a hardware store - he will definitely show you what options are available.
Now we take the profile and push one end of it inside the connector. We measure the missing length on another profile and carefully cut it with metal scissors. We insert it into the connector on the other side. We check the strength of the connection - the stability of our future drywall construction depends on this. Then, using pliers, clamp the edges of the connector and profile. The final stage is to secure the profile and connector with metal screws through the holes in the ends.
Here's how to connect a profile if the length is not enough.
Option two. Without connector
If you haven’t stocked up on connectors in advance and don’t want to run to the store, you can lengthen the profile in another way. We take two profiles and apply them to each other. We measure the required length, but cut it about 10 cm longer. Using a grinder or metal scissors, we carefully remove the upper curved edges on both sides of the profile, also by 10 cm. We insert the profile with the cut edge into another profile to a depth of the same 10 cm. We connect the profiles using four metal screws screwed into the ends of the profiles.
Procedure for installing a ceiling frame
- A frame marking diagram is made. To do this, mark a level on the walls around the perimeter of the room. An even mark can be obtained using a laser or water level or a level. Then the UD wall profile is attached to the finished level. It is secured with dowels every 50 cm.
- Next, markings are made on the ceiling where the CD guides will be located. They are placed in increments of 40-60 cm in accordance with the length of the drywall so that the sheets are connected by joints on one profile. Suspensions are mounted along these lines, which should be fastened in increments of 30 cm to 1 meter. It is better to place the pendants not in one line, but in a checkerboard pattern.
- At this stage, profiles are mounted. For even horizontal fastening, a strong thread is pulled between opposite walls. The guides are aligned along the thread and screwed to the hangers. The edges of the guide profiles must be inserted into the UD wall supports. The joints are connected with self-tapping screws using CD connectors. The assembled frame is checked for the level and evenness of the structure. Then additional mounts for the chandelier or other elements are installed, and electrical wiring for lighting is installed.
- Now the sheets of drywall are attached to the metal with self-tapping screws. They are screwed in increments of 20 cm. The self-tapping screw is carefully deepened into the drywall, but not pressed too hard so that the holding capacity is preserved. It is necessary to ensure that all joints are on the profile and do not subsequently sag. It is very important during installation to leave a gap between the sheets of drywall from 3 mm to 7 mm. This will give the structure mobility, i.e. will allow it to expand and contract slightly with changes in humidity and temperature, without compromising its integrity.
- To enhance the rigidity of the frame of a two-level suspended ceiling, cross members are installed along the structure of CD profiles, maintaining a gap of 30 to 60 cm in increments of 10 cm. When connecting the elements in this way, a crab is used, which is installed on top of the connection.
- The final stage of work is to putty the seams using reinforced tape.
For clarity, we recommend watching a video of the installation of a frame for plasterboard ceilings:
«>
How to lengthen a drywall profile
The strong connection of the metal profiles is ready.
A profile lengthened in this way should obtain the required rigidity. But if you have doubts, place additional hangers at the junction at a distance of 7-8 cm.
Simple useful tips
Open wine without a corkscrew: If you don’t have a corkscrew at hand, you can open a bottle of wine in another way. It is necessary to screw a screw or a wood screw into the cork, after which it is necessary to pull the cork out of the bottle using pliers while holding the head of the screw. It is also necessary to remember that when pressing a cork into a bottle, there is a possibility that the bottle may burst from the pressure.
Fleas in cats and dogs. An excellent way to fight: A cat, dog or other animal can be freed from fleas if you bathe it in a tobacco decoction. After this, wash with warm water.
Types of tools
There are three options for devices on sale:
- Manual cutters;
- Reinforced devices;
- Professional tool.
Each solution has its pros and cons, read the sections below to see which option is best for you.
Option 1 - hand tool
This type of device has the following features:
Illustration Description
Compact sizes. This option is often called a drywall profile hole punch, as it is small in size and weight. This allows you to work even in hard-to-reach places without experiencing discomfort. The tool is easy to store and transport; it even fits into a work clothes pocket and weighs less than one kilogram.
Ease of use
This is the only option that can be used with one hand; all others are designed for two-handed use. Thanks to this, you can fasten elements without an assistant, which is especially important when installing ceiling structures, when it is inconvenient to work.
Low performance. Such a tool is not intended for large volumes of work, so its resource is short. Those who will be doing repairs in an apartment or house should choose such cutters. If you are engaged in installing frames on an ongoing basis, then it is better to pay attention to one of the options described below.
Low cost
The price of good options starts from 700 rubles and can reach one and a half thousand. This is the most economical option, which can be considered an ideal solution for home use. The price is valid in spring 2022.
Option 2 - reinforced cutters
This punch for a drywall profile has the following features:
| Illustration | Description |
| Reliability of the design. This option is much stronger than standard hand cutters. It occupies an intermediate position between household and professional tools and is ideal for use by small teams and craftsmen who periodically assemble profile frames. | |
| Designed for two-handed operation. Due to the design features and large dimensions, the profile is secured with two hands. This simplifies the workflow, but requires an assistant to position the elements and hold them in a stationary position while attaching. | |
| Suitable for working with any profile. If the one-handed version does not cope well with a profile thicker than 0.55 mm, since it is difficult to push through metal with one hand, then a reinforced cutter can pierce thick elements without much difficulty. | |
| Affordable price. This option costs from one thousand to two thousand rubles, which is inexpensive, given the long service life and reliability of the tool. The photo shows a tool for drywall and metal structures, Tsentroinstrument 0270. Its price today is approximately 1,600 rubles. |
There is often advice online that it is cheaper to make a cutter for a drywall profile with your own hands. But if you do not have the skills of a turner and the appropriate equipment, then you will pay almost the same for production as for a ready-made version, so it is much easier and faster to buy a factory device.
Option 3 - professional cutters
This type of product has several differences:
| Illustration | Description |
| High reliability. The tool is intended for constant everyday use for several years. It has a long service life; in addition, the kit most often includes spare punches so that, if necessary, you can quickly replace the working parts and continue working. | |
| Big sizes. Because of this, such devices are often called drywall profile pliers. Long handles simplify the work process and make it easier to cut profiles of any thickness. Of course, in a limited space this causes some inconvenience, but there are also compact one-handed options from the professional line. | |
| High price. The price of a professional tool starts from 4,000 and can reach 10,000. The photo shows a version of the KNIPEX brand - the most reliable and durable, such pliers will cost you about 8,000 rubles. |
How to lengthen a drywall profile between each other
All plasterboard structures are built from four main types of profiles: rack and guide profiles for plasterboard partitions and guides and ceiling profiles for plasterboard ceilings.
In cross-section, the profiles for gypsum craton are shaped like the letter P; accordingly, the profiles have one wall and two shelves. The guide profiles, both for ceilings and partitions, have even shelves. In rack and load-bearing ceiling profiles, the profile flanges have bends to strengthen the structure.
Profiles are connected in two ways:
- Using a special tool called a cutter;
- Using metal-to-metal screws. Self-tapping screws are marked as LN, these are piercing screws and LB drilling screws.
Advantages
Ticks have significant advantages:
- Significant savings for large volumes.
- Energy independence. The tool can be used anywhere. Its action is purely mechanical.
- No need to make markings.
- Profiles are not subject to deformation.
- The holes are neat, with smooth edges.
- No additional tools (drill, screwdriver) are required to carry out the work.
- There will be no dents left on the frame.
With the help of a cutter, a hole is punched faster than a self-tapping screw is screwed in, and there is no risk that it will go far. Thanks to the profile pliers, the connections are reliable. If necessary, they can be easily disassembled.
Extension of profiles
When installing large structures, it is necessary to connect both ceiling and rack profiles.
When extending, the profiles can be joined end-to-end or overlapped.
For butt connections, special standard connectors are used. They are applied to the butt joint of the profiles and secured with self-tapping screws.
To connect rack profiles, instead of standard connectors, you can use a piece of rack profile (PS). It is also applied to the butt joint of the profiles and secured with self-tapping screws. With such a connection, it is important to maintain the length of the applied profile.
Lack of damper tape on the guides
When installing the frame, a special sealing tape is glued to the mounting plane of the guide profile. It acts as a layer between the base and the frame. This allows you to compensate for the expansion of plasterboard sheets, and the tape is also an important element of the sound insulation system.
Sound propagation through ceilings and drywall frames.
Read about the mistakes that are often made when installing drywall in the article “10 Mistakes When Installing Drywall.”
Connecting profiles in the corner of the structure
When installing frames for a box or cabinet made of plasterboard, the task arises of connecting the guides and rack profiles at the corner of the structure.
If only rack profiles are used for the frame, they are easily inserted into each other and connected to each other with self-tapping screws or a cutter in three places (top, middle and bottom).
Small plasterboard structures such as pipe boxes or battery screens can be mounted entirely from guide profiles (PN 50×27). Two guide profiles are connected in the corner in the same way as rack-mount ones, only the curved edges of the shelves are cut off for one profile. I repeat, profiles for plasterboard are quite technologically advanced and you can use your imagination in connecting profiles.
The main thing is that the resulting structure is strong and stable.
BASIC INSTALLATION RULES
To ensure proper installation of vinyl siding, you must strictly follow the installation instructions.
- When installing siding, use only self-tapping screws with anti-corrosion coating.
- It is very important to install the first panel evenly, otherwise the remaining panels will be installed skewed.
- Use self-tapping screws only with a press washer. All screws must be long enough to penetrate the wall or sheathing at least 35mm. The size of the screw head should not be less than 8 mm.
- When attaching horizontal siding, the self-tapping screw must fit into the nail hole strictly in the center. When fastening vertical panels, the first screw is screwed in close to the upper edge of the upper hole, the remaining fasteners should be made in the center of the holes. Do not screw the screw in all the way. Leave a gap of 1-2 mm.
- To prevent the panel from warping, you need to screw in the screws perpendicular to the wall surface exactly in the center of the nail hole.
- The fastening pitch is a maximum of 40 cm for panels and from 20 to 25 cm for accessories.
- Do not drive screws through vinyl.
- When installing siding, take into account its thermal expansion.
- When joining profiles, do not forget that the nail strips of the profiles should not rest against each other.
- When attaching any external objects through vinyl siding, make sure that these objects do not limit the thermal movement of the vinyl. It is strictly forbidden to attach external objects directly to the siding.
Table of temperature gaps
- To make it easier for you to install siding, we have compiled a table that takes into account the air temperature when installing vinyl panels and the change in their sizes (with rounded results) as the temperature changes. For example: ordinary siding at an installation temperature of +20° can increase the length by 6 mm when the temperature rises and can reduce the length by 14 mm when the temperature drops.
- Attention! During installation, contact of PVC products with metal parts is prohibited. Heating the metal will lead to heating of the siding to a critical temperature, and thermal irreversible deformation of the products is possible. Also, when installing elements of dark colors, leave ventilation gaps on the side of the sheathing so that there is no stagnation of warm air on the inside.
| Ordinary siding, window profile, casing L=3600 mm | Temperature during installation, °C | ||||||
| -10 | +10 | +20 | +30 | +40 | +50 | ||
| Maximum elongation, mm | 12 | 10 | 8 | 6 | 4 | 2 | |
| Maximum length reduction, mm | 8 | 10 | 12 | 14 | 16 | 18 | 20 |
| Soffit, flashing, J-chamfer, H-profile, J-profile, starting strip, external and internal corners L=3000 mm | Temperature during installation, °C | ||||||
| -10 | +10 | +20 | +30 | +40 | +50 | ||
| Maximum elongation, mm | 10,2 | 8,5 | 6,8 | 5,1 | 3,4 | 1,7 | |
| Maximum length reduction, mm | 6,8 | 8,5 | 10,2 | 11,9 | 13,6 | 15,3 | 17 |
Siding Installation Tool
To cut sheathing and siding:
- A regular hacksaw and a hacksaw for metal, a circular saw or an angle grinder (grinder), metal scissors, a knife-cutter.
For installation:
- Screwdriver/screwdriver or hammer.
For marking:
- Water level, coated cord, plumb line, long level, corner, tape measure, pencil.
Special tools:
- Hole punch for creating mounting holes; notch punch for snapping panels; dismantling hook for dismantling siding panels.
How to connect profiles for plasterboard ceilings
Profiles for plasterboard ceilings in frame structures have to be extended and connected at an angle of 90°. Extension of PP ceiling profiles (60x27) is carried out using special extensions.
Cross-connection of ceiling profiles is made using special connectors.
The connection of ceiling profiles in a single-level ceiling is made with a single-level connector for ceiling profiles PP 60/27, simply called “crab”.
The connection of profiles in a two-level ceiling is made with a two-level connector. It can be rotated along its axis to the desired connection angle.
Connection methods
Building up
Such a common method of connecting drywall profiles as extensions is used in standard cases. It is preferred by many professional craftsmen. Usually a 3-meter length is enough to install the sheathing. On the contrary, you often have to trim it.
However, when covering the ceiling, the guide is sometimes too short. In this situation, it is necessary to “deliver” it with another segment of the required length. There are longitudinal connectors for this purpose. Two profiles are inserted into such an element by sliding into the corresponding groove. In the middle of the connector there is a protrusion-limiter.
To strengthen the frame and increase the reliability of the connection, they are fastened with short self-tapping screws equipped with press washers (builders call them “seeds” or “bugs”).
Cross method
Basically, this connection of profiles is used when covering ceilings with plasterboard and serves the purpose of creating a more durable frame and tight adhesion of its individual elements to each other. This joint is made using a connector called a crab. It is extremely easy to use.
- Four profiles cut to measured dimensions are inserted with their ends into a connector that has 4 grooves arranged in the form of a cross.
- Each segment is pushed into the “crab” until it clicks.
- The antennae of the connector are bent at a right angle and fixed with “seeds” on the sides of the guides.
Also, a similar connection of drywall profiles with a cross can be made without such an element, but you will have to cut, bend and adjust the guides themselves, which requires serious professional skills and takes a lot of time.
Incomplete cross
Sometimes it is necessary to make a connection with an incomplete cross, in the form of the letter T. This occurs when installing lathing under hidden lighting or in multi-level ceilings. In this case, you can go two ways.
- Use a connector specifically designed for this transition. One end of it is equipped with a groove for inserting a profile, the other is made in the form of a wide hook that clings to the transverse rail.
- If you missed this moment and did not buy the necessary adapter, you can use the same “crab”. The extra, fourth, end is cut off from it, after which installation is carried out like a cross-shaped connection.
You can also use homemade joining methods, with cutting, bending and fastening with self-tapping screws. However, this method is considered less reliable. In addition, it is more difficult to maintain a strictly right angle, and therefore the entire structure may be skewed.
Bends
With a complex configuration of a multi-level ceiling, the task of installing a frame under it becomes somewhat more complicated, since it is sometimes necessary to connect the profile for plasterboard at an angle, and not always straight.
In such cases, a special connector is used. It is somewhat similar to an extension cord, only its sides are cut in the center to the base and there is no limiter.
Devices for carrying and maintaining drywall sheets
When working with drywall, it is not very convenient to perform some actions, since massive slabs often have to be moved from one place to another. Also, certain difficulties may arise in cases where it is necessary to hold the mounted material at a height. Special devices that are used by many professional craftsmen help cope with such tasks.
Carrying handles for drywall
There are models of carrying handles designed both for work in pairs and for one person. In the first case, a set of two handles is used, which allows you to grab the plasterboard at the required height and carefully move the material, holding it in the desired position with your free hand.
For work performed alone, a carrier made of plastic or metal is intended, due to the design of which the sheet is sufficiently securely fixed. This device is convenient to use at home if repairs are carried out without the involvement of assistants.
Three wheel trolley
To transport drywall on a large construction site, it is advisable to use a trolley on which up to 400 kg of material can be loaded. The length of such a device is usually about 1.2 m, and the width is at least 0.6 m. If it is necessary to transport sheets, they are installed on the edge, maintaining a small angle of inclination. It should be noted that the larger the diameter of the trolley wheels, the easier it is to transport through an area that has not been cleared of construction waste.
Mounting support
This tool for working with drywall is a device in the form of a lever located on a stand, which is equipped with a metal movable stop necessary to hold the material. In the process of covering walls, as well as creating niches and partitions, such a device ensures the vertical position of the sheet, which is attached to the profile. At the same time, the integrity of the lower edge of the mounted gypsum board is preserved.
Pedal lift
Allows you not only to quickly fix sheets during wall covering, but also to press drywall to the ceiling. However, it will be difficult to install drywall without the help of a partner, since such a design limits the movement of the master.
Frame lift
For some complex work, in particular those related to the installation of ceiling structures or ventilation elements, the ideal option would be to use a mobile device such as a frame lift. It can be used to move and install sheets in both vertical and horizontal positions. This tool for installing hypocardboard allows you to securely fix the material on the frame, which is especially convenient when creating continuous suspended ceilings. The lift is equipped with wheels, due to which the gypsum boards are moved almost effortlessly, which in turn has a positive effect on the quality of installation.
The total weight of such a device is usually about 26 kg. At the same time, it can be used in work performed at a height of up to 3 m. The maximum permissible weight of transported materials is 50 kg. With such a device at his disposal, one person can easily install sheets of drywall without involving assistants.
Some technical characteristics of models offered by different manufacturers may vary slightly. In addition, there is such a device as a spacer lift. It is mainly used when working with suspended ceilings.
With a limited budget, not every home craftsman can afford to purchase a special device. However, it will be quite difficult to efficiently install a solid suspended ceiling without auxiliary equipment. In this case, it makes sense to make two T-shaped supports yourself. The length of the stand of such a product is determined based on the height of the room, so that the material can be ensured a tight fit to the ceiling. Craftsmen successfully used such devices before the first lifts went on sale. A partner is expected to be present during the installation process.
How to lengthen a drywall profile
Materials for installing drywall - goo.gl/v22oWt How to lengthen a profile for drywall! In our hectic life, however, as, for example, in all aspects or types of any repair there are unique features, everyone’s favorite drywall (GKL) is also present, and these features do not always lie on the surface of the repair, and we frantically remember about them, these little things, only when absolutely necessary and sometimes too late. As, for example, about building up and extending a metal profile, be it a widespread ceiling one (60*28) or a specific rack-mount for gypsum plasterboard partitions. Not the point! For your consideration, the Guys from Stone, that is, Maxim and I, are in a hurry to present video lesson No. 84 - “How to lengthen a plasterboard profile”! To be honest, it’s not that difficult to carry out this action. In the case of the ceiling metal profile of the Knauf system, we only need an extension (connector) for the 60*28 profile and a screwdriver with a suitable bit. When it comes to a wider rack profile, any 50*50 or 100*100, and its extension, it is worth preparing a cutter (stapler) for the profile and a piece of a guide profile from a suitable ruler. Everything else will be shown by those same Volgograd Guys from that very Stone!
The public construction-positive channel “Guys from Stone” talked about how to properly and quickly extend your profile for all types of imaginable work - youtube.com/c/Guysstone And a find page on my native VKontakte, where this is not the first video about profiles for drywall - vk.com/guysstone We also follow the development of Instagram, where there are our photos from the scene and it is clearly visible how exactly we want to build up our profile - instagram.com/guys_stone_
There are also a number of cool videos where you may need knowledge in lengthening the profile for gypsum boards and not only it: No. 32 How to make a frame for drywall - youtu.be/GCup5TkBoHo No. 52 How to make a partition from plasterboard - youtu.be/qMx7CityNxg No. 57 How to use profile cutter - youtu.be/GbhOWgHivCQ
To summarize, if you need to lengthen a profile for drywall, no matter rack or ceiling, watch this video, friends. An extension cord will help you!
How to extend the profile for drywall! As in every other work in drywall there are things that do not always lie on the surface, and we remember them only when absolutely necessary. How, for example, build the profile, whether ceiling 60 * 28 or blade for partitions. For Your consideration GuysStone in a hurry to introduce video No. 84 - “How to extend the profile of plasterboard”! Make it frankly is not difficult. In the case of ceiling metal sheets, we need only the extension (connector) to the profile of 60 * 28, and screwdriver. When it comes to rackmount profile and its extension, you should prepare for stapler profile and guide profile piece. Everything else is show the GuysStone! #Drywall #Profile #StoneGuys
How to connect drywall profiles
Published on October 31, 2017 in the category Building materials // 1 comment // Author: Admin
- 5
- 4
- 3
- 2
- 1
(0 votes, average: 0 out of 5)
Drywall is a universal material that is actively used to create smooth surfaces, original decorative elements, niches, and shelves. In order for such structures to be durable and last a long time, it is necessary to install a reliable frame. It is this that allows you to fully realize high-quality insulation, sound insulation and disguise various types of communications - pipes, wires. Properly installed sheathing requires the exact size of the profiles and calculation of the installation density of individual elements. This article will describe how to attach drywall profiles to each other.
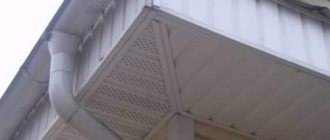
Installation of corner elements
The insulation structure is a solid surface, so we will attach the siding guides on top of it. When insulating with extruded polystyrene foam, we recommend finishing it in the first year, since its surface begins to crumble from the sun and precipitation. We begin siding installation by installing corner elements. To do this, use a hammer drill to drill a hole for attaching the hangers.
All siding will be secured to a galvanized metal frame.
To fasten the hangers, we use dowel-nails with a diameter of 8 mm and a length of 100 mm. We calculated the length of the nails as follows: 5 cm for insulation and 5 cm for reliable fixation in the brick. Remove the screw from the plug and insert the plug into the drilled hole.
Make sure that the plug is inserted all the way. We take a regular hanger for a metal profile and fasten it to the wall surface with a screw.
The head of this dowel-nail is wide enough, so you can attach it in the middle without fear of it popping out. The design is quite rigid. All that remains is to bend the ears of the suspension into the letter P.
One standard three-meter profile requires 3-4 hangers. We install the profile in the middle of the suspension and tighten two screws on each side.
Please note that the profiles for forming the corner must be positioned strictly vertically. A building level is used for this. For other profiles, alignment is carried out using cords stretched from above and below. The ends of the cords are fixed along the exposed corner profiles. Having secured the profile at the end, we spread the ears of the suspensions to the sides.
Having leveled and secured the corner profiles, we mount the outer corner of the siding into them. We install this angle on both sides of the wall.
Now you can pull the cords from above and below and install other profiles along them.
Why attach profiles to each other?
It is necessary to connect profiles with each other for the following reasons:
- To increase the strength level of plasterboard construction
- In order to lengthen the profile, both wall and guide
The fastening of drywall profiles to each other should be carried out according to the installation technology, so you can assemble a really high-quality structure and not be afraid to place massive objects in the form of a TV, books, dishes and other interior items on it, if these are shelves.
Advantages
Hundreds of connecting parts are required to assemble metal sheathing. By using a drywall cutter, you can completely eliminate the use of consumables (screws, dowels, etc.). The principle of working with it is very simple and does not require special training.
Advantages of working with a cutter:
- Metal parts are not deformed, as happens when working with power tools.
- There are no burrs left at the attachment points, so no additional cleaning is required.
- Save time.
- There is no need to supply electricity to the work site.
- There is no need to make preliminary markings.
The reliability of fastening is not inferior in strength to fastening with self-tapping screws. There are no screw caps left on the front side of the sheathing, so the sheets of facing material fit tightly to the profile.
Fastening with a cutter
An effective device for connecting profiles is a special device called a cutter. In most cases, it is used by experienced craftsmen. This is explained by the high cost of the tool; a good cutter costs over one and a half thousand rubles. Therefore, it is not rational for home craftsmen to purchase it for joining galvanized elements, but it will come in handy for professionals.
The main advantage of the cutter as a tool is that there is no need to use self-tapping screws to fasten profiles. This device is capable of cutting through two galvanized products, while the metal is bent only from the inside, which makes the connection as reliable as possible.
But this device also has a minus. Prosecatal cannot be used everywhere, taking into account the design features of the device itself. It is often necessary to use a screwdriver and self-tapping screws in the process of fastening metal elements.
How to choose?
Pneumatic model
The choice of this kind of tool is very important, since you will have to deal with it very often. Therefore, in order for the profile cutter to last as long as possible, you should choose a high-quality tool. There are the following options for selecting it:
- material. Each tool is designed to work with a specific material. Therefore, they differ in the thickness of the holes made. A cutter with a reinforced mechanism can make a hole 1.5 mm thick, and manual models - 0.55 mm;
- diameter of the resulting holes. The tool is equipped with a specific set of bits that allow making holes of various diameters (from 2 to 5 mm).
Machine model
Considering these characteristics, you can select a cutter for the profiles of the required parameters and obtain the desired result. Finding the right tool is very easy. It is sold in any hardware store or hypermarket. The main problem here is the choice of model. The cutter for drywall profile can be of the following types:
- pneumatic. It will help to connect several elements, cut corners, and also bend or stretch the frame;
- machine;
- manual. Used in the same situations as the pneumatic model. Manual model
But they are mainly used in repair work. For example, you can use it to break through a keyhole.
Models differ from each other in power, manufacturer and area of application. All cutters are small in size, making the tool very convenient to use with one hand. There is also a reinforced version of the tool. It is used when working with durable materials. His
Strengthened model
The design provides high strength, making it virtually unbreakable. But the cutting part can be easily replaced if necessary.
In addition, there are also professional models on sale. They are used both in the process of redevelopment of premises and during repair work. But their price is very high. Therefore, they are used only by professional builders when constructing buildings.
Professional model
When choosing a tool, it is necessary to clearly understand the scope of its future application and the requirements for it. This way your purchase will be justified and useful. If extensive construction or repair work is planned, then it is better to purchase several dividers at once to work with different materials and for different purposes. This will significantly save work time and make it better quality.