Nowadays you won’t surprise anyone with wallpaper or original painting of the ceiling; people are tired of them. Plastic, no matter how elegant it may be, is also not very popular, but finishing with MDF panels breaks all records of popularity. Next, we will look at the types and sizes of MDF, plus I will tell you how to attach MDF panels to the ceiling in three relatively simple options.
The MDF panel on the ceiling looks much better than wallpaper and painting combined
How to choose MDF
The surge in popularity of the material is due to the fact that it is beautiful, durable, and most importantly, installation of MDF is quite accessible to the home craftsman.
I’ll say right away that any panel or sheet, if desired, can be hung on the ceiling, the only question is feasibility, as well as time and material costs. Below you will get a couple of universal ways to decorate the ceiling with panels, but now let’s look at the types.
Types of material
Important! The division into wall and ceiling MDF is conditional; it is believed that sheets or panels up to 6 mm thick are more suitable for the ceiling, everything else is attached to the walls, but if you install a good load-bearing sheathing, then any material can be fixed to the ceiling.
| Photo | Recommendations |
| Reiki It is the slats that are often called panels. They can have different sizes, but they are all mounted according to the type of lining, that is, tongue and groove. For the ceiling, the panel is considered an ideal option; the thickness here ranges from 3 to 6 mm, so the weight is light, plus mutual interlocking makes installing MDF panels on the ceiling a fairly simple task. | |
| Volume sheets The good thing about the sheets is that they are large in size, allowing you to cover an area of up to 4 m² without visible joints. At the same time, when connecting two large sheets, there will still be a joint, and since it is not initially decorated, it will have to be covered with an overlay strip. Depending on the manufacturer and dimensions, the sheet thickness ranges from 3 mm to 25 mm. | |
| Shaped products In principle, these are the same sheets, only they were cut in the workshop, in some cases milled and the ends decorated. Processing such panels with your own hands is impossible; they must be ordered, and the more complex the milling, the more expensive it will cost to finish the ceiling. The photo on the left shows shaped milled MDF panels, and below are sheets that were simply cut and sealed at the ends. The material is the same, but the appearance and price are diametrically opposed. |
Important! There are 3 related materials: fiberboard, MDF and HDF. Their composition is the same, only the density is different. The cheapest fiberboard, the strongest HDF, by the way, is used to make laminate flooring. MDF is somewhere in the middle.
Common MDF dimensions
Let's start with the most common one: MDF ceiling panels have 3 length standards, from 2440 mm to 2800 mm. The width of the slats has 5 options and ranges from 100 to 250 mm, each option is marked with the letter “P” and a number from 1 to 5. The thickness can reach up to 30 mm, but for the ceiling there is no point in taking a panel thicker than 6 mm.
When choosing an MDF panel, the size has more influence on the appearance and cost than on durability and installation technology
The next number in our ranking is laminated sheets. For those who do not know, laminated sheets are sheets covered with paper with an ornament applied to it. They are perfect for dry rooms, but they cannot be placed in the kitchen or bathroom; after six months they will lose their appearance due to moisture and will delaminate.
It is easier to equip a solid MDF ceiling with thin sheets
Thick laminated wall MDF, rarely placed on the ceiling. The material looks great, but the weight is too much; it’s cheaper to take thin laminated slats and use them to create a ceiling.
It is better to decorate the ceiling and walls under wood with laminated panels or sheets
MDF finishing options
Both panels and MDF sheets are basically the same, the main difference lies in the exterior finishing, and the price directly depends on it.
| Types of cladding MDF sheets and panels | |
| Photo | Recommendations |
| Veneer Veneering technology, or veneering as it is also called, has been known for a long time. Veneer is a thin cut of natural wood. If you paste it over MDF, then the panel cannot be distinguished from a real board. The price for this material is the highest, but now it is rarely purchased, since modern methods of textured lamination make it possible to obtain the same result for less money. | |
| Lamination Previously, lamination consisted of covering a laminated panel with PVC film. Now more advanced technology has appeared. The MDF panel is coated with melamine resin, after which a texture is applied, as a result it is not much different from natural wood, plus its strength and moisture resistance are disproportionately higher. | |
| Enamel In this case, the sheet is covered in several layers with automotive enamel and then polished. The end result looks luxurious, especially if you do 3D milling, but this option is more suitable for furniture than for the ceiling, although there are exceptions. | |
| Laminated sheet I mentioned this option above; it is the most reasonable price, but I personally do not recommend using a laminated sheet. What's the point of putting a paper-covered panel on the ceiling if it's easier and cheaper to stick wallpaper? | |
Important! MDF panels with a 3D effect have appeared relatively recently - these are MDF sheets with textured milling. Usually they come either laminated or enameled. Theoretically, you can install such an MDF panel on the ceiling with your own hands, but given its cost, it is better to hire a professional.
Milled MDF panels with a 3D effect look gorgeous, but their price is fantastic
As already mentioned, MDF panels can be mounted on the ceiling in three ways; in fact, there are many more such methods, but upon closer examination it is clear that they are all derived from the options described below.
Types of panels
The main difference between the panels may be the features of their manufacture. They can be divided into several types.
Conventional (also called solid-pressed) are sheets of wood fiber made by dry hot pressing. The surface of the sheets is not treated with anything, but is very smooth due to the fact that the fibers are very small and tightly pressed against each other. But their color is completely heterogeneous; inclusions of fibers of different colors are visible, since all sorts of residues from wood processing are used to make them. And the shade of slabs from different batches may vary slightly. This type of panel can be processed or used as is for finishing non-residential premises.
Special ones differ from ordinary ones in that they use a higher grade of wood for their production, and they are pressed longer and at a higher temperature.
These include several types of panels.
- Moisture resistant - their properties are comparable to plastic, since they are in no way affected by a humid environment.
- Heat-resistant (that is, resistant to fire). Unlike other fire-resistant materials, instead of phenols and resins, they contain paraffin and lignin, which are not toxic. These include products marked KM1 and KM2.
- Flexible - have greater plasticity for creating bent and arched structures. They can be single-layer or double-layer.
- Increased density (curl panel type) - can withstand heavy loads.
Any MDF panel for wall cladding can have a coating that not only gives it a certain aesthetic appearance, but also, to varying degrees, serves as protection from environmental factors.
Various materials can serve as decorative coatings.
- Film or plastic (melamine, PVC). In essence, plastic is a film of greater thickness. The material laminated in this way can look almost anything: imitate any natural material (stone, wood), be glossy or matte, smooth or textured, plain, colored or with a pattern (pattern). The laminated coating can have a holographic or 3D effect.
- Veneer is a thin layer of wood, specially treated - a high-quality product made of veneer based on chipboard is practically no different from a solid wood panel. However, it is this coating that provides the least protection from moisture or scratches. Veneer can be painted in almost any wood shade and has the appropriate texture.
- Enamel or any other suitable type of paint is less durable than plastic, but if damaged, it can be restored locally or the painted layer can be completely replaced with a new one. The coating is monochromatic, but the choice of shades is huge.
Method number 1. Stick it and forget it
At first glance, gluing MDF ceilings with your own hands is the easiest way. Indeed, if we take the classic instructions, then it is so.
- Clean the ceiling and cover it with strengthening primer a couple of times.
- Degrease the back side of the panel with an alcohol-containing solution.
- In a random pattern, apply polymer glue such as “Liquid Nails” or something similar to the ceiling and the back side of the panel.
- Apply the panel to the ceiling, then immediately tear it off and set it aside for 10 minutes to air.
- Finally glue the panel into place.
Finishing the MDF ceiling - brief instructions for gluing
Dangers of sticking
Gluing MDF is a good option, but it is not suitable for everyone, as it has several significant disadvantages.
- Ceilings must be perfectly flat, the maximum permissible curvature along the plane is 3 mm per 1 linear meter. It’s difficult to find such a surface now, so first you’ll have to plaster it, which with such quality will cost good money; without experience, it’s not realistic to plaster it to zero.
- The thickness of the sheet should not exceed 3 - 4 mm, otherwise the glue simply will not hold such a cladding.
- It is also not realistic to place hidden lighting under such a covering, as well as additional wiring.
- If you want to dismantle the coating, it is unlikely that you will be able to use it a second time. When you peel off, some of the panels will delaminate, plus the plaster may fall off and you will have to do everything again.
Installation direction
You should start attaching the slats from the side of the wall opposite the entrance to the room. We fix the first rail at the level of fastening the ceiling elements (but not less than 5 cm) using dowel nails.
Fastening the guide profile according to the markings
Professionals advise first attaching 3 guide profiles, and gluing the last one after joining all the panels
Installation of a frame on the ceiling for IDF panels
After installing the frame, I laid wires in the corrugated pipe to the places where the spotlights were attached
We fasten each subsequent one in parallel with a step of no more than 40-50 cm.
Next, using a metal corner, you should check the horizontalness of the resulting surface. If such a need arises, lay pieces of plywood (laminated wood board), fiberboard or laminate under the sheathing slats.
Method number 2. Wooden sheathing
If your ceilings are not very high and you have not previously encountered installing a metal frame for plasterboard, then it will be easier for you to work with wood. Installing an MDF panel on a wooden sheathing is not difficult; it is important to correctly install the sheathing itself.
Options for hanging wood sheathing
Under the sheathing, take a flat wooden strip with a thickness of at least 25 mm; if you take less, it can split from a hammered nail or driven screw. The width is not particularly important, but usually bars from 30 mm are taken.
Finishing the ceiling with MDF panels over wooden lathing is more suitable for an amateur
- It is better to use metal hangers if the ceilings are very crooked. By the way, with their help it is easiest to set the horizontal plane.
- Where ceiling beams are installed, the bars are inserted between them in increments of 50 - 70 cm. The bars are attached to the beams themselves with metal corners.
- Twin cross battens are usually installed to install concealed lighting, but they require a relatively level ceiling. First, one row of bars is placed on the ceiling, and then another one is attached perpendicularly to them, in both cases the step is about half a meter.
- Solid lathing is installed on low ceilings, where every centimeter plays a role. Often, for this purpose, a 25x30 mm rail is used and screwed directly to the ceiling.
Horizon mark
The first step in arranging the ceiling sheathing will be to determine the horizontal plane. A laser level is best suited for these purposes, but such equipment is expensive and only professionals have it.
It is easier for an amateur to use a hydraulic level; it is a transparent soft tube with liquid inside. Such a tool is available on any construction market, and it costs a penny.
The factory hydraulic level is equipped with two graduated flasks at the ends, with such graduation it is much easier to set the horizon
Using a hydraulic level is more than simple; it works on the principle of communicating vessels. Fill in the liquid, stretch the tube in the corners and the liquid level in the flasks will show a horizontal line.
The hydraulic level works on the principle of communicating vessels and always shows the horizon
- In most houses, even the seemingly even ceiling is tilted to one side. First you need to use a hydraulic level to determine the lowest corner or side.
- Further from the ceiling of the littered side, step back down by the thickness of the sheathing and put a mark.
- Now you need to draw a horizontal line from this mark along all the walls; a hydraulic level will also help here.
Installation of sheathing
We have the horizon, then we proceed to the installation of the wooden sheathing. To do this, select even planks and screw them along the horizon line to the wall. It's simple:
- first, holes (3 mm) are drilled in the planks in 1 m increments;
- Self-tapping screws are lightly screwed into these holes, only so that the end of the screw comes out slightly from the back side;
- firmly apply the block to the planned installation location and the screws will leave marks on the wall;
- now, using this marking, drill a series of holes in the wall (6 mm);
- Plastic dowels are inserted into the holes, after which all that remains is to screw the strips with self-tapping screws.
Sheathing bars can be attached to a wall or ceiling either with self-tapping screws or with dowel-nails
The perimeter is done, now you can move on to the main sheathing. Even for the thinnest MDF panels, the pitch of the slats in the sheathing is 50–70 cm; for thick sheets, it can be 1 m. To make it easier to align them horizontally, stretch 2–3 nylon cords between them; they will serve as guides.
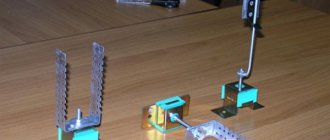
Scheme of hanging the sheathing on metal hangers
Personally, I prefer working with metal perforated hangers. The suspension is attached to the ceiling with dowel nails, after which the wings are bent down and the sheathing strip is screwed on both sides with self-tapping screws at the required height. The excess part of the wings of the suspension is bent upward or cut off.
It is easier to align the ceiling lathing horizontally with the help of metal perforated hangers
There is another option: you can align the intermediate sheathing strips horizontally using wooden wedges. At first glance, it is simpler, but grinding so many wedges along a slope is time-consuming and problematic.
It’s easier to assemble a ceiling made of MDF panels with your own hands on a wooden lathing, but wooden wedges are not much cheaper than metal hangers, and attaching them takes 2 times longer
When the wooden sheathing is ready, you can begin finishing the ceiling with panels. Volumetric sheets are simply screwed to the sheathing with self-tapping screws. Since the strips are straight, the screws will be driven in along one line, and then they are simply covered with decorative strips. There is also fastening using clamps, but I will talk about them in the next chapter.
Preparation
When carrying out preparatory work prior to finishing the ceiling, it is not enough to calculate the amount of materials needed
It is worth paying special attention to the presence of cracks, chips and other surface defects
The following is a complete list of tools that may be needed in your work.
- A hammer drill will be needed when installing the frame.
- A screwdriver is used when fastening panels to beams or metal profiles. In principle, you can use a hammer drill for this purpose, but it is quite heavy, so it will be difficult for a beginner without experience to handle it.
- A construction stapler will be needed if the ceiling panels are attached to brackets.
- The level is used to improve marking accuracy.
- Marker – for various notes.
- Roulette.
- A circular saw or jigsaw will be required at the stage of installing the frame to cut off the profile elements.
- Ladder. Since you are supposed to work at height, you will therefore need a support point. In the absence of a stepladder, you can use a regular table, but a professional tool is still safer and more reliable.
- Rubber mallet – used for fitting PVC panels.
- Corners.
If you plan to design decorative elements, then it is worth purchasing molding.
After all the necessary calculations have been made and the tools have been purchased, you can begin preparing the surface and finishing itself.
To do this, do the following:
- the old coating is removed;
- all lighting and electrical equipment is disassembled;
- the ceiling is cleaned of dust and dirt.
After this, you should tap the surface of the ceiling with a hammer - this will allow you to detect defects that must be corrected before starting work.
Preparation is completed by applying a primer. After the surface has dried, begin to install the ceiling itself.
Method No. 3 Lathing from ceiling profiles
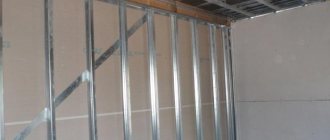
We are talking about ceiling metal UD and CD profiles, which are used for arranging drywall.
Direct suspension
The installation instructions for a straight metal ceiling suspension are not very different from the wooden version.
- The horizon is marked.
- UD profiles are placed around the perimeter; they are attached bottom to the wall.
- Rows of hangers are attached to the ceiling along the supposed lines of the sheathing, but the wings are not yet bent.
- CD profiles are inserted into the UD profiles fixed to the walls perpendicularly according to the lines with the suspensions on the ceiling.
- Now all that remains is to bend the wings of the suspensions down and fix the CD profiles on them.
The metal ceiling frame is much stronger than a wooden one, plus it does not suffer from changes in humidity and temperature
Installation of panels on clamps
A clamp is a special metal bracket that is used when installing cladding assembled according to the tongue-and-groove principle, for example, lining. It is a metal plate with a small protruding hook. The clamp hook is inserted into the lower edge of the panel groove, after which the main plate is nailed or screwed to the sheathing.
The clamp is nailed to the wooden sheathing with small nails, and screwed to metal profiles with metal screws
- When the sheathing is ready, the first MDF panel is placed with a tenon to the wall and, stepping back 10 mm from the edge, it is screwed through with self-tapping screws to the sheathing.
- Next, on the opposite side of the panel, put a clamp on the edge of the groove and, pressing it to the sheathing, screw or nail it.
- Now insert the tenon of the next plank into the groove of the previous one and similarly fix it with clamps on the reverse side. Continue this way until you have assembled the entire ceiling.
The MDF panel is guided to the wall with a tenon and attached tightly
MDF with stretch ceiling
In addition to flat planes, using UD and CD profiles, you can build multi-level structures. If you combine a plane of MDF panels and a suspended ceiling together, you will get an exclusive design. This is a little more difficult to do, but an amateur can still do this task.
- To mount a two-level stretch ceiling using MDF, you need to build a threshold at least 100 mm high on the dividing line, to which the suspended ceiling reinforcement is attached to the side, and the lower level is hemmed with MDF sheets or panels.
- To install a bracket with a tension polymer film, about 30 - 40 mm is needed, the remaining 60 mm are needed for visual separation of levels.
- The beginning is the same as in the previous method, that is, you need to beat off the horizon of the lower level and fix the UD profile on the walls.
- If you need a straight and even threshold, then the easiest way for an amateur to lower it is to anchor a wooden beam with a cross-section of 100 mm (along the height of the threshold) to the ceiling.
To assemble a two-level stretch ceiling using MDF, you need a lathing of UD and CD ceiling profiles
- If you plan to construct a broken threshold or smooth bends, then a counter emphasis is made from the same ceiling profiles. The technology is identical to assembling a frame for a two-level plasterboard ceiling, with the only difference being that MDF is used instead of plasterboard. Step-by-step instructions in several versions with photos and videos are described and shown “HERE” .
- There is also the option of arranging a two-level structure with a suspended ceiling and several lighting options. Instructions for assembling such beauty, along with diagrams, photos and videos, are given “HERE” .
An MDF ceiling in combination with a suspended ceiling is assembled using the same technology as all similar plasterboard structures
Design
MDF panels are available in various design options. Products with veneer coating are considered classic. In their production, natural wood is used, which is used as a decorative shell. Externally, such models resemble wooden planks. Ceilings made of veneered tiles will fit perfectly into rooms decorated in a classic or retro style.
You can also find glossy moisture-resistant panels on the market. Such products have a special laminated layer that reliably protects the material from moisture. These durable planks are available in a variety of colors and can also imitate stone or wood.
Simple and inexpensive options with a simple design include painted slabs. They can be either glossy or matte.
Important little things
In any technology there are several important nuances that professionals forget to mention, because they believe that everyone should know such little things, and amateurs then get into trouble.
- For example, you need to join a figured or straight seam between two multi-colored MDF sheets. There is a special plastic H-shaped profile for this. You put the sheets on top of each other, cut them along a curly line, and then join them through this profile and you have everything in one plane.
The flexible H-shaped profile allows you to beautifully join both the same type and multi-colored materials
- Overhead shaped MDF strips are sold in furniture fittings stores.
- After you have mounted the pendant and covered it with MDF, you need to secure the ceiling plinth around the perimeter. Hobbyists often have problems with accurately cutting and joining plinths; how to do this simply and quickly is written and shown “HERE” .
- In two-level ceilings with a curved edge, it is easier to cover the side of the curved threshold with thin plasterboard. It needs to be rolled with a needle roller and moistened, as a result, after half an hour it will get wet and bend as needed.
- If you are making electrical wiring inside the sheathing, then the wires need to be routed into plastic or metal corrugation.
MDF is a flammable material, so electrical wiring must be hidden in corrugation
- In most houses, the wiring is walled up in the ceiling area and when a person starts attaching bars or profiles to the walls, he can damage it. If you don’t have a device for finding hidden wiring, then focus on distribution boxes; wires from them run only horizontally or vertically.
If you don’t have a device for finding hidden wiring at hand, then focus on the wiring boxes, the wires from them run either vertically or horizontally
What kind of material is this?
The surface is covered with veneer, which imitates the texture of wood fibers
- in the first case, small dust-like particles are used;
- in the second - large chips.
The dimensions of individual panels are set at the stage of cutting a single piece of slab
- sufficient rigidity, which protects the structure of the slab from mechanical loads and impacts;
- high density of the fabric, providing the necessary strength;
- absence of flaws, defects, irregularities or joints throughout the entire surface, which can often be found in wood, for example, pine or other conifers;
- Easy processing with low to medium power tools.
Attention When processing MDF panels, it is necessary to take into account the toxicity of urea-formaldehyde resin, which requires the use of special respirators with a high degree of air purification and other protective equipment. The respiratory organs must also be protected from wood dust, which is released when cutting such slabs.
MDF is often used in the manufacture of cabinet furniture (cabinets)
Conclusion
Making your own MDF ceiling is not as difficult as it might seem. The methods described above and the videos in this article are more intended for amateurs, so I tried to present everything as simply as possible. If you have anything to add or have any questions, knock on the comments and let’s talk.
