Application of adhesive composition
Whether it is more effective to apply glue - on the canvas or on the walls - is impossible to answer unequivocally. The technology depends on the type of wallpaper. Some need soaking time to swell. Others do not need extra contact with the adhesive - it is applied to the wall. The most effective way is to follow the instructions. Standard requirements depending on type :
- Paper base . They need to be coated with glue and rolled in a special way for impregnation. Then apply glue to the wall where you plan to install the paper sheet. Wallpaper from some manufacturers does not require such a procedure; there is a note about this in the instructions.
- On a non-woven basis . Glue cannot be applied to these, especially heavy non-woven ones. Only apply glue to the wall. There are some exceptions: some manufacturers indicate in the instructions that glue can (but not necessarily) be applied to these non-woven wallpapers.
- Vinyl . The technology for working with these materials depends on their basis. It can be applied both to a roll and to a wall.
Therefore, the most effective thing is to follow the instructions from the instructions. Special symbols on the label will help you understand the technology:
- a vessel with water and a roll - just moisten the back side with water;
- brush and vertical stripe - means the need to apply only to the wall;
- horizontal strip (in the form of a roll) and a brush - you need to lubricate the wallpaper with glue and let it soak.
Which roller to choose for wallpaper
The most suitable one is foam rubber with large air slots. It is important to consider that the wall must be level. Before work, it will have to be lubricated with glue. The optimal width of the working part of the foam roller is from 20 to 30 centimeters.
The main advantages of the tool when working with wallpaper:
- It is enough to pass over the bath several times for the solution to be absorbed;
- uniform lubrication of the entire surface;
- easy to clean, adhesive liquid is removed quickly;
- hardens almost immediately, just wait a couple of minutes, regardless of the type of glue (instant, quick-drying, PVA, epoxy, syndeticone, etc.).
Is it necessary for vinyl?
Attention
When gluing vinyl sheeting, the place where the composition is applied depends on the base of the finish. Technologies may vary.
It is important to read the instructions carefully:
- Vinyl on paper - require application to a roll, and not to the wall (what are the features of gluing vinyl wallpaper?).
- On a non-woven backing - placed on a wall that has already been coated with an adhesive mixture; there is no need to smear the canvases themselves (how to properly glue wallpaper on a non-woven backing?).
- Self-adhesive - a rare type. These must either be moistened with water or the protective film on the back side must be peeled off.
Necessary tools for wallpapering
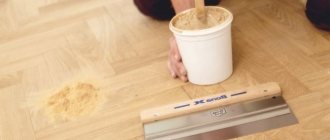
Another thing is that a fur roller will cost more than one made from foam rubber. Therefore, it is better to buy from foam rubber to save money. It is also more convenient to buy a roller tray right away, this way the glue will be used sparingly and you will save time, this is what the roller tray looks like:
I applied the glue with two rollers - a fur roller and a foam roller - I won’t say that one of them is better or worse (in work), but after gluing the wallpaper it became clear that it is better to use a foam roller - its price is low, you can do without I regret throwing it away, but the fur rollers are expensive and it turned out to be very difficult to wash it off from the glue.
So it’s wiser to take a foam roller (in general, it’s convenient to apply glue with a regular rag, but you need to constantly wipe your hands).
Tools and Process Steps
To work you will need the following tools:
- Brush. It is used to apply glue to narrow strips or along the edges.
- Foam roller. Rollers with artificial or natural fur can replace it, but this is the most comfortable one. The quality of the pasting largely depends on which roller is used for the job. Before first use, it must be well saturated with water.
- Bath. Necessary for rolling out the roller; it's easier to use than a whole bucket of glue.
- A rag or sponge made of foam rubber.
Stages of gluing:
- Carefully study the instructions and all symbols on the roll. Determine application technique.
- Prepare the composition according to the instructions on the package. It is important to follow the recommendations on water temperature and the duration of swelling of the mixture. A large sieve will help you get rid of lumps, through which you need to pass the entire composition (read more about how to cook and use and where to store the paste here).
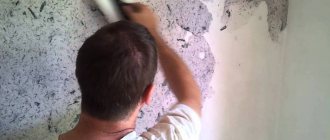
- When applying to sheets, you need to prepare a place for their placement. This can be done on the floor or on a large table. When applying to the walls, you need to make sure that they are clean, free of dust and small debris.
- Wet the brush and roller with plain water.
- Spread a protective layer of paper on the floor or table and lay out the linens. It is important that the paper does not fade or print on the roll when wet. This is especially true for white and light wallpapers.
- Apply glue to the center of the sheet depending on the wallpaper material: a little on thin ones, more on thick ones, allowing for absorption.
- Spread with a roller along the entire length: from edge to edge of the opposite side. Then move to the near half, apply from edge to edge along the length.
- Separately coat the edges with a brush. Blot any excess that gets on the front side with a rag or sponge.
- Thin wallpaper can be pasted. Thick ones - leave to swell, folding the edges towards the center and setting aside for 5-10 minutes. Then stick it on.
- If it is necessary to apply it to the wall, it is better to do it in two layers. The first serves as a primer, the second is where the wallpaper is directly glued.
Vinyl
Gluing technology:
- Prime the wall well.
- Next, proceed as indicated in the instructions from the roll: Either smear the vinyl sheet and leave it to soak, or lubricate the wall.
- The only possible way of docking is end-to-end. It is important to note that when saturated, this type of fabric stretches greatly.
Non-woven
Let's consider whether it is possible to apply glue to non-woven covering and what attention should be paid to. Pasting instructions :
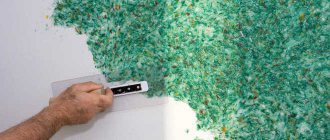
- No adhesive is applied to this type of wallpaper. It is important to pay attention to careful processing of the surface for non-woven finishing, where the glue is applied in a thick layer, preferably twice. It is important not to miss a single centimeter when applying.
- They are glued end to end, without overlap.
- It is convenient that non-woven wallpaper will not tear, as it is mounted on the wall dry. The sheet is convenient to transfer and correct in case of an error.
Paper
Stages of gluing:
- Apply glue to the inner surface of the canvas, fold the edges towards the center, leave to swell.
- Straighten the canvas, coat it with glue again, paying attention to the edges and corners.
- If the sheet curls up, it means it is not ready yet; it needs time to soak.
- Gluing - overlap.
Types of wallpaper rollers
For each stage of wallpapering there is a special roller. It accomplishes its task, thereby simplifying the worker's task. The types of products differ not only in the scope of use, but also in the material from which the working cylinder is made, dimensions and other factors. Let's look at the main types.
For wallpaper
The scope of use is indicated in the title. But its purpose is not to apply glue to the trellises, but to smooth out the canvas already glued to the surface. After all, after installation, there is air and excess glue under the wallpaper. The purpose of a wallpaper roller is to remove residual air and glue, level the surface and ensure a good appearance.
There are special plastic spatulas on sale for removing air and leveling. However, they are not suitable for all types of wallpaper. There are trellises that are too thin, a spatula can damage them, and there are products with a relief pattern that will suffer the same fate. Therefore, a wallpaper roller is simply necessary here.
The tool is made of rubber. Dimensions: 15–30 cm maximum. For smoothing, this is the best option.
For processing joints
The best option for rolling joints formed between adjacent sheets. Another name is "barrel". It is made of plastic, has a slightly conical shape and a comfortable handle. Joints are the weak point of wallpaper. Over time, they may begin to peel off in these places. To prevent this, a barrel is used. It allows you to securely fix the canvas at the joints, as well as make the place less noticeable. Joint roller length: 30–45 mm.
Advice! If the canvases have a relief pattern, you need to roll the tool carefully so as not to spoil the appearance.
For corners
Somewhat reminiscent of the previous version, only narrow. Thanks to this roller, it is possible to glue the wallpaper well at the corners, level the canvas and ensure reliable adhesion.
Needle
Instead of a fur coat or rubber cylinder, a needle-shaped wallpaper roller has metal spikes. This allows it to be used when removing old paintings. Why? Some wallpapers have a protective layer that does not allow moisture to pass through. Therefore, even after treatment with water, the liquid will not penetrate to the base and the wallpaper will be difficult to remove (in addition, there are washable wallpapers on sale that are not at all afraid of moisture).
The needle version is used for perforation. The spikes pierce the protective layer to the base, making holes in the wallpaper. This allows moisture, once hydrated, to reach the base layer. After such manipulations, removing old wallpaper will be much easier.
Painter
It is with this roller that you need to apply glue both to the surface of the wall and to the wallpaper itself. The peculiarity of the instrument is that it has a fleecy coat. Thanks to this, the paste is evenly distributed to the wall or trellis. The fur coat is made of sheepskin, or silk with synthetic materials. Slides onto a bobbin. The handle on a metal frame is made of plastic. A durable tool that is affordable. Fur coats can be changed. Optimal size for working with wallpaper: 25 cm.
A paint roller is also used for painting surfaces. This is especially true for wallpaper that can be painted. It is with this that the paint and varnish material is applied to the surface, penetrating into the structural recesses.
How to glue correctly: subtleties and nuances
The process of wallpapering is simple, but it has its own subtleties.:
- The application technology is important: from the center to the edges, paying special attention to the corners and edges (how to properly glue wallpaper in the corners of a room?).
- The amount of composition is selected based on the thickness of the fabric. The thicker it is, the more glue will need to be applied.
- It is necessary to distribute starting from the opposite side. Only after complete application there move to the side that is closer.
- Thick and papery canvases require time to soak. Simply leaving a leaf is not enough. To avoid drying out, it must be folded, bending the edges towards the center. Then you need to brush the edges again, since here the composition is absorbed and dries faster.
- Thin ones should be mounted on the wall immediately after application - this way there is less chance of tearing them as a result of excessive moisture.
- Any excess that ends up on the front side is immediately removed. This error cannot be corrected subsequently. Use a sponge or rag to remove. Excess should be removed using blotting movements, without rubbing or pressing.
Possible problems resulting from incorrectly applied glue and ways to solve them:
- Bubbles appear immediately after gluing. This may mean unevenness of the applied composition or the presence of air. The cardinal solution is to inject glue into the places where bubbles form with a syringe. This method is rarely used if it is not possible to remove bubbles with a spatula (read about why bubbles appear and how to glue wallpaper without swollen areas).
- The canvas falls off the wall. Most likely, the reason is improperly prepared or low-quality glue. It should be prepared fresh or replaced with a new one.
- The seams on the wallpaper are noticeable. If the technology for placing the sheets is followed, then the reason is poor application to the edges of the sheets. The solution is to carefully glue the edges with a brush.
- Yellow spots. The reasons for their appearance are poor-quality glue or contact of the canvas with the coloring base after applying the composition. In this case, only plywood will help.
Wallpapering is a simple but labor-intensive process. The task will be greatly simplified by carefully following the instructions described in this material and correctly applying the glue to the canvas.
Peculiarities
The roller is a hand tool consisting of a yoke (curved part), a tube (metal part), and a reel (rotating cylinder). Thanks to its simple design, it is easy to work with. The scope of use is huge: applying paint, glue, primer, expelling air from under the wallpaper, forming a pattern on the surface if the roller is shaped.
The versatility of the tool is amazing. Moreover, if you use an additional handle. It allows you, while working below, to reach the ceiling and process hard-to-reach places. Among the advantages are ergonomics, ease of use, accurate application of the material to the surface, and uniformity of this application. Thanks to the different widths of the working base, the process of applying glue is carried out quickly and efficiently. But that's not all you need to know about the roller. After all, it is suitable not only for applying wallpaper glue.
What you need to apply glue to wallpaper
In order for the whole procedure to go as smoothly and successfully as possible, you need to immediately stock up on everything you need. In fact, you will need a minimum number of tools:
- Wide brush with soft bristles and a roller with a foam nozzle;
- Rags, preferably cotton;
- Several foam sponges that are used for washing dishes.
All this is quite cheap, and you can find it in any market, so there will be no problems with the search.
Preparing the glue correctly
You also need to remember that wallpaper glue is not a liquid substance in which you open the bottle cap and start gluing wallpaper. Everything is much more complicated here, since this is a dry mixture that needs to be diluted with water in certain proportions, maintaining certain temperature conditions. The further result will depend on how correctly you prepare the glue, so you need to carefully study the instructions from the manufacturer, which are located on the packaging. You need to pay attention to the main criteria that will be useful when preparing glue:
- The temperature of the water used to dilute the powder substance.
- The rate in time at which the adhesive begins to thicken.
- The time it takes for the dry glue granules to swell to the desired consistency.
There's really nothing complicated about it. The main thing is to strictly follow the instructions. To achieve an ideal result, you can pass the glue through a fine sieve to completely get rid of small lumps that could disrupt the ideal surface of the wallpaper.
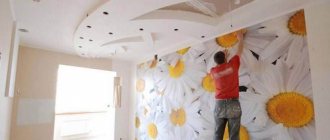
The nuances of wallpapering the ceiling with paper
The technique for gluing the ceiling is the same as for walls. There are differences, but they are few:
- work always starts from the window - gluing is carried out deep into the room;
- uneven, crooked ceilings should be leveled with gypsum plasterboard or fiberboard;
- You need a partner, or even better, two assistants - it’s impossible to do all the work efficiently alone.
In conclusion, paper wallpaper seems simple only at first glance. In reality, many nuances arise during the work process. Compliance with the recommendations and conditions of work allows you to get a beautifully decorated interior.