You can make a reliable and relatively inexpensive fence for a site using a combined fence - the posts are made of brick, and the filling (spans) is made of any light material - wood, corrugated sheets, forged fences. The look is solid, and the costs are much lower than for a “pure” brick fence. Moreover, laying pillars is not the most difficult task, but it is profitable. Two years ago craftsmen were asking for 2,000 rubles per pole, but today prices have more than doubled. You can build brick fence posts with your own hands without the skills of a mason. It is important to follow the technology and everything will work out.
Foundation for a fence with brick pillars
The choice of the type of foundation for brick pillars depends on what material the filling will be made of and also on the type of soil. If the fence span is made of light material (corrugated sheets, wood), you can make a pile foundation for each post. The depth to which the pile must be driven/screwed depends on the type of soil and the height of the groundwater. If soils are prone to winter heaving (clay or loam) with highly located groundwater, it is necessary to dig in 15-20 cm below the freezing depth of the soil. On well-drained soils (sands and sandy loams), it is enough to dig down to 80 cm.
Pile foundation for a brick fence post with light filling
A pile foundation for a brick pillar is made using standard technology:
- drill a hole of the required depth (diameter 25-35 cm);
- a bucket or two of crushed stone is poured into the bottom;
- compact;
- they place a pipe around which the pillar will subsequently be laid (on heaving soils, several pieces of metal rods, tapes, and corners are often welded to the part being buried for greater stability);
- the pipe is positioned strictly vertically and fixed;
- for heaving soils, if metal pieces are not welded to the pipe, you can stick several reinforcing bars into the hole; for very difficult soils, you can tie a frame;
- high-grade concrete is poured - M300 or higher (read about grades and composition here).
The length of the pipes consists of two quantities: the part that is walled up in concrete and the part that will stick out from above. Moreover, the upper section of the pipe in this case does not necessarily have to be up to the very top of the pillar. It can be 40-50 cm shorter. An exception is the pillars on which the gate and/or wicket will be hung. Here the internal reinforcement should be almost to the very top.
If the fence is planned to be entirely brick or there are high wind loads in the region, most likely you will need to make a full-fledged strip foundation. Another option is piles connected with shallow tape.
Fence design with brick pillars on a monolithic reinforced concrete foundation
Read more about the types of foundations for various types of fences in the article “Foundation for a fence: how not to bury extra money.”
Mortar and brick for posts
The solution is made of cement-sand with a ratio of 1:5 (or 1:6). It is better to take fine sand, high-grade cement - no lower than M400. For plasticity, you can add a little liquid hand soap or dishwashing detergent (20-30 g per standard batch - 1 bucket).
It is important to obtain the desired fluidity when preparing the solution. It should not be dry, but it is also inconvenient to work with liquid, so add water gradually, monitoring the consistency of the solution. The desired condition can be checked as follows: lay out a certain amount of solution on some surface, and use a trowel to make a cross on it. Then take the marked area with a trowel and watch the cross: it should not “float”.
Optimal mortar consistency for laying brick pillars
If you wish, you can get a black solution by adding soot to it. It is sold in construction stores in bags. You add a small portion of soot and get decorative seams without painting.
Black grout adds decorativeness
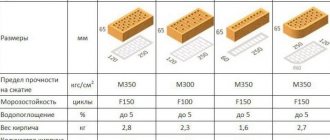
Any brick can be used for pillars, just pay attention to the number of defrost-freeze cycles (the more, the better) and the geometry. Ideally, deviations in size should not be more than a couple of millimeters. Then your work will be easy. If you come across a batch of different sizes, carefully sort by size so that the bricks in one column have minimal discrepancy.
Laying fence posts: technologies
In most cases, fence posts are made of 1.5 or 2 bricks, the cross-section is 380*380 mm and 510*510 mm, respectively, and the height is up to 3 meters.
The masonry is carried out with bandaging (offset) - the seam of the bottom row is overlapped by the “body” of the brick lying on top. The standard seam is 8-10 mm. The diagram for laying columns of one and a half and two bricks is in the photo below.
Brick pillars of 1.5 and 2 bricks
Laying pillars: work order
Cut-off waterproofing is spread on the finished foundation. It can be roofing material in two layers, but it is better to use waterproofing with bitumen mastic. This layer is necessary so that the brick does not “pull” moisture from the soil. If wet brick freezes, it will quickly begin to crack and crumble. Therefore, waterproofing is necessary. Rolled waterproofing can be replaced - coat the foundation twice with bitumen mastic, and in areas with high humidity it is better to do double waterproofing - coat it with mastic, and then lay “Gidroizol” as well.
According to the size of the pillar, a layer of mortar a little more than 1 cm is applied to the waterproofing. Bricks are laid on it, according to the diagram. They are leveled in vertical and horizontal planes by tapping with a special rubber hammer. Craftsmen can use the handle of a trowel, but in this case, the remains of the mortar can fly off the surface of the trowel, staining their hands and the brick, and it is difficult to wipe off the cement.
Ceramic brick absorbs moisture very quickly, so if you hesitate a little, it will be difficult for you to “put” it in place. To ensure that the solution retains its plasticity longer, the brick is dipped in water for a few seconds before laying. The same maneuver makes it easier to wipe the solution from the surface (it is removed immediately with a dry cloth).
We hit with a hammer
The second row is laid in the same way: the mortar is spread on the bricks, the bricks are placed on it, but with a bandage - unfolded so that the seam is blocked. Level again. Then take a tape measure and check the dimensions of the laid rows. Even a small displacement of 1-2 mm is eliminated. Tap the end of the brick (called a “poke”), moving the bricks closer. Then, if the side edges were not coated, fill the vertical seams. All subsequent rows are placed similarly.
If there is a void between the inner reinforcement pipe and the brickwork, it is filled. If the distance is small, you can use masonry mortar; if the void is significant, to save space you can fill it with crushed stone, compact it, then pour it with liquid cement-sand mortar.
Masonry under the rod
The masonry of pillars described above has long been tested, but for beginners, when making it themselves, it is difficult to maintain an even seam. Another problem is that the solution comes out of the seam, staining the surface. It doesn't turn out very nice. To make the work easier, we came up with a laying under the rod. Take a square metal rod with a side of 8-10 mm, cut it into pieces, 10-15 cm longer than the dimensions of the post.
Bar layout
Having laid the first row, a rod is laid on it along the edge of the brick. Fill the area with a small amount of solution, with a larger layer being made closer to the pipe. Then, running a trowel along the rod, remove the excess, clearing the rod of the solution. But at the same time, the slope of the solution is maintained. They place a brick and level it. At the same time, the rod prevents it from settling too much, and we control the position of the other end with a level.
Apply the solution to the side edge under the rod
Then take a short piece of rod about 10 cm (for a vertical seam), place it along the butt, apply the mortar with a trowel to the side of the laid brick, also removing the excess along the rod. The second brick is placed and leveled. After the level is set, the seam is pressed from above with a trowel, and the vertical rod is removed.
We take out the rod, holding the seam with a trowel
This is how all the bricks are laid out in a row. Then the rods are removed and proceed to the next row. This technology for laying brick pillars allows you to control the seams and make them neat. Even a novice amateur mason can fold a pillar this way with his own hands. It is only important to control the parameters of each row during the process (so that the column in the cross-section is the same size).
Video lessons
A more complex version of a brick pillar - twisted with a screw
Features of working with ceramic bricks
Design Features
For sliding gates
When installing sliding gates, there is no point in looking for drawings of the embedded elements, they simply do not exist. The geometry and dimensions are chosen arbitrarily, because only one task must be solved: creating a base for installing rollers and a drive mechanism. Typically, mortgages are made from channels numbered 10-20. There is a clear rule here: the weight of the gate increases - larger rolled metal is required.
Keep in mind that space for the engine must be provided behind this line in the yard. To avoid mistakes, it is worth making the embedded element equal in length to the “counterweight” of the gate.
Sometimes it can be smaller, but a maximum of 20 cm. If you plan to later install a drive with an electric motor, the platform for its installation is welded to the mortgage in a randomly selected location. But some builders do things differently. At the time of construction of the gate, they do not prepare any basis for the motor. Only then, when it is being installed, is a steel plate that extends slightly to the side welded onto the top of the mortgage.
For the gate
The approach to such mortgages is somewhat different than to the elements holding sliding gates. There is no need to insert the rods inside the brick pillars. It is necessary to place them directly next to the supports, driving them into the ground. When this work is completed, the channel is welded.
Since wickets are much lighter than regular gates, the hinges should not be too massive either. But it is recommended to bury the supports into the soil, then they will be more reliable.
For large gates with high posts, it is not enough to install vertical channels near both halves. At the bottom they are fastened with a third channel, the length of which should coincide with the distance from the pillars to the gate.
You can often come across statements that it is possible to weld embeds to steel strips protruding from the pillars. But in reality, these miniature protrusions will not be able to hold even a small gate. In the case of swing gates, metal mortgages measuring from 5 to 7 cm are welded to the central posts of the pillars. This is quite enough for automatic structures, if they do not turn out to be too heavy.
Additional recommendations for selection and installation:
- For heavy swing gates, I-beams or rails can be welded between the posts. It will be safer if you do this with braces and weld additional beams on the other side.
- If you lack experience, it is better not to try to hide mortgages and then bring them out; this is extremely difficult.
- It is more correct to hammer (screw in) a metal product through a hole prepared with a special tool.
- Holes in the brick are made at an angle of 45 degrees (deviation is acceptable, but small, otherwise the brick will crack).
How to make mortgages with your own hands, see the video below.
Let's block ads! (Why?)
Possible problems and their solutions
The main problems that may arise when laying pillars with your own hands are changes in size and “twisting”. Both defects arise from insufficient control.
When laying pillars with your own hands, often the top rows become much wider than the bottom ones. This happens gradually, a millimeter or even less is added, but in almost every row. As a result, at a height of 2 m the width of the column is 400 mm or even more. This is instead of 380 mm. The fix for this error is to control the size of each row.
It is not enough to control the dimensions of the pillar using the building level alone. Basically, a household tool (yellow) is used, and it has a fairly large error. And if the level is 60-80 cm long, you simply will not see minor vertical deviations. Therefore, they additionally use a tape measure - measuring each row. To reduce the time it takes to control, you can make a template according to the size of the column (for example, from even planks) with which to check for deviations.
The fence posts are laid around a metal reinforcing pipe, verticality is checked after laying each row
Laying pillars on your own without experience in such work can lead to another mistake: the edges of the pillar can shift, causing the pillar to twist around its axis. This drawback is much more unpleasant: try attaching spans to such pillars. There will be many problems. Therefore, when laying each row, you must strictly ensure that the corners are located strictly one above the other.
You can make the task easier by using two corners screwed to opposite corners. They are temporarily attached to the lower rows (with bolts or self-tapping screws in the seam) and then used as a guide, placing the bricks strictly in the corner.
Required Tools
Detailed drawing for reinforcing masonry pillars and foundations
To make gates that have a beautiful appearance, you must have various materials, as well as the appropriate tools:
- Fittings;
- Brick;
- Steel pipe;
- Cement;
- Crushed stone;
- Sand;
- Bulgarian;
- Buckets;
- Shovels;
- Master OK;
- Concrete mixer;
- Roulette;
- Building level.
Return to contents
Mortgage elements and gate fastening
When laying brick pillars, you need to think about how you will attach the span to them. In order to be able to secure the horizontal guides for filling the fence, the embeds are pre-welded to the pipes located in the middle of the column. These can be corners, studs, “ears” for attaching wooden planks, etc. They are welded at the same height so that the attached crossbars are strictly horizontal.
One of the options is suitable for fastening corrugated sheets, picket fences
Mortgage options may vary. Some people make it from a corner; for others, hairpins are enough. It all depends on the type of fence filling (what the spans will be made of) or the weight of the gate leaf.
Options for mortgages in brick pillars
Different weights require different power elements
At least three metal parts with a metal thickness of at least 3 mm (preferably 4 mm or even more) are required for gates or wickets.
An example of the location of mortgages for swing gates
The construction and installation of sliding gates with your own hands is described here. Read about how to automate swing gates here.
Typical error
When you attach gates to brick supports with your own hands, one characteristic mistake is made. Mortgages are welded directly to a metal post in order to secure the future gate. But only two pillars should have mortgages; they are simply not needed on the rest. The gate will not be highly reliable, since it simply will not be held in place by small sections of brick from which a metal rod sticks out.
To install the gate when the pillars are made of brick, you need to first make a layout and mark those pillars that will become the main support of the gate. The gates are mounted using electric welding, which is cheaper than gas welding. It does not form an influx of metal.
Return to contents
Making a cap for a brick pillar
To protect the brick from moisture, the top of the pillar is covered with a cap. They are sold in large quantities, some are metal, concrete or composite. If desired, you can make a cap for a pole from roofing iron yourself. Below is the diagram. All you have to do is set the dimensions and then bend it using a bending machine along the marked lines. The product is fastened with special rivets, but self-tapping screws can also be used. You just need to pre-drill the holes, coat them with anti-rust, and then paint them.
Drawing of a cap for a brick pillar
Brick cladding of columns
The columns located in the room take on the main emphasis in its interior. The same statement applies to similar elements of the facade. No less interesting is the facing of columns with brick, which allows them to give them a more solid and prestigious character.
Types of columns for cladding
types of brick columns
The possibility of its subsequent design will depend on the shape of this element. The following types are distinguished:
- square;
- round;
- polygonal.
Another issue is the cladding of metal pole products. But, as a rule, it comes down to giving them one of the above configurations.
Features of work
facing the column with brick
Brick is a building material of a certain rectangular shape and size. This can create certain difficulties in achieving your plans. The following points stand out here:
- The simplest is square cladding . There are four planes that should be finished one by one. Before the implementation of an idea begins, special lighthouse slats are usually installed.
- The result of working with polygonal columns will depend on the qualifications of the master . It is he who will have to calculate the angle of rotation for each of its faces. Most often, such a specialist acts according to a previously established template.
- The most difficult will be the cladding of the round type , which is a closed plane. Here it is imperative to maintain the verticality of the surface and adhere to the strict geometry of its cross-section. In this case, the specialist focuses on the guides along which he builds a semicircle pattern. The work is carried out in two stages (first the first half of the column, then the second).
Main advantages
column cladding methods
Despite the apparent complexity, the good thing about brick cladding of columns is that the preparation of the surface layer is completely eliminated. But there are other stages:
- The preparatory period is a mandatory hanging. At this time, the upper and lower marks will be determined. The estimated straightness is also taken into account - it is measured relative to the first row.
- The brick itself must be laid in rows. The main rule here is to maintain verticality in the corners and the thickness of the seam itself.
- There is another undeniable bonus in such an event - the material can be placed on both the smooth and chipped sides. This makes the installation process easier.
Photo ideas for fences with brick pillars
The most popular option is a corrugated fence with brick pillars
Forging always looks good
Torn stone and picket fence - combined fence
Wood filling can be solid
Decorative brick pillars decorate the fence
The most popular color of corrugated board on a fence is burgundy.
In combination with Euro picket fence
Twisted posts for advanced masons
