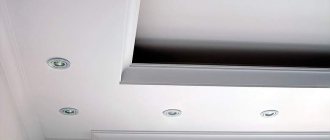
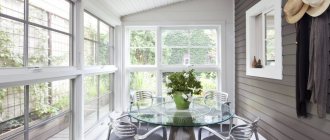
The kitchens of apartments, especially those built during the Soviet period, are distinguished by one feature: a large number of communications located in plain sight and spoiling the overall impression of the interior of the room. These are heating pipes and gas communications, “decorated” with various valves and metering devices. The corrugated air duct of a kitchen hood also does not look very aesthetically pleasing. During the renovation process, it is advisable to hide them, while simultaneously improving the ergonomics of the kitchen. For example, in the box above the kitchen shown in the photo, made of plasterboard, you can also place additional lighting. Is it really possible to do it yourself?
Step-by-step instructions for installing a plasterboard box
Most of the housing available to the bulk of the population was built during the Soviet era. Unfortunately, most often the quality of the building itself leaves much to be desired. It’s no wonder that when they were preparing the plan, they weren’t concerned with the particular accuracy and evenness of the surfaces. But today, when making renovations in their apartment, owners are faced with the problem of leveling walls, ceilings, and most importantly, the problem of how to hide utility lines. Various kinds of risers, heating pipes and heaters can be hidden in a box made of plasterboard on a frame. The installation technology itself is simple and allows you to do all stages of the work yourself. But how to make a box from plasterboard and what are the nuances of such a process?
Marking
They usually start with markings on the wall:
- make several marks on the wall, measuring the same distance from the ceiling, for example 50 cm;
- then tighten the lacing with dye. In order for an even strip to remain on the wall, the thread must be pulled back and then quickly released;
Marking the ceiling for the box - they go over the next wall and do the whole process again;
- Once all the walls are marked, proceed to the ceiling. You can draw straight lines on it using a hydraulic level, or you can use the same thread;
- On the ceiling, the end points of installation of fasteners are marked to form the frame of the duct for the hood.
As soon as all the main lines of the future box have been drawn on the surface, you can begin to install a rigid frame under the drywall.
What you will need for installation
Assembling a box from gypsum plasterboard is not a very expensive process, all materials are available, and some tools are available at home.
- Drywall. Today there are several types of this material: wall, moisture-resistant, fire-resistant. Sheets are sold in different thicknesses and sizes. Which one to choose for installing the box will depend on the conditions where the structure will be located. For the kitchen or bathroom, it is best to purchase moisture-resistant plasterboard; in residential premises, you can use ordinary wall plasterboard, and fire-resistant plasterboard is used when assembling wall elements near fireplaces and stoves.
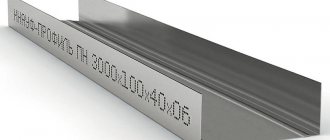
- Metallic profile. This is the second most important part during assembly. The entire frame is assembled from the profile, on which the sheets of wall material will be fixed. There are a lot of options, but to install a plasterboard box you will need CD and UD profiles.
The CD profile acts as a frame for fastening plasterboard sheets; it has curved edges and stiffening ribs. It is used to create durable structures for suspended ceilings and various types of boxes.
The UD profile is used as a guide rail for the frame posts. It is attached around the perimeter of the room. For strength, it is mounted to the surface of the floor or wall.
When choosing profiles, you must pay attention to the quality of the metal and its galvanized coating.
- Suspensions. These are metal strips with perforations for attaching long frame guides. You can make them yourself, but store-bought ones are inexpensive and more convenient to use. They are used if you need to move the guides at a distance from the surface.
- Fasteners These are dowel-nails for attaching UD profiles and hangers to the surface of walls and ceilings. They look like a screw, but with a sharp tip without rifling. You also need so-called “fleas”, these are small self-tapping screws that are used to connect the metal parts of the frame to each other. And of course, it’s worth purchasing fasteners for drywall sheets. Sold in the form of black self-tapping screws with a gimlet cut, starting from 25 millimeters in length.
- Tools: hammer drill (impact drill), screwdriver, building level, metal scissors, stationery knife with a supply of blades (for cutting drywall), cord, tape measure.
- For final finishing you will need putty, sickle tape and spatulas.
This is the main list; in work, some tools can be replaced with improvised ones. For example, a screwdriver will replace a drill at low speeds (although not as convenient), or metal scissors will replace a saw. But the presence of specifically designed tools significantly speeds up the production of a plasterboard box.
Required materials and tools
Drywall is selected according to the type of work, as well as its direct use. Preference should be given to a moisture-resistant option, since in the kitchen it can be exposed to moisture, which has a detrimental effect on a material that does not have this property. The thickness of the sheet and its size are also important, which is why before purchasing you need to carefully study all the characteristics of a particular offer. If you have any doubts, it would be appropriate to seek help from consultants, which will help you avoid making a mistaken purchase.
Tools needed to make a box:
- tape measure, pencil;
- metal profiles;
- screwdriver or screwdriver;
- perforator;
- self-tapping screws;
- metal scissors;
- building level;
- construction knife.
It is also necessary to prepare finishing materials, selected depending on the interior of the kitchen and personal preferences.
How to assemble a plasterboard box: marking, installing guides, fastening sheets
Marking
Installation of a plasterboard box begins with marking its dimensions. All markings of the future box depend on the dimensions of what will be hidden in it. For example, the size of a plasterboard box in the kitchen is planned based on the parameters of the kitchen hood.
Vertical breakdown is done using a cord, a long rod and a level. We find the farthest point from the wall, in this place we install a strip to which we apply a level. We align it according to the position of the bubble. At the points where the slats touch the ceiling and floor, we attach nails or screws and tighten the cord. For convenience, it is better to use brightly colored cords.
After marking the vertical markings, we make horizontal markings on the floor and ceiling for attaching the guides.
If you are going to assemble a ceiling plasterboard box, the cords are pulled parallel to the floor and ceiling, taking into account the level.
Work planning
Before purchasing building materials and further manufacturing the box, you should make preliminary calculations that will allow you to avoid unnecessary costs. First of all, the product must be designed on paper, for which the length and width of the riser and its estimated distance from the wall are measured. Next, a diagram of the location of the profiles and the location of the transverse jumpers is applied to the paper.
Important! The distance between the metal frame and the pipes should not be less than 10 cm.
The design of the box and the complexity of its manufacture directly depend on the location of the riser, which can be either in the corner of the room, which is the simplest option, or at a short distance from it, or in the middle of the kitchen. The angular arrangement requires little effort, since only 2 planes will need to be covered, while in other options - 3.
How to make a box from plasterboard. Step-by-step algorithm
Installation of guides
A box made from a profile for plasterboard is assembled after beating lines with cords or markings; guides from a UD profile, cut to size, are attached to them. Fastening is done using dowel nails or dowels with self-tapping screws. The pitch should be no more than 300 millimeters. It is important to ensure strong fastening. If the walls are made of a soft material such as aerated concrete, then standard plastic dowels will not work. You need to use special metal dowels (“crocodiles”).
You also need to assemble a so-called shelf - one or several. This is a design made of guides, which will ensure fastening of the CD profile to the convergence edges of the box faces.
To do this, another similar one is attached to one side of the UD profile. Fastening is ensured by self-tapping screws (press washers). To smoothly connect the edges of the shelves, first attach the ends to each other, and then the middle.
After assembly, the resulting structure is fixed in guides attached to the surfaces of the walls, ceiling or floor. In this case, if the shelf is very long, immediately insert a jumper from the CD profile.
Installation of jumpers
The jumpers are made to size from a CD profile. They are inserted into the guides at a frequency of about 400 millimeters. If this is a ceiling box, then you should immediately mark their location so that there are no problems with cutting openings for the lighting or ventilation system.
The jumpers are secured to the guides using fleas and a screwdriver.
Which is better: heated floors or radiators?
Warm floorBatteries
After assembling the entire frame, you need to check its geometric accuracy so that the box does not spoil the drywall mounted on it with uneven ribs. To do this, apply a level to the guides; if there are any unevenness, the stand is pulled back and secured to the surface with a self-tapping screw.
The rigidity and strength of the entire structure will depend on the number of attachment points, but there is no need to be overzealous; a step of 300 - 400 millimeters will be enough.
Fastening plasterboard sheets
The sheet of drywall is cut to the required size using a utility knife along the markings on both sides. An important rule is that gaps of 10 mm and 5 mm are made to the floor and ceiling, respectively. It is also better to display the factory edges of the sheets on the edges of the box, then they will turn out smoother, and it will be easier to secure the plaster corner in future finishing.
The sheets are attached to the jumpers and guides with self-tapping screws, the heads of which are slightly recessed into the surface of the drywall. When assembling a ceiling box, the step between fasteners should be smaller - about 150 millimeters. For a vertical structure, the frequency of fastening is 250 - 300 millimeters.
Also, you should not attach drywall at the joints of the guides and jumpers; it is better to step back a little so that the self-tapping screw does not pierce the double layer of metal.
If you need access to the inside of the box, then you should consider viewing windows.
The structure is ready, and we need to move on to the next stage - finishing.
The assembly process itself does not require any special skills or tools. Mounting a plasterboard box with your own hands is not difficult and, if you know the technological nuances of the process, it will not take much time. If you don’t want to do it yourself, then it’s better to invite a qualified specialist.
Installing jumpers
Now let's mark the position of the vertical and horizontal jumpers. Ideally, the distance between them is 400 mm. But an element such as a box is often not only decorative, but also serves as a place for mounting lighting and ventilation. Therefore, first of all, let’s note where the outputs of various messages will be located and adjust the position of the jumpers.
For example, when constructing the frame of a box covering the supply ventilation system, I was faced with the need to install two diffusers and two hatches providing access to the system’s service. It is clear that in this case it will not be possible to track the sequence of jumpers in one step. When there are no barriers, it looks like this;
© shutterstock
I had to retreat from the equal step between the pillars:
© shutterstock
What should be considered when determining the position of frame elements. The presence of metal strengthens the structure, especially where it is placed. Any cutouts in the drywall, as well as the installation of lamps, on the contrary, weaken the rigidity.
Therefore, it is advisable to move or install additional jumpers in close proximity to areas of increased load. In the case of hatches, the profile is mounted as a frame on at least two sides of the cut rectangle. The screws show where the horizontal posts are.
The final stage of assembly is covering the box with plasterboard. After the required number of racks has been installed, they still need to be secured, and this must be done so that the shelf (edge or outer edge of the frame) forms a clear straight line.
How to make a box from plasterboard: video
Sooner or later there comes a time when you need to make repairs in your office or apartment. I want a stylish and beautiful design of the room, regardless of its price factors and purpose. In such a situation, many resort to non-standard solutions, and below we will look at one of them, namely, how to make a box from plasterboard. We will describe the process in detail and provide a video.
- How to make a box from plasterboard: video and description of the process To understand how to make a box from plasterboard, we recommend that you familiarize yourself with the main works:
- DIY plasterboard box
We often encounter such a common problem as protruding communication systems (electrical wiring, pipelines, ventilation shafts) and imperfect planning. There are other unpleasant additions to the interior of the room that need to be hidden or decorated with building elements.
When sewing communication systems into a box, before starting work you need to carry out an inspection so that you don’t have to destroy the constructed structure later. Carry out painting and save a diagram of the location of all connections and valves in case of an emergency. Check the tightness and integrity of pipelines and shut-off valves.
Think about how to discreetly design a false panel or inspection window for access to communications. If necessary, tie the pipes using insulating tape. If ventilation shafts or sewer risers are a source of constant noise, then it is better to use mineral wool as a soundproofing material.
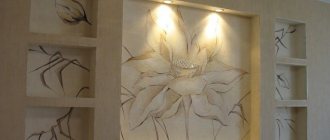
Design, photo
The presented canvas hides any protrusions well, ventilation ducts are built in the kitchen, covering communications, pipes and risers are hidden in the bathrooms, forming a single structure. This is a universal solution used by many finishers, achieving the best aesthetic results.
How it looks in the interior;
How to make a box from plasterboard: video and description of the process
Preparatory stage
To make it easier for novice craftsmen to navigate the process of creating a plasterboard box, we recommend that you familiarize yourself with the full list of materials and equipment that will be needed to get started:
- drywall (it’s good if you use moisture-resistant);
- metal profiles (2 types);
- fastening elements (screws, dowels);
- hammer;
- building level;
- perforator;
- screwdriver;
- roulette;
- knife;
- reinforcing strip for seams;
- brush, spatula;
- putty;
- soil solutions.
You can buy basic materials for repairs at any hardware store. Their cost varies depending on the manufacturer, but does not differ much from each other. If there are no specialized tools in the household, then you can borrow them from friends or from organizations that offer rental services. The operating conditions for them can be found in the instructions that come with the devices.
To understand how to make a box from plasterboard, we recommend that you familiarize yourself with the main works:
- Creation of a project and installation of a frame made of metal profiles according to the required dimensions.
- Fastening at the destination (to the floor, ceiling, panels). There are two types of fasteners: in the first case, a rectangular frame is created, which is installed in the desired location; the second involves the stationary installation of a guide profile along the entire perimeter of the selected object, where a rack profile is horizontally fixed, forming the same frame.
- Creation of plasterboard panels according to shape and size.
- Installation and fixation of plasterboard blanks to a metal structure.
- Surface finishing.
By carefully listening to our advice, you will learn how to properly make a plasterboard box, as well as how to economically spend your family budget.
Before you make a box from plasterboard, you need to buy a profile. In this case, two types of products are required: rack-mount and guide profile. The latter acts as the frame of the product, and the first is attached in the transverse direction and gives the structure the necessary rigidity. When installing the frame, measure its verticality and horizontality with a level and only then proceed to fasten it using self-tapping screws.
DIY plasterboard box
We offer two options for creating a box that will be appropriate in standard apartments. The first is when the pipes run in the corner of the room and the box should be angular. The second is when the pipes run along the center of the wall.
The first option is a pipe in the corner of the room.
To create such a box you will need three profiles. In principle, wooden blocks that are treated with varnish can also be used so that the wood is not damaged as a result of high humidity.
- We cut the profile according to the height of the room.
- Box size. If cladding is not done, screw them to the wall vertically so that they are as close to the pipe as possible. If you are going to do plasterboard cladding, then it is advisable to adjust the size to the tile. Use a square and draw the required dimensions directly on the floor. Next, using self-tapping screws and dowels, we screw the profiles to the wall.
- We measure the required distance of the plasterboard strip using a square and a tape measure.
- We measure the plasterboard blank and screw it to the profiles. It is better to double-check the size of the second strip using a tape measure.
- We screw the third profile along the edge of the strip.
- The final stage is cutting and screwing the second plasterboard strip onto two profiles using self-tapping screws.
The second option is pipes in the center of the wall.
In this case, you will need four profiles. Step-by-step actions:
- We fasten the profile with self-tapping screws and dowels vertically and as close to the pipe as possible.
- We prepare two side strips of drywall of the required width. It’s better to double-check that you haven’t cut less than necessary so that the box completely covers the pipe.
- Screw one strip to the profile.
- Next, screw another one to the other edge.
- Then measure the distance between them and cut two guide profiles to size (for the ceiling and floor).
- We insert a rack hole into them, into which the plasterboard strips are screwed.
- The third stripe needs to be measured. If the width is more than 40 cm, then from the profile to secure the structure you need to make several horizontal mortgages, which should be installed in increments of 60 cm. If they are slightly smaller, namely 40 cm, leave them like that - the third strip will structurally tighten them.
Now you know how to make a drywall box with your own hands, but you shouldn’t create dull rectangular boxes without a bit of imagination and flight of fancy.
Attention! Transform your camouflage designs into real designer pieces. Design them in the form of decorative niches, multifunctional shelves, pseudo-portals or false cabinets, and in the case of ceiling boxes - in the form of cornices. It would also be nice to make electricity and illuminate the elements.
conclusions
If you approach the topic of construction seriously, studying descriptions and watching videos, then acquiring the skills to install drywall will not be difficult.
Therefore, by following step-by-step recommendations, you can turn your idea into reality. Do not forget that by decorating imperfections in this way, you can create a beautiful interior, since plasterboard modules significantly change the style of the room and accentuate attention.
A high-quality and beautifully designed ceiling always serves as a worthy decoration for any room. But modern ceiling designs are called upon.
If the box is intended for cables and wiring, then it is called a cable channel. There are other structures in which various engineering technologies are hidden.
Installing a plasterboard ceiling What better way to help you figure out how to make a suspended plasterboard ceiling with your own hands - video instructions or.
It is better to purchase fasteners with a reserve. During the installation process, these elements may get lost or broken, and running to the store for a pair of hangers will be very disappointing. You should not join sheets of drywall in the corners; it is better to place whole fragments there, otherwise there is a high probability of cracks appearing in these places.
Partition technology
The whole process can be divided into 3 stages:
- layout;
- frame installation;
- frame covering.
After this, all that remains is to finish the partition so that it does not stand out from the overall style of the room.
Layout
At the planning stage, you need to mark the outline of the future partition on the floor and ceiling. Its walls must be strictly vertical, so when transferring the contour from the floor to the ceiling, you will need a building level.
The marking instructions look like this:
the outline of the future partition is drawn on the floor at right angles to the walls of the room
In this case, it is important to maintain the distance from the partition wall to the pipe itself. It is desirable that it be at least 5–7 cm;
Frame installation
When you need to cover pipes in a toilet with plasterboard or in another room with a high level of humidity, it is better to use galvanized metal profiles for the frame. You will need 2 types of profiles: UD - attached to the floor and ceiling, as well as CD profile - will act as racks and horizontal partitions.
Although, ordinary wooden planks can be used for the frame, but such a design will be more cumbersome. Besides, using wood in the kitchen or bathroom is not a good idea.
The metal profiles are connected to the floor and to each other with small self-tapping screws.
The frame assembly should be carried out in the following sequence:
- first, guides are attached to the floor and ceiling;
- then rack profiles are installed in the corners of the box, and their verticality is additionally controlled. The same profiles need to be installed against the wall;
- in order to ensure the rigidity of the structure, cross members from the same rack profile are fixed between the racks; the step between them can be about 60 cm.
Frame covering
The sheets are attached to metal profiles with self-tapping screws. It is convenient to use a knife to cut sheets. The sheet is cut along a pre-marked line to approximately 2/3 of the depth, then placed with its back on the edge of the table and sharply broken.
After this, all that remains is to cut through the thin layer of cardboard with a knife.
When all the work is done with your own hands, you must take into account the purpose of the room. So, ordinary plasterboard is suitable for the living room, but for the bathroom, kitchen and toilet it is recommended to use moisture-resistant plasterboard (it differs from the usual one in a greenish color).
The interior of the box must be ventilated. To do this, when covering the frame, a small hole (at least 5 cm in diameter) is left in the upper part.
In addition, access to the pipeline may be needed at any time, for example, in case of leaking joints. For inspection in the box, it is advisable to provide a door opposite the taps and fittings.
After finishing the partition, the door will be almost invisible.
The space between the sheets and the wall can be filled with heat and sound insulating material, for example, mineral wool. Thanks to this, the noise in the pipes will become absolutely inaudible.
How to hide heating pipes?
When deciding how to cover heating pipes with plasterboard in a room, in general, the procedure remains the same. The differences in technology are associated with the high temperature of the coolant pipes.
As a rule, the heating radiator is located under the window, approximately in the middle of the wall. Therefore, in addition to the vertical pipeline, there is also a significant section of horizontal pipe in the room.
When masking heating pipes, it is better to bring the plasterboard partition all the way to the ceiling in the area from the riser to the radiator. The loss of free space will be almost unnoticeable, but the partition will not stand out.
In addition, more intensive ventilation must be provided. Large holes in the drywall will be too obvious, so you can drill many small holes along the piping.
Covering the pipes in the kitchen with plasterboard
The essence of the preparation is to ensure that the box continues to perform its functions effectively and for a long time, as well as to facilitate the work. In conclusion, it remains to design the closing box in accordance with the kitchen interior. The characteristics of drywall make it possible to finish it with almost any type of material:
- clean old putty from the walls;
- check pipes for damage;
- treat the walls with a solution that prevents the appearance of mold and mildew on them.
How to make a plasterboard box for pipes in the kitchen yourself? Despite the fact that drywall is easy to process, all operations must be carried out carefully and carefully, since the material, along with many positive qualities, has fragility. The entire installation process occurs in several stages. The next step is to connect the fixed profiles with jumpers, which are installed in increments of 50 cm, which will result in rigidity to the structure.
In this case, gas pipes should be hidden using elements that prevent them from dangling or not fitting tightly.
Useful little things
A few small but effective tips will help you avoid making mistakes and close the gas pipe more efficiently:
- The presence of an inspection hatch in the box is mandatory, since there must be a constant opportunity to easily reach the meter and gas tap.
- Independently changing the location of the riser is prohibited. If you receive permission for this, you should not do it yourself, since the procedure will need to be legalized.
- If the noise in the box is annoying due to water pipes, then soundproofing material can be placed in it.
Hiding pipes with plasterboard makes it possible to turn all your ideas into reality, since its versatility allows you to give the structure any shape. Following the rules, as well as careful and attentive work, will allow you to quickly implement your plans, giving the kitchen a finished, attractive look.
Video
Plasterboard box for pipes
The structure can also be built using wooden blocks; the installation of wooden slats is carried out using the same technology, but they must be impregnated with protective solutions, unlike metal or plastic racks, but this will be more expensive, so preference is given to metal materials. In addition, the metal is more pliable and much easier to work with, saving time and physical costs. Auxiliary techniques will create additional protection for the material from the effects of water and increase the service life of your structure. Moisture-resistant drywall is a suitable material for use in damp rooms, is easy to use, and has a lot of positive reviews.
It is widely used in all types of construction, in any premises and, if installed correctly, has no negative aspects.
- Wall plasterboard 12.5 mm, moisture resistant or standard.
- Wall profiles (PN), ceiling profiles (PP) made of metal, or wooden beams.
- Self-tapping screws for metal 25-35 mm, self-tapping screws with a press washer, dowels, staples.
- Reinforcing mesh and tape, protective corner, polyurethane tape.
- Putty for leveling and sealing joints.
- Special connectors for metal profiles, multi-level and single-level, side, taking into account the structure. Installation can be carried out without their participation.
One of the distinctive qualities of gypsum boards is the ability to create the required shape, which is very convenient for the structure of the box. Installation work can be carried out independently, and it is not necessary to have special skills. It is appropriate to use curves, rounded lines and other design options, expanding decorative possibilities. The most common shape is considered rectangular and is much easier to assemble. Let’s look in more detail at how to make a plasterboard box to securely cover pipes, with your own hands, following step-by-step steps:
Design Features
This box is very interesting as an experimental one because it was invented by a customer who does not know the technology for assembling plasterboard structures. This makes the task more difficult, but makes it more interesting. Usually I draw up the drawings myself and adjust the dimensions and configuration to the dimensions of the drywall sheets, taking into account ease of assembly. But this time everything was different. Here is our example of bullying finishers:
Here we see a box consisting of three parts. The one by the window corresponds to the dining area, the rest contain lighting for the kitchen area. Its width above the kitchen is 70 cm, which does not allow rational use of gypsum boards. The width of the dining area is 125 cm, and this is generally not bad, because it is exactly half the length of the sheet.
The first thing you need to start assembling such structures is drawing up a map of the use of drywall sheets. That is, we must first figure out how it would be better for us to arrange the sheets. In this case, the most rational option is this:
We see that three sheets of drywall are enough for everything, even taking into account the end. Now, after we have figured out the orientation of the sheets, we are thinking about the location of the guides, main and load-bearing ceiling profiles. Let me remind you that the main profiles are those that are attached to the rough ceiling with suspensions, and the load-bearing ones are those that are attached only to the main ones.
I recommend that you read my article “Drywall Ceiling” before reading this one further. From it you will learn the basics necessary to fully understand the technology of assembling structures from gypsum plasterboard. In it I talked about what profiles there are, types of drywall, talked about the necessary measuring tools, etc.
How to make a plasterboard box correctly
When choosing further finishing materials, plasterboard is more versatile, because it allows you to use almost all types of finishing. In addition to it, you also need profiles: guide and main. The box itself will be attached to them, they act as a frame. Sometimes wooden blocks are used as a profile, but these profiles do not pass any criticism : at high humidity, wood begins to loosen, and defects may appear in the box, and there is no need to mention that the wood burns.
The shapes can be absolutely anything that your imagination allows, but the most common are regular geometric shapes, of which the most popular is rectangular. But there are also options with a round shape, but the circle is made not only using drywall, but also when finishing this workpiece.
- Luke;
- wardrobe;
- TV;
- sink;
- curtains under the cornice at the top;
- heating batteries;
- backlight with LED strip;
- installations and so on.
- UD 27/28, CD 60/27 - profiles are common for all types of premises, but not for suspended ceilings. They are used in rooms whose length does not exceed 5 meters.
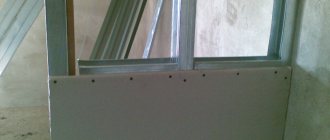
The process of installing plasterboard sheets The plasterboard box in the kitchen is ready, all that remains is to properly line it, or prepare it for painting.
- plasterboard fragments are screwed to the frame and trimmed flush with the profile;
- if lighting is provided on the box, then install holes for lamps on the ceiling;
- The screw pitch when attaching gypsum boards should be 15 cm;
- After installing the bottom sheets, we proceed to attaching the sidewalls.
Small pieces of the profile are mounted perpendicularly between the side profiles on the walls and the ceiling; they must be fixed to the upper end profile. Two hangers are mounted at a distance of 15-20 cm from each other: they will support the transverse profile that fits into the guide elements.
- apply markings to the sheets;
- cut the sheets into the required pieces;
- We apply the sheet to the profiles so that its end falls in the middle, and fasten it with self-tapping screws. They need to be twisted in such a way that they do not rise above the sheets and are not deeply recessed into them.
When the so-called “stiffeners” are installed, we connect them with jumpers. We attach jumpers every 50 cm. As a result, you should have a rigid structure.
If some profiles are not screwed tightly and are loose, then they should be secured more firmly. Next, to give the structure the desired look, it should be sheathed with plasterboard. To do this we do the following:
How to treat the surface → Room decoration → How to choose the right paint → Surface treatment technologies → Leveling and finishing the walls → Selecting and applying a primer → Removal from the surface → Stretch ceilings and technologies → Reviews and testimonials
Types of plasterboard ceilings
Types of gypsum ceilings are distinguished by the number of levels:
- 1 Single-level - ideal for a small kitchen, since a complex design on the ceiling in a small room will “eat up” the feeling of spaciousness.
But this does not mean at all that in a small kitchen the ceiling should be boring and inexpressive. Why not paint it? For example, depicting a blue sky with cheerful clouds, or a night sky strewn with a scattering of stars? You can also choose a stylish pattern that is repeated on wallpaper, furniture facades or textiles.
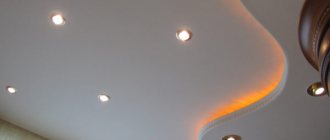
- 2Two-level - the most common option for the kitchen. Most often, the work box is mounted along the work area - it is convenient to hide ventilation and communications here.
But you can choose any shape of the box - geometrically correct (rectangular, oval, semi-circular), with intricate curves, repeating the line of furniture modules, abstract shapes. Want to further emphasize zoning? Repeat the pattern of the box on the floor, combining, for example, tiles and laminate.
- 3Multi-level ceilings - these are acceptable only in a spacious kitchen. And the more levels there are in the design, the more saturated the lighting should be so that the entire structure does not look heavy and cumbersome.