For many decades, serpyankas have been indispensable in construction and repair work. They help to avoid the appearance of cracks in new houses, which may shrink in the first years or when repairing cracks that have already formed.
Functional purpose of serpyanka
- Even 70–80 years ago, strips of gauze were used for this. Which was first glued with wallpaper glue, and putty on top. This method was widely used when repairing walls in “Stalinist” houses. To this day, you can often hear advice to use gauze as a cheaper option. But it is difficult to tinker with it, since it is too soft and when puttying can move away from the wall, leaving unevenness.
- Then manufacturers produced construction bandages; they were already narrow in shape, like a modern serpyanka, made from stamps and impregnated with a putty compound. Before application, they were dipped in water for some time, during which they soaked and stuck to the surface. A modern analogue is serpyanka, which is highly durable.
- Reinforcing mesh for walls helps to do the job efficiently, and is simply necessary if temperature changes or high humidity are possible in the room being repaired, since these factors provoke the formation of cracks on the walls.
- Corner serpyankas can significantly speed up the work of puttying knocks, both internal and external. These are the most complex elements; making them even is quite difficult. And a flat plastic corner with self-adhesive sickle tape on the sides will make the job doable even for non-professionals.
- Reinforcement of drywall seams will prevent the appearance of cracks, even if finishing materials are carried out in violation of the technological process.
Properties of serpyanka:
- creates a single durable layer of the treated surface;
- Serpyanka can be impregnated independently with glue, primer or liquid putty;
- smooth edge along the entire length;
- compact roll with a long web length;
- does not collapse under the influence of ultraviolet radiation.
Scope of use of serpyanka
- joints of plasterboard, fiberboard or MDF sheets;
- internal and external corners, joints of walls and ceilings;
- cracks and cracks;
- at the junctions of slopes with door or window openings.
Advantages and disadvantages
Reinforcing tape has many advantages that justify the demand for this construction and finishing material. The use of serpyanka allows you to maximally level the surface being treated with minimal effort and energy, but this is not all the advantages of the product.
The list of advantages of the tape also includes:
- high resistance to the influence of aggressive factors;
- environmental protection;
- fast, easy and reliable bonding to the surface;
- simplicity, efficiency of use;
- perfect cell tightness, weaving uniformity;
- smooth styling without bumps and protrusions;
- rupture protection;
- maintaining shape;
- resistance to pressure and heavy weight;
- availability.
Self-adhesive tape made from lavsan has a fairly low cost, which can significantly reduce the cost of construction and finishing work. But, despite all the advantages, the material has quite a few disadvantages, including: poor gluing at the junctions of walls, inability to use for internal corners, and the need for additional coating with glue. It is significantly inferior in strength to paper adhesive tape. In addition, the use of serpyanka mesh does not guarantee ideal reinforcement at the end joints.
What is it used for?
To find out what serpyanka is needed for, just look at its properties. This is a universal, multifunctional material, widely used in construction, for interior finishing, painting, sealing, and reinforcement work.
Among the main ways to use sickle tape are:
- strengthening corners and joints;
- treatment of seams, cracks, defects on plaster or other surface;
- covering adjacent areas of the window frame, doors to the wall;
- protection of joints between sheet materials (chipboard, plasterboard, MDF);
- wall decoration from different materials;
- reinforcement of seams.
Thanks to the use of mesh tape, you can achieve perfectly even seams, corners, slopes, and create a single layer of the treated surface. A compact roll of reinforcing material with a smooth edge along its entire length simplifies work with the product, minimizing the cost of time and effort. Before using serpyanka , it is important to pre-treat the surface, as well as select the appropriate type of tape based on the finishing material.
Types of material
There are different types of tape, it is divided into subcategories depending on the area of application, purpose and type of work for which it is intended.
The range of modern finishing materials offers the following types of serpyanka:
- from glass fibers;
- from lavsan;
- for interior work;
- for outdoor work;
- narrow;
- wide;
- with a self-adhesive layer;
- without adhesive base.
Before gluing serpyanka to drywall, it is important to make sure that the type of material is chosen correctly. The structure of the material for interior decoration is significantly different from the exterior product. As a rule, the diameter of the internal material is no more than 2-4 mm. For finishing walls inside the house, a product for interior work is suitable. But it will provide high-quality and reliable bonding, while material for external use may not grip firmly enough.
Purpose
The tape is used with equal success in the following types of work:
- interior decoration of rooms;
- strengthening the outer parts of the building walls;
- wall restoration.
It is necessary to use serpyanka to strengthen the surface and avoid cracks or unevenness. This is the main purpose of the tape. In addition, it is convenient to use for:
- gluing corners, joints, cracks on concrete structures;
- fixing the places where the frames of windows and doors adjoin the walls.
Glue
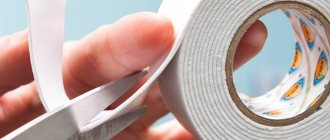
Serpyanka is an adhesive reinforcing tape that serves to hold putty or plaster at the junctions of two surfaces, in the corners of walls and on ceiling seams. Serpyanka is sold in rolls 4-5 cm wide and 10-50 meters long.
You will need - a serpyanka, - a painting knife, - a spatula, PVA glue, - putty.
Instructions
1 Although one side of the serpyanka has an adhesive base, the surface on which you are going to attach the serpyanka should still be primed with primer. Then the reinforcing tape will be firmly held on the seam, and you can easily apply a layer of putty on it. 2 Attach the serpyanka to the plasterboard after the first layer of base putty. First, apply a base putty to the seam between two sheets of plaster, and then use a putty knife to work it from top to bottom to catch any excess mixture. The spatula should overlap the special recesses on the drywall by about 5 cm on each side of the sheet. Let the putty dry.
3 Once the base putty is dry, sand it and prime it again. Then cut a strip of the required length from the roll of sickle tape and paste it onto the surface of the seam, guiding and pressing the tape with a spatula.
4 When the serpyanka is glued to the base putty, putty it with the finishing putty. Do not try to apply a thicker layer; the smaller the layer of putty, the less likely it is to crumble. Let the finishing putty dry, then sand it and prime it with primer.
5 If the serpyanka does not “obey” and constantly falls from the wall, then there is a method that will help you cope with this scourge. Take PVA glue and thickly coat the seam you are going to reinforce. Then place the tape against the seam, press it with a brush and move the brush down, adding glue if necessary.
6 It can be difficult to glue reinforced tape into a corner, so don’t try to glue it along the entire length of the corner at once. Cut the tape into strips, and then glue each strip, placing it on the putty. Each subsequent strip is glued overlapping the previous one.
7 In addition to reinforced serpyanka, there is also a construction bandage “serpyanka”, which has a finer structure, but the principle of gluing it to the surface is the same. Spread the seam with PVA glue, attach a bandage, straighten it carefully on the surface and glue it, sinking it into the glue. Then cover it with glue again for strength. After the bandage has dried, proceed to putty.
Kinds
Serpyanka tape is divided into types, which depend on the gluing method and size.
There are different types of gluing method:
- Tape that requires binding compounds for fastening. The most common type, with easy application, excellent results, and an affordable price.
- Self-adhesive. An adhesive composition is applied on one side, resulting in rapid adhesion. When applying, special care is required, since when removed, re-sticking will not work, the adhesive layer loses its properties.
Types by size:
- The distance between the threads is 1–3 mm. This type is suitable for firmly holding the putty and ensures the absence of even small cracks.
- The distance between the threads is from 5 mm. This type is glued with starting putty.
Of all the materials for the base, the most popular is serpyanka, made from glass fibers.
Which serpyanka is best to choose?
There is a huge amount of this building material on the market, but choosing the right one can sometimes be very difficult.
Peeling off of the serpyanka can occur not only due to poor-quality glue, but also due to the adhesive material itself.
To seal seams on drywall, as well as putty joints of drywall, it is best to buy:
- Axton 45x45. This tape is perfect for sealing seams and joints, for holding putty or plaster in a joint, as well as for reinforcing surfaces. This type of serpyanka can also be used to work with other materials, for example, concrete, wood, etc.
- Semin 150 m. This type of adhesive tape is made of corrugated paper. It is not susceptible to moisture, soaking or tearing. It goes well with plasterboard structures, perfectly protecting and shaping the edges of corners. This tape adheres well to the surface and can even be used on surfaces covered with putty.
Lifehacks
To make working with adhesive tape as simple as possible, and to make the result happy with its perfection, you can use a few tips:
- If you plan to use self-adhesive tape, it is better to pre-cut it into small pieces, especially if you need to treat a large area. This way it won’t roll, and it’s much easier to glue small pieces. In this case, each subsequent part should be glued with an overlap of 1-1.5 cm.
- When working on drywall, you should constantly ensure that the mesh does not move away from the surface and is pressed tightly against the seams. This will protect against the appearance of even greater differences and possible falling off of the plaster.
- It is impossible for there to be voids under the tape. They should be sealed with mortar or PVA glue.
- When cutting the tape, pay attention to its edges. Long, sloppy trims and protruding threads will be clearly visible and will create additional differences.
- Buy a serpyanka whose surface is treated with polyacrylic dispersion. This substance protects the tape from the aggressive effects of putty and plaster, ensuring its durability. But the cost of such material is much higher than the classic version.
- If self-adhesive tape is used, it should be stored in a clean box at all times. Dust and dirt easily settle on the material, which will not allow the use of such a serpyanka in further work.
Attention! If the cement mortar was prepared with errors in dilution, then it is better to use fiberglass for the job. It will not allow the material to flow down and at the same time will add the necessary strength to the wall.
How to glue serpyanka to drywall
This piece of work is very important, so it needs to be done with greater responsibility. The reliability of the fastening of seams and joints, and, consequently, the durability of the repair will depend on the quality of work performed.
In order to seal drywall seams, you will need:
- spatula and putty,
- knife,
- adhesive tape,
- Sometimes glue may be required.
Option 1, without using glue:
A layer of primer is applied to the drywall.
The following steps show how to putty joints between drywall.
Putty is applied to the seams between the gypsum board leaves. After this, use a spatula to distribute it evenly and remove excess.
Tip: before applying putty, it is better to remove a small layer of gypsum board. The width of the removed layer should be equal to the width of the serpyanka.
Give everything time to dry.
Next, you need to cut the required size of adhesive tape and use it to seal the drywall seams. All this is glued to the putty.
The serpyanka needs to be smoothed out well and pressed into the putty layer. This way it will hold on more securely.
You can apply another layer of putty on top of the pasted tape.
It is best to putty the seams in a thin layer, so there is less chance that over time they will begin to crack and fall off.
Give time to dry.
After this, sand the seam with sandpaper to remove all unevenness and roughness.
If the adhesive tape does not adhere well or does not stick, you can use glue. How to seal seams and joints using an adhesive solution:
- It is necessary to take a glue suitable for such work and carefully lubricate the seams with it.
- Glue the serpyanka there and press it with a brush, while adding glue.
- It is best to use more adhesive, so the serpyanka will stick better.
- Wait until everything is dry.
Next, you need to follow the instructions on how to properly glue the serpyanka without glue.
Advice: to keep the serpyanka even more secure, you can apply a thick layer of primer to the ceiling, followed by the glue itself.
In order to do all the work correctly and without unpleasant surprises, you can watch a video on the Internet where each stage of the work is described in detail.
Tricks, goodies
8.1. CCEnhancer program
Do-it-yourself plasterboard ceiling with finishing examples
CCleaner “knows” few programs, but this can be fixed. To increase the number of cleaning programs in the Applications tab, download and run the CCEnhancer
from this page:
The archive will download, the program can be launched from there without unpacking:
Click Download Latest
and wait. The program will download the file winapp2.ini from its website, which contains information about junk files and folders of many programs. Then there will be a question:
| Do you want to run CCleaner now? Not really |
Click Yes
, CCleaner will launch.
There will obviously be more items in it!
New items will be marked with an asterisk *
In the future, you can periodically run CCEnhancer to download a new version of the winapp2.ini file to help CCleaner keep up with the latest software recognition.
Attention! The added cleaning items have not been tested by CCleaner developers; something wrong may be removed!
Attention No. 2! CCEnhancer does not work with portable versions of CCleaner and various repacks. Correct operation is guaranteed only if CCEnhancer is installed normally and launched as an administrator.
8.2. How to find out what CCleaner wants to remove when a particular item is running
Let’s say you’re wondering what will be deleted if you check an item or items. To do this, check the boxes and click the Analysis
, wait for it to finish, then right-click on the lines with the analysis results - Detailed results. How to remove an unnecessary file that is harmful to your computer. How to clean your computer from unnecessary files and programs. Finding and removing duplicate files How to remove an unnecessary file that is harmful to your computer. How to clean your computer from unnecessary files and programs. Find and remove duplicate files
Greetings to all readers on the blog! Sooner or later, no matter how you keep “order” on your computer, a lot of unnecessary files (sometimes called junk files) appear on it. Appear...
As you use your computer, various kinds of unnecessary files inevitably accumulate on it. Especially a lot of such files accumulate on . Over time, there are so many such files that the free space on the disk runs out and the computer begins to slow down. If you are faced with a similar problem, then you have come to the right place. Now you will rid your computer of unnecessary files.
Method number 1. Disk Cleanup function.
Windows operating systems have a feature called Disk Cleanup. This function is designed to search and delete unnecessary files on the disk. In order to launch it, open “ ”, right-click on the drive you need and select “Properties”.
After the “Disk Properties” window appears in front of you, click on the “Disk Cleanup” button.
You can also run disk cleanup using the command. To do this, open the Run menu, enter the command “cleanmgr.exe”, and then select the disk you want to clean.
After running Disk Cleanup, the operating system will analyze the files on the disk and show a list of files that can be deleted without harm to the system or the user. In this window you need to mark the files that need to be deleted and click on the “OK” button
After this, the system will ask you to confirm the deletion of files, after which it will begin deleting unnecessary files from your computer. This method is quite effective and allows you to free up from several tens of megabytes to several gigabytes of disk space.
Method number 2. CCleaner program.
Features of gluing serpyanka
This type of construction tape is intended for indoor use where the temperature does not fall below zero degrees. In the cold, the serpyanka will not be able to hold on and will simply peel off.
To ensure that the entire work process does not go down the drain, you must adhere to the following rules:
- When gluing the serpyanka, it should fit tightly to the surface. This will help prevent it from peeling off.
- After the tape is applied to the surface, use a spatula to remove any voids that could lead to cracks.
Useful tips
Recommendations from experienced craftsmen will help you glue the serpyanka as reliably and efficiently as possible:
- While working, be careful to ensure that the tape fits snugly. There should be no layers, since their leveling is a labor-intensive process. Voids under the mesh lead to cracks at the joints in the future.
- Cut the material very carefully to avoid threads sticking out at the edges. If they are still there, remove them with a lighter, since puttying over the tape in this case will not be easy.
- Store serpyanka in a tightly sealed bag. This will keep the glue from drying out and prevent dust from entering.
Recommendations for using serpyanka
Before using self-adhesive serpyanka for surface reinforcement, it is recommended to study the features of its application to different types of surfaces.
The tips below will help improve the quality of gluing mesh tape and avoid possible mistakes:
- sometimes the adhesive base of the tape is not enough for reliable adhesion, so it is recommended to additionally treat the material with glue before use;
- covering the serpyanka with a layer of plaster helps smooth out the imperfections of the adhesive;
- if you don’t have a special adhesive solution at hand, ordinary PVC glue is quite suitable for processing the tape;
- after applying the plaster, the serpyanka needs to be pressed into the wall as hard as possible, this will ensure an even and high-quality adhesion;
- the service life of the future joint depends on the force of pressing the mesh into the putty.
If you follow the recommendations and know the technology of how to properly glue serpyanka to drywall, joints and seams , you can carry out high-quality finishing work in your home without additional help.
Preparatory work
Let's consider the use of self-adhesive serpyanka. To properly glue the tape, you need to carry out several simple steps that will make the final result positive:
- It is important to clean the surface of all contaminants by wiping with a wet sponge and detergent.
- Prime before applying the material.
- Apply putty compound.
- Apply serpyanka reinforcing tape to the wet layer.
- Lay with a layer of plaster mixture.
- Dry for about 24 hours.
Before you start gluing, when preparing the process, you need to close all doors and windows, since tightness is important here. If you follow these small recommendations, you can get excellent results.
Download CCleaner
The question arises: what happens if you clear free space in MFT?
Answer: nothing bad will happen. But the chance of recovering deleted data will be greatly reduced. Regarding the increase in performance by cleaning MFT: I cleaned MFT on several computers, but I did not notice an increase in the speed of reading and writing files. So I never clean the MFT.
For this option to work, you need to check the Cleanup – Clean up free space checkbox.
7.2. Cookies
I explained what cookies are at the very beginning of the article - see the section on clearing Internet Explorer information.
You will see two lists in the window. The left list is a list of all the “cookies” of sites you have visited. The list on the right side of the window contains cookies that CCleaner will not delete.
By selecting the required lines (you can select several at once using Ctrl or Shift), you can use the two buttons in the middle to move them between lists.
7.3. Inclusions
Now we get to the “delicious” feature of the program.
On this tab you can create your own list of folders and files to delete.
This is the window that appears when you click the
Add button:
The function is made convenient and understandable; there is no point in going into detail about all the buttons. The only important point: the function will only work if in Cleanup - Windows
There is a checkmark for
Other files and folders.
7.4. Exceptions
The function is the opposite of the previous one. Allows you to create a list of files, folders and registry entries that should never be deleted. Unfortunately, the function is not fully developed. In the help, the developers honestly indicated that if you add a folder to the list, this does not add files in subfolders (folders nested in this folder, sorry for the tautology) to the exclusion list.
7.5. Additionally
Some pretty interesting settings are collected here:
Show results in detail view
– the program always generates a detailed report on deleted files. However, you can right-click on the text of a regular report and select Detailed results there - the effect will be the same.
Delete files from the Temp folder only if they are older than 24 hours
– it’s better not to uncheck the box, since although the Temp folder is intended exclusively for “junk files,” some recently created files can be used by programs. Removing them will cause such programs to malfunction.
Only delete files older than 25 hours from the Recycle Bin
– the meaning of the option is clear.
If you often mistakenly send files to the Recycle Bin, it is better to check the box. Hide warnings
– the meaning of the option is clear. It is better not to check the box - warnings in such a program have a certain value.
Close the program after cleaning
– if CCleaner closes after cleaning, then we will not see a report on the amount of freed space, so it is better not to check the box.
Request registry backups
– for the sake of your computer, I advise you to leave the checkbox. The registry backup file can be deleted manually later when you are sure that there are no glitches after cleaning the registry.
Minimize to notification area
– after minimizing the program window, the button in the taskbar will disappear and a small CCleaner icon will appear near the clock.
Store program settings in an INI file
– a useful option for those who store the program folder on a flash drive and want to have the same settings on all computers where CCleaner runs. The settings will be stored in a file in the program folder.
Jump List Tasks
– if the option is enabled, then right-clicking in Windows 7 on the CCleaner button on the Taskbar appears the following lines with actions:
About the program
Here you can see information about the program.
Why do you need putty joints?
Under the influence of moisture and high temperatures, drywall is subject to certain fluctuations. This is most evident in the weak areas of the plasterboard structure - the joints of the sheets. If you do not use joint tape during the process of filling gypsum board panels, after a while cracks will certainly form on them. At the same time, a special tape product will help prevent damage and facilitate surface leveling.
When installing plasterboard sheets, it is extremely important to seal all seams efficiently. Over time, mistakes made will certainly remind you of themselves and lead to considerable financial expenses. Therefore, the space between gypsum board panels should always be filled with reinforcement.
If the space between the plasterboard sheets is puttied without additional reinforcement, then due to temperature deformations the plaster will crack over time Source stroychik.ru
Subtleties of choice
Properly selected materials are a guarantee of quality work. Like any other components, serpyanka should be purchased taking into account a number of the following criteria:
- Markings of parameters and information about the manufacturer, which is indicated on the packaging.
- Certificate of conformity.
- Reviews about the manufacturer left by other consumers.
If you make the right choice, you will be able to purchase a suitable tape that will not only be convenient to use, but also have a long service life.