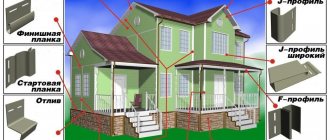
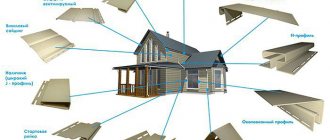
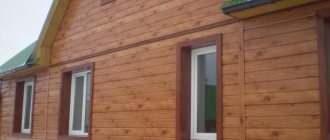
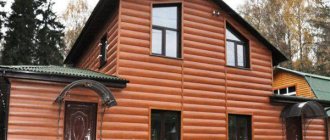
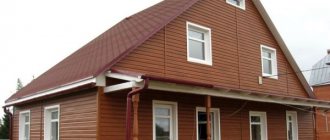
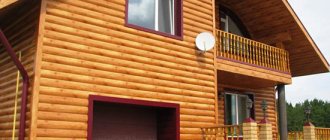
Important elements of the siding finishing process are additional elements or, as they are also called, accessories. The finishing of windows and doors with siding is carried out using additional components - near-window strips and platbands. These components allow you to easily sheathe difficult areas such as corners, the space around windows and doors. In addition, additional elements include special joints and connecting elements for different planes. The use of accessories and their quantity will depend on the size of the building and the nature of its facade.
IMPORTANT: The colors of all Alta-Profile planks fully match the colors of the siding!
| Initial strip (3.66 m long) – used as the initial element for finishing the surface with siding; installed with the top edge on the originally applied chalk line and nailed along this line; then the bottom edge of the first vinyl "siding" panel is inserted into the starting strip and the top edge is nailed to the wall; |
| Hinged strip (3.66 m long) - installed above the upper window opening or at the junction of vinyl siding and the base of the building to protect against water flows; |
| Connecting strip (3.05 m long) – designed to connect “siding” panels to each other and cover the seams; |
| Window strip (3.05 m long) and J-Trim strip (3.66 m long) - used for finishing window and door openings, installed along the perimeter of door and window openings; |
| Near-window wide strip - used for finishing window and door openings whose width is more than 14 cm; |
| Platband (3.66 m long) – designed for edging door and other openings; |
| The outer corner (3.05 m long) is installed at the existing junction of two walls; |
| Internal corner |
| The finishing strip (3.66 m long) is the final element of fastening the “siding” panels under the eaves; installed before mounting the last row of panels; |
| J-chamfer (3.66 m long) – used for finishing roof eaves; |
| J-trim (3.66 m long) – used for finishing window and door openings, installed around the perimeter of door and window openings; |
| Wide platband is used when edging door or other openings; |
| A corner radius strip is an outer corner, only rounded, installed at the junction of two walls (used both together with a wide platband, forming a compound angle to the siding, and separately); |
| Additional strip - used for finishing window and door niches whose width is more than 23 cm. |
| Soffit (3 m long and 0.23 m wide) – designed to provide ventilation for facades and roofs of buildings. Soffits are usually used to trim roof gables. There are three versions of vinyl soffit available: without perforation, with partial perforation and fully perforated |
As practice shows, buying siding and additional elements for it is still half the battle. Carefully think through the installation process and strictly follow the instructions - here is a complete list of prerequisites for giving your home a new look. Attention, finishing windows with siding will require you to have basic construction skills. By purchasing Alta-Profile siding and accessories, you receive high-quality finishing materials that are easy to install, including yourself.
Types of additional elements
There are several main types of siding accessories that are used at different stages of installation:
Before installing the panels, secure the starting profile for the siding. The initial strip is attached to the frame with nails or screwed with self-tapping screws. The first panel is mounted to it.
Window strips for siding are mounted around the perimeter of door and window openings. This siding profile can also be used to cover small recesses.
To close the panel from the side, use a J-trim strip.
To join the siding along the length, use a connecting strip.
To secure the soffits, use an f-profile for siding.
The range of components for vinyl siding is in many ways similar to those additional elements that are used for installing other types of cladding panels. But there are also some differences. For basement siding, for example, a wider starting strip is used, as well as a corner element. Components for metal siding can be produced to order, up to 6 meters long.
Installation
Based on professional experience, we can say that the selection and purchase of the necessary additional parts for siding is only part of the whole process, the basis of which is their competent installation according to the instructions.
Here you cannot do without special skills, otherwise the result of the work may be disastrous.
After becoming familiar with the technology of cladding buildings with vinyl planks, you can perform decorative cladding yourself.
Additional parts for siding are intended for the final decorative finishing of the facade and give it a finished, neat look. Siding accessories may vary in configuration and color depending on the brand.
Their sizes may also vary, despite the fact that most manufacturers adhere to generally accepted standards.
Installation features
As mentioned earlier, there are several main types of additional elements for facing strips, which are attached to the facade at different stages of installation.
Before installing the main panels, fix the starting profile.
It is nailed or screwed to the frame with self-tapping screws.
Lathing devices for siding installation
Even if the wall of the building is absolutely flat, it is advisable to install the siding on a metal profile. This is a simpler and more reliable option than making a frame from wooden beams. The galvanized profile for siding does not require antiseptic and hydrophobic protection. Thanks to this you will save money and time. In addition, the metal siding profile can withstand heavy loads, so it is well suited for the installation of basement and metal facade panels.
Installation operations
Installation of the initial strip is carried out as follows:
Determine the lower reference line. To do this, a horizontal line is cut from one of the corners at the level of the base. If the walls of the building have sagged, start from the lowest mark of the base. The height deviation between the beginning and end of the line should be no more than 1 mm. Fasten the starting strip, corner guides, trims and H-profiles
It is important to know how to fasten. Horizontal guides are screwed (nailed) at +5 cm from the broken line
Work is carried out from the center to the edges; vertical elements are attached from top to bottom. It is necessary to leave temperature gaps ranging from 6 to 12 mm between the mating edges. After installation, check the level: each strip must hang strictly horizontally, and it must move freely along the fasteners within the boundaries of the sockets. The panels are installed directly: the finishing siding is hung (see photo).
The finishing siding is attached to the sheathing profile with nails made of non-ferrous metal or anodized steel. The strict choice of fastener material is due to the fact that rust stains on the front panels are unacceptable. The type of fastening elements depends on the material of the sheathing. The panels are nailed to wooden slats with aluminum nails, and screwed to the metal profile with self-tapping screws. The optimal fastener diameter is 3 mm.
The panels are installed from the bottom up from the starting strip. Each panel is fixed with a given step
It is important to follow the manufacturer’s recommendations on how to attach the product to the profile or panel slats:
- When fastening horizontal sheets, the fastener must be in the middle of the fastening groove.
- Vertical elements are nailed at the top, the screw (nail) is located at the upper edge of the fastening cutout; at other points - in the middle.
- There should be a gap of 1 mm between the cap and the panel (see photo).
When laying each row, the requirements for maintaining thermal gaps must be observed. There should be a free space on each side of the horizontal sheet - 6 mm to the nearest adjacent edge of the vertical panel and 12 mm to the horizontal one. Nailing siding directly through plastic is prohibited. If such a need arises, use a punch to lengthen the mounting hole to 12 mm.
Siding installation is carried out with continuous control of the laying angle. The horizontal installation is checked on every second - third row.
When installing strips in the area of window openings, the siding is cut in such a way as to ensure that the panels do not adhere tightly to the trim (see photo). If the window and the wall are located in the same plane, platbands are not installed. In this case, the starting and finishing profiles for siding are hung along the outer horizontal boundaries of the window opening, and ordinary cladding elements are attached to them, respectively, on top of the window opening, and below. Siding can be trimmed if necessary. The material is secured using mounting holes, which are cut with a special punch at the required height.
Final operations
The finishing panel for siding at the edge of the roof is attached using a finishing profile, J-channel or other finishing element. Installation of the finishing strip for siding is carried out as follows:
- the desired profile is fixed at a given height;
- measure the distance between the locking elements of the bottom panel and the final profile, subtract 3 mm;
- the ordinary panel is cut to the required level;
- the sidewall sheet is perforated with a punch at intervals of 0.2 m, the resulting tongues are bent outward;
- engage the last panel from bottom to top.
After facing the main planes, they begin finishing the prominent elements and pediments.
Boxes are made over the protruding parts using connecting elements for external and internal corners. The order is carried out taking into account the manufacturer's requirements. The design is completed with a finishing strip for siding.
The order of finishing the pediments. The upper triangular part of the perimeter wall is sheathed with J-panel. They are fastened in the same way as vertical planes: first of all, install the top screw under the edge of the mounting cutout, then the rest - in the middle of the slots. Installing the finishing strip for siding on the gable has a peculiarity: it is attached with a screw through the front surface to the rail or profile.
How to attach a profile under siding?
You can easily find the answer to this question on construction sites and forums or with the help of the video instruction “Installing a profile for siding.”
Basic recommendations for installing a profile frame for siding:
- It is advisable to choose a profile for lathing under siding with a cross-section of at least 2.7x6 cm. It has a special flange that gives it additional rigidity.
- To attach the siding profile to wood, self-tapping screws are sufficient. When attaching to reinforced concrete or brick, dowels must be used.
- The greater the weight of the finishing material, the smaller the step for attaching the metal profile under the siding should be. Please note that plinth and metal panels weigh more than vinyl. Therefore, in the video instructions for installing a profile under siding, it is recommended to maintain a distance between the planks of 0.6 meters for vinyl and 0.4 m for vinyl siding and metal siding.
- Installation of profiles under siding is done perpendicular to the direction of installation of decorative panels. In most cases, the frame is mounted vertically. The exception is the installation of sheathing for vertical siding.
- Lathing from a siding profile makes it possible to visually align the walls and install additional heat and waterproofing for the house.
Careful reading and careful adherence to the installation instructions is a guarantee of correct installation of sheathing and siding in full accordance with technology.
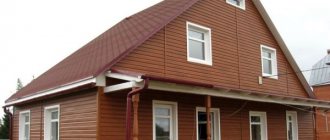
Siding is formatted panels that are fixed to the facade using special technology. Panels can be wood, metal, vinyl. When installing them, a number of additional elements are used, with the help of which the cladding acquires a complete appearance. These additional elements are used when decorating corners, window and door openings, and so on. And it won’t be possible to install the siding itself without them.
How to calculate the required quantity
It is simply impossible to install siding panels without components. Moreover, in the absence of a starting bar, builders will not be able to lay even the first row of panels. In addition, it is necessary to take into account that without additional elements, finishing work will become too complex and require a significant amount of time.
Therefore, it is worth thinking in advance about what decorative and load-bearing accessories will be needed for installation and calculating their quantity. It is best to carry out such calculations simultaneously with calculating the consumption of the base material. This approach will significantly reduce the time for finishing work, even on buildings with an individual configuration.
There are probably professionals who can “by eye” calculate the number of finishing plates and components for facade cladding. However, such a calculation depends not only on the size, but also on the architectural features of the building.
Everyone else should pick up a regular tape measure or a more advanced measuring device to draw up a working drawing indicating the exact dimensions of each wall where finishing work will be carried out. In addition, it is necessary to accurately measure the height and perimeter of the building, taking into account all protruding parts, and also find out the dimensions of the perimeters of all openings.
All these measurements will be useful for accurately calculating additional materials needed for seamless installation of cladding panels.
For example, the number of strips used at the first and final stages of installation of siding plates depends on the number of walls, and the sizes of these components depend on the length of each individual wall. At the same time, experts recommend buying these finishing and starting strips with a small margin, since anything can happen during finishing work - from damage to components to changes in the design concept.
The number and size of corner panels are calculated using a similar method. Only this time it is necessary to measure the length of all corners (external and internal), add up these numbers, the sum of which should be divided by the average height of the corner. It must be taken into account that the last value may not coincide with the actual dimensions. Therefore, it is better to separately count the number of these auxiliary parts for each angle. This approach will help to use solid planks during installation without unnecessary joints.
A similar approach is used to count platbands, window trims and J-profiles. However, this time you first need to decide what type of additional parts you can’t do without this time:
- Platbands will definitely be required for lining openings located flush with the wall.
- Near-window strips will help to design openings with double-glazed windows and doors “recessed” into the openings.
- The scope of application of the J-profile begins with openings and ends with the corners and gables of buildings. The arched version of the profile is necessary when finishing facades with openings of complex configuration.
Otherwise, the calculation for these auxiliary parts depends on the number and size of the perimeter of the façade openings.
In modern construction, components have become full-fledged installation parts when cladding the facade of a building. Therefore, the service life of facing materials increases with proper calculation and professional installation of not only the plates themselves, but also auxiliary parts.
Therefore, when installing components on the sheathing, it is advisable to avoid mistakes that will not allow you to achieve optimal results when finishing the building facade. There will be much fewer such errors if builders carefully read the detailed installation instructions included with the finishing material upon purchase.
Why are components needed?
Finishing the facade with siding has been known for a long time. Initially, it was used only as a protective cover that protected the facade from exposure to atmospheric factors. Thanks to such protection, the service life of the building increased significantly, which is especially important for houses made of wood, because wood deteriorates from negative natural factors much faster than other building materials.
Note: today manufacturers offer a wide selection of siding designed for cladding facades - made of vinyl, metal, wood and other materials. Thanks to modern manufacturing and processing technologies, all types of siding last for quite a long time - for several decades.
In order for the siding installation process to be quick and correct, and for the finished cladding to look beautiful and neat, it is imperative to use the components. These include different types of planks and profiles for decorating various parts of the building: corners, openings, roof overhangs, and so on. The components perform not only a decorative function, but also a technical one.
Purpose of parts
The popularity of siding is explained by the fact that this finishing material, which has a rich history, perfectly performs its two main functions:
- Reliably protects buildings from external influences of a man-made and natural nature;
- gives the facades of houses a beautiful and finished image.
Other advantages of siding panels include easy installation, low cost (compared to natural materials), long service life and easy maintenance.
However, this was not always the case. After all, initially the inventors of siding cared only about the safety of buildings suffering from external influences. Therefore, the first panels were made of wood and were fastened to the walls with nails in such a way that each subsequent horizontal row hung over the previous one.
Over time, new technologies have emerged that make it possible to produce siding panels not only from wood, but also using new materials (vinyl, steel and cement), which significantly increased the performance qualities of the popular finishing building material and gave rise to the creation of auxiliary fasteners.
The components have made a real revolution in the installation of siding plates. After all, these details:
- simplified installation work as much as possible;
- set a new level for the finishing of corners, windows with doors and gables with roofs;
- helped with the aesthetic design of joints and transitions between rows;
- made the fasteners invisible, since the load-bearing parts were hidden under the finishing material.
Most Russian consumers simply do not know that installation work on cladding building facades with siding has a technology that has been proven over decades, which experts do not recommend violating.
Therefore, our compatriots often decide to cover the facade of their house with siding themselves, without having any idea about the purpose of the component elements.
In most cases, this solution ends in failure, since the installation of finishing panels cannot be carried out without first installing additional materials that give the façade cladding a completed look.
Types of components
Based on the structural features of the building, certain types of components are selected for the façade cladding. They are usually divided into two types: decorative and load-bearing.
- Decorative ones include: end strip, soffits, trims, flashings, J-profile, near-window profile, moldings.
- Load-bearing structures are divided into two subtypes: visible from the outside and hidden. These include regular and arched J-profiles, starting strips, external and internal corner profiles, connecting strips.
Briefly about the main thing
If you carefully read the article, then you know almost everything about the GI profile for siding: what it is used for, what it looks like, what types of it are used for finishing openings, arched windows, ends and cornices. This universal additional element, which can replace many other siding components, is popular among buyers due to its affordable price. With its help you can beautifully decorate windows, gables, cornices and even the corners of a building.
Ratings 0
Brief description of all types of components
To better understand the purpose of certain components, we offer a brief description of them.
- J-profile. Load bearing element. It is used when processing window and door openings, areas where the roof meets the pediment. It is fixed before installation of the siding begins, since the edges of the siding panels are installed directly into this profile. Sometimes the J-profile is also used as a decorative and protective element when processing corners. In this case, two profiles are attached close to each other on both sides of the corner, closing it.
- Starting/starting bar. Load bearing element. It is used at the very beginning of installation - the first siding panel is attached to it to facilitate the entire cladding process. The initial bar is set in strict accordance with the level, since if it is installed unevenly, the position of all other elements will also be distorted.
- Connecting H-profile. Load bearing element. Used to join two adjacent panels of the same row. Available in two types - standard and extended. The latter option allows you not only to connect the panels, but also to place emphasis on the joining point according to the design idea.
- J-profile arched. Load bearing element. Used to design window and door openings with an arched bend. There are notches on the profile, thanks to which it takes the required shape.
- Corner profile - internal and external. Load bearing element. It is used to decorate the corners of a building both outside and inside. The profile is equipped with grooves into which plastic panels are inserted.
- End bar. Decorative element. It is mounted at the top of the cladding in order to hide the edge of the last panel and give the facade a completed appearance.
- Soffit. Decorative element. It is used to treat the roof overhang of a building. Available in solid fabric and with perforations - holes to provide ventilation.
- Platband. Decorative element. It is used for finishing window and door openings to give them a neat appearance. Platbands are used if the openings are located on the same level as the facade walls.
- J-bevel - wind board. Decorative element. It is used to trim the edges of the roof.
- Window strip. Decorative element. It is used instead of platbands if window and door openings are recessed into the wall, that is, they have slopes.
- Molding. Decorative element. Used when decorating the internal corners of a building.
- Low tide. Decorative element. Used to drain rain and melt water from the facade and foundation.
Note: You will not be able to install siding without additional elements - at a minimum, you must use the starting strip. You can discard the remaining elements, but then the cladding will look as if it is unfinished.
Wooden toilet
First appeared on the market, made from traditional materials to satisfy, wood siding is considered the most noble, expensive and environmentally friendly.
Advantages of paving stones:
- power
- Ecological cleanliness
- High thermal insulation
- decorative
Disadvantages of wood flooring: fragility, need for fire retardants and preservative treatment, coloring, susceptibility to deformation, high cost.
Aluminum rail
The high price and "cold" urban design of such conclusions were more demanding in the construction of commercial and other public buildings.
Advantages of aluminum cladding:
- fire resistant
- Humidity resistance
- power
- quickness
- Possibility of continuous operation
- Variety of textures (smooth or grainy)
The disadvantages of aluminum sails are: the possibility of using a dump during transportation, lack of elasticity (the original shape is not improved by dorsalization).
Cement coating
This type of paneling is made of high quality cement with the addition of fine elastic fibers.
Its decorative and technical properties are no worse than artificial stone.
Advantages of cement pressure:
- It does not support combustion
- Resistant to sun and rain
- Maintain geometric stability under significant temperature differences
- Easy repair without disassembly
- constantly
- She doesn't have to worry
- It is not susceptible to the formation of fungi and mold colonies
Defects in cement pressure: heavy weight, need for a strong frame, high price, small selection of colors.
The installation makes it difficult to use a special tool to cut the material.
By cutting the sides of the cement, the silicone powder is formed in such a simple way to protect itself from inhalation.
Types of Metal Pages
become
It is used for residential buildings and public buildings. The gaskets are coated with a polymer layer or powder coating.
The leaves are smooth or embossed.
Advantages of steel sheet:
- If the protective and decorative coating is not broken, the plates are resistant to corrosion
- fire resistant
- power
- decorative
- Resistant to temperature changes and adverse weather conditions
- reliability
- Easy DIY Metal Side Installation
Weakness of the steel tube: lack of sound insulation, poor thermal insulation properties.
zinc
The latest material has appeared on the domestic market.
It features a gray or black anthracite surface. It has the advantages of steel siding, but due to its high price, it is rarely used.
Ceramic siding
This type of substrate is made of silicate fiber reinforced materials.
The ceramic surface is obtained through a hardening process and using a special hyperlink. The coating consists of inorganic or silicon acrylic dyes.
Calculation of components
It is better to calculate the required number of additional elements before starting work. This can be done along with calculating the required number of siding panels. This calculation is especially important for buildings of non-standard geometry.
The easiest way is to calculate how many starting and ending strips you will need. In total, their length is equal to the total length of the walls that you are going to cover. Just measure them with a tape measure and get the desired result. And the number of planks is determined by dividing the total length by the length of one panel. Please note that waste is inevitable during any construction work, so purchase planks with a reserve.
There should also be no problems with calculating the corner profile. Measure the height of the inner and outer corners, add the values, and then divide by the height of one corner. It is necessary to take into account that it is better to sheathe corners with a solid profile or with a minimum number of joints. For this reason, professionals recommend counting the number of corner profiles for each corner separately.
The J-profile and near-window profile are calculated along the perimeter of window and door openings using the same methodology as for the elements described above.
Dimensions, markings of vinyl siding
Popular herringbone material has a certain number of waves, called form factor.
Popular herringbone material has a certain number of waves, called form factor. The marking is indicated as follows:
- S – single;
- D – double;
- T – triple.
But after the letter there are numbers showing the width of the sheet. For example, D 4.5 is a double herringbone with a single wave thickness of 4.5 inches, which is equal to 114 mm - this makes it easier to calculate the width of the sheet, which will be approximately 228.6 mm. There are no sizing standards, so average indicators are accepted:
- Length 2.5-13 meters (most often 2.5-4.5 meters);
- Width 200-300 mm;
- Thickness 1.0-1.2 mm.
In addition to ordinary sheets, additional elements are offered for sale, thanks to which cladding becomes much simpler and more affordable. It should be remembered that the accessories for the material are varied in terms of width, model configurations, lengths - this makes the selection easier and more difficult, since the uniqueness of the indicators does not allow you to buy the material “by eye”, but only with accurate calculations. The most popular components for siding:
- The starting strip is a lamella that begins the installation process.
- The J-profile is necessary when facing vertical seams and soffits.
- Basement siding external corner.
- Internal corner.
- Connecting H-profile used to connect sheets so as not to overlap the cladding.
In addition to the standard list, there are also individual additional fittings:
- Finishing strip - this completes the installation of vinyl siding. Can perform the same function as the J-profile.
- Window trims have a more complex configuration than J-bars and are used for cladding window profiles.
- Platbands - used for finishing doorways.
All accessories make it easier to install vinyl siding yourself and the work takes less time. And in order to choose additional elements, you should look at the photo, read reviews about the manufacturer and find out how much the products cost - often the fittings are much more expensive than standard sheets.
Right choice
You must select additional elements for cladding responsibly. First of all, pay attention to their quality. It is advisable to buy components from the same manufacturer as the siding panels themselves. Otherwise, they may not fit well or not fit at all.
Attention: Select all elements strictly according to the parameters so that they fit together without gaps.
The color of the components can be chosen either to match the siding panels or vice versa - in contrast to them, if this option was intended by the designer. Please note that light-colored elements heat up and fade less under the sun than dark ones.
Note: elements with a matte surface are more practical than glossy ones, since, again, they heat up less under the sun's rays. An even more practical option is elements with a laminated surface.
What does misuse lead to?
It is important to follow installation rules and use high-quality materials.
Thanks to advanced technology, laying siding is a fairly simple undertaking. However, even here, novice masters can make mistakes. The use of material that does not meet the proper criteria and violation of the rules for its installation leads to the following consequences:
- leaks at joints;
- large cracks where birds and insects enter;
- strong rattling in the wind;
- destruction of the coating under the influence of thermal expansion;
- deformation of planks, appearance of cracks:
- withdrawal of finishing from the base under the influence of internal stresses.
All this can be easily avoided if you follow the manufacturer's instructions and the recommendations of experienced craftsmen.
To sheathe a building, you should use only high-quality products. You need to buy it in large stores and only after checking for a quality certificate. All parts must be inspected for clarity of shape, uniformity of color and absence of mechanical damage. It is mandatory to complete the transaction by obtaining a warranty card.
Installation
Before installing panels and additional elements, you must carefully read the instructions from the manufacturer. Otherwise, you may make mistakes that are then difficult or impossible to correct. If you strictly follow the instructions, there will be no problems with installation.
In the first stage of work, install the initial strip to which you will directly attach the siding itself. The initial strip is fixed to the sheathing or to the facade wall using self-tapping screws, which are screwed strictly in the center of the special mounting holes. Then the J-profile, arched profiles (if necessary), corner profiles are installed, and the joints are processed. After this work is completed, proceed to the installation of the siding itself.
To get the job done quickly and successfully, you will need the following tools:
- Measuring tape and ruler;
- Carpentry corner;
- Screwdriver and hammer;
- Construction level, better authentic;
- Twine rope, chalk and pencil;
- Scissors for working with metal products.
Material calculation and preparation
The technology for finishing a house with siding is almost the same for all types. To cladding a house, you will need to prepare some tools for the job:
- a universal hacksaw with small teeth;
- scissors for cutting metal;
- screwdriver;
- pliers;
- hammer;
- construction plumb line;
- roulette;
- pencil.
A complete list of necessary tools.
The work is easier to do with two people. They start with calculating the material. This is necessary in order to immediately purchase the required quantity and avoid additional transport and time costs during the work process.
The amount of material can be calculated approximately. To do this, calculate the area of the external walls, plinth and cornices. To calculate the required number of panels, the result must be divided by the area of one element. In order to think over the location of the joints and more accurately calculate the quantity, it is worth making a sketch of the external walls of the building. It is recommended to add 5-10% to the amount of siding received for trimming and various unforeseen expenses.
Calculation of surface area for cladding
Wall finishing begins with surface preparation. It includes the following steps:
- cleaning from dirt and dust;
- removal of plants, dried lime;
- removal of worn-out plaster and other finishing materials;
- dismantling drainpipes, window sills, various decorative elements that may interfere with the work process.
Lathing for siding
The sheathing for siding can also, in some way, be called a component element. Experts advise using it even if the panels are installed on a perfectly flat façade. This is necessary in order to give the structure high strength, since it must cope well with heavy loads. This is especially important when arranging the basement of a building and using metal siding.
It is advisable to make the lathing from a metal profile with a cross-section of at least 2.7x6 cm, then it will be durable. The distance between the slats depends on the type of siding: for metal panels - at least 0.40 m, for vinyl - 0.60 m. And the interval between fasteners depends on the weight of the panels - the heavier they are, the smaller the interval. The sheathing is made perpendicular to the location of the panels: if the panels are installed horizontally, then the sheathing slats are installed vertically, and vice versa.
Insulation and waterproofing of the house
Before you start covering the house, you need to clean the walls and seal the cracks in them. Old paint and plaster will not be visible under the siding, but it is better to get rid of them. If the house is made of wood or aerated concrete blocks, then a vapor-permeable waterproofing film must be attached to it under the sheathing.
The insulation is placed between the guides of the frame, which is stuffed under the finishing material in question for the facade of a private house. Next, another layer of waterproofing is laid on top of it. Moreover, everything is done so that an air cushion remains between the membrane and the heat insulator on the walls of the house.
Installation of soffit panels
Let's look at the process of installing siding soffits. To install them you will need an H-profile, a J-profile, and 3x5 cm wooden slats.
- -Make marks on the surface of the wall, along which you will then attach the slats. The length of the slats should reach the end of the roof overhang.
- The slats are attached to the façade wall using special pegs, which are used for quick installation.
- In addition, the slats are secured along the entire perimeter of the roof overhang.
- Next, additional supporting elements from the slats are mounted perpendicular to those that were installed previously. In the middle of the transverse elements, you can additionally install another strip so that the soffit holds more firmly.
- The finishing strip is fixed to the rail, which is installed along the perimeter of the walls. Such strips are used wherever soffits will be installed.
- Note: to make it easier to join the planks, cut off a piece on one of them, on which the mounting holes are located, and insert one plank into the other.
- If necessary, the soffits are trimmed to take into account thermal expansion.
- Then the soffits are simply inserted into the finishing strips until a characteristic click is heard, which means that the connection is made correctly.
- Next, proceed to installing the corners using corner strips. They are inserted into the structure at the corners. Then, using a level and a corner, the outline of the facade is copied onto the plank and the excess is cut off.
- The cut strip is fixed to the corner located inside. Then they cut it from the outside in a similar way and install it.
- The panels in this section of the structure are installed as follows: one of them is fixed to the previous one using a locking mechanism, then the corner is marked and other corner panels are installed.
- Note: soffits can be installed in two ways: herringbone or straight. In the second case, the H-profile is installed parallel to the soffits.
Installation of spotlights and components is quite simple, and if you carefully understand its principles, you will probably be able to cope with the work yourself. By doing this, you will save a decent amount of money, since the work of professional installers is not cheap.
Return to list
Characteristics and purpose
Profiled strips for siding panels are represented by the following main types of extensions.
Starting profile strip
It is necessary to take into account the fact that such an initial siding strip must be installed across the sheathing frame. There must be a rigid type of base underneath. On a wooden frame, such an element can be represented by a perforated corner or strip, and on a galvanized version of the CD sheathing - by a UD profile. The proprietary version of the ventilated façade subsystem has a base provided by the manufacturers.
Finishing profile strip
Installing the latest siding trim panel involves using a finishing strip that clamps the edge of the cut trim sheet. This version of the profile, like the starting strip, is fixed across the sheathing frame and needs to strengthen the base. To obtain the required rigidity during the installation process, the same method is used as for the initial profile.
Installing the latest siding trim panel involves using a finishing strip that clamps the edge of the cut trim sheet
Internal and external profile corner elements
Fastening this type of plank is done arbitrarily. As in the case of using a finishing profile strip, this fastening allows the element to freely contract and expand under temperature changes. This type of profile is also produced for the installation of basement siding panels that imitate natural finishing materials.
J-Trim profile strip and J-shaped profile chamfer
J-Trim profile additional elements are used at the end of the design of the facing space, and the installation site is protruding structures on the surface of the walls, as well as in the absence of a transition of siding panels at the level of one plane.
Window profile or window strip for siding
A near-window or slope version of the plank is usually installed in areas that need to cover narrow recesses. Such areas are most often observed on window and door slopes. Screwing such a profile is carried out in any order.
A near-window or slope version of the plank is usually installed in areas that need to cover narrow recesses
H-shaped profile strip
H-shaped profile or connecting type of profile strip for finishing siding panels is used when joining siding panels along the length. This version of the plank is mounted along the sheathing frame under the siding panels. For this element, additional horizontal profiles are installed on the sheathing frame in increments of 40 cm. Fastening is carried out in any order.
Platband and hanging profile strip
Platbands or a wide version of the J-shaped profile are used, as a rule, for decorative purposes and are installed when transitioning from one type of siding panel to another or as a beautiful frame. The element is assigned arbitrarily.
Projects of houses with siding
Number of projects 66
- 4 rooms
- 2 bathrooms
Austin House Project
To favorites
- 191² Total area
- 11 x 9m Construction area
from RUR 2,845,182 Construction time individually
- 5 rooms
- 2 bathrooms
Bremen House Project
To favorites
- 138² Total area
- 10 x 8m Construction area
from 2,984,034 rub. Construction time individually
- 2 rooms
- 1 bathroom
House Project DOK-85 / Gardar
To favorites
- 85.16² Total area
- 10 x 9m Construction area
from RUB 1,532,880 Construction time individually
- 2 rooms
- 1 bathroom
House Project New City 60
To favorites
- 102² Total area
- 5 x 12m Construction area
from 795,000 rub. Construction period 21 days
- 2 rooms
- 1 bathroom
House Project T-112
To favorites
- 115² Total area
- 12 x 15m Construction area
from RUR 1,017,858 Construction time individually
- 3 rooms
- 1 bathroom
Bordeaux House Project
To favorites
- 95² Total area
- 11 x 11m Construction area
from RUR 2,222,627 Construction time individually
- 1 room
- 1 bathroom
House T-20 project
To favorites
- 34.9² Total area
- 5 x 5m Building area
individual calculation Construction period individually
- 3 rooms
- 1 bathroom
House Project T-83 (Alsace)
To favorites
- 111² Total area
- 12 x 11m Construction area
individual calculation Construction period individually
- 5 rooms
- 3 bathrooms
House Project Wroclaw
To favorites
- 191² Total area
- 10 x 10m Construction area
from RUR 2,482,892 Construction time individually
- 2 rooms
- 1 bathroom
Wismar House Project
To favorites
- 80² Total area
- 12 x 7m Construction area
from RUR 2,717,935 Construction time individually
- 6 rooms
- 2 bathrooms
Oslo House Project
To favorites
- 185² Total area
- 10 x 9m Construction area
from RUR 2,426,202 Construction time individually
- 4 rooms
- 2 bathrooms
Tallahassee House Project
To favorites
- 186² Total area
- 10 x 10m Construction area
from RUR 2,129,649 Construction time individually
- 2 rooms
- 1 bathroom
House Project T-96 (Basis)
To favorites
- 73² Total area
- 9 x 7m Construction area
individual calculation Construction period individually
- 3 rooms
- 1 bathroom
House Project DOK-96 / Brione
To favorites
- 96.37² Total area
- 6 x 10m Construction area
from RUB 1,734,660 Construction time individually
- 2 rooms
- 1 bathroom
House 5 Project
To favorites
- 107.8² Total area
- 9 x 8m Construction area
from 1,425,000 rub. Construction time individually
- 3 rooms
- 2 bathrooms
House Project T-69
To favorites
- 82² Total area
- 9 x 7m Construction area
individual calculation Construction period individually
- 4 rooms
- 2 bathrooms
House Project DOK-111 / Milan
To favorites
- 116.5² Total area
- 9 x 8m Construction area
from 2,002,680 rub. Construction time individually
- 4 rooms
- 3 bathrooms
Alpine Meadows House Project
To favorites
- 184² Total area
- 14 x 8m Construction area
from RUR 3,181,992 Construction time individually
- 2 rooms
- 1 bathroom
House Project T-63
To favorites
- 48.46² Total area
- 6 x 6m Construction area
individual calculation Construction period individually
- 4 rooms
- 1 bathroom
House 3 Project
To favorites
- 115.9² Total area
- 9 x 7m Construction area
individual calculation Construction period individually
View all projects
The topic of this article is types of siding, which siding is best to use for cladding a house. The topic is interesting because this type of external cladding of house walls appeared relatively recently on the modern Russian market. But it has already occupied its strong niche. This finishing material is presented in a fairly wide variety, both in design and in the use of raw materials. So let's look at siding specifically.
House covered with siding Source l-mont.spb.ru
Which panels are better, acrylic or vinyl?
Calculation of siding for cladding a house
By and large, this is one material, it is almost impossible to distinguish it visually. The difference lies in the chemical composition and manufacturing technology. That is, acrylic siding uses special acrylic polymers, which improve the properties and characteristics of the panels.
- resistance to elevated temperatures (up to +90 degrees);
- does not support combustion;
- high resistance to UV rays;
- resistance to chemicals;
- high strength characteristics.
Acrylic siding is more expensive than vinyl siding. However, in a number of characteristics it wins, so the cost is justified.
Types of vinyl siding
There are three types of siding panels, taking into account the purpose and several varieties of each:
Soffit – for cladding horizontal surfaces.
Types of soffit:
- fully perforated;
- perforated in the middle;
- solid.
Basement plastic siding - short, high-strength panels for cladding the base of a house.
In addition to facing panels for the plinth, which imitate brick or natural stone, components are used, such as j-trim strips, facing, outer and outer corners.
Wall plastic siding - used for cladding vertical surfaces. Moreover, the surface of wall siding can be either smooth or can imitate a wood structure.
Types of wall panels:
- Single Christmas tree.
- Double Christmas tree.
- Triple Christmas tree.
- Block house.
- Ship plank (timber).
- Log vinyl siding.
Vinyl siding markings
Panels are marked according to this principle:
- T – triple herringbone;
- D – double herringbone;
- S – single herringbone.
After the letter symbol there are numbers, which indicate the width of the siding.
For example, the T4.6 marking means that this siding panel is triple herringbone with a wave thickness of 4.6 inches. Accordingly, the total width of the siding is 229.6 mm.
Additional siding elements
The fittings for the panels differ in configuration, width, and length. These characteristics are unique for each manufacturer, as well as for each series of panels.
Standard additional elements.
Each manufacturer has them. They differ only in the size of the surfaces.
