It is hardly possible to call a garden plot complete without a gazebo. This place provides excellent protection from the scorching sun and rain, and here you can sit with friends and contemplate nature. This small architectural form will fit even in a small area, and you can give it a complete aesthetic look by finishing it with decorative grilles. They will make the design more sophisticated and cozy.
In this article we will look at the main types of these decorative elements and how to make wooden grilles for a gazebo with your own hands.
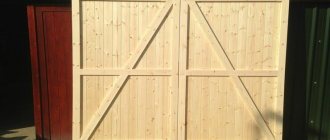
Making a frame for a wooden lattice
To make the frame, you will need four beams, the corner connection of which is made into a tenon or into the floor of the tree. These are the simplest and most affordable options at home and do not require the use of woodworking machines.
Tenon connection. One beam has a protrusion that is inserted into the groove of the second beam.
Corner connection, which is called “in the wood floor”. Each beam has a cutout of half the height.
When fastening corner joints, a round wooden chip is usually used, which is inserted into a hole drilled through the corner joint, set with glue.
Foundation
For a light frame wooden building, you can make a columnar, strip, screw pile, rubble or rubble concrete foundation.
A column foundation is the most economical option for a frame wooden veranda. To erect it, columns are made at the corners of the veranda and in gaps at a distance of 50-60 cm. The columns can be made of brick or blocks, or they can also be poured with concrete. For the pillars, dig holes about 1 m deep, but not less than the depth of the house foundation, and pour a sand or crushed stone cushion 20 cm thick into them. The sand is compacted, a small layer of concrete is poured and brick or block pillars are laid out.
To make concrete columns, asbestos-cement pipes or roofing felt rolled into a tube are lowered into the pits, reinforcement is placed in this formwork and concrete is poured. The gap between the post and the soil is filled with sand.
Important! All supports of a columnar foundation must be leveled, this is done using a level. They are made with a height equal to the height of the foundation (basement) of the house
Between the brick and the subfloor joists, waterproofing is laid, for example, two layers of roofing felt. The foundation is made at such a height that there is approximately 30 cm left to the finished floor.
Finishing
Finishing the grille involves covering the surface with protective decorative agents. For this purpose, waterproof paints and varnishes for exterior use, decorative impregnations based on synthetic and mineral oils or wax can be used.
Before applying protective compounds, you need to thoroughly sand the joints that were glued during assembly. Adhesive that has come out and dried on the surface can prevent reliable adhesion between the coating and the wood.
Products are applied with a brush or spray. After the first layer has dried, it is necessary to sand the remaining irregularities and cover the grate a second time.
The second option is to install slats in the gazebo window
If in the first version the grille was made in advance, then in this case the slats are immediately attached to the window at an angle of 45 degrees.
Idea for a gazebo with trellises
Before sheathing the gazebo, it is necessary to calculate the length of the material. The most difficult thing here is the calculations - you need to clearly measure the dimensions so that the distances in the cells are the same and the whole “picture” looks symmetrical.
The grille is attached to self-tapping screws at an angle of 45 degrees to the window, after which the slats themselves are also fastened together. Gaps at joints can be hidden with decorative plinths.
This option is suitable if the gazebo has smooth windows, which will allow you to attach wooden blocks to it without additional processing.
The video above shows step-by-step instructions on how to implement this option. This video is not as dynamic as the next one (although the method is more professional), but it shows the essence and understanding of the method very well.
Distinctive features
What is so special about this cladding? Why should it be used for arranging gazebos? Let's look at its advantages.
pros
Beautiful appearance. By creating a simple pattern, it gives the building a certain elegance and even aristocracy.
Lightness and aesthetics
Harmonious compatibility with other cladding materials. For example, it can be successfully combined with wood paneling. This is very convenient if, in order to save money, you use as exterior decoration everything that remains from previous construction or repair work.
Combination of different materials in finishing
Ability to diffuse light. This allows you to use cross strips instead of glazing to save money.
Decorative strip instead of glass
Low price. Purchasing suitable planks will not put a big dent in your budget.
Tip: If you're on a budget, you can increase the size of the cage as you see fit. Then the consumption of the slats will be significantly less.
Photo of a large cage ornament
It is a way to decorate another less aesthetic material. The planed board may well be complemented with a checkered pattern.
Decorating the walls of the gazebo
- Easy to install with your own hands. All work can be done on your own without the help of professionals.
- Increasing the load-bearing strength of the wall.
- The opportunity to plant climbing plants that will give the building a unique green look, bringing harmony with the garden to perfection and creating absolute protection from sunlight.
Popular articles Green morning glory tower: how to grow?
Green design
Advice: if you are planning to plant vines, you can use cheaper and easier to install reinforced networks. This will further reduce waste.
As you can see, this finish provides many benefits at a low cost. But, if you dwell on it, then you should also have an idea about its negative sides.
Wood care
It is advisable to impregnate frames and grilles, apply antiseptic agents and paint before assembly.
It is also better to paint the frame before fixing the grille in place. If you paint assembled structures, it is difficult to manage a large volume. In addition, places where parts overlap each other may remain unpainted. This will worsen the external condition of the gazebo. The durability of the structure will also suffer due to areas not protected by treatment. Now there are enough antiseptics on the construction market, the use of which during processing will preserve the color and patterns of wood. They can also be used before painting the gratings.
It is not difficult to make gratings from wood of the selected variety on your own. Even if the lightest types of structures are chosen. Handmade products with love and diligence will be an excellent decoration for a garden gazebo. In the future, you can decorate the open veranda in the same way.
In addition to the pleasure of his own work, each master will provide significant savings to the family budget, because he saved money on the manufacture of decorative elements in the carpentry workshop.
To learn how to make a decorative wooden lattice with your own hands, watch the video below.
When preparing this article, photographs from the website Shpallera.rf were used.
Start of construction work: tools and materials
Wood finishing is an ideal option for a country house and a summer veranda. But you can use any materials that are available.
Any terrace is quite suitable for a brick house, it all depends on financial capabilities. For example, the most economical way to build a veranda is to build a frame made of foam concrete or a metal frame. In general terms, the construction of a brick veranda can be divided into 4 main stages, not counting the project itself and the building permit.
- A load-bearing foundation for the terrace is being built.
- The veranda is built from brick walls and door and window panels are installed.
- Roof installation.
- All finishing works.
The most common and optimal option for a brick extension is the end or front part of the house, 2.5-3 m wide and approximately 6 m long. Such a veranda provides for the internal installation of a door leaf. Any terrace, including brick terraces, requires laying a foundation.
The classic version of a columnar base involves creating a base made of brick. In this case, it will not require a lot of labor and the use of special equipment in order for the veranda to be perfectly built. To construct a supporting base you will need the following materials:
- gravel or crushed stone;
- hot bitumen;
- broken brick;
- concrete mixture.
Among the roofing materials, you can give preference to the following:
- asbestos-cement;
- roll;
- steel.
In addition to roofing material, you will need for the veranda:
- cut boards to form sheathing;
- slats for placing the roof on the surface of the slope.
Considering that the veranda is just an extension, single window panels may be suitable. Also for assembly and installation you will need the following tools to attach the structure:
- building level;
- roulette;
- cord;
- steel corner;
- Bulgarian;
- electric drill;
- electric screwdriver;
- electric saw;
- shovel;
- hammer;
- sledgehammer;
- axe;
- nails;
- screws;
- wood shields.
Additionally, for windows:
- wooden wedges;
- gypsum mortar;
- dry tow.
Design
The construction of a terrace or veranda allows you to connect the enclosed space of your home and nature into a single whole and opens up wide possibilities for the design of these buildings.
Fencing. They can be made protective or decorative, for example, in the form of a low, elegant fence or pergolas - canopies of several arches, decorated with vines or potted compositions of bright hanging plants. It is good to decorate the perimeter with ornamental shrubs and flowers.
- Instead of a standard roof, you can use a removable awning, retractable awnings, or a portable umbrella.
- When a terrace or veranda is not attached to the house, but is located separately in the yard, then a path is used as a connecting link between the buildings. To decorate the path, spotlights built into niches on the ground cover or LED lighting plus one or more openwork arches to create the effect of a luminous tunnel are suitable.
For a summer veranda or open terrace, it is advisable to choose plastic in muted dark colors - smoky, tobacco shade, bottle glass color with a grayish or bluish undertone. Being in red, blue or bright green on your porch can be irritating.
c36ac8488e67a8800292fa292c6acd5e.jpe
When the frame is made of wood, then after antiseptic treatment and varnishing the wood acquires a reddish color. In this case, brownish or orange polycarbonate is selected for the roof. Such tones help create a relaxing atmosphere and increase the color temperature of the veranda interior.
Distinctive features
What is so special about this cladding? Why should it be used for arranging gazebos? Let's look at its advantages.
pros
Beautiful appearance. By creating a simple pattern, it gives the building a certain elegance and even aristocracy.
Lightness and aesthetics
Harmonious compatibility with other cladding materials. For example, it can be successfully combined with wood paneling. This is very convenient if, in order to save money, you use as exterior decoration everything that remains from previous construction or repair work.
Combination of different materials in finishing
Ability to diffuse light. This allows you to use cross strips instead of glazing to save money.
Decorative strip instead of glass
Low price. Purchasing suitable planks will not put a big dent in your budget.
Photo of a large cage ornament
It is a way to decorate another less aesthetic material. The planed board may well be complemented with a checkered pattern.
Decorating the walls of the gazebo
- Easy to install with your own hands. All work can be done on your own without the help of professionals.
- Increasing the load-bearing strength of the wall.
- The opportunity to plant climbing plants that will give the building a unique green look, bringing harmony with the garden to perfection and creating absolute protection from sunlight.
Green design
As you can see, this finish provides many benefits at a low cost. But, if you dwell on it, then you should also have an idea about its negative sides.
Minuses
- Poor wind protection.
- Lack of thermal insulation properties.
This only tells us that the sheathing is not suitable for constructing a closed all-season gazebo. But for summer it’s almost an ideal option.
What to make from
Some people prefer that the sheathing be made of metal, but this design turns out to be quite bulky and takes away all the lightness from the gazebo. That is why it is easier to make it from wood, and besides, this option is easy to do with your own hands. Oak can be used as a base.
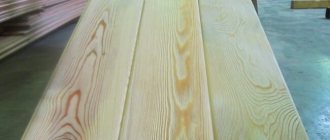
The wood of this plant has high strength and durability. It can be coated with stain to give it a special shade. But for an inexperienced carpenter, oak can pose a problem, since its processing requires special skill.
In terms of strength, oak is not inferior to larch. But the wood of this plant is more amenable to processing, and therefore is an excellent option for lathing. Another advantage of this type of wood is its resistance to moisture.
Due to the high density of wood, moisture is not able to penetrate into the thickness and cause rotting processes. Another option for constructing such a structure is ash. To a certain extent, it has absorbed all the advantages of the other two options and its appearance will delight the owner.
In some areas it is easy to obtain beech wood. The highlight of the wood is its pinkish tint, which cannot help but attract the eye. The wood of this plant is well processed, but without finishing it will not last long. With constant exposure to humid air, coniferous wood will be an excellent basis for lathing.
The thickness contains a significant amount of resins that have a water-repellent effect. In addition, such wood will fill the room with a pleasant aroma.
Do-it-yourself grille for a gazebo: stages of work
Naturally, first you must think about what kind of wood lattice for the gazebo will be - the pattern and size of the cell. The width of the slats and the amount of material depend on this. The drawing will help you imagine how everything will look when finished.
In my case, this is a lattice with a simple rectangular cell of 10x10 cm. I needed to close the internal space, but to maintain natural ventilation
At the same time, I paid attention to aesthetics - the configuration and size of the cell should have something in common with the tiles on the garage and with the already screwed boards along the lower tier of the firewood shed
After we have visually presented the result, we get to work.
Frame
The first thing you will encounter is how to actually attach the grille to the opening? The difficulty here is that any error in the calculations or a crooked rack will lead to cracks and gaps.
The grille for the gazebo can be made either locally (as in my case, right in the opening), or on the ground, and then insert the finished structure as a card.
Popular articles How to make a homemade pump for a fountain, its design and installation
Consider two points:
- number of openings - if the gazebo is large and there are many openings where there will be a standard lattice, make it according to a template on the ground, it is more convenient and faster, but it requires dexterity and skills;
- pattern - if the pattern is simple and you don’t need to do any magic on it, do it locally.
I did it locally, it seems to me that it’s easier and not so labor-intensive.
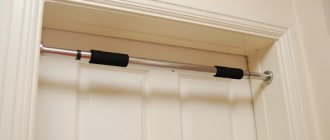
To ensure that the lattice sits smoothly and beautifully, screw a strip around the perimeter of the opening to the beam of the gazebo (in the photo it is light-colored around the perimeter). This frame will serve as the basis on which you will then mark the steps and where you will screw the slats.
You can do without a frame, for example, screw it directly to the beam or make recesses in it, but why complicate your work?
Preparation
At this stage, all the main work is done - preparing the material and marking:
- make vertical and horizontal blanks from the slats - cut them to size;
- treat the wood with a primer or antiseptic;
- determine the horizontal center of the opening and secure the first central vertical rail;
- Mark the grid spacing horizontally.
You can start with both vertical and horizontal slats, whichever is more convenient for you!
To mark the horizontal step between the slats with a decorative lattice for the gazebo, take a template (a strip one step wide) and horizontally set this distance from the central slats to the side + the width of the slats itself, this will be the second step. Be precise! And so on until the end - template + width of the slats.
Process
When everything is marked, proceed to fastening the vertical slats.
Screw it in with a screwdriver, because a hammer can break the fragile strip.
- After screwing all the vertical slats, proceed to the horizontal ones. To do this, measure the center again, only this time in the vertical plane, and mark the steps from it with a template: template + width of the slats.
- All slats should be well screwed with small screws at the intersections and at the ends.
- If your steps are not the same and there is a small distance left at the end, stretch the step a little (but do it evenly!), or use a decorative strip. This often happens if the opening is already ready.
- The main thing is to accurately maintain the given height and length of the cell so that the lattice comes out even and symmetrical.
That's all! Making a lattice from slats turns out to be not at all difficult, although there are some difficulties.
By the way, if you don’t have experience and don’t want to start something global, you can practice on smaller structures - make a decorative pergola or flower stand. Fast, not troublesome, beautiful and always useful in your area!
Post Views: 1,126
Method number 2. If there are no tools for tenoning
Algorithm for creating sheathing
We make small samples at the ends of the wooden blocks. Then we dock them and firmly connect them with wood glue. You should also strengthen the corners with self-tapping screws (drive one self-tapping screw into each corner). We make two identical wooden frames. Then we attach slats to the side of each beam. Now you have a fold.
Filling
Now, in order to get a high-quality wooden lattice for the gazebo with your own hands, you need to start filling it. To do this, you need to make the same slats that are used in the fold. The slats are placed diagonally at an equal distance from each other.
Assembly
Let's start assembling the grille. Let's fold the two frames so that the slats intersect and fasten them with self-tapping screws. At the same time, the frames can be sharpened a little for better joining.
It is also worth placing a mosquito net between the frames. This will help you avoid a huge accumulation of insects in the gazebo and will reliably protect you from bites.
Grating processing
To give the wood a better look, as well as for a longer service life of the wood, it should be treated with paint or varnish. Usually the varnish is applied in several layers. It is better to process before assembling the grating. Here is one example of how to make a finished lattice for a gazebo.
Work progress
The entire work of constructing the lattice is quite simple, although some nuances will make you scratch your head.
About some surprises of a generally simple job
Let's consider these surprises as follows:
The work requires preliminary geometric calculations - knowing the dimensions of the frame and the dimensions of the boards of the gazebo lattice, it is necessary to arrange them wisely, it would be good if at least some imagination is shown;
Such manufacturing instructions significantly increase the labor intensity of the entire work and it cannot be said that it is justified, except that the price also increases significantly
You can carry out work either directly at the location of the grating, or by first creating the entire structure separately, and then installing it: in the first case, there are no problems with the material itself, but it will be difficult to fully maintain all dimensions; in the second case, there will be no problems with the “paper” dimensions, but then it will be difficult to put the entire grille in place and fasten it evenly.
We draw your attention to a certain trick, which for some even becomes a discovery. When you build a structure separately, there is no 45 degree rotation, which is often used and appears in most of the photos in the article.
This is still the same straight lattice, on which the slats are located at 90 degrees to each other. Only then, during installation, the entire structure is rotated 45 degrees.
And who said that a wooden frame for a gazebo is a long-read book, it’s not true, there are still very interesting unfamiliar pages left in there
- If you do not want problems with the future fastening of the grille, then install it as you did, at 90 degrees.
- A 45-degree turn causes difficulties with fastening, when additional leveling and trimming of the edges of the structure around the perimeter of the frame being filled with grating is unavoidable. If the perimeter of the frame has a complex trajectory, then trimming can become a very difficult task, and most importantly, very time-consuming.
In progress
The work itself can be completed in literally a couple of hours if everything is prepared in advance and calculated. We will focus on the example of photo “B”, although it suffers from some inaccuracy in geometric calculations.
Popular articles How to make a fireplace on the veranda with your own hands
So:
vertical wooden posts were prepared to which the grille will be attached;
Making a wooden lattice for a gazebo sometimes turns into a simple exercise in geometry and the ability to work with metalwork tools (photo “B”)
All measurements were taken, markings were made and boards were prepared to size.
Then:
- The main thing here is to start correctly - we select the lower horizontal strip and attach the two outer vertical strips to it with stainless steel screws - our task is to determine the main rectangle of the lattice;
- the vertical planks will then attach the structure to the posts, so they must be inside the gazebo - thus, we put a horizontal plank and put two vertical ones on top of it, and not vice versa;
And why are these distances calculated with a ruler, sometimes some deviation from the “hierarchical system” gives very unexpected and good results
- We attach the top horizontal one to the vertical ones in the same way;
- further work actually turns into school labor lessons, to which students can be invited;
- not forgetting to check all the calculations again and having placed the internal vertical strips to the created frame, we attach them with self-tapping screws to the lower and upper horizontals;
Here is a completely unexpected option, as they say, from the generosity of imagination and to its order
- then we fasten the horizontal strips - here you only need to make sure that the screwdriver does not “get hot”;
- When the lattice is created, we attach it to the vertical posts with the same self-tapping screws.
Difficulties
The task becomes much more difficult if you need to rotate the same lattice by 45 degrees.
The most important thing here:
- accurately calculate the required length of all slats in order to minimize their consumption,
- accurately cut the edges of all planks at 45 degrees so that they fit exactly with the frame, and,
This is one of the most difficult approaches to solving the problem - do-it-yourself wooden gratings for a gazebo - grooves, and even the uneven surface of the boards
to think over the design of attaching such a “rotated” lattice to the base - this task will require some design imagination, which is more convenient to first place on its frame and then lift it up.
An excellent option for a gazebo from all points of view, and the lattice harmoniously serves the overall impression (photo “C”)
Installation of sheathing without frame
If there is a solid pergola on your site, then you can mount the slats on the frame. It is necessary to think in advance about the layout of the slats, mark the frame, adjust the bars to size, and secure them to the frame.
Next, the sheathing is sanded, varnished or painted. What to choose – varnish or paint – depends on the preferences of the owner and the intended design. Some people like bright colors when decorating their gazebo in a modern style. In this case, it is better to use paint. Varnishing allows you to preserve the appearance of natural wood, which will be preferred by lovers of traditional designs.
White sheathing combines with a dark roofSource besedkimsk.ru
Types of partitions
The most common type of decorative partitions of this type is a mesh of interwoven thin slats mounted on a wooden frame. There may be several options for manufacturing the main frame. It should fit exactly into the side opening; you can make it with your own hands from beams, for example, with a section of 20 by 40 mm.
To make the rectangular structure rigid and durable, the sides are best secured with a tenon joint.
“at the expense”, “at half a tree”, “at the end” or “thorn nest”, you need to choose depending on your capabilities and skill. Some people make a frame from old furniture or door frames, the advantage is that there is already a ready-made tenon joint.
The lathing of the decorative opening inside the frame is made with thin slats of the same thickness. You can use components with a cross section of 5x10, 10x20 mm or others. They are nailed or screwed with self-tapping screws to the frame along its sides or at an inclined angle at the same distance, crosswise. The easiest way is when one row of slats is superimposed on another, perpendicular to the first.
Another way to connect elements on the sheathing is “hidden”
, when the slats do not overlap, but seem to be recessed into each other. To do this, grooves are made at the joints half the depth of the rail and its thickness. The notches can be made by hand using a hacksaw or chisel.
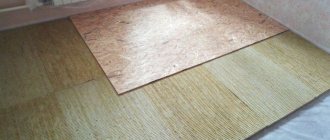
The partition may not be assembled from individual slats, but made from a single sheet of plywood, chipboard, laminated board or board. To create a lattice, openwork patterns are cut into them; the result can be a chic carved lattice. The advantages of this method are strength, no need for assembly, originality of the pattern, but the weight of the structure can be significantly greater than that assembled from slats.
Lattice gazebos: a variety of shapes and patterns
There are dozens of ways to beautifully decorate a gazebo using a lattice. Moreover, you can come up with your own design. We told you about the technology for making the simplest design, but there are other decor options!
For example, diamonds can be made double or the slats can be placed in the middle of the frames more often than at the edges. An option is possible when the skin is made of slats with cut teeth. Looks aesthetically pleasing and original!
As for the shape, rectangular and square are not the limit. How do you like the top of the grille to be broken or curved instead of the traditional straight shape? As for slatted cornices, they are often made in the form of an arch.
How to extend the life of the grille
The wooden sheathing for the gazebo is exposed to precipitation and ultraviolet rays. Therefore, at the manufacturing stage, care should be taken to preserve its appearance. The frame and grille are treated with antiseptic compounds, primed, painted or varnished.
Interesting color combinationSource remontnik.ru
It is better to paint the grille separately from the frame, since painting the finished product may leave unpainted areas. If you plan to plant climbing plants near the gazebo, you will have to paint in two layers. In humid conditions, the procedure is carried out annually every two years.