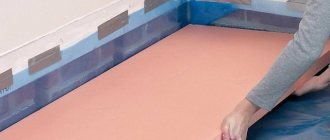
Preparing the base
Metal frame
There are panels that do not require the installation of a frame, that is, they are self-supporting elements. To install them, a foundation will be sufficient. In cases where sandwich panels are not self-supporting, foundation preparation will be required. As a rule, such a base is a metal frame. During its assembly, you need to take into account a number of nuances:
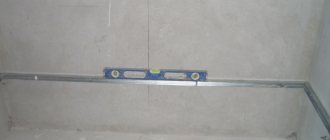
- The foundation must be leveled horizontally, the maximum deviation should not exceed 3 mm;
- The distance between the vertical and horizontal profiles must correspond to the dimensions of the panels with a margin of 5 cm on each side to allow for smooth joining of elements and installation of decorative screens;
- When using wooden guides, they should be treated with antiseptic and fire-retardant compounds before installation to avoid further troubles.
You can, of course, make the panels yourself, but it is better to buy ready-made ones, since the panels from the factory have high quality insulation and glue.
Types of CBPB boards
In addition to the different sizes of such boards, the following types are distinguished depending on the fraction of wood fibers and other fillers:
Arbolite is a universal material that is equated to lightweight concrete. Why? The thing is that the filler of this material is based on: wood chips, small wood shavings, rice straw and reed stalks. But such a building product is not durable. It is used mainly for internal interior partitions that do not carry any additional loads.
Fiberboard is a board based on wood wool or fibers. Such products have a high level of fiberization, making them wear-resistant and durable. Such boards are not solid, have a low density and are often used for sound and heat insulation in rooms.
Xylolite is a unique material made from Sorel cement. It is often used for installation in rooms with high humidity. The product is so insensitive to moisture that it is used for finishing roofs, floors, etc.
Advantages and disadvantages of DSP facades
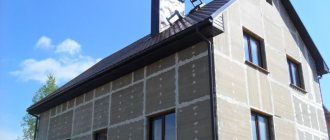
DSP facades have characteristic features associated with the structure and manufacturing technology of DSP boards. The dimensions of the material (2,600 by 1,250 and 3,200 by 1,250) allow them to cover large areas, which distinguishes them favorably from the board coverings previously widely used in individual construction.
The structure of the slabs consists of wood chips bonded with cement mortar and a layer of stone chips
The advantages of such facades include the following qualities:
ease of installation, which allows almost every person to participate in it; the material is amenable to any mechanical processing; the surface does not require labor-intensive finishing; any paint used for exterior work with preparatory priming is suitable for this; materials are environmentally friendly, non-toxic, non-toxic; due to the high cement content they do not burn or smoke; are not susceptible to insects and putrefactive fungi, even with very high and prolonged atmospheric humidity; durable, does not chip, resistant to impacts; have good sound insulation; the possibility of applying natural stone chips to the top layer makes them very diverse, attractive, modern and cozy. Along with the undeniable advantages, this type of facade has some disadvantages arising from the technological features of the DSP. These disadvantages are much smaller than the advantages. They are as follows: the rather large dimensions and weight of the slabs require the involvement of assistants for their installation, and when lifting to the upper floors - special equipment; For external work, slabs with a thickness of at least 16 mm are suitable, because
thinner material can be broken when installing the facade; mechanical processing of the material when installing the facade requires special tools for cutting stone or concrete (grinder); When cladding large areas of the facade, you always have to pay great attention to the quality of sealing the seams between the slabs in order to avoid their frequent cracking.
Domestic manufacturers use only environmentally friendly materials
Conclusion
Painting DSP is a fairly simple task. The main thing is to choose the appropriate paint and properly prepare the base. If you still have any questions, watch the video in this article, it explains some important points in great detail.
Similar articles
- Spray painting: video instructions on how to paint with your own hands, features of spray guns, price, photos
1 Advantages of this type of work 2 Technology of applying compositions in aerosol packages 2.1 Features of base preparation 2.2 Main stage of work 3… - Painting a bathroom: the best way to paint at home, options, photos and video instructions
1 Features of the choice of paints and varnishes for finishing a bathroom 1.1 Preparatory work 1.2 Water-based paints 1.3 Paints on acrylic… - Paint for aluminum surfaces: instructions for choosing what is best to paint, video and photos
1 Methods of painting aluminum products 1.1 Electrochemical coating method 1.2 Powder coating 1.3 We paint the house 2…
Installation technology of external wall panels
We will talk about constructing a façade from single-layer polyvinyl chloride cladding elements. The panels are mounted on an uneven base on a frame made of galvanized metal profiles.
Facade wall panels can be installed at almost any temperature. Installation is prohibited only in severe frosts, when the thermometer drops below -15°C. Facade cladding work consists of several stages:
- Preparation.
- Lathing for mounting panels.
- Fastening of facade panels.
Preparation
Work on preparing the foundation must be completed before installation of the supporting frame begins. Excess elements, such as an external unit for an air conditioner, are removed from the facade. The flashing and lining of the slopes are removed from the windows. If the facade is wooden, then it must be treated with an antiseptic to inhibit the processes of decay and fungal development. If the facade is stone or concrete, then such treatment is not necessary.
Cladding without insulation does not require a vapor barrier membrane. If external lighting is planned, then the wiring is carried out at the preparation stage.
Lathing for mounting panels
The sheathing for the façade panels can be made of wood or a U-shaped profile. The second option is preferable, since the galvanized profile does not corrode or collapse. It does not need to be further protected.
On a flat base, it is possible to mount the profile directly on a bare wall. If the facade is curved, then a frame is mounted under the facade panels.
The frame consists of brackets and supporting profiles. Using brackets, the frame is leveled. The profile is mounted on the pre-marked surface of the facade. Marking is carried out using a laser level and measuring tape
The first horizontal element is installed 50 mm from the ground. The starting strip for the façade panels is attached to it. The installation step of the vertical guides is 500-600 mm, and the horizontal ones depend on the height of the facing element. Horizontal guides are made of J-profile. For fastening, self-tapping dowels are used with a pitch of 300-400 mm.
Facade panel fastenings
Installation of facade panels begins from the bottom corner strictly from left to right and from top to bottom. The first row is installed on the starting bar. The left end, which goes to the corner, is cut exactly at a right angle.
Then it is secured with self-tapping screws, which are screwed into the nail holes and the body of the wall. The second panel is connected to the first to the junction of the temperature compensators and secured in a similar way. To increase the strength of the structure, the panels can be glued to the starting strip with polyurethane foam.
The construction of a facade from single-layer and multi-layer panels can be done with your own hands. The work is not particularly difficult if the rules and technologies are followed.
The facade panels will be complemented by a wide range of additional elements that allow you to hide minor flaws of a novice installer.
Installation of external corner strips
External corner strips are installed in a similar way, adjusted for the reverse geometry of the element. The same overlap joining technique is required, temperature gaps are required, etc. As a replacement for a complex corner, you can use two J-bars located close to each other at the corners.
For external corners, a simpler design method is possible - using a simple corner that is installed on top of the panels. In this case, the siding is installed first without a corner, so that the joint of the planes is as neat as possible, after which a simple corner is screwed on top. Often this option turns out to be the most preferable because it is simpler and for untrained people this option seems optimal.
Fastening sandwich panels
Seating of screws
A little higher in the article there was already a mention of some types of frames for structures made of sandwich panels, differing in the material of manufacture. Therefore, the fasteners for each of them will be different. Not only the load-bearing capacity of the frame and its service life, but also its appearance will depend on the correct selection of fastening material.
There are several rules that should be followed when attaching panels:
- The installation location of the fastener should not be too close to the edge of the element, the minimum distance is 50 mm;
- Any fastener must be installed strictly at right angles to the front surface of the sandwich panel being fixed, this directly affects the reliability of the connection;
- When using self-tapping screws that have a sealing washer made of rubber, they must be tightened until they are in full contact with the working surface, but at the same time, severe deformation of the washer must be avoided, which over time will lead to loss of tightness of the connection.
How to install slabs
The DSP facade can be installed as a suspended ventilated facade with or without insulation. But professionals recommend using an insulating layer regardless of the weather conditions of the region. It helps protect not only from severe frosts, but also from sweltering heat.
There is also an option for a frame-panel house building system, as in the picture below.
The frame for the ventilation facade is mounted from wooden blocks treated with an antiseptic, or from a metal profile. The second option, of course, is preferable, since it will last a very long time, and manufacturers guarantee that the DSP finish will last no less than 50 years.
The frame strips can be mounted both horizontally and vertically. Here you need to focus on how the façade panels will be installed. If the DSP board is mounted horizontally, then the frame is made vertical and vice versa. The step between the planks is no more than 60 cm. During the fastening process, you should periodically check with a level and plumb line whether all the planks are installed evenly.
After the frame is constructed, insulation and a hydraulic barrier should be installed. They are fixed with a mushroom dowel at a rate of 5 per square meter, with 2 securing the insulation, and the remaining 3 - the hydrobarrier and insulation together.
Now you can begin installing the DSP on the facades, but you must leave a ventilation gap between the slab and the waterproofing membrane of at least 2 cm. The panels are attached with 3 fasteners to each frame strip with which they come into contact. This will be the most reliable way.
Holes for self-tapping screws must first be made on the ground, since the material is very hard. A small distance of approximately 3–5 mm should be left between the DSP; this is necessary for the expansion of the material when heated. It is best to seal these seams with sealant. This substance is elastic and will not crack like putty or cement mortar. Another option is to insert a polyethylene foam cord there, as in the picture below.
After all the panels are attached and the seams are sealed, finishing the DSP facade still cannot be considered complete. Conventional slabs, although smooth, have a gray, unpresentable appearance. In order to diversify it, you can use facade paint for concrete.
Before applying the dye, you need to deepen the screws a little, and fill these recesses with putty and lightly sand the rough surface. In addition, the joints can be covered with metal or wooden strips and painted in a contrasting color. This method of finishing will be unusual and interesting.
Manufacturers also produce decorative versions of cement-bonded particle boards for exterior finishing. The front surface may have a layer applied that imitates brick or stonework, or the surface may be completely strewn with marble chips of various colors.
A house whose exterior is lined with cement particle boards will be reliable in any corner of the world, since it has acquired the advantages of cement: it does not rot, does not burn, and does not freeze.
Detailed video instructions for installing DSP boards and further finishing.
Features of DSP finishing
DSP is used for wall cladding (both external and internal). The main competitors of CBPB are: plywood, plasterboard, OSB, chipboard. The disadvantages of CBPB is its high density - 1.4 t/m3. Also, due to its low bending strength, it can break.
Before starting to process the panel, you need to make sure that there are no chemical manifestations on its surface. If found, they should be removed with sandpaper or industrial soap.
Putty for CBPB should be limited only to the area of the seams. To do this, using a spatula, put putty in the gap between the joints of the plates. (flush), and at the same time they putty the places where the screws will be installed. Putty for CBPB is made in order to provide protection against corrosion. After the putty has dried, final puttying is done. To remove irregularities, the places where the slabs are laid are rubbed.
After the DSP joints have been sealed, the façade cladding can be subjected to further processing. To do this, preliminary priming is carried out with a primer composition. Priming is done with a brush or brush. Particularly carefully prime the cut edges of the slabs and the places that were cut out for pipes. After sealing the DSP joints, priming and other finishing work have been completed, you can begin painting and cladding. So, if you decide to tile with ceramic tiles, then DSP is exactly what you need. Because it provides a smooth surface and a very rigid structure that ceramic tiles require. The same principle is used when treating the inner surface of a cement particle board.
DSP - has excellent sound insulation properties. If you use mineral wool with DSP, you get a very effective product that can protect against noise. If we consider CBPB from the fire safety point of view, then according to GOST this material is assigned to the category of low-flammability.
DSP boards do not have a negative impact on the human body, as well as on the environment. This is due to the components included in this slab. So, cement particle board can be safely used in the construction of modular houses.
June 18, 2014
How to seal the seams between the DSP boards, how to seal a crack in the DSP, what screws to fasten the DSP, how to fix the DSP, how to seal the cracks in the DSP, how to putty the DSP, sealant for the DSP.
In my previous articles, I talked about how to make, how to fasten CBPB boards, how to fasten CBPB boards. Today I will continue the topic about DSP and tell you in detail how and what is the best way to seal DSP seams. But first I want to warn you what screws you need to use to secure the DSP. Last year, in some places I fastened the DSP with yellow (galvanized) self-tapping screws 4 x 35 mm (I just ran out of 4.5 x 30-35 mm self-tapping screws), then I sealed the fastening points with putty, sealed the seams between the DSP boards with sealant, and glued serpyanka to the seams (polyethylene mesh), also sealed with putty and PVA glue. I didn’t have time to paint it last year, I just soaked it 2 times with a deep penetration primer for cement. In the spring I saw the following. The putty in some places where it was fastened with 4 x 35 mm self-tapping screws fell off or was pulled out. I began to figure out what was going on. It turned out that the screws simply BURST in half and were pushed out. I had to unscrew the rest and screw 4.5 x 35 mm screws at a slight angle into the same place. Then, for 5-8 cm below or above these self-tapping screws, I drilled additional holes for fasteners with a drill with a diameter of 10 mm and screwed in 5 x 30 mm self-tapping screws. Conclusion: fasten slabs or 5 x 35 mm (where the thread goes all the way to the head, along the entire length of the screw), otherwise screws of a smaller diameter may burst in winter. ATTENTION: if, when installing CBPB slabs, one slab accidentally cracks a little, then change this slab immediately, the crack will spread further. Place the CBPB boards vertically to their full height without pieces (with the exception of windows and doors). Place the largest CBPB slabs first, and then cut smaller ones (if your slab is cracked, you can cut a smaller piece out of it). at high humidity they expand by 1 mm, and in sunny or dry weather they narrow by 1 mm. This has been tested and there is no getting rid of it. If you seal the seams with sealant and then serpyanka (polyethylene mesh), then putty with PVA, then after winter the seams will sooner or later crack. We conclude: the seams will still have to be covered with decorative boards. Therefore, before doing this, you need to think through everything right away so that it will be beautiful when you cover the seams with a decorative board.
Let's try to seal the seams in the following, more reliable way; maybe a crack between the plates will not appear soon (or maybe it won't). I recently sealed one seam with a new method, now I have to wait a year to see the result, but I will prepare a decorative board for this seam right away, so that later I can immediately take this board and install it on the seam. First of all, we buy a sealant for sealing joints in cement. This sealant is GRAY in color and is often sold not in tubes, but as a sausage in a red package (looks like a loaf of smoked sausage). Sorry, I don’t remember the name, but the salesman at the hardware store will tell you, but the sealant must be gray for sealing joints in cement (don’t buy anything else). When this sealant dries, it becomes like hard rubber. Buy a plastic gun (plastic is slippery to the touch) for this sausage (300 rubles). All the sausage will not fit into the gun. You cut the sausage in half with a sharp knife and first insert one part into the gun, and when the sealant runs out, take out the packaging that remains in the gun and insert the other half of the sausage. The gun is easy to clean when the sealant dries, do not be afraid that your sealant will dry out, but try to use all the sealant at once so that it does not remain in the gun. The next day you can easily clean the plastic gun and be able to continue working. 1 . , we move the gun from top to bottom (it’s just more convenient). We applied about 1 meter of sealant, now wet your finger and run it along the seam, pressing lightly so that the sealant sticks better to the edges of the DSP boards, and then again apply the sealant into the untreated seam 1 meter, then again with your finger. DO NOT wipe off the remaining sealant, wait for the sealant to harden, and then cut it off with a sharp shoe knife or other. 2. When the sealant has dried (the next day), take a FABRIC sickle for seams 10 cm wide and cut pieces along the entire length of the seam. Take PVA glue produced in Veliky Novgorod in a 1 kg jar, add 1/3 cup of water there and stir well. Pour the glue into a small clean bucket and use a wide flat brush (brush width 6-8 cm) onto the seam of the DSP boards (the glue dries quickly and therefore the glue must be applied in parts). We glue the serpyanka to this area and immediately coat it with glue on top. Then we again apply glue with a segment of 50-70 cm below the seam, glue the serpyanka further and coat it with glue on top. Thus, we will glue the serpyanka to the seam of the DSP boards. 3. We sealed all the seams with sickle tape. You can immediately putty the first seam. We dilute the finishing gypsum putty not with water, but with adhesive emulsion. Emulsion composition: . We go through all the seams with putty once. There is no need to apply a thick layer of putty, the main thing is that there is a smooth transition at the edges of the serpyanka. Apply the putty once and you can immediately apply a second one to the place where you started putting the putty (the putty should already be dry). Use the same putty to seal the screw heads twice. Tip: apply putty to the place where the head of the screw and so that the putty sticks better to the edges of the countersink, and then remove the excess with a spatula. This way the putty won't fly off. 4 . Apply sandpaper to a wooden block and sand the putty. 5 . Apply primer to the entire façade. 6. Paint the facade 2 times. Further at your discretion. I will cover the seams with facing boards. I think the seams will crack sooner or later anyway. For cladding the facade I will use planed boards 100 x 20 mm. First, I’ll paint the board on all sides with Belinka twice, secure it with galvanized screws 4.5 x 50-60 mm, and then I MUST coat the heads of the screws with Belinka (otherwise rust will appear over time).
On the main page you can see other interesting and useful tips on construction and renovation.
As a token of gratitude, if you liked the advice,
do not forget about the recommendation. Sincerely, Yuri Moskvin. When using site materials, reference to
Cement-bonded particle boards (CPB) refers to universal sheet building materials. The raw materials for cement particle boards (CPB) are Portland cement, crushed wood shavings and additives that reduce the influence of substances contained in wood on the formation of cement stone.
What types of finishes are suitable?
Those who have already dealt with cement particle boards talked about the difficulties in finishing. There are no particular difficulties at this stage of construction, you just need to know about the features of DSP, this will help you figure out what material to use for finishing inside and outside.
The slab has a low level of hygroscopicity and adhesion - to apply layers of plaster or putty you will need a special primer and reinforcing mesh. The seams should be filled with elastic plaster or covered with decorative elements.
Interior decoration
Interior decoration depends on the interior style you choose. DSP - smooth panels that can be easily painted or applied with decorative textured paints and putties
It is important to fill the seams correctly so that they do not crack, and to choose a composition for application to the wall surface
If you are still worried about possible cracks, there is a more expensive but reliable method. It is necessary to sew up the gypsum board walls in one layer without lathing (after all, the slab is smooth, there is no need to level the surface). After this, any coating can easily be placed on the wall. The same method is suitable for bathrooms and toilets where ceramic tiles are planned.
Without preliminary preparation (economy class), you can purchase thick vinyl wallpaper for painting and paste it on the walls. They have the ability to stretch and compress, so the movement of the slabs under the influence of changes in humidity will be completely leveled.
Exterior decoration of the house
The most common way to finish a DSP frame is to imitate half-timbering. The seams are securely hidden behind the slats, and the main area is covered with paintwork of the selected color. But not everyone likes the style itself.
- Application of elastic paint. The method is convenient and reliably prevents the appearance of cracks. The downside is the high cost, especially in turnkey configurations from developers offering the construction of houses.
- Using elastic mastics to fill seams for further painting. Acrylate enamels for exterior use and organic solvent paints are used as the main coating.
- Ventilated façade. The minus is a large-scale complex of works, the plus is the attractive appearance of the facade, a long service life without repairs and maintenance.
- Sheathing with siding and other sheet materials. It is rational if in your region there is a possibility of a strong drop in temperature in winter. An additional thermal insulation layer with wind protection can be installed under the cladding. Disadvantage: high cost, large-scale work package.
To briefly summarize, we get the following facts. A frame house covered with cement particle boards is a strong and durable home without the need for frequent repairs. Easily withstands low temperatures, changes in humidity, does not rot, is not flammable, and is not susceptible to damage by insects and rodents. Technologically, the material provides ample opportunities in the choice of finishing materials. The only difficulty is to find a conscientious developer who will erect the building exactly according to the technology, without mistakes or hackwork, and only in this case the building will be able to show all its positive qualities.
Cement particle boards or CSP are a pressed, heat-treated mixture of Portland cement and wood chips. After molding, the material is thoroughly dried. It gains technical hardness over the next two weeks. In terms of performance properties, finished boards are superior to plywood, plasterboard, OSB, and chipboard. They are widely used for cladding frame houses and installing floors.
Plasters for frame houses
In addition to classic decorative plaster, other types of plaster are also used to decorate the facade of a frame house:
- Elastic plaster
. A special type of plaster, which, as the name suggests, can slightly change its geometry. It is usually applied over a base layer of regular plaster to prevent cracking. The elastic material is made on the basis of acrylic and can withstand both severe frosts and extreme heat with direct sunlight.
The disadvantage of elastic plaster for frame houses is its high cost. This material appeared relatively recently in our country, and has not yet become widespread. However, many houses are already plastered with this composition, but due to the long warranty period (up to 10 years), it is not yet possible to verify whether the figures indicated by the manufacturers are correct.
- Multilayer plaster
. This composition differs from ordinary plaster and requires special preparatory operations. The main requirement is that it can only be applied to OSB coating. Moreover, the plates must be installed in such a way that the chips in them are located horizontally. Only in this case will the OSB boards easily withstand the additional weight of the plaster and will not deform due to temperature changes.
Before applying plaster to OSB boards, the latter must be covered with a special fire-retardant membrane. This is done in order to reliably protect the insulation material before plastering. If you do not have the opportunity to cover the wall with a continuous piece of film, you can lay it in strips, overlapping them on top of each other. In addition, before plastering the façade of a house, care should be taken to provide additional protection for window and door openings. To do this, they are covered with a primary layer of waterproofing, on top of which the main film is laid. The films are fastened with a construction stapler. As for the frame of the house, the gap between the posts should be the same as when covering it with siding or clapboard.
Which paint to choose for DSP on the facade
After completing the installation work, the ideal facade of the house is obtained. You can get rid of the dull gray color with basic coloring. DSP panels for exterior finishing of a house are painted with acrylic, latex or silicate facade paints.
Acrylic paint is often used to paint DSP facades. Thanks to the plastic resin included in the composition, it fits well on the concrete surface. Polymers ensure its resistance to any climatic conditions and natural phenomena.
Another option is latex paint. Its latex polymers provide increased stability. Silicone, polyvinyl and other similar components provide additional strength. As a result of painting, a durable film is formed that easily resists any atmospheric conditions and can be washed, if necessary, with any detergents.
Silicate paint is produced on the basis of liquid glass. It has excellent adhesive properties and penetrates into the structure of the material. As a result of staining, high biological stability of the surface is ensured, as well as resistance to aggressive environments, including acid rain. The use of high-quality DSP for façade cladding followed by painting allows you to transform a new house and restore an old building. The resulting result will please the eye for many years and will extend the service life of the building.
What do you need to know when working with DSP?
First, it is necessary to clarify some technological points. First of all, it is important to understand that DSP is not quite a wood-composite board in its usual sense (OSB, chipboard). The share of shavings in the structure of the material is 30–20%, the rest is Portland cement and chemical additives for the mineralization of the wood component, so the properties of the slab are closer to concrete products.
Storage of CBPB sheets
The slabs should not be lifted by the edges parallel to the ground, this can lead to the material breaking under its own weight. It should be carried with the edge to the ground and stored in a horizontal position.
Advantages and disadvantages of DSP
The use of DSP as a finishing material for walls and foundations is fully justified by its numerous advantages:
- thanks to the natural materials used for manufacturing, the slabs are safe for the environment;
- the increased content of cement in the composition ensures resistance to fire;
- the material is not afraid of high humidity and does not rot;
- indifferent to temperature changes and their critical values;
- has increased resistance to mechanical shocks;
- allows to reduce heat loss;
- provides good sound insulation;
- does not lose its initial characteristics during operation.
DSP is often used as permanent formwork in the construction of houses made of various materials, as well as in the construction of walls of frame buildings.
Despite many advantages, DSPs also have disadvantages:
- the weight of the slabs makes it impossible to decorate the walls or base without an assistant;
- cutting the material requires a tool designed for working with concrete structures;
- In order to maintain the original properties of the material throughout the entire period of operation, it is necessary to take care of the quality of sealing of the seams.
The material has low bending strength and is not suitable for finishing complex architectural elements with rounded shapes. DSP is not used for finishing arched structures either.
Specifications
Before using the material, it is necessary to study its basic operational and technical characteristics. Currently, according to GOST 26816-2016, the domestic industry produces two types of CBPB boards, the characteristics of which are given in the table:
| Options | TsSP-1 | TsSP-2 |
| Bending elasticity index, MPa | 4500 | 4000 |
| Surface hardness, MPa | 40 — 60 | |
| Thermal conductivity of the material, W/(m °C) | 0,26 | |
| Specific heat capacity, kJ/kg °C | 1,2 | |
| Specific resistance to fastener removal, N/m | 3.5 — 8 | |
| Frost resistance of the material | ||
| Number of freeze/thaw cycles | 55 | |
| Residual strength, % | 90 | |
| Resistance to changes in humidity and temperature | ||
| Strength reduction (20 cycles), % | 30 | |
| Increase in sample thickness (20 cycles), % | 5 | |
Such performance characteristics allow the material to be used in a wide variety of areas of repair and construction work.
Preparing for the installation of a DSP coating
Before starting work on arranging a rough surface made of CBPB, the base of the floor must be properly prepared. For example, if the material is laid on a wooden base, old or rotten boards must be dismantled and replaced with new ones
It is important to seal all cracks with putty, and the wooden base is primed for better adhesion to the glue on which the slab covering will be mounted
If installation will be carried out on a concrete base, then it should also be carefully inspected for damage and repaired if necessary. Also, if there are strong horizontal deviations, leveling is done with cement mixtures. When laying CBPB on the ground, it is necessary to first level the surface - this can be done by pouring a 20 cm thick sand-gravel mixture onto the ground and compacting it.
The process of building a gazebo with a DSP floor
The best option is to lay CBPB slabs on logs. In this case, if it is planned to install the foundation directly above the ground, supports for the logs are installed on the ground, and hydro- and thermal insulation is also laid. The distance between the supports can vary from 0.5 to 1 m - this indicator depends on the thickness of the timber used for the logs.
Materials and tools that need to be prepared for working with DSP:
- timber for logs (section 150x100 or 50x100 mm);
- DSP boards in the required quantity;
- antiseptic solution for timber;
- sawing tool (for example, a hacksaw);
- materials for waterproofing and insulation;
- tools for taking measurements (tape measure, pencil);
- fastening material;
- drill.
Fastening floor slabs using self-tapping screws
The procedure for leveling the floor
The installation of screeds from slabs does not require special tools. To trim the slabs, you can use a hacksaw blade, but you must not forget about dust protection; it is better to wear a respirator and protective plastic glasses. The work procedure is carried out according to the following scheme:
- Carefully measure the room and draw up a layout drawing, taking into account the dimensions of the slabs and the area of the given area. In accordance with the diagram, the slabs are cut and numbered to facilitate further work - for this they will have to be laid out on the floor in accordance with the drawing. After everything has been verified, the slabs are removed from the floor and the base is prepared - it is cleaned of debris and dust, after which the adhesive is applied. If the base is a wooden floor, it must first be primed and dried. When everything is ready, begin laying the slabs according to the drawing, leaving a small gap between them (at least 5mm). The gap is necessary in case of deformation and expansion due to high humidity. To install the slab, just press it firmly to the floor. Further work depends on the properties of the adhesive composition - it is recommended to apply the finishing coating after the glue has completely dried.
Cement particle boards are easy to install, but due to their significant weight, it will not be possible to install without outside help.
Facade installation
If the walls of the house are not wooden, then the sequence of installing the DSP is as follows:
- at a distance of six tens of centimeters in the vertical or horizontal direction, brackets or bars are fixed to the wall;
- insulation is installed, which is reinforced with two mushroom dowels;
- a wind barrier is installed, it is secured by three more fungi;
- The sheathing is installed, and a thread is used to check the correctness of its installation. Moreover, a small gap of approximately 10 mm is maintained between the frame and the wind barrier;
- The last to be installed are the façade panels, which are secured with self-tapping screws; 3 fastenings are made for each slab. Before this, they are drilled under them with the plates in a horizontal position on the plane of the hole. A gap of several millimeters is maintained between the plates. If the façade is installed on a wooden base, it is first treated with a special impregnation. After this, the waterproofing is installed using thick paper - roofing glassine with bitumen impregnation, fastened with a construction stapler.
DSP facades are very popular and allow many design solutions to be implemented
Then the sequence of actions is as follows:
- A frame of painted boards measuring 30 by 90 mm is installed; it must be strictly in the same plane with a gap of four tens of centimeters between the planks.
- The next layer is foam, which retains moisture.
- On a wooden stand, a sheet of DSP, previously cut with a grinder, is primed on one side, placed on the stand to dry, then turned over and impregnated on the reverse side.
- After drying, all sheets are placed in a stack, covered with film in case of rain, and a press is placed on top to prevent them from warping. It is not allowed to keep the DSP sheets in the sun.
- The preparation of holes for self-tapping screws is carried out in the following order: using a screwdriver, retreating from the corner to 10 cm and from the edge to 2.5 cm, make holes at a distance of 25 cm from one another; Use a large drill to countersink holes for their heads, and place stops on the drill.
- Mark the centers of the frame strips at the top and bottom.
- Nails are driven into the outermost strip of the frame at the top and bottom. Pressing the edge of the sheet against them, firmly fasten it with self-tapping screws. The same procedure is done with all the other sheets, gradually moving the signal strip with nails. You need to drill holes in a staggered pattern.
- The sheets are installed from the edges of the window towards the edges of the wall. First, whole sheets are mounted, and then pieces are added.
- The heads of the screws are sealed with gypsum putty with water and PVA glue twice. Self-tapping screws must be galvanized so as not to rust.
Stone chip coating can be made from various rocks
What it is?
Wood chips and cement are used to produce this unique building material. The wooden filler is pre-crushed and sorted, after which it is antiseptically treated with calcium and aluminum chlorides. The components are thoroughly mixed, and the resulting mass is poured into special molds. As a rule, the composition of a cement-bonded particle board (CSB) includes:
- Portland cement – 65%;
- Wood shavings – 24%;
- Water – from 8.5 to 9%;
- Hydration and mineral supplements – from 2 to 2.5%.
To reduce internal stresses and more efficient pressing, a small amount of fuel oil or industrial oil can be added to the prepared mixture. The filled forms are stacked and pressed. Working pressure can vary from 1.7 to 6.5 MPa. To accelerate hydration and hardening of the mixture, it is subjected to intense heating for 8 hours.
Important!
The elasticity of wood chips compensates for the shrinkage of cement, therefore, even during the drying process, the dimensions of the slabs remain unchanged.
After removal from the formwork, the CBPB board is transported to a technological warehouse, where it finally dries under natural conditions. The final stage of production is hot air blowing, cutting, polishing and delivery to the storage location.
What is DSP for facades?
DSPs are presented on the construction market in the form of sheet material with a hard and smooth surface. Their basis is crushed wood shavings. During the production process, the chips are treated with reagents and mineralized. Cement and plasticizers are used to fasten small elements and form slabs.
The CBPB production process occurs in the following sequence: cement, shavings, additional elements and water in the required proportions are placed in an industrial concrete mixing plant and mixed thoroughly. The resulting mixture is poured into molds. Then, using dry pressing, slabs with the required parameters are formed.
Thanks to subsequent heat treatment, a durable, moisture-resistant material is obtained that is not inferior in strength to stone. For maximum strength gain, the finished slabs arrive in the warehouse for at least four weeks.
How to cut CBPB correctly?
It cannot be cut with an ordinary construction knife, like drywall, and many people have a problem - how to cut CBPB
-stove.
... The main thing is to choose a suitable disk:
- victorious;
- diamond;
- for cutting stone and concrete;
- fine-toothed with tips made of tungsten carbide and similar alloys.
Interesting materials:
Why does it say search on iPhone? Why does my iPhone show network search? Why is my iPhone constantly searching for a network? Why is my iPhone constantly searching for a network? Why can't I find my Instagram account? Why doesn't Google voice search work on Android? Why doesn't voice search work for me? Why is there a network search in Dota? Searching for new whatsapp messages what is it? How to find popular live broadcasts on Instagram?
Construction of a house from cement particle boards
The technology for constructing a cottage or DSP is no different from Canadian installation technology.
The technology for erecting a cottage or DSP is no different from Canadian installation technology. In the same way, a frame with unthreaded beams and or platforms is driven out. Then cement particle boards are sewn on top of the frame.
A vapor barrier and insulation are installed between the two planes of the slabs. As a result, the thickness of the walls of such a frame will be only 20-25 cm. And their thermal conductivity will be equal to the thermal conductivity of the walls of a stone house with a thickness of 80-90 cm.
A fully assembled house is subjected to interior or exterior finishing. DSP is painted, covered with clinker tiles (outside) or ceramic tiles (inside), plastered, etc.
As a result, the cottage takes on an attractive, modern look.
Features of installation and surface care
Summarizing the above, it is necessary to note a number of features of installation and care of this material. So, for example, before proceeding with the installation of walls, it is necessary to ensure reliable insulation of the lower sandwich panels from moisture penetration from the foundation of the building.
The first layer needs to be laid bitumen cardboard (roofing felt), and on top of it - a layer of mineral wool. The width of such a “layer cake” should exceed the width of the panel wall by 10 mm on each side, and the mineral wool should be laid in such a way that it completely fills the grooves of the lower panels.
The protective coating on sandwich panels, which is applied during their production, is quite unstable, so special care should be taken during installation. After completion of construction, during the operation of the building, it is necessary to regularly inspect the surface of the panels, and if damage is detected, restore them using special repair dyes.
Dirt is easily removed with a medium-hard brush dipped in soapy water. The factory protective film must be removed immediately upon completion of installation work, but this should only be done in dry and cool weather.