In order to reduce heat loss, according to SP 23-101 of 2004 (clause 8.11), it is recommended to carry out thermal insulation measures on the side of the building facade. However, this is additionally accompanied by significant costs, difficulties in accessing the entire work site due to height and environmental conditions. It is also necessary to quickly isolate the finish from ultraviolet rays and other troubles. As a result, you have to find out, for example, whether it is possible to insulate with penoplex indoors. Here's what I found out about this option.
Source remontnik.ru
What is penoplex
Everyone knows polystyrene foam insulation. Penoplex is a modern material developed by the company of the same name. Its characteristics are close to polystyrene foam. However, manufacturers took into account the shortcomings and made the insulation much better. In appearance, these are thin sheets of orange color. Designed for heat and sound insulation of premises.
Unlike polystyrene foam, which is formed by processing polystyrene granules and pressing them, penoplex is produced by melting polystyrene granules and then pressing them through a forming hole. Then everything is pressed. This process is called extrusion (extrusion - from Latin “pushing out”). Another name for this material is EPS (extruded polystyrene foam). When talking about penoplex, we mean EPS from a specific manufacturer.
Key Features
Since errors were corrected during creation, the created material has a number of features for which everyone loves penoplex so much. They are:
- Resistant to moisture. The material practically does not absorb moisture, mold and mildew will not appear on the walls.
- Long operational period. According to the manufacturer, insulation boards can last up to 50 years without changes. In fact, this period is even longer.
- Ecological cleanliness. The material will not cause an allergic reaction and does not release harmful substances into the air.
- High density. It is denser than polystyrene foam, holds its shape better and retains all the heat inside the room.
- Resistance to loads.
- Withstands temperature fluctuations from -50 to +75 degrees.
- Easy to install. The weight of penoplex is small, it is easily fixed on the walls, and does not crumble.
In addition, the material is resistant to chemical influences and has excellent sound and heat insulation characteristics. And thanks to the additional substances in the composition, it is fireproof.
Specifications
The insulation has the following parameters:
- Thermal conductivity coefficient is 0.03 W/(m °C). This is one of the best options. In addition, the indicators do not change depending on temperature changes and humidity levels in the room.
- Hygroscopicity – from 0.4 to 0.6%. These are indicators for immersing the entire slab in water for 30 days. This tiny percentage of water penetrates only into the top layer of the slab.
- Vapor permeability is on par with roofing felt, 0.018 mg/mchPa.
- Compressive strength from 0.2 to 0.5 MPa. The material is not afraid of stretching, compression and tensile forces.
- Biological neutrality. Fungi and mold will not form on the surface and in the material.
- Flammability group from G1 to G4, it all depends on the type of penoplex.
Wall decoration with penoplex is an excellent solution to make your home comfortable, warm and protected from extraneous noise. However, after gluing the insulation, it is important to carry out further finishing. This requires plaster. How exactly is the work carried out?
Material Information
Penoplex is not afraid of liquids and effectively retains heat.
Penoplex is the same extruded polystyrene of a synthetic nature. This polymer insulation is produced in various thicknesses with the following properties:
- helps to effectively retain heat;
- has good mechanical strength and provides a strong base for plaster and putty;
- has high-quality sound insulation;
- does not absorb liquid;
- resists the emergence of harmful microorganisms.
The disadvantages of the material are its toxicity and rather high price, so it is unlikely that you will be able to save money on it.
How to plaster penoplex correctly
Plastering on foam plastic indoors is carried out using a certain technology in compliance with all stages of work. It is important to read the instructions in advance and practice before starting the task.
Tools and materials for work
A spatula and a trowel (mat) are the main tools of a plasterer. It is with them that the mixture is transferred from the bucket to the wall. But you can’t do without other tools:
- A grater with sandpaper or a regular plastic one.
- Masking tape to protect unpainted areas.
- Construction mixer.
- Container for mixing plaster.
- Roulette, level, rule.
- Knife for cutting penoplex and reinforced mesh.
- Roller and brush for priming.
List of materials:
- The required amount of plaster. It is better to take 10–15% of the reserve.
- Primer.
- Armor mesh.
- Water (not warm, room temperature).
- Polyurethane foam.
- Corners with mesh to protect corners.
Preparing the mixture
There are many types of plasters for work. They are divided into leveling, decorative and special. To plaster penoplex, leveling or decorative mixtures are suitable. According to the area of application, plasters are divided into universal, internal and facade. Depending on the main component, plaster can be acrylic, silicate, mineral, or silicone.
Multifunctional mixture suitable for creating a wet facade. Mineral plasters are made from gypsum or cement. A less popular option is lime and clay. For dry rooms you can choose gypsum mixtures, for wet rooms - cement. The advantages of mineral solutions are low cost, environmental friendliness, strength and durability.
Acrylic plaster is made on the basis of polymers and has its own advantages. For example, it is impact-resistant, elastic, waterproof and durable. Of the minuses, it has an average cost and attracts dust.
Silicone plaster is very elastic and is not afraid of room shrinkage. It is elastic and durable. Vapor permeable, durable and not afraid of moisture. Everything about it is good, except the cost.
Silicate materials are made on the basis of liquid glass. Feature: good adhesion with penoplex. Other advantages: resistance to chemicals, durability, ease of maintenance, moisture protection, vapor permeability. Cons: Not suitable for indoor use.
Immediately before plastering the penoplex indoors, it is important to prepare the mixture according to the manufacturer's instructions. Usually the scheme is simple: the dry mixture is poured into a bucket of water in the required proportion and mixed thoroughly. But, kneading should be done after other preparatory work has been completed and application can begin. After all, the lifespan of mixed plaster is not so long (information on the packaging).
Preparing the walls
Sequence of work:
- If the gaps between the foam boards are not sealed, then foam them. Wait for the foam to dry and cut off the excess.
- Check the surface for evenness. This is done by a level or rule. Protruding parts must be removed. This is done with a grater.
- Check the dowel heads. Sometimes umbrellas are not recessed slightly into the surface, but protrude slightly above it. The protruding parts need to be lightly hammered.
- To make the penoplex rough, it is scratched with a wire brush.
- Then the surface is treated with special primer “Betonkontakt”. The layer is made even, all areas are coated.
- After the first layer has dried, the second is applied.
Now you can proceed to the next stage.
Insulation reinforcement
The process involves gluing the mesh onto the penoplex. This is done to improve adhesion and prevent cracking of the plaster when the walls are deformed.
Sequence of work:
- Cover the dowel caps and other recesses and holes.
- Glue perforated corners to the corners to strengthen them and protect them from damage. Fixation with glue, as is the case with reinforcing mesh. These are Ceresit ST 83, Glims KF, KREISEL 210 and other analogues.
- You need to use fiberglass mesh. This is done overlapping with the previous strip of 5–10 cm, stretched so that the canvas does not hang down. You cannot cut the mesh flush at the corners; it is important to make a 10 cm fold.
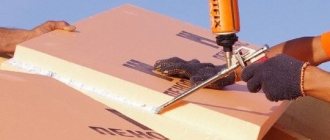
- An adhesive composition is applied to the wall. The optimal thickness is 3 mm. A little more or less is allowed. After this, the first fiberglass sheet is immediately fixed. It is fixed from above, after which it is recessed into the created layer with a downward movement using a spatula. Only the area where the first strip will be glued is treated with glue, plus a grip of 10 cm. After gluing the first strip, the second is fixed in a similar pattern, applying glue, fixing the strip overlapping with the previous one by 5–10 cm.
- After this, you can apply another thin layer of adhesive. This layer acts as rough plaster.
The reinforcement is completed, all that remains is to wait for the glue to dry and begin applying the plaster.
Features of installing insulation on the foundation
As a rule, the foundation needs insulation in the same way as the walls. Various methods of insulating the base of a building with penoplex are used.
- Vertical method.
- Along the entire foundation there is a lower level for laying insulation.
- The slab is covered with adhesive and pressed in the right place.
- The entire foundation is covered with insulation using the same method. An exception may be places that are in the ground. The slabs in this place are pressed tightly against the foundation with soil.
- Horizontal method.
In this way, the foundation from below is protected from freezing. The work is carried out at the initial stage of construction, when the foundation is just being laid.
- The slabs are tightly placed on the concrete base of the formwork.
- Waterproofing is laid on the insulation, and then the foundation is poured and reinforced.
- After removing the formwork, the sides of the foundation are insulated.
- Thermal protection around the house.
In this case, the foundation and the surrounding area are simultaneously insulated.
- First of all, the foundation is insulated vertically.
- Then formwork is made around the foundations with an indentation of 100 mm, and the blind area is prepared.
- Insulation is laid in a dense layer on the compacted surface between the foundation and the formwork.
- A waterproofing film is installed on top of the insulation, overlapping the foundation, after which the formwork is filled with concrete.
Applying a leveling layer of plaster
You can plaster over the created adhesive layer. The solution is mixed. After kneading, you need to let it ripen for 5–10 minutes. And then the main work begins. Using a narrow spatula, transfer the mixture from the container to a wide one. Using translational movements from a wide spatula or trowel, the solution is transferred to the wall. The leveling mixture should have a thickness of no more than 3 mm.
After treating the walls, you need to wait for the mixture to dry and rub the surface with a grater or sandpaper. The task is to remove all defects, traces of stripes from the spatula and make the wall smooth, ready for further processing with the finishing layer.
To ensure that the subsequent decorative layer on the penoplex sticks well, the wall is primed again in two layers. And only after drying can the final stage of work begin.
Finishing with a spatula
At this stage, it was possible to hide the penoplex, reinforce it with a reinforcing mesh and level the surface. It is ready to create a decorative layer. It is thin and it is important to work carefully. There are different options for creating a finish. But the essence remains the same - plaster is applied to the surface and then painted. At this point, the work on processing the room is completed.
Preparing the walls
Before insulation, clean and level the walls.
Before you begin finishing the surface, it must be properly prepared.
Already in a habitable room, the walls are cleaned of old plaster.
But if it is in excellent condition, then the coating can be left.
The cleaned wall is leveled; if necessary, a mesh is used, and a leveling compound is applied on top of it.
Additional tips from the experts
It happens that after completing the process, the plaster may crack or fall off. This means that the technology was not followed during the work, or low-quality materials were chosen. There are some more tips from the experts that will help you avoid mistakes:
- When plastering walls near doors, it is better to install the mortar flush. And seal the adjacent parts of the doors with masking tape.
- Some people feel sorry for throwing away the remaining mortar, and they apply it to an already dry wall. There is no need to do this so that the new layer does not fall off from the old one over time. The reason for this is the layer thickness and temperature.
- You cannot work if there is a draft in the room. The optimal temperature inside is from 10 to 20 degrees.
Penoplex is an excellent option for insulation. And if you know how to plaster it correctly, the house will be reliably protected from negative influences. And thanks to the decorative layer, it will be transformed and will delight its owners for a long time. The main thing is to follow the technology, do the work slowly, carefully and efficiently. If possible, ask a friend or relative for help.
Insulation from the inside: advantages and disadvantages
Unfortunately, this method has more disadvantages than advantages and they are quite significant. The disadvantages include the fact that insulation from the inside is, in fact, a violation of the requirements of heating engineering, according to which the heat insulator must be attached on the cold air side. In this case, the dew point (the place where condensation will accumulate) moves into the thickness of the walls, which can lead to their destruction. The following points can also be considered as disadvantages:
- complexity of interior decoration;
- reducing the usable area of rooms;
- insecurity of supporting structures from exposure to cold air from outside.
Accumulation of condensate inside the wall
If you choose the method of insulating the walls from the inside with penoplex, then you need to be prepared for the negative consequences listed above. But there are cases when it is not possible to use other options. Such situations include the following.
Application in apartment buildings
Insulation of external walls from the inside with penoplex may be required for residents of the upper floors. Unfortunately, in the past there were rather lenient requirements for thermal protection of buildings. This has led to the creation of a huge amount of housing in the country, which is not comfortable for living in winter and requires enormous heating costs.
The only method of thermal insulation on the upper floors
Among such houses, it is worth highlighting panel houses, where the thickness of the concrete wall is 30-50 cm, although to comply with modern heating engineering requirements it would be necessary to build a concrete wall more than 4 meters thick. In this situation, only one option is possible - insulation from the inside.
Firstly, no one will give permission to make changes to the facade of a house on a small plot; it will be too conspicuous. Secondly, it is impossible to insulate the walls on the upper floors yourself; you will need to resort to the expensive services of industrial climbers.
Capital facade
If fairly expensive and durable materials were used in finishing the facade, it is irrational to dismantle them. It is better to insulate the walls from the inside. Only careful adherence to technology will allow you to get a fairly good result for a long time.
Fastening methods
One of the main advantages of penoplex is the ease of installation. Any craftsman can insulate walls, ceilings and floors from various materials and any shape. Sheets can be attached in several ways both inside and outside the building.
With sheathing
This method requires the creation of a special frame, or when installing wall trim on the sheathing, you can take advantage of the opportunity to lay thermal insulation between wooden planks or aluminum profiles. In this case, it is advisable to select the sheet size to match the distance between the frame elements in order to reduce the number of scraps.
Penoplex is simply laid in the gaps and sealed around the perimeter with mounting foam, which simultaneously fixes the sheet to the wall. The insulation is covered with finishing finishing: siding, block house or wall panels.
It is necessary to install sheathing on top of the thermal insulation.
For special teams
For frameless fastening of penoplex, a special cement-based adhesive is sold, which is also used for foam plastic and mineral wool. It is available dry in paper bags and diluted with water. You can use bitumen-polymer mastic, liquid nails or an adhesive composition in pressure cylinders. It is inserted into a foam gun and applied to the sheet in a zigzag or along the perimeter and crosswise. The back side of the panels has a corrugated surface for better adhesion; smooth sheets should be rolled with a needle roller.
With the frameless method of installing penoplex, you can use special adhesives
If the panels do not fit tightly, the seams are taped with foil tape to avoid heat leakage. Before the glue hardens, the master has one hour to correct or remove the layer. To prevent the insulation from sliding down, its lower part is installed on a starting strip, which is mounted strictly horizontally.
For special fasteners
To fasten the sheets, special dowels with wide disc-shaped caps are used. 5-6 pieces are used per sheet. The dowels provide reliable, long-lasting fastening, and the wide cap does not damage the foamed polystyrene. This method is suitable for working on large areas and uneven walls.
The wide cap will not damage the insulation and will not fall into it
Holes are drilled in the rough base using a hammer drill. The length of the dowel must be at least 100 mm. Self-tapping screws of the required size are often included with the insulation.
At the joints of the sheets, it is better to coat them with additional glue and cover the seams with foil tape. Due to the loose fit, such fastening promotes the growth of fungus under the foam layer. To solve this problem, the rough base is impregnated with a fungicidal composition.
Carrying out work:
- Any surface can be treated with a deep penetration primer to strengthen, compact the dust layer and make moisture neutral.
- The adhesive solution should be prepared immediately before starting insulation, completely following the factory instructions on the packaging.
- Using a notched trowel, level the adhesive base and lay the foam on the walls, pressing firmly over the entire surface. Use a level for leveling.
- After 12 hours of drying, you can begin installing additional fasteners - dowels for foam plastic. It is better to buy them a few centimeters longer - for reliability. Using a drill and a pobedit-tipped drill, you need to make holes along the length of the nails and the width of the dowel.
- First, a fungus is placed in the hole (just below the surface of the polystyrene foam), and then a metal or plastic nail is driven in (it is better to use plastic, since it does not rust).
- Next, the insulation is covered with a thin layer of cement plaster (you can use an adhesive mixture) and the mesh is embedded into it. The mesh can also be attached with dowels directly to the slabs, and then plastered.
- The finishing touch can be any type of plaster, wallpaper or tile.
The insulation layer conceals the usable area of the home, but will be very important when dampness and mold appear in the corners of rooms located on the ground or upper floors, which is a strong argument for insulating the house using this method.
Characteristics:
To fasten the sheets, you can use foam adhesive, mortar or special-purpose plastic dowels. It will be very convenient to lay thermal insulation with locking grooves that do not create seams.
Proper wall insulation with Penoplex and the technology for carrying out the work will help determine the types of materials, taking into account their compatibility, quality and price. Since installation work using expanded polystyrene is most often carried out outside, the moment of selecting everything necessary is very important for the long service of the entire insulating layer.
Where is it safe to use polystyrene foam?
- in places where there are no potential sources of fire;
- in non-residential premises;
- use for external insulation of the base, foundation, insulation of a frame house with polystyrene foam from the outside.
As you can see, insulation inside the house is unacceptable, and polystyrene foam installed under the slate will not cause harm only if it is installed in a non-residential attic with good ventilation.
Let us note once again, answering the question of whether polystyrene foam is harmful indoors, it is not the styrene itself that is harmful, but its concentration. Expanded polystyrene is a completely safe decor, but is not recommended as insulation for residential premises.
Conclusion
Sellers of expanded polystyrene have the right to refer to GOSTs and SNiPs when offering their goods, because these standards do not regulate the environmental aspect of the use of this heat-insulating material.