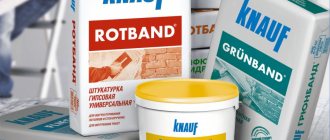
Gilded products always attract attention and become an advantageous accent in the decoration of premises. Creating refined and elegant decor is painstaking and delicate work. For this purpose, gold leaf is widely used to decorate artwork or interior items with gold plating.
- Features of choosing glue for gold leaf
- Types of adhesives for gold leaf gilding
- Alcohol based
- Water based
- Oil
- Benefits of Oil Based Adhesive
- Popular brands of glue for gold leaf
- How to make mixtion with your own hands: two recipes
- DIY starch glue
- Creamy face for gold leaf
- How to glue transfer metal: instructions
- Some useful tips
- Finally
The material is an alloy of zinc and copper. Such a thin film easily applies to any surface and creates a very impressive effect. Thus, with the help of this material of different shades they imitate coating with gold leaf or silvering of objects. A profitable option on a modest budget for those who want to add shine to their product at an affordable price.
Products treated with film gold are practical and look great in any lighting. Therefore, more and more craftsmen give their preference to this material for the artistic design of surfaces.
Features of choosing glue for gold leaf
To ensure that the gold plating layer fits correctly and adheres securely to the surface, special-purpose adhesive is used. Usually, potal for gilding various materials is applied using a mordan. This is the name given to the adhesive mixture, which allows you to perfectly distribute a layer of foil even over the most intricate reliefs. Mordan ensures strong fixation of gold leaf on the surface of the product to be glued.
However, glue for gold leaf is chosen taking into account several important conditions.
- Drying time, or more precisely, the period of stickiness retention. The larger it is, the longer you can work on the surface to achieve the desired effect. In addition, the adhesive mixture must be sticky.
- Air humidity. For dry rooms, choose long-drying glue. And at high humidity, preference is given to those adhesive compositions that have a higher setting speed.
- Presence of dust in the air. To prevent foreign particles from reducing the adhesive properties of the composition, in dusty rooms it is recommended to use mixtures with a long drying time. When working in a clean room, you can use quick-drying compounds.
- Surface area to be processed. If gilding is applied to a large area of an object, then you will have to work hard on the layer. In this case, the choice of adhesive composition again directly depends on the speed of its hardening. Thus, the adhesive for gluing gold leaf onto a large part of the product must have a long hardening time. In turn, to treat small elements with gold leaf, you can use quick-drying water-based compounds.
- Properties of the processed material. If the base to work with is smooth and hygroscopic, then choose Mordan based on water, oil, alcohol or acrylic. However, those surfaces that easily absorb moisture require preliminary priming. So, when working with gypsum or wood products, it is necessary to use special specific compounds.
As you can see, high-quality gilding of artistic elements is carried out taking into account the characteristics of the room and the product being processed. Therefore, before starting the process, it is important to prepare ideal working conditions.
In addition, the right glue is one of the main points for creating a highlight of your home interior. To do this, let's look at the types of adhesive mixtures in order to clearly know how to glue gold leaf to various surfaces.
How to apply different types of gold leaf
Do not forget that gold leaf can be different. For each type of work, a different option is selected.
Liquid
This paint is chrome-plated and has a metallic tint. It contains solvents, varnishes and pigments. The material is suitable for creativity. Apply to ceramics, glass, metal or wood. For work, take a sponge or brush.
After applying the first layer of gold leaf, you need to wait several hours . Next, the second one is painted. a day for the product to dry thoroughly . Now in stores liquid gold leaf is sold in the form of an aerosol.
Liquid gold leaf is applied with a brush or sponge
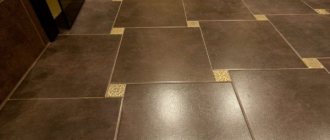
Roll
This is a separate type that is convenient to work with on a large, flat surface. Such gold leaf is often applied under pressure to papyrus paper in order to glue it along the seams and at the joints. The length of the rolls reaches 50 meters .
Here you need a special glue for gold leaf. First of all, glue is applied, then gold leaf, then the adhesive substance is coated on top again.
Rolled gold requires special glue
Leafy
The most common type. The application of gold leaf occurs on any surface. For its scale, it is loved by needlewomen, designers and all creative personalities. To apply a layer, you need to do the same work as with rolls.
A special glue is useful here, which is applied in 2 layers - below and above the gold leaf. Gilding occurs only after thorough cleaning of the material and degreasing.
Sheet gold leaf is often used to create paintings
Chit
This is a favorite variety for craftsmen working with epoxy resin. Due to the fact that the material is produced in bulk form and has different shades, it looks great on decorative items and jewelry. Working with gold leaf should be carried out cleanly.
The item is degreased and cleaned, then covered with a layer of glue. You should wait several hours until it dries completely. You can use water-based glue, then the crumbs are applied directly to the surface. The crumb differs from others in that it is sprinkled onto the product.
Three-dimensional paintings are made with gold chips
Transfer
This is the most reusable type. Transfer potal is applied to paper or tracing paper in several layers. The sheet is applied to the product again and again until the paint runs out.
The transfer potal is attached to tracing paper
Types of adhesives for gold leaf gilding
Gilding with gold leaf requires careful selection of the adhesive mixture. Therefore, industrial production has recently made the task easier. Manufacturers offer all sorts of mordan options, which are optimized for different materials and working conditions. Thanks to this, handicraftsmen invented various techniques for applying gold leaf to products. Thus, new techniques provide an amazing effect that previously could only be dreamed of.
In the traditional sense, mordan is an oil glue for gold leaf. However, today this concept includes all types of adhesive mixtures for gilding and silvering with foil. Therefore, if you come across such a name in an unexpected context, take it as a synonym for any adhesive composition for applying gold leaf.
Alcohol based
Alcohol-based glue for gold leaf is the most convenient option for long-term painstaking work. The mixture retains its adhesive properties for two days from the moment of application. For this reason, it can be used to decorate rooms, complex bas-reliefs and any other structures.
In this case, you can start working almost immediately, since the liquid base evaporates immediately. Based on these properties, alcohol mixtures are most widespread among consumers.
Water based
The water-based adhesive is universal and easy to use. Several types of water-acrylic compositions are offered:
- glue, which has a paste-like texture, is used when working with plaster and wood, since these materials strongly absorb moisture;
- glue sticks and adhesives in tubes are relevant for fine work with miniature products;
- conventional water mixtures are used after preliminary preparation of working surfaces, including priming.
Water-based glue is often chosen to save money. It is quite convenient to use and suitable for amateur practice at home.
Oil
Oil formulations are used mainly by professionals. This type of glue is quite difficult to work with; it requires a dry room and precise film application technique. These mixtures belong to the classic Mordan recipes and are created on the basis of natural oils.
Typically, oil glue for gold leaf takes a long time to dry. Therefore, it is used for large-scale external work in dry weather. Drying accelerators are added to some compositions so that the mixture can be conveniently used on internal interior elements.
Benefits of Oil Based Adhesive
The positive characteristics of oil glue definitely include its environmental friendliness, as well as reliable fixation of gold leaf on the base surface.
This adhesive for gold leaf is often used in traditional outdoor projects where the strength of the finished product is important. For example, for gilding domes, fences and signs. In addition, oil adhesives do not require a special protective coating of the finished product.
LiveInternetLiveInternet
https://www.xn--80awhdq6d.xn--p1ai/index.php?id=85
| Materials and tools • Potal • Glue for gold leaf • Glue brush • Lampemsel (Foot) – flat squirrel brush • Scissors • Gilder’s knife • Gilder’s pillow • Soft cotton cloth or cotton swab • Protective varnish for gold leaf Preparing the base. Metal bases must be cleaned of dirt, dust, grease, rust and primed with a special metal primer or red lead. In most cases, glass, plastic, chrome-plated or nickel-plated metal do not need to be primed; it is enough to clean them of dirt and degrease the surface. Applying the background. The background color depends on what effect you want to achieve when gilding with gold leaf. To achieve, for example, the effect of cracks, to give the product an antique effect, you can make the background black. Potal is very thin and lies unevenly, especially on raised areas, so cracks will form. They will be clearly visible against a black background. If it is necessary to achieve a uniform golden surface, then the background color should be matched to the color of the gold leaf. To ensure uniform coloring of the product, it is advisable to coat it with paint at least twice. Applying glue for gold leaf. After the paint has dried, you can apply a layer of glue for the gold leaf. Glue can be applied to metal primed surfaces as follows: first apply the glue with a brush, wait 5-10 minutes, then use an almost dry brush (which applied the glue) a second time to remove (smear) smudges. After this you need to wait 10-15 minutes. When the glue dries, the surface of the product will become sticky. The drying time for each glue is indicated in the instructions for it. When gilding with gold leaf, the main thing is to apply an even amount of glue, not too much, but not too little; the gold leaf may not stick to those areas of the product that were poorly coated with glue. Application of gold leaf. Potal can be transfer (each sheet is placed under pressure on tracing paper or white silk paper) and free (laid with two sheets of paper). In the first case, you can use scissors to cut off the desired piece of gold leaf along with the paper and transfer it to the product. When the gold leaf sticks to the product, the paper can be carefully peeled off. In the second case, the desired shape is cut out of gold leaf onto a pillow for gilding using a special gilder’s knife. Then the potal is taken with a special brush (lampemsel) and transferred to the product. Please note that gold leaf is very thin and must be handled with care and caution. Potal can be smoothed with a kolinsky brush, gently tapped on the surface or smoothed. Pieces of sweat that have not stuck to the product need to be collected; they can be used to cover uncovered areas of the product. When the gold leaf is smoothed evenly, it can be pressed tightly and smoothed with a cloth or cotton swab. Potal must be applied with an overlap. IMPORTANT: the cotton swab should not go onto the glued surface, otherwise pieces of cotton wool may remain on the adhesive surface and it will be impossible to remove them without breaking the adhesive layer. Gold plated surface treatment. The sheets of sweat do not adhere evenly or tightly. First, gilding defects (gaps) are covered with gold residue. After application and complete drying (drying time depends on the applied base, usually after 2-3 hours, but sometimes 12 hours), the sheet is polished. They start polishing from the corner, move along the surface with straight strokes, after each pass the surface of the gold becomes more glossy. The surface is polished until completely homogeneous - the joints of the sheets are carefully smoothed, the seams should not be visible. Protective layer. Potal may oxidize and fade over time. To prevent this from happening, the coated surface can be treated with a protective varnish. The varnish is applied with a brush. There are types of varnish designed to protect against mechanical damage and exposure to cleaning agents. Potal can also be coated with special bitumen to give it an antique effect. |
https://www.xn--80awhdq6d.xn--p1ai/index.php?id=84
Adhesives (from the word “adhesion” - sticking) are binding materials for adhesion of layers of different chemical compositions.
NORIS Milk is a water-based synthetic adhesive that allows you to lay gold leaf literally 10-15 minutes after application to the surface.
Used only in INTERIOR work for gilding with potassium. You can work for about 10 minutes to half an hour.
Temporary characteristics depend on its consistency and thickness of the applied layer.
Application technique
The milk should be applied to a dry, clean surface with a soft brush in a thin layer, trying not to leave grooves from the hair (all this will appear on the surface of the gold leaf).
After 10-15 minutes, you can apply gold leaf.
The sheets of sweat should overlap each other slightly. Foil wrinkles are carefully “nailed” with cotton wool if they have formed.
Next, the next piece is applied, which is “nailed” with cotton wool, and the first one is easily smoothed, pressing the entire surface of the foil...
It is important that you do not have impulses anywhere. If they have formed, and you notice this before “smoothing”, then you can put a piece of gold leaf on that place and press it - it will stick to the milk.
If, during polishing or smoothing, a section of gold leaf was removed, you should not touch this area until it is completely dry (there are cotton fibers left on it).
After drying, you can lightly polish the area with steel wool or fine sandpaper from 400, then apply milk again and reapply the gold leaf.
Make sure that the milk does not get on the front side of the sweat. After finishing the gilding, you should wait until the glue under the gold leaf has completely dried.
After this, the gold leaf should be coated with a topcoat varnish to avoid oxidation.
Approximate consumption per square meter ~100 - 150 ml.
Mixtion is a glue based on linseed oil.
Charbonnel's internationally acclaimed oil mixtions are equally suitable for industrial applications as well as large-scale restoration work.
These exclusive oil-based adhesives undergo multi-level purification, consisting of multiple heating steps in closed containers and filtration.
The high quality of the product ensures a long service life of gilding objects.
Two types of mixtions are available - 3-hour (leaf materials can be applied after 3 hours) and 12-hour (leaf materials can be applied after 12 hours).
The choice depends on the thickness of the layer, the properties of the surface to be coated, as well as the temperature and humidity of the room. Mixtion should be applied in a thin, even layer.
This will be easier to do if you first dilute it with turpentine (1:1).
Application technique
Before applying gold leaf, it is necessary to prepare the surface well. Good preparation is the key to excellent and high-quality gilding.
For absorbent surfaces, it is recommended to use gesso (chalk mixed with animal or fish glue with the addition of linseed oil) when preparing the surface.
A layer of paint, for example acrylic, is applied to the carefully prepared gesso. After complete drying, the paint is sanded.
Several layers of an alcohol solution of shellac (varnish) are applied to the paint. Each layer is sanded. After the last layer of polish has dried, the surface is covered with mixtion.
When the varnish has dried normally, gold leaf (potal) sticks firmly and tightly, has a good shine and does not come off when rubbed hard with a swab.
If the glue is not sufficiently dry, the gold “sinks” and the surface becomes unevenly matte.
If the glue is dry, the gold will not stick to the surface. In this case, gilding should be stopped and after the mixtion has completely dried, the gilded surface should be covered with glue again. Approximate material consumption per square meter ~ 50 ml.
Permacoll Size glue (red, transparent)
A long-term adhesive acrylic-based product intended for interior work.
The adhesion strength is higher than that of Instacoll and is therefore particularly suitable for high-gloss gold leaf plating.
Application technique
Absorbent surfaces such as plaster, wood or wood materials are impregnated with varnish
Sealer 123A.
Typically, a single, uniform application of Permacoll Size is sufficient. Non-absorbent surfaces such as varnished wood or synthetic materials, as long as they are free of grease and dust, can be coated immediately with Permacoll Size. Repulsive (matte) areas are coated twice.
After the film has dried - this can be seen by the uniform gloss and saturation of the base shade - gold leaf is applied. To achieve a uniform gloss, light rubbing with cotton wool is sufficient. The possible degree of gloss depends on the smoothness of the surface and the thickness of the leaf: the thicker the sheet, the higher the degree of gloss.
To protect against weather and mechanical influences, the gold leaf can be coated with Sealer 123A varnish.
https://www.mastera-rukodeliya.ru/dekupaj/materialy-texniki/4758-potal.html
Blog: Babo4kanayablo4ke
Lately I have been asked a lot of questions about the specifics of working with gold leaf, so I decided to share my experience.
Firstly, in the room where they work with gold leaf there should be no drafts, children running around and other nervously parading household members! We also monitor our breathing - breathe evenly through our nose, trying not to cough or sneeze! Otherwise everything will fly away!
If you have to cover large surfaces, we remove the sheets of gold onto the workpiece directly from the book.
At first it seems that all the gold gold we bought will be ruined, because it always flies away somewhere, but just doesn’t get where it needs to be...
The main thing is to get used to it!
In the end, even if it falls into folds on the glue, you can always correct it with your finger!
If we cover small surfaces with gold leaf, then first of all we need to cut it.
It is recommended to cut both gold leaf and gold leaf on special pads lined with fur or suede.
But I don't bother. From the book I lay out sheets of sweat in some thick magazine, I put one sheet at a time every 10-15 pages. I cut directly on the open page.
I leave the remaining pieces from the large piece there for later use.
But the magazine sheets should not be polished, otherwise the gold leaf will stick tightly to them!!!
They should be like newspaper ones, not very good quality. Some people cut with a knife sharpened on both sides, others with a scalpel, but I use a high-quality blade.
To transfer pieces of gold leaf to the right place, you can make a tassel called a lampemsel, which is made like this: a decent-sized squirrel tassel is fan-shaped and glued between two small pieces of cardboard.
When the glue dries, the fan will stick to them, like in a short cardboard stalk.
For greater ease of use, it is embedded in a wooden handle, the length and thickness of an ordinary pencil. Thus, lampemsel has the appearance of a stalk with a fan of squirrel hair.
Dry paw hair (lampemsel) will not accept gold leaf; it sticks to oily surfaces.
Before working with the paw, lightly grease the top of the left hand with butter and, holding the paw with the right hand, from time to time easily move it along the oily hand of the left hand, giving these paw hairs the ability to grab gold and transfer it to the desired place.
Hands must be completely clean during this work.
In the absence of a foot, some recommend using a piece of elastic paper rubbed with paraffin in the same way. I do this: I run my paw through my hair, the paw becomes slightly lubricated and electrified!
Now about what we glue on!
I won’t tell you about the various branded varnishes that are sold in Artist’s Shops and other specialty stores, because... There is plenty of information about them on the Internet! Personally, this is expensive for me!
So I’ll tell you what I glue on. Some recipes are taken from ancient sources and stories of my Teachers.
- Garlic tincture. Take a small head of garlic, chop it finely or crush it.
- Pour in about one hundred grams of the most inexpensive cognac and leave for about a week (if you can’t bear it, then 3 days is enough) in a dark place at room temperature.
- Wring it out with a cloth and you can work. Some people simply glue with a cut clove of garlic, but if the surface is not very smooth, then pieces of garlic can get clogged into the pores, thereby ruining the work!
- But if for some reason your paint doesn’t stick somewhere (rolls off), a garlic clove will really help out!
- Lubricate the surface with garlic and the paint will adhere perfectly.
- You shouldn't be afraid of the smell of garlic tincture. Dissipates quickly.
- Assist - this is the name in icon painting for the composition used for gold. I also use it for gluing gold leaf. Just mess around with it more.
- It is prepared from beer, preferably dark, which is poured into a bowl and simmered on a hot stove until it becomes a thick sticky mass, or from peeled heads of garlic, which are simmered in a small ceramic bowl in a low-heat oven until they reach the same condition.
- When used, it is diluted to the desired thickness (so that the sweat leaf does not float - too liquid, or the brush leaves rough stripes on the surface - too thick). The color of the assist is dark brown, shiny.
- I use this technique for decoration with some patterns, inscriptions, etc.
- The surface is dusted with talcum powder or fine chalk using cotton wool, the excess talcum powder is blown off and the desired pattern or letter or some other squiggle is painted on with an assist (the brush is dipped into the assist as if it were paint).
- The applied pattern can be clearly read on the powdered chalk field, which is very helpful in ensuring its correctness.
- The drawing made with glue must be dried thoroughly. Next, take a piece of fresh rye bread, crumpled into a sticky lump.
- We take the gold leaf with it and, after breathing on the prescribed pattern (which restores the adhesive ability of the wort), tap the gold leaf on the drawing.
- It sticks to the wort, its excess is taken up by a roll of bread.
- When the work is finished, imperfections in the drawing can be corrected with paint. To secure it, the gold leaf is covered with a thin layer of alcohol-based shellac varnish or polish.
- The remaining chalk is brushed off with something soft.
You may ask: why all this rigmarole, if you can simply paint the desired pattern with just gold, bronze or copper acrylic?
I assure you that you will not get such a bright and even pattern with simple metallic paint! And if you also replace the potal with gold leaf!!!!
After all, in this way they painted and still paint brocades on clothes on icons and decorate the borders of icons with gold ornaments.
Now let's sand what we pasted!
You can polish gold leaf with cloth or felt, but gold leaf, like gold leaf, acquires a special look if you polish it with a wolf fang (hunters I knew gave it to me), as well as with polished flint, carnelian or agate.
Polished! Now let's protect our beauty!
The main principle is “No to water-based varnishes!” Although some use them as finishers. But then, after a while, the gold leaf darkens, turns green, and one day my gold leaf completely disappeared somewhere...
True, I am most likely sinning on the soil on which it was glued (putty).
I protect the gold leaf, extinguish its shine, and give it a pleasant shade with the help of oil mars. I take Mars dark and Mars light or Mars medium and Mars light. I mix them in proportions as God wishes - to suit my mood: darker or lighter.
Then I add white spirit so that it’s not too liquid and cover the work with this composition - I like it directly with my hands (although it takes a long time to wash my hands afterwards) or with a cotton swab.
This whole mess takes quite a long time to dry, but I’m almost always happy with the result. The main thing is to choose the color.
By the way, this is a good substitute for bitumen wax or bitumen varnish diluted with white spirit for polychromy. Although, I myself have not yet had time to use Mars for polychromy, but Natasha Vorobyova said that everything would work out.
Something like that!
The “Gold overlay” technique is a decorative gilding of surfaces. The term “gilding” usually refers to the process of simulating gold plating on various objects (picture frames, furniture elements, parts of a frieze, etc.). Imitation gold, presented in the form of sheets of gold foil, is called Potal. Stages of work in the technique of “Applying gold leaf” | ||
Surface preparationSurfaces suitable for applying gold leaf include: wood, glass, ceramics, porcelain, metal, cardboard, plaster, canvas, acrylic paint, etc. Before applying a special adhesive composition for gold leaf, the surface is sanded and primed, if necessary. When using a special paste-like Mordan, which simultaneously combines the properties of primer and glue, there is no need to additionally prepare the surface for gilding. | ||
| Special products used in gilding act as primers. One of these means is Bolus. The bolus is a special composition for priming surfaces; its purpose is to ensure the tightest possible fit of the foil film to the surface to be decorated. The bolus is available in different colors, which helps to obtain different results in each case. After applying the bolus, the surface must be allowed to dry for several hours. Excess product is then removed using a cloth swab. A special composition is widely used as a primer - Levkas . This is a primer that is most often used on wooden products on plastered surfaces to prepare them for painting and/or gilding. | ||
Application of adhesive compositionThe next step in preparing the surface for gilding is the application of special glue . This can be a mixture of varnish - Mordan , which can be quick and long drying. In the second case, the surface with the applied composition must be kept for over 12 hours before applying the gold leaf. Alcohol-based composition - alcohol polyment , recommended for use on water-repellent surfaces. You can apply the gold leaf after 30 minutes. | ||
| Water-based composition - water polyment, is intended mainly for medium and small gilding jobs. Potal can be applied within an hour after applying the composition, and in some cases even earlier. Water-based mordan is often called glue milk . Such products dry very quickly and the leaf coating can be applied within 15 minutes after application. The composition is applied with an ordinary brush in a thin layer. After applying the glue, the brush is washed with water. Water-acrylic Mordan, on which gold leaf can be applied in just 15-30 minutes, is perfect for beginners. And Paste Glue for gold leaf will find its application in stencil gilding technique. Soon we will prepare for you a Master Class on this fascinating technique. | ||
| Rabbit glue — this product is available in granules for easy storage. This is an animal glue used in the production of many types of gold plating products. You can prepare liquid rabbit glue yourself as follows: dilute 100 g of granules in 1 liter of water in a water bath. The leaf coating can be applied a few hours after applying the glue. | ||
| The adhesive can be applied using bristle brushes or synthetic brushes. Depending on the amount of work to be gilded, brushes can be round or flat, large, small or medium in size. The main thing is to apply the glue carefully and evenly, avoiding smudges beyond the boundaries of the intended gilding area. You should not check the degree of drying of the glue with your fingertips, since after gilding the marks will be visible. It is enough just to follow the instructions for using this or that product. | ||
The moment of applying gold leafOnce the surface is prepared, you can begin applying sheets of gold leaf to the base (you can also use gold leaf chips). When working with gold leaf, it is recommended to use special wide flat brushes called Lampenzel or fan-shaped brushes called Lapka . Brushes are made from ox or squirrel hair, and sizes range from No. 35 to No. 85 and larger. These brushes allow you to pick up sheets of gold leaf and transfer them to the surface to be treated. You need to act very carefully and carefully, since you will not be able to move or remove the gold that has already been applied without deforming it. | ||
| If you are working with sheet material, then it should be applied, trying to cover as much surface as possible. Small parts are gilded, as a rule, with pieces left over from large sheets. You can walk along the surface covered with gold leaf with a piece of cotton fabric, while making gentle pressing movements. Thus, the gold leaf will lie tightly on the base. You can also use tools specially designed for this, for example, a rubber brush for gilding . These brushes are available in various sizes and shapes. They help to carefully glue gold sheets to the surface being processed in hard-to-reach places, for example, in places of artistic carving. When working with potassium chips, it should be poured in an even layer onto the surface to be treated, and then pressed down with a cotton swab. Potassium chips are widely used to obtain new shades of gold or to imitate the effect of aging. | ||
| Excess gold can be easily removed from the surface not covered with glue with a couple of strokes of the brush. These can be special gilding brushes or any synthetic type of flat brush that suits your size. Once the gold has been glued to the surface, there may be a need to revive it. You can add more smoothness and shine to gold through the polishing process. However, gilding can only be polished with agate teeth . It is important to remember that these tools are only applicable to the gesso technique. In other cases, gilding cannot be polished. | ||
Aging process of gold platingThe applied gold plating usually has an overly “new” and shiny appearance. To somewhat dim the shine, give the work a warmer shade and an aged look, use special products, so-called bitumen: Bitumen wax - the paste is applied with a cotton swab, drying time is 7-8 hours. Liquid bitumen - a thick liquid from the professional gilding series is applied with a brush, the excess is removed with a cotton swab. Drying time is 7-8 hours. Thick bitumen - the composition from the Idea “Patina” series has a strong odor, is applied with a cotton swab or sponge. Dries quickly, after a couple of hours you can continue working. | ||
| To age the applied gilding, you can also use varnishes to give an old look. Such varnishes have an amber or dark burgundy color and are used in cases where it is necessary to “gild” silver leaf. For example, this type of varnish includes Mecca Lacquer , which can also be used as a finishing varnish. Varnishes are applied to the surface using soft varnish brushes. | ||
https://www.babyblog.ru/community/post/DECOUPAGE/1699582
…………
Series of messages “theory and practice”:
Part 1 - CREATE A DIAL WITH THE HELP OF PAINT.NET. Part 2 - Without a title... Part 28 - "GLOW" EFFECT IN DECOUPAGE ON WOODEN BLANKS Part 29 - About the use and composition of ganosis - the protector of ceramics Part 30 - ALL THE SECRETS OF WORKING WITH GOLD
Popular brands of glue for gold leaf
In the line of adhesive mixtures there are three brands of the highest quality and popular Mordan for gold leaf:
- The universal mixture "Ferrario" is suitable for gold leaf and gold leaf. The glue must be applied to the prepared surface and wait 20-30 minutes. The mixture does not harden for another 2-3 hours, which allows you to do the work gradually and without haste.
- Kolner Permacoll Size - acrylic composition for long-lasting work with glossy gold plating. Due to its long hardening time, such adhesive for gold leaf is used in large-scale works over large areas and for fine processing of reliefs.
- Tair glue for transfer film is a convenient transparent water-based composition. It is also effectively used for leaf gold leaf and gilding flakes. The characteristics of the mixtion allow it to be used on all types of materials - from plastic and wood to glass and metal. The glue remains sticky for a long time, leaving the master enough time to work.
If there is a shortage of professional glue to fully process the elements, then the industrial glue can be replaced with a homemade compound. To do this, let’s take a closer look at how to make glue for gold leaf with your own hands.
Popular techniques for working with gold leaf
A set of rules and a step-by-step algorithm for gilding products is called a technique.
There are many different techniques, and for one type of gold leaf there are several methods of applying it.
Today, even a novice artist does not experience a shortage of information, since on the Internet you can find recordings of master classes on various topics.
Here are examples of the most popular techniques that use various types of gold leaf.
- Stretching technique. It is suitable for gold leaf flakes, since the artist has the opportunity to form or adjust the leaf layer already on the surface itself. The well-known craquelures are made using the stretching technique.
- Sheet application technique. This is a fairly simple type of gilding, which is used to decorate a large surface area. Sheets of gold leaf are glued to the prepared surface in various ways.
- Creating an invoice. The gold leaf is applied to the surface, and a stamp is placed on top of it. The remaining material is removed, and the leaf coating remains only in the depressions left by the stamp.
- Filling with epoxy resin. Resin has many positive qualities that allow it to be used in various decorating techniques. If you pour melted flakes with a layer of resin or use layer-by-layer pouring, you can get a beautiful volumetric overflow.
- Mixed technique. In this technique, gold dust or flakes are mixed with paint and then applied to the product.
How to make mixtion with your own hands: two recipes
Craftsmen have been using their own secrets for many centuries to prepare Mordan glue. Previously, this art was practiced by icon painters; they found a way out in simple improvised means, creating masterpieces that are still revered by connoisseurs to this day.
And today you can make simple potali glue with your own hands from what you have in the kitchen. Experienced craftsmen use egg whites, garlic juice, sugar syrup, starch and other astringents. We suggest you take note of the two most durable and easiest to prepare compositions, recognized by the majority of decorators.
DIY starch glue
So, you will need a glass of water, 70 g of granulated sugar, 1/3 cup of food starch and a tablespoon of white vinegar. To prepare, follow these steps step by step:
- heat 200 ml of water until warm, dissolve sugar in it and bring the syrup to a boil;
- pour vinegar into the mixture and mix the mixture thoroughly.
- the liquid should be kept on the fire for no more than half a minute;
- add starch to the syrup, constantly stirring the emulsion;
- When the resulting mixtion has cooled, its consistency should resemble sour cream.
The advantages of this composition are that it becomes completely transparent and invisible as it polymerizes. At the same time, a homemade starch mixtion firmly fixes the foil on the surface of the products.
Creamy face for gold leaf
So, mixtion for gilding can also be prepared using milk cream. To create the glue you will need to take 100 ml of cognac and the same amount of heavy cream.
Initially, the components are thoroughly mixed and applied to the surface prepared for gilding. The composition is allowed to dry for 30-60 minutes. After this time has passed, it’s time to start processing the product with a shiny film.
conclusions
Still, the advantages of the material are obvious! Due to the fact that gold leaf is such an interesting and inexpensive material, restorers have a wonderful opportunity to transform ancient treasures: icons, paintings, frescoes, sculptures. And thus, preserve the heritage left to us from our distant ancestors. The potal also allows masters to create new masterpieces!
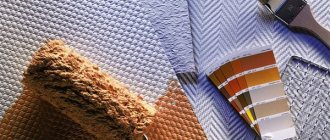
Modern wedding invitation designs. Gilding with gold leaf.
The theater begins with a hanger, and a wedding begins with an invitation. This is the first news of the upcoming celebration, which, in addition to informational and decorative components, concentrates anticipation of the holiday, mood and a hint of the style of the future wedding. Therefore, the reverent attitude of wedding planners, decorators and the future newlyweds themselves to the preparation of wedding invitations is quite understandable.
We all want individuality, originality - so that the invitations make an impression and become the promise of a stylish, beautiful holiday. In search of your own "trick"
It doesn’t hurt to take a look at fashion trends and designer tips for designing wedding invitations.
Perhaps invitations have never been so diverse, stylish, thoughtful and detailed as we see them today. A modern arsenal of materials and techniques allows you to turn this small sheet of paper into a small masterpiece, a work of printing and hand-made art. Among the most popular and already well-known trends are romantic watercolors and elegant calligraphy, delicate pastels and a magical dark palette, minimalist graphics and interesting geometry.
But today I would like to dwell in more detail on another interesting trend that deserves a separate story - gilding. "Golden" invitations
they look very impressive, if not luxurious. However, if you are not a fan of the “expensive-rich” style, then you may like “lightweight” elegant gilding options. After all, gold in wedding printing is glamor, romance, vintage, modern, classic, and minimalism. And, contrary to the popular “gold is cold”, it adds a touch of warmth and, undoubtedly, noble chic to any design.
Gilding goes well with paper of different textures and a variety of decorative techniques and themes: with delicate watercolor and pastel backgrounds or, on the contrary, with dark rich shades, with geometric patterns and floral patterns. Metallized (gold, silver or copper) can be individual words, numbers or the entire text of the invitation, monograms, frames, patterns and other accents.
How can you add a metallic shine to your invitations?
The easiest way is to entrust the work to an experienced graphic designer, who will “gild” or “silver” the layout directly in Photoshop; or send the order to a printing house, where they can print with metallized foil embossing.
Well, for those who value handwork in everything, there are several more labor-intensive, but interesting methods:
- gilding using acrylic paint or metal powder;
- gilding using ink (including dry ink) for calligraphy;
- gold leaf gilding.
With paint and ink, everything is more or less clear: the first one can tint the elements of the invitation, the second one can “gild” (that is, write) the text part. How to work with gold leaf and what can it be useful for?
Potal for gilding is available in flakes, sheets and rolls. For our work, the last two are of particular interest - such a leaf can be free (each sheet is lined with thin parchment paper) and transfer (each sheet is placed under pressure on silk paper or film). It is more convenient to work with transfer gold leaf: it can be easily cut with scissors in accordance with the required size and shape.
In addition to the gold leaf itself, the work requires special glue (it’s called “glue for gold leaf”), synthetic brushes and other tools, depending on which technique will be chosen.
Let's start with the simplest
For example, we are faced with the task of adding a little shine - “gilding” the corners or individual fragments of the sheet. We take the workpiece, apply it with a synthetic brush and evenly distribute it in the right place with glue for the gold leaf. Let the glue dry a little until it becomes “tack-free”.
Apply gold leaf to the areas where the glue is applied and lightly press it to the surface. If you are working with loose gold leaf (without a backing), be careful: it is very thin and can easily fly apart. And again leave for a few minutes. Then, using a dry, hard brush, we smooth out the layer of gold leaf again and remove any excess that has not stuck to the surface.
Such careless gilding goes especially well with the now equally fashionable watercolor paper with torn edges. Using this technique you can make invitations, seating cards, and menus.
In this way, large areas can be covered with gold leaf, but in this case it is better to use transfer gold leaf. The sequence of working with it is the same: it is applied to the adhesive layer and pressed to the surface, after which all that remains is to carefully separate the backing.
Transfer potal can also
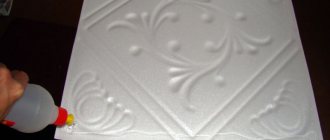
- using decorative stamps
: apply gold leaf glue to a relief stamp with a pattern you like, leave the impression on the paper (and immediately wash the stamp), put gold leaf on top of it, press it, separate the backing; - using stencils
: apply the stencil to a sheet of paper like paint, apply glue through the stencil, separate it from the paper (and immediately wash it), apply and press the gold leaf, separate the backing; - using double-sided tape
: glue thin strips of double-sided tape to the paper, apply gold leaf, press, separate the backing.
Gilding with tone-sensitive foil
And finally, another method of gilding - using the so-called tone-sensitive foil
, which is sold in rolls of different sizes. In addition to this, you will need a laminator to work. You can purchase the simplest inexpensive device or, if possible, rent it.
To begin, choose a black and white drawing or text with clear lines. We print it on a black and white laser printer. The printer you need is a laser one, not a full-color one, and the paper is thick, but not designer or textured. Cut a piece of foil of the required size so that it covers the printed picture or text. We put foil on it, and cover it all with another clean sheet of paper on top.
Now the resulting “sandwich” must be passed through a heated laminator. And then all that remains is to carefully separate the foil - it should remain only on the printed picture or text. If the foil does not stick in some places, you can cover the design with foil again and run it through the laminator again.
Some masters advise: if it is not possible to use a laminator, you can use an iron instead. But there is no guarantee that the golden print will be transmitted as clearly and evenly.
As you can see, there are many ways to add a golden sparkle to your wedding invitations and turn them into truly treasured creations.
How to glue transfer metal: instructions
In order for gold-plated products to retain their luxurious appearance for a long time, the selected element must be properly processed. We present step-by-step instructions on how to work with gold leaf:
- Before starting the main work, the surface must be cleaned of dirt and degreased.
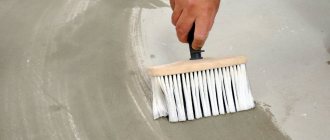
- After this, the treated area and complex relief details are carefully coated with glue.
- Then the adhesive is allowed to dry for some time in accordance with the instructions.
- Next, a layer of gold plating is carefully applied. Most often, in the processing of decorative elements, a convenient gold leaf is used in the form of a thin film with a protective layer.
- To transfer the foil to the surface of the product, the protective layer is removed from one side of the sheet. After that, the gold leaf is applied to the surface treated with glue and the film is smoothed with a special tool. Basically, a medium-hard art brush or a cotton swab is used for this.
- When processing is complete, excess material is removed.
To protect the gold-plated surface from mechanical damage and extend the service life of the product, use gold leaf varnish. Professionals recommend using shellac, created specifically for metal surfaces.
In addition, acrylic mixtures are also suitable for similar purposes. But it is better to avoid water-based varnishes so that the film does not oxidize.
Features of the material, pros and cons
The material is used by craftsmen in decorative and applied arts. It is used to process and decorate products made of wood, metal, plaster, ceramics, cardboard, and glass. The material comes in bronze, gold and silver shades. The application technique is not easy and requires the skill of the author and special tools. Depending on the type of gold leaf, it is used on different scales of production, from handicrafts to large factories.
Positive qualities of the material:
- helps to paint outdated interior items in gold, bronze and silver;
- unlike the original metal, it is inexpensive;
- easy to use;
- can be used to decorate dishes;
- analogue of gold leaf;
- helps create a mirror surface.
What does gold leaf look like?
The only drawbacks that the craftsmen highlight are the fragility of the material. In order for gold leaf to serve for a long time, decades, it is necessary to occasionally apply a new layer of gold leaf.
Some useful tips
For those who have only recently discovered the art of gold leaf gilding, we remind you of a few simple rules. These recommendations will help you achieve better results and avoid annoying mistakes in your work:
- The simplest but most important tip for working with gilding glue is to carefully study the instructions. Even if you have already worked with homemade formulations, still be sure to read the manufacturer's recommendations. Usually the bottle describes in detail the rules for using glue, timing of work and precautions.
- When applying gold leaf to an artwork, use gloves. Delicate foil fits the base well. However, for complete accuracy, protect the coating from foreign marks and stray fingerprints, and protect your skin from contact with sticky substances.
- If you are just learning to work with film gilding, then in order to save money you can train on homemade compositions. But on the other hand, a high-quality industrial mixture will allow you to better master the intricacies of the work and achieve excellent results without the threat of spoiling the surface.
Finally
If you like to do elaborate work with gold trim, then be sure to try professional materials. Only special compositions will allow you to achieve an impeccable decoupage effect.
In Moscow, varnish and glue for gold leaf are available for purchase in art and design shops. In addition, it is convenient to order the required adhesive composition in specialized online stores. Choose the type of product you need and do what you love with inspiration.
For those who want to learn how to work with gold plating or hone their skills, we recommend watching the video instructions on how to glue gold leaf:
The main stages of gilding products
The process of gilding is not only complex, but also fascinating. Due to the fact that gold leaf, in whatever form it is used, produces beautiful shimmers, many beginning artists dream of getting to work as quickly as possible, without getting acquainted with the basic introductory principles.
Meanwhile, the sequence of stages plays a decisive role, and it is very easy to spoil the result of many hours of work.
During the gilding process, care and attention must be exercised. There is no rush here, since each layer of material applied to the surface must dry well.
If it is necessary to remove excess from the surface, then this is done with a soft cloth, and the sooner the better.
At the preparation stage, all necessary tools and materials are collected. Potal is usually sold in a ready-to-use form. All that remains is to do some work on the surface. It is cleaned of dust, degreased, and then a primer is applied.
It is important to completely dry the soil, otherwise it will come off along with the gold leaf during work.
The next step is applying glue. The surface is covered with glue only after the soil has completely dried. As for this stage, there can be no temporary norms here.
Different types of adhesives have different hardening times, so you need to carefully read the instructions from the manufacturer and do not use materials packaged by third parties.
Everyone, without exception, considers the stage of applying gold to be the most important. If you are working with sheet material or flakes, then you need to pick up the sweat particles with a lamp and place them on the surface so that they overlap each other.
At this stage, the main thing is accuracy and precision of movements, since you will no longer be able to move the particles. If you try to adjust the position of the sheets, they may become deformed. The gold leaf is smoothed over the surface with a soft cloth, but it is better to use a core brush for these purposes.
Large portions of flakes should be applied to the surface in an even layer. Subsequently, the flakes are pressed down with a cotton swab. Excess can be removed using a regular brush. There may be gaps on the surface where the sweat flakes did not fall. This is quite common.
You can close these gaps in small portions by moving them with a fan-shaped brush.
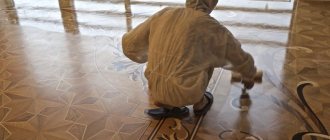
If gesso (a mixture of chalk and fish glue) is used as a primer, then the surface can be polished. After this procedure, it will become smoother and shiny. Polishing begins from the corner, moving diagonally and covering an increasingly larger area. Choose a soft, lint-free fabric. It smooths out all seams and irregularities.
In the vast majority of cases, surfaces after gilding are treated with varnish. It adds extra shine and also protects the layer of gold leaf. The varnish is applied in two layers, and if the first layer was applied in one direction, then the second must be applied in the opposite direction.
It is important to carefully review the result of your work so that there are no areas left uncovered with varnish.
Potal flakes
There is a special type of gold foil - in flakes, its leaves are smaller than traditional ones. The flakes are available in three shades: brown, green and red. They work with flakes in the same way as with leaf gold, but for greater effect they usually make the background using acrylic paint.
In the gilding technique, you can use art markers or metallic colored felt-tip pens. They have rods of different diameters, which allows you to significantly diversify your work, for example, to draw the details of an image. You need to draw with a marker without hesitation, applying the same amount of effort. Before use, shake it slightly without removing the cap.
An example of gilding a painting
The interior painting is intended for decorating a living space. It can be of different themes, and in each of them there is a place for such a technique as gilding.
For work you will need the following materials and tools:
- Canvas (preferably primed and stretched on a stretcher);
- Acrylic paints;
- Palette knife;
- Brushes;
- Texture paste;
- Potal leaf;
- Gloves;
- Soft matter;
- Glue;
- Varnish.
The basic colors of the room's interior dictate the list of colors in the palette.
Thus, the artist paints a picture for a specific interior. It is necessary to think about not only the tones, but also the place where the future work will hang.
There is no need to describe in detail the process of drawing the image, since the main attention is now paid to the gilding process. This type of decor is perfect for still lifes, landscapes and even abstractions. There are no restrictions on the content, since everything depends on the artist’s imagination.
Texture paste is used to give the image volume.
You need to have a certain skill to work with such material.
It is pre-mixed with the desired paint and applied to the canvas with a brush. You can start gilding only when the entire paint layer has dried. On those areas where it is planned to apply gold leaf, a layer of glue is first applied. More detailed information about the exposure time and layer thickness should be indicated in the instructions for use.
The gold leaf is transferred to the canvas very carefully, and then it is smoothed using a special brush. Excess gilding must be removed. The picture can be modified if necessary. After all the manipulations, the work is coated with colorless varnish.
Alcoholic
The alcohol-based composition is characterized by stable and long-lasting stickiness of the adhesive layer (tack-free). Thanks to this, the gold leaf can be glued within 48 hours (SP series products). After fastening, the surface will need to be coated with protective compounds to increase wear resistance.
Interesting fact Mordan was originally an oil glue for gold leaf. However, over time, the meaning expanded, and today on price tags Mordan is any composition for both gold leaf and gold leaf.
What is potal
Potal is a decorative material that is used in painting, decoupage and other applied techniques to imitate real gold when gilding paintings and objects.
Although gold leaf looks and feels like gold, it does not contain gold metals and is not a piece of jewelry. This is why decorative artists love her so much. After all, at a relatively low cost, when used correctly, gold leaf can work wonders and decorate any object or picture.
Due to the fact that gold leaf comes in several types and colors, you can create unique effects and combinations in your works!
Potal comes in several forms, for example, in sheets, crumbs, and liquid. Below we will look at all the main types of gold leaf, their properties and how to use them.
Also, the gold leaf has several colors. In addition to gold, there are also silver and bronze colors, which in turn, depending on the manufacturer, may have their own shades.