Author: Color Laboratory
Filling your home with comfort, harmony and beauty is what every person strives for. A material such as ceramic tiles will help make the floor in your apartment clean, practical and original. This is a durable and strong material that is wear-resistant. But despite these positive qualities, the consumer may encounter some problems.
Due to the fact that the tile has a porous and rough surface, it takes a long time to dry, and caring for it takes a lot of time.
Over time, tiles (even expensive ones) lose their attractive appearance. Spots, scratches and chips begin to appear on its surface.
The matte finish of the tiles is often damaged. Having a porous structure, the material, like a sponge, absorbs moisture and dirt. It can be quite difficult to remove the resulting plaque without damaging its surface.
Tile varnish will help keep the room fresh and clean for a long time. It will protect the surface from damage and the design from fading.
Why varnish tiles?
Beautiful surface cladding with high-quality installation does not require additional processing. The aesthetics of the coating largely depends on the appearance of the tile or ceramic, its palette, the design of one fragment, and the overall pattern. When getting started, it is important to read the label recommendations for applying floor tile varnish. Experiments by designers and decorators led to new “discoveries.” For example, we tried all the options for the design under the self-leveling floor – from photo wallpaper with a 3D effect to ceramic cladding. The tiled floor showed better qualities, and the protective cladding looks new.
Important! Tiles are made from white clay, ceramics are made from red or terracotta, porcelain stoneware is a harder material due to release technology.
If you use varnish for tiles, the protective coating will give the surface new properties:
- glossy effect;
- filling all the seams that are inevitable when joining piece facing material;
- the opportunity to modernize the interior using an accessible method;
- protection against abrasion and mechanical damage;
- extending the service life of expensive imported material.
Note! A high-tech coating based on acrylic “wet stone” has been developed, which looks very realistic in swimming pools, in places where flower beds are watered, near fountains, and artificial ponds.
Varnish is not applicable in all cases. Fireproof cladding should not be treated - it may ignite near a fireplace or other open hearth.
Additional recommendations
For work on Tuscan tiles, terracotta, and highly absorbent coatings, it is recommended, if possible, to avoid using varnish until the adhesive has completely cured. The curing process can take months. When laying on a dry screed with cement adhesives, the curing time is significantly shorter.
Before varnishing clinker, it is recommended to first treat the seams. Then, after finishing with varnish, the surface will look perfect if you decide to varnish the tiles.
There is a special varnish for processing stone - wet stone. It will reliably protect natural or artificial stone from aggressive influences.
When it is not possible to replace old tiles with new ones, then using varnishes you can give the floor or wall a completely new look. If the tiles have just been purchased, then the varnish coating will help protect them from moisture, from various mechanical influences, and from temperature changes. Varnishing will give a positive effect, and if the result is not to your liking, you can paint it. The varnish is also good because it can be applied independently.
Should I use tile varnish (2 videos)
One of the methods of additional protection of the floor covering is tile varnish. This processing method is not widely used. Designers suggested using polymer self-leveling floors, as well as self-leveling mixtures. The tile floor gave the best results as a base.
Pros and cons of varnishing
Dirt and small debris easily accumulate in the spaces between the tiles; they are difficult to deal with, especially if it is a hallway or kitchen. Poor-quality installation loosens individual fragments and they fall off over time. The cement base crumbles, liquids seep through the seams, and moisture destroys the floors. Varnishing will eliminate many imperfections. Advantages of varnishing tile floors:
- protection of porous material from temperature changes and high humidity;
- the old coating will become more attractive and less slippery if the varnish has a “roughness” (read the packaging carefully), which is important in a swimming pool, bathroom or kitchen;
- filling seams;
- the dense film that forms after drying fixes the tile on the surface, counteracting the displacement of individual fragments;
- This is practical; a surface treated with a transparent composition is much easier to tidy up in any other way (wash, clean, vacuum, sweep).
It has its drawbacks - over time it will become covered with small scratches, potholes, and cracks will appear from “situational” influences. Scratches disrupt the glossy effect.
The procedure for painting work
Before painting begins, it is necessary to replace or repair any damaged tiles, if any. The painting process itself is quite simple and consists of several steps:
- Surface cleaning. Before starting work, the tiles must be washed with detergents and degreasing agents and passed over the entire surface with a metal sponge. You can use regular sand, sprinkling it on a sponge and wiping the surface. Sand or a metal sponge will create small scratches on the glaze, which are necessary to increase the adhesion of paints and varnishes.
- Surface grinding. Is it possible not to plaster polystyrene foam for the winter? Even the best tile paint will not adhere to a smooth glaze. To remove the glaze, sandpaper is used, which is used to rub the surface of the tile until it is matte. Ideally, you can use a grinder or grinder. Also carefully sand the seams between the tiles, as this is where dirt accumulates.
- Primer of tiles. After sanding, wipe the surface with a damp cloth, allow to dry and apply a layer of primer using a brush. Monitor the quality of the primer application and avoid drips, especially at the seams, if you are priming the wall surface. Use an epoxy-based primer; after hardening, sand the surface again with fine sandpaper.
- Surface painting. The final step is to paint the floor tiles using the paint of your choice. It is better to apply the paint with a roller, squeezing it thoroughly in the bath. If the paint contains little coloring pigment and it does not cover the old color in one layer, then the first layer is applied with a rag roller, and all subsequent layers with a foam roller.
Varnish selection and step-by-step application instructions
It is easy to make a mistake with the consumption of the varnish mixture - each type of tile has its own porosity indicator. The absorption of the composition will vary; the thicker the varnish, the less it is absorbed.
Helpful advice! The varnish consumption should be indicated on the packaging, but if the tiles have reliefs and chamfers, multiply by 1.5.
It is advisable to buy varnish with a small supply. It’s better to let it remain than to look for 1 can at points of sale until the work process is completed.
Helpful advice! Choose a two-component varnish that has fine ceramic fractions to fill small cracks.
This is an acrylic base containing tiny ceramic chips. Actively absorbent tiles are varnished twice. The paint and varnish mixture must meet the following parameters:
- gives an even coating without sagging or drips, with the effect of filling minor defects and scratches;
- have high abrasion resistance;
- preserves and enhances color without the obsessive yellowness that often occurs with wood varnish;
- does not require pre-treatment of the tile with any mixture, with the exception of a primer from the same manufacturer.
When preparing a room, it is important to remove all foreign objects in advance (they can absorb odors) and thoroughly clean the floor (or wall) before painting. You will need the following working tools:
- a roller with a suitable attachment and a tray suitable for it in width;
- paint brushes of different sizes;
- dry rags and sponges (for cleaning surfaces);
- medium-grain sandpaper (to smooth out uneven areas at joints);
- sufficient quantity of varnish;
- solvent (to remove residues from tools and hands).
It is important to take all safety measures into account when working. Varnishes contain volatile, flammable substances - smoking and the use of an open fire in the room where painting is intended are prohibited. It is necessary to work in a well-ventilated area without drafts. To protect your skin from varnish and your respiratory system from caustic fumes, it is recommended to wear:
- respirator;
- protective glasses;
- work gloves;
- workwear.
Laying floor tiles with click joints
1. First, lay an insulating coating against impact noise (for example, penofol) and carefully glue the joints with metallized tape | 2. Then lay the first row of slabs, keeping a distance of 10 mm from the edges. To maintain the required distance, use spacers |
3. Separate elements must be joined in such a way that each subsequent one is joined along its length with the two previous ones, due to which the installation will be stable; such tiles are not laid in a staggered manner, like laminate | 4. At junctions with other floor coverings, transition profiles consisting of two elements are installed. The lower element is attached to the floor using dowels (if there is a floor heating system, it is fixed using assembly adhesive). Then the upper facing element is inserted into it |
5. The same strips can also be used as skirting boards. To do this, remove the protective film from the back side with adhesive tape and stick them to the wall. | 6. Fill the seams generously with elastic joint compound from the tube. One tube is enough to process seams in an area of approximately 1.5 m² |
7. The grouting compound protruding above the tile surface is carefully removed using a plastic trowel; The tiles are thoroughly wiped with a damp sponge. | 8. Due to the relatively large structural height (the thickness of the tiles with click joints is 15 mm, plus a 3 mm thick impact noise insulation coating), the door and door frame will have to be shortened. The tile must be turned, placed under the box and cut to the required length with a hacksaw |
9. To trim tiles, you will need a carbide cutting (friction) disc. For small cuts it is recommended to use special saw blades. It is better to carry out pruning outdoors, as this produces an extremely large amount of fine abrasive dust. |
Composition of the varnish mixture
Typically, varnish for ceramic floor tiles is made from acrylic resins with the addition of very small ceramic particles. In addition, the tile varnish may contain polyurethane polymer substances that are dissolved in an aliphatic solvent.
Depending on the composition, glossy and matte varnishes for tiles are produced. On a matte surface, dirt is less visible, while a glossy finish is shiny, reflects light well, and looks very attractive. Regardless of the type of gloss, each composition has a high level of strength and wear resistance, protecting ceramic tiles from damage.
Laying ceramic floor tiles with glue
1. The adhesive for laying ceramic tiles is thoroughly mixed in a bucket using a drill and a mixing attachment until all lumps are completely mixed. Always mix just enough to use in approximately 40 minutes of work. | 2. First you need to lay a row of tiles along the wall. Spacer crosses will help maintain the same distance between tiles, approximately 5 mm |
3. When tiling the floor in niches, first lay whole tiles, and then cut ones | 4. Floor tiles with a thickness of 8 mm can be cut well using a manual ceramic tile cutting machine (tile cutter) |
5. Seams must always remain clean when laying. Fresh excess adhesive for laying ceramic tiles should be removed using a piece of wood, and the edges of the tiles should be thoroughly washed. This makes it easier to sand the seams later. | 6. After the tile adhesive has dried (approximately 24 hours), apply grout and work it into the grout using a rubber trowel, alternating strokes along the grout and diagonally. The seams are rubbed without applying strong pressure |
7. When the grout begins to dry, begin removing cement slurry from the surface of the tiles using a board with a sponge and a large amount of water. | 8. In rooms with high humidity levels, such as kitchens and bathrooms, it is recommended to glue ceramic tile baseboards. Spacer crosses placed underneath will help maintain the required distance from the floor of 5 mm. These seams will subsequently need to be covered with a putty mass that retains the ability to remain elastic for a long time. In residential premises it is enough to use ordinary wooden skirting boards |
9. Insert two spacer crosses on each side of the tile, as close as possible to the “crossing” of the joints. It is better to insert them vertically, then later it will be easier to completely remove them |
Area of use
Tile varnishing is used for the following types of coating:
- cladding with cement-based joints;
- ceramic tiles that absorb moisture, for example, varnished Tuscan tiles or terracotta;
- protection of natural stone or bricks;
- treatment of concrete surfaces, including walls and floors;
- agglomerated or natural stone, all kinds of paving slabs;
- processing of clinker tiles.
Why do you need paint for tiles video
Correctly selected and applied paint to the surface of the tile will allow you to achieve a very good result and return the surface to its former shine and beauty.
Additional Information:
Step 6. Varnishing. This item is optional. It is worth resorting to it only if the painted area will be exposed to aggressive influence. You need to make sure that the varnish does not corrode the painted surface.
It doesn’t hurt to test their compatibility in advance - for example, on a piece of plywood or glass.
For professional decorative finishing of surfaces used indoors, as well as wallpaper, stone, plaster, plasterboard, brick, aerated concrete, ceramic tiles, foam plastic, chipboard, fiberboard, wood. They can be tinted with water-based pigment pastes; the recommended tinting system is VAK-COLOR, NCS, RAL, etc.
But tiles also have one significant drawback. Anti-corrosion paint for metal, reviews? Its essence is that over time the coating becomes less attractive, since the peculiar conditions of use negatively affect the color.
This problem can be easily solved; you just need to coat the tiles with paint.
- Major painting. Involves a complete color change.
- Color update. The color background does not change, and the only purpose is to update the existing paint layer. You just need to make the color background more intense.
- Creating drawings or patterns. It is performed both on the old layer of paint and on the new one.
Walls can be painted using the techniques of landscapes, abstractions, still lifes, and portraits. Drawings are applied using stencils or created independently. Patterns can be applied to individual fragments of tiles or to the entire area. When the color is updated, it becomes more saturated.
If you decide to completely paint the tiles in the bathroom, replacing the color, patterns, designs, images, ornaments, then this work is considered major. The method is selected depending on the purpose of staining.
Advantages and disadvantages
Varnishing ceramic tiles provides many undeniable advantages. After the varnish dries, a thin but very durable protective layer is created on the surface. Varnishing tiles, especially old tiles, can make them attractive again and save money.
In addition, in some cases, after varnishing, the floor covering becomes less slippery.
If you varnish tiles that are in conditions of excessive air humidity and temperature fluctuations, the acrylic varnish mixture will protect the material from gradual destruction. How to varnish terracotta tiles for stoves? The varnish fills all the microcracks and pores located on the surface of the new or old tile, as a result it remains protected from the absorption of moisture and water. After varnishing, it is much easier to care for the surface, since a flat and smooth wall or floor becomes dirty very slowly, and cleaning is done very quickly.
After using tile varnish, this material will not fade, that is, its shade will not change over time, thanks to which the tile remains attractive for many years.
If you do not follow the varnishing technology and apply the varnish mixture incorrectly, the appearance of the coating will be ruined. And if you varnish a floor that a huge number of people walk on every day, the coating will wear off very quickly, despite the fact that it is durable and reliable. The old varnish layer, which has completely hardened, is quite difficult to remove.
How to properly paint tiles in the kitchen
Is it possible to glue tiles onto regular chipboard? Is it possible to lay tiles onto chipboard on the floor?
Painting ceramic tiles in the kitchen with your own hands is quite easy and quick. You can also do a very beautiful painting that will highlight the overall design of the room. This option is considered the most budget-friendly option for updating tiles.
It is possible to very quickly improve the condition of tile joints.
- Paint;
- Treat with vinegar solution;
- Replace grout.
After painting the tiles, it is important to know what to do with the seams. Light-colored tile joints darken very quickly, lose color and become covered with a greasy coating
The easiest way is to paint the seams between the tiles.
The most ordinary paint or marker will do for this.
Before painting, you need to thoroughly clean the seams from dirt and dry them well.
If the seams between the tiles are darkened, then most likely the reason is the formation of mold. You can clean it with a weak vinegar solution.
Then carefully wipe the seams with a soft cloth or sponge.
The most difficult and reliable method is to replace the grout. To do this, you need to remove the top layer of the old grout and apply new putty.
Consumption
The consumption of tile varnish depends on how quickly the material absorbs liquid, as well as the temperature and humidity of the air. If the liquid is absorbed very quickly, you will have to varnish in several layers. In addition, in order to achieve the desired aesthetic result, it may be necessary to apply not one, but several layers of varnish; thanks to multi-layer varnish, the shade of the surface will change.
Methods for laying living tiles
There are several ways to lay tiles. It is placed on a mixture of glue, secured with tape, and if the room area is large, the tiles are laid on U- and H-shaped profiles. The latter method makes it easy to lay and dismantle a living floor.
The tiles are also combined with other flooring materials, for example, laid in the form of a circle in the center of a room covered with carpet.
An example of an interesting insertion of interactive tiles was the Google office located in Chicago. Since the Google office itself is filled with ball-shaped objects, the designers decorated the floor with separately placed yellow-green round interactive tiles.
When laying liquid flooring you must:
1. Calculate the floor area and select the size of the tiles, as well as their quantity.
2. Prepare the surface for laying the living floor. This stage must be approached responsibly. The quality of laying interactive tiles depends on the prepared surface.
It is important that the surface is hard, smooth, even and horizontal, and also has load-bearing capacity. If the surface is on a slight slope, the color on the tile will be unevenly distributed.
Therefore, it is better to level the base with leveling mixtures and let it dry so that the surface becomes durable.
The tiles are laid on a dry base, and the humidity level should not be higher than 3%.
3. Prime the base of the floor.
4. Lay the tiles. The mixture for the tiles is made independently; for this, dry glue is mixed with water, or a ready-made two-part glue is purchased. It is better to purchase polyurethane-based or water-based glue. Plastic mixtures are applied if the interactive tiles are placed on a wooden base, as well as on a “warm floor”.
The glue is applied in a layer of 3 mm.
Temporarily the tiles are laid using tape. It should be double-sided and cotton-based. The tape is cut into small pieces and glued around the perimeter of the living tile.
The gaps between the tiles are sealed with a colorless sealant that contains silicone.
Note! It is not recommended that the tiles be exposed to direct sunlight while laying the tiles. Intense heat promotes expansion and deformation of the coating
But if the floor is laid under hot rays, it is necessary to leave small gaps around the perimeter of each tile. As the temperature changes, it will contract and expand without spoiling the appearance.
As you can see, liquid tiles combine modern technologies, environmental friendliness and aesthetic beauty. It is easy to install and maintain. And most importantly, interactive tiles will make the interior ultra-modern, surprising and memorable.
Varnishing tips
If you need to varnish terracotta tiles or Tuscan tiles or any other surfaces that quickly absorb liquid, you need to wait until the adhesive has completely hardened, otherwise the shade of the tile may fade. Sometimes you need to wait from several weeks to several months. But if the installation is carried out on a dry concrete screed, or cement-based adhesive is used, then the waiting period is significantly reduced.
It is not recommended to apply varnish to floor tiles in a very thick layer. It is better to apply 2-3 thin coats than one thick coat. You need to varnish evenly, avoiding gaps, and you should not allow sagging or the appearance of puddles, which will be too visible on a light-colored material.
You can varnish with a regular piece of fabric.
Attention! It is highly not recommended to varnish a material whose base is not protected from moisture penetration.
It is allowed to varnish the tiles only after they have been cleaned of any contaminants, including cement residues, dirt, dust, grease, etc. The seams must be aligned. The varnish must be applied only to a dry and clean surface.
Instructions for use
Before applying varnish, it is necessary to prepare the floor surface. It must be completely dry and free of dust or other contaminants. Any remaining cement must be removed and the seams leveled.
The material is applied using soft gauze. The piece must be perfectly clean. The fabric should not have lint. A soft brush will also work.
Apply the varnish as evenly as possible. Do not pour out all the material at once and then distribute it - this can lead to sagging and stains. Then the layer is given time to absorb - 2-3 minutes, the excess is removed with a rag.
If terracotta, Tuscan tiles and other highly absorbent materials are being varnished, the surface should be treated one more time to obtain a high-quality result. If the tile absorbs poorly, then the composition is applied only with soft fabrics to avoid streaks that can spoil the result.
After 12 hours you can start walking on the floor. If this material is used on a wall, then the principle of application is the same.
These coatings can also be used for pre-treatment of Tuscan tiles and easily absorbent tiles before laying them on an adhesive or cement mixture. This will help remove the finished tiles. But terracotta should not be pre-treated - there is a risk of fading.
Rules for applying varnish
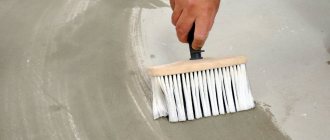
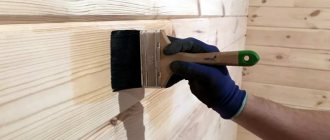
The varnish composition can be applied to floor or wall tiles using a brush, tassel or piece of soft cloth. Is it possible to coat paving slabs with varnish? If fabric is used, it should be lint-free.
The composition is applied in an even layer; experts do not recommend using the pouring method, since if you pour the varnish onto the floor, then it is quite difficult to distribute it in an even layer on the base, as a result stains and sagging will appear.
When the solution is applied, you need to wait 10-15 minutes for the mixture to be absorbed, after which the residue is removed with a rag or rag. If you are varnishing Tuscan tiles or terracotta, you must apply two or three layers to achieve the desired result. If the material is smooth and practically does not absorb liquid, then you need to use only a soft cloth to avoid sagging, which will definitely ruin the appearance of the floor.
After 12 hours of varnishing, you can begin to walk on the floor. The process of applying varnish to wall tiles is exactly the same. Experts say that tile varnish can be used to varnish various quickly absorbing materials before gluing them to a concrete base, or before creating seams. Pre-varnishing will make cleaning much easier.
However, there is no need to pre-varnish terracotta, as it may fade. Under normal conditions, the consumer characteristics of tile varnish compositions are maintained for one and a half to three years. When all work is completed, clothing, skin and tools used must be immediately washed with some solvent.
Choosing floor tiles for the shower
A bathroom or shower room is a place where people can not only take a bath or shower, but also recharge their batteries before work and relax after a hard day at work.
Therefore, it is important to decorate this room beautifully and stylishly. It is better to tile walls in damp rooms
Which tile to choose? What are the rules for choosing bathroom floor tiles?
- When choosing tiles with a pattern, it is recommended to purchase products with a small pattern for tight spaces and vice versa.
- The tiles themselves for the bathroom are also selected according to the size of the room. For small bathrooms, large tiles with dimensions of 25 mm and above will not be suitable, since the seams between the floor elements will be noticeable.
- If you want to visually increase the size of the room, it is recommended to choose rectangular tiles for the bathroom. At the same time, if you need to increase the length, then the bathroom floor tiles are laid with the long side along the walls.
- It is better to choose matte tiles for the floor, the coating of which is less slippery when wet.
- The choice of bathroom floor tile color depends on the lighting. If it is bright enough, the flooring will have a natural color. And in dim light, the flooring will look dark.
- Light colors increase the size of the room, so it is not recommended to use dark finishes in a cramped bathroom.
Bathroom decorated in light colors
For a bathroom, it is better to avoid black tiles altogether, since stains that remain after water are clearly visible on its surface. It is better to choose green and yellow tones for a room made in bright colors.
Bathroom floor tiles in green tones
- Bathroom floor tiles look harmonious with skirting boards or steps from the same collection. This set costs a little more, but it will be fully paid for by the beautiful appearance of the bathroom and the long service life of the flooring.
- To ensure that the flooring lasts a long time, it is recommended to choose products with a thickness of 0.9 cm or more.
- If you plan to decorate both the floor and walls with tiles, then it is better to immediately purchase all the material.
Laying bathroom floor tiles is not particularly difficult and you can do the job yourself.
Installing tile flooring will create a beautiful and durable floor that is appropriate in bathrooms decorated in any style.
Safety precautions
When working with paints and varnishes, the following rules must be observed:
- You can only work with safety glasses and rubber gloves;
- It is recommended to wear a respirator that protects the respiratory system from harmful varnish vapors;
- storing varnish solution is usually allowed at temperatures from +5 to +25 degrees;
- It is prohibited to apply the composition near an open flame; you cannot smoke near an open container;
- the remaining mixture must not be discharged into the sewer system;
- the room where the varnish mixture is stored must be well ventilated;
- During the application of varnish, the room must be well ventilated.
Areas of application and technical parameters
Varnishing of tiles is used for the following coatings:
- absorbent ceramic tiles (for example, Tuscan tiles, terracotta, etc.);
- cladding with seams based on cement grout;
- cladding made of natural stone or brick;
- concrete floors, coverings made of natural and agglomerated stone, as well as paving slabs, etc.
This type of varnish is usually made on the basis of acrylic with the addition of very small particles of ceramics. Also, the tile varnish may include a urethane polymer dissolved in aliphatic solvents.
After drying, the treated surface becomes glossy and much stronger, which helps prevent mechanical damage.
The tiles are coated with a protective varnish to avoid fading and various mechanical damages.
How to apply protective compounds
To apply protective agents, brushes or a roller are used. After application, the composition must dry, usually this takes from 2 to 5 hours, then a second layer is applied. After this, a thin transparent film is visible on the surface, which soon becomes invisible, while the floor covering is protected. When the work is completed, after a day wipe the surface of the tiles with a dry cloth, now the floor is ready for use again.
There is nothing complicated in such work, see this by watching the video:
Source
Basic rules for caring for porcelain stoneware floors
If on ceramic granite
If minor stains are noticeable, remove with a wet or dry cloth. If the stains are quite complex, then use cleaning products that contain acids. Maintenance of such floors is carried out without the use of abrasives, which are used in extreme cases.
After all, despite the greater strength of the material, the abrasive particles that are present in detergents cause to the tiled surface .
Dirt brought from the street on the sole of a shoe also acts as an abrasive material, especially if it contains sand, so it is always necessary to clean porcelain stoneware floors in order to prevent subsequent contamination, which is more difficult to deal with. If the dirt is dry, vacuum it up and then wipe the floor with a wet cloth. If you regularly and well take care of such floors, then they will serve faithfully for many years and will not lose their beautiful appearance throughout the entire period.
But tiles made of polished ceramic granite
need serious care, since the slightest scratch or insignificant chip is visible on the glossy
tile surface and distorts the appearance of the floors. Polished ceramic granite should be cleaned regularly using a vacuum cleaner, soft brushes and wiped with a wet cloth. It is better to use a product designed for cleaning ceramic granite, polish small defects on the tile surface and give the flooring a beautiful appearance. What varnish should I use to coat gypsum tiles to look like stone for interior decoration?
After such finishing, the seams will not be damaged, since the polish does not contain acids.
Treated and untreated tile surface
Features of care
New flooring made of polished and semi-polished porcelain stoneware must be looked after especially carefully during the first three to four months of use. Wash the surface of the tiles with an acid solution to preserve the visual appeal of the products, because when dirt accumulates in the micropores on the cut surface, then the floor covering will become dull and ugly. Before treatment, coat the tiles with a water-repellent agent, because a polished surface is more exposed to moisture than a matte one.
Unpolished Tiles
In those places where there is the most contamination, it is better to use matte porcelain stoneware cladding. To clean glossy surfaces, do not use products that contain acids and organic fats, because after their use a film or unsightly coating will form on the floor surface. In rooms where high levels of humidity prevail, after treatment with this composition the glaze will lose its shine and an environment that is comfortable for mold and bacteria will begin to be created.
Polished porcelain stoneware flooring
Benefits of using protective and cleaning products for porcelain tiles
High-quality protection of porcelain tiles will extend the service life of the material, so you should not save money on compounds that provide protection to the floor covering. Today there is a large selection of impregnations that ensure the safety of tiles. The advantages of such funds are undeniable:
Attention! Impregnation, which provides care for porcelain stoneware, creates a long-term effect: after applying several layers, you can not repeat such actions for a long time. However, when applying the composition, it is necessary to first test it on a small area of porcelain tiles.
Why do we need impregnations for porcelain tiles, application methods and types?
Porcelain tile is a durable material that is not afraid of negative influences. Currently, porcelain tiles are used for flooring, this is not surprising, because such a material is characterized by high strength characteristics and an excellent degree of wear resistance. But to maintain the attractive appearance of the flooring and extend its service life, proper care is required.
receipts for inflating the cost of an apartment
The material itself is not afraid of contamination, however, tile joints are sensitive to aggressive environments, quickly become dirty, and in the event of strong mechanical impact, destruction occurs. Therefore, such flooring should be constantly monitored and properly cared for using a special cleaning agent.
Conditions under which surface varnishing is not permissible
In most cases, applying varnish to ceramic tiles is not recommended:
- If the tile adhesive has not cured enough. It takes at least one month for the glue to set. To speed up the process, it is recommended to lay the tiles with cement adhesive, which will reduce the waiting time.
- If the surface is poorly insulated from moisture, applying paints and varnishes is also not recommended.
Summarizing the above, we can say with certainty that varnishing a tiled floor
tiles are a method of changing it and increasing its service life. But to do this you need to choose a varnish suitable for ceramic surfaces. The technique of applying varnish is simple - even an amateur can handle it.
I'm sick of rough porcelain tiles(((
Well, in fact, no force. It doesn't wash off. Even with a hard brush like an “iron” and a fairy-amway and so on.
Girls, how to clean the floor?)))
And yes, don’t repeat my mistake))))))
show me at least with a password, please!)
About the fact that the workers messed up by not properly wiping off the grout? Well, there is such an option, perhaps.
No, I think it’s definitely gotten worse since then))
Of course, I had a terrible time with the repairs - the foreman was a very creative person)))) In principle, knowledgeable, but a goof. The people who were laying the tiles were kicked out when I saw all the dirt. But then other craftsmen somehow cleaned the grout with something special. Maybe they didn't clean it completely. And when the floor is wet it seems much dirtier.
You're right, I'm confused. The floor was cleaner. But hardly clean. And the tiles are such that it’s difficult to see if the grout is rough there. The grout originally matched the tiles.
Upd: since the person we paid for the repairs (let's call him a foreman) ran away from us somewhere in the middle of the finishing work and stopped answering the phone, and completely different people were finishing the work, no one rented out the apartment to us in a shabby state. And it’s difficult to say whether something was clean or not. That's why I'm a little confused in the readings)
window size with balcony standard
Have you tried cleaning the grout between the tiles? If not, can you try it?? Well please))
How was the plasticine washed off? Did it dissolve due to temperature?
Yes, I’m unlikely to change it anyway. Although, at the same time there would be a reason to change the dead heated floor))
You need to be brave and try acid washing. Tlt completely chicken out and call the cleaning service)
But there is still a possibility that it’s just dirt getting into it. Maybe I’ll buy a steam cleaner
I read a lot of things, and realized that there are fakes, and they break. Therefore, I decided not to buy a cheap mop, I compared different online stores, and in some places the phone numbers weren’t even listed. And here there are even shops.
Regarding the reviews, yes, there are a lot of praise on sales sites, but in this thread the girls also praise
I’m telling you!)) My husband finally bought a mop and arrived home just in time for the window installation to be completed. She swept, vacuumed, then took up the mop. I didn’t know where to start, and my gaze fell on the battery. Our battery was old, sectional, cast iron, the inside was just black with dirt, it was) It was impossible to wash it with anything; vacuuming was useless. I started fiddling with the steam generator there. Cleaned up great! After which my husband stopped whining that this was some kind of bullshit))
Source
A friend decided to buy floor tiles with a very rough surface. The tile is 30x30 cm in size, there are all sorts of grooves on the surface with beautifully uneven edges, width and depth from 0.5 to 3 millimeters. Yes, she is also light. Question: does anyone have experience using this type of tile? Will these tiles need to be cleaned with a toothbrush every week?
2altor can be smooth, but it looks like it has fibers, would you recommend this one to her?
In my practice, there was a case with such tiles: The guys spilled some instant coffee on the floor made of such tiles, and that’s all. They rubbed it with everything they could and then had to pick out two tiles, so they spilled it on two. And replace them with new ones, it’s good that there is a supply left. Otherwise, if the owner had seen it, she would probably have had a heart attack from what she saw.
So I don’t recommend using such tiles in your home.
I have a rough one in the bathroom, made to look like burlap, and it’s light. It doesn’t get dirty, although there isn’t much dirt there either. Vedict: everything is great in the bathroom. And my legs don't move apart
It depends on how rough it is. In my hallway and kitchen there are tiles of medium roughness, also with relief and unevenness. Very practical. And it doesn't slip and doesn't get dirty. I think it's called Kerama Marazzi.
Do you also have burlap? There is no need to scrub it white; slight darkening from dirt creates the decorative “used” effect that is fashionable today.
Marazzi specially makes these tiles that look like they were chipped from an ancient Roman toilet, and very carelessly
Source
