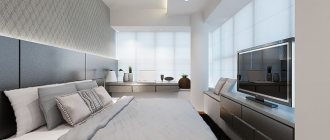
Modern fashion trends in the arrangement of residential premises dictate their conditions. Drywall is used in every room to create a fashionable and practical design. Today, any thing can be made from drywall. It is famous for its environmental friendliness, evenness, and practicality. The only drawback is fragility. It can be eliminated when installing a drywall frame. Plasterboard structures serve not only for decorative purposes, but also for functionality.
Structures that can be made from plasterboard
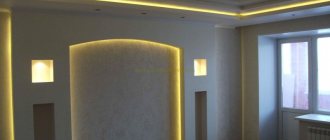
Plasterboard sheets are used to make a two-level ceiling with lighting, boxes for hiding lighting fixtures, pipes and other communications; plasterboard is used in bathhouses and bathrooms.
Plasterboard structures in the interior of an apartment The tabletop and cabinet, arch and bar counter are made from plasterboard. Do-it-yourself plasterboard structures are easy and quick to make. The main thing in such work is not to deviate from the algorithm of actions and take into account the advice from the masters.
Decorative plasterboard structures are made in residential premises not only for the sake of the interior. Many of the structures made have their own functions. With their help, space in the apartment is saved, coziness and comfort are created. These plasterboard structures always correspond to fashion trends and look solid.
Arches
With the help of arches of various types, corners are smoothed out, making plasterboard doorways and other elements of the apartment’s interior softer and more modern. To create an arch, you will need a set of drywall tools and material, which includes an arched profile, drywall, and self-tapping screws.
Plasterboard arches in the interior The profile can be bent by cutting its edges with a certain step. The profile should be secured using self-tapping screws. First you need to attach it vertically, then bend it on top. If lighting is provided in the arch, then you should lay a corrugated wire with wires under the drywall. This must be done carefully. The wires must be solid and not touch metal.
The wires are hidden and laid in corrugation. Drywall is applied to the profile. For better bending, you need to take a sheet 9 mm thick. There are several methods for bending gypsum boards. Having chosen one of them, the bent, cut sheet of drywall is attached to the profile with self-tapping screws.
After installing the gypsum board, you should start reinforcing the corners, joints and subsequent decoration. Plasterboard arches in an apartment or house make the atmosphere more pleasant, the room larger and brighter.
Option for a plasterboard arch in the interior of a room
Installation of the second layer
Installation of the second layer of drywall begins only after the sheets of the first layer are securely attached to the ceiling. When performing installation, increase the interval between fasteners.
Interior partition
The two-layer fastening technology means that plasterboard sheets are installed in such a way that the seams of the first layer do not coincide with the seams of the second. The first sheet is not laid whole, but starts with half. The order of work is as follows:
- The end surface of the gypsum board is lubricated with glue;
- It is optimal to plant sheets on PVA glue;
- Screw the sheets with long self-tapping screws to the frame slats through two layers;
- Next, installation is carried out by analogy with the first layer.
The seams are sealed using reinforcing material.
The result is a ceiling with a strong, rigid, almost monolithic ceiling sheathing. The total thickness of such a coating is 19 mm, onto which a frame can be safely installed in two or more levels.
There are many variations in the design of the formed ceiling base. They combine perfectly with other types of finishes. Multi-level illuminated systems amaze the imagination with luxury and variety.
Niches
The niches created from plasterboard in the apartment have their own purposes:
- Bed head. A niche in the bedroom serves as lighting at night. If the design has shelves, the necessary items are placed there - glasses for reading and watching TV, a board book, a phone charger, knitting.
- A niche for a TV makes the interior of the apartment modern; all wires and telecommunications are perfectly hidden in this niche.
- Corner niche made of plasterboard - mainly comes with lighting and shelves for small things that make the interior of the room - photo frames, colored stones, beads.
- A niche for a mirror is not only a frame with lighting fixtures, but also an additional shelf for a comb, lipstick, and keys.
To create a niche you will need a few tools and a small set of materials. The main factor here is the reinforced frame made of a plasterboard profile, because mainly the lower part of the niche is supported by a heavy object. In a dry room, a wooden beam serves as a reinforcement, but reinforcement can be created from profiles.
Assembled frame with wires laid in corrugation. Wires are hidden in the created frame. It is covered with plasterboard. The corners must be covered with reinforced aluminum corners. The joints on the plasterboard structure are covered with sickle tape and puttied.
Plasterboard covering and putty The decor of a plasterboard niche should correspond to the overall design of the room.
Box
Drywall boxes in apartments are created to hide ugly objects. In the kitchen there is a hood, in the toilet and in the bathroom there is a plasterboard box for pipes. Hiding communications can also be done using a box. To create the box design you will need a set of tools and materials. There must be a galvanized profile, moisture-resistant drywall, and self-tapping screws for drywall. Depending on the location of the box, a frame base is made.
An example of a frame base for a box. This base consists of guide profiles. Then the frame is covered with plasterboard and the decor is created. The main factor here is evenness. Everything should be done clearly and to a building level.
Ceiling
Leveling the ceiling with plasterboard in the bedroom, creating a suspended ceiling with lighting, reproducing a two-level ceiling from plasterboard - there are many options to make the room extraordinary, modern, and functional. For plasterboard ceilings, sheets up to 12.5 mm are mainly used, as well as a ceiling profile. The plasterboard structure on the ceiling should be light and not weighed down by objects.
Prepared markings on the ceiling To create a plasterboard ceiling, you need to carefully prepare it, take measurements and make markings. These first steps in work are the main ones. Profiles and hangers are mounted according to the markings. The frame must be not only smooth, but also durable. Thermal insulation material is installed into the finished frame, which also serves as sound insulation. And also all the wires and cables are laid there.
Covering the prepared ceiling The finished frame can be covered with plasterboard. This also has its own nuances:
- for multi-level figured ceilings, plasterboard should be bent into a certain shape;
- the sheets are attached in this order: first the whole sheet is mounted, and then the remaining space is sewn up. Sheets should not create a single horizontal border;
- It is mandatory to reinforce the joints with serpyanka. Primer and putty.
When creating a plasterboard ceiling, you should work in stages, following a clear algorithm of actions.
Features of such a device
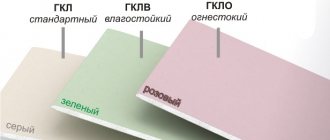
Types of drywall and their color markings.
Using a large bending radius in the design, you can also use ordinary plasterboard with which to sheathe the ceilings.
Its minimum thickness is 9.5 mm. This is quite enough to bend a sheet of drywall under an arch.
Do not forget that such actions require special care. The gypsum board is gradually attached to the frame while simultaneously bending along the base. The main thing is not to rush, because if you forget about caution, you can break the drywall.
By using special arched plasterboard sheets, you will only benefit in the speed of completing the work. But the price will be not one order of magnitude higher. Compared to conventional sheets of plasterboard for the ceiling, the price of arched plasterboard is approximately twice as high.
Having completed the installation of the entire structure, you can carry out finishing work. It includes sealing the seams between sheets of drywall and processing the attachment points to the frame. They are primed, sealed with putty, leveled, and so on.
Shelves
The created plasterboard shelf structures can be different in length, functionality, and shape. If the shelf is long and a heavy thing is installed on it, then its frame made of profiles is reinforced, sometimes a sheet of chipboard is placed under it.
Interior variations with plasterboard shelves If the shelf is small in size and serves for a photo frame in the bedroom or a vase with dried flowers, then a regular frame is created and two layers of plasterboard are applied. The profile is mainly galvanized.
Shelves made of plasterboard in the kitchen Shelf options:
- Corner shelves made of gypsum plasterboard can be used for small essentials. For heavier objects (books), the frame is strengthened.
- TV shelf in the living room.
- Shelf in the kitchen for dishes.
- Shelf in the bathroom for bath accessories.
- In the children's room for toys.
- In the bedroom for knitting and glasses.
Interior of a room with plasterboard shelves
To make a shelf you will need a set of tools and plasterboard, as well as profiles and screws. You can create a shelf separately, and then use anchors to hang it on a wall or corner.
Installation of lighting objects
It is better to decide on the choice of lighting fixtures and the method of hanging them at the project planning stage, so that the formed frame does not conflict with the lighting scenario.
Lightweight devices are installed on an already mounted ceiling. Recommendations:
- Application of the fastening strip;
- Using butterfly dowels.
Heavy - using an anchor with an extended leg.
Massive chandeliers are also installed on a rough base base. To do this, use a hook, folding dowel or spacer.
Wardrobe and dressing room
A plasterboard wardrobe in a bedroom or a plasterboard dressing room is created in an apartment in order to save space and is decorated with the overall interior. Thus, maximum functionality is obtained with a minimum of space. Wardrobes can be built into the wall, like dressing rooms built into a plasterboard partition, or they can be corner.
To create a closet or dressing room, you must first decide on the location. Make all measurements and markings. Afterwards you will need a standard set of tools and materials. The profiles are attached to the rough surface using dowels. This will make the structure rigid and allow it to bear a certain weight. Vertical posts can be secured with self-tapping screws. The main thing is the fact of evenness. The frame needs to be strengthened with the help of more profiles and jumpers.
You should carefully check the rigidity of the created structure, the strength of the installation and the evenness of the surface. Only after this can the frame be sheathed with plasterboard. In some cases, there is light in the dressing room or closet. To do this, a corrugated wire is built into the finished frame. After covering with plasterboard, you need to take care of the joints and further finishing.
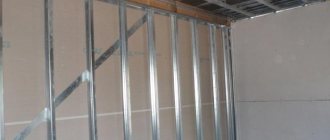
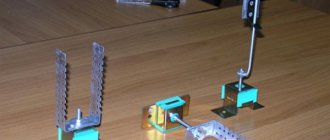
Frame assembly
At the first stage, we construct a frame from guide profiles:
In the case of wooden walls and ceilings, the procedure is simplified: dowel-nails are replaced with wood screws with a wide head.
Attaching racks and horizontal jumpers is easy:
Using a cutter has an important advantage: the joint is completely smooth. The caps of the screws will prevent the drywall sheets from fitting tightly to the frame. A more reliable, but also more labor-intensive method of forming horizontal jumpers: having cut through the side walls, we bend the excess on the profile at a right angle. Then we place the resulting “ears” on top of the vertical posts and fix them. This is usually done when forming a doorway.
Fireplace
The fireplace in the living room interior is unusual and beautiful. If this item is present in the room, it becomes warm and cozy. A fireplace made of plasterboard can be installed quickly and easily with your own hands. There are two types of plasterboard fireplaces: straight - against the wall, corner. To create a fireplace in the living room, you will need to purchase the necessary materials: drywall, profiles, screws, a set of tools.
Installation diagram for a frame for a plasterboard fireplace You should make markings, decide on the depth of the fireplace and begin installing the frame.
The frame should be strengthened, because heavy objects are placed on the fireplace. The profiles are attached to the wall using dowels. The rear wall is assembled from guides and crossbars.
Then the camera is assembled. Here you should use a profile curved into a semicircle. After which the depth of the fireplace and the front panel are created. Stiffening ribs must be present in creating the frame. They are installed horizontally from wooden beams.
Covering the fireplace with plasterboard The finished frame is sheathed with cut-out plasterboard shapes and reinforced. All joints should be reinforced with sickle tape, and corners with aluminum corners.
Design option for a corner fireplace To ensure the evenness of the structure, you can use a level and plumb lines. The decor of the fireplace should match the interior of the apartment and not stand out from the general background. Watch the video for the process of installing a plasterboard fireplace.
Performing a small radius bend
In order to bend elements with a small radius (100-400 mm), another technology is used.
To make a bend on the inside of the sheet, using a router with a conical attachment, make a series of grooves (U-shaped), parallel to the bend line. The depth, width and distance between the grooves are determined in accordance with the desired bending radius.
The smaller the distance between the grooves, the wider and deeper their size, the more the structure will be bent. If the elements are small, the grooves are applied manually using a chisel.
After this, the part is cleaned of dust and placed on the template, with the grooves facing up. Having taken the desired shape, the part is fixed using putty. After the latter has dried, the finished part can be installed on the frame.
Do not forget that when installing curved elements, you need to strengthen them in the area of the joints on the back side using curved steel strips (thickness about 0.5 mm, width 100 mm), using self-tapping screws.
source: //www.vashgipsokarton.ru/konstrukcii/izgotovlenie-iz-gkl.html
Repairs require significant investments, which is why many people are afraid of them. But in addition to spending money, work such as whitewashing or leveling surfaces brings a lot of dirt. And there is simply no desire to carry them out. Plasterboard ceilings that have appeared on the market have become an excellent alternative for those who want to update their apartment without significant costs.
But the main advantage of a plasterboard ceiling is the ability to install it yourself. You just need to stock up on the necessary materials, study the fastening technology and draw up your personal project. Its development involves drawing a ceiling plan onto paper on a reduced scale. You must accurately calculate the locations for attaching the hangers to the supporting structures and the installation locations for lighting fixtures. Such thorough preparation will allow for quick and, most importantly, correct installation, as well as saving up to 15% of gypsum boards.
Rules for marking
When the project is ready, you can transfer the markup. The first step is to make a mark on one of the walls. Then, using a hydraulic level, a horizontal line is drawn along all walls. If everything was done correctly, then the end of this line will close at the starting point. If this does not happen, then you need to re-draw the line. And in order to make a plasterboard ceiling that will last for many years without cracks or breaks, you need to make a solid base.
To begin with, parallel lines are drawn along the room at a distance of 60 cm, then perpendicular stripes are drawn across them in increments of 50 cm. The result is a mesh, and at the intersections of the strips, hangers are attached on which the profiles will be held. But before making plasterboard ceilings, you need to decide what type of frame you will need.
Shower room
A shower cabin made of plasterboard takes up little space, but at the same time it is practical to use. They come to the creation of such a design when there are no appropriate cabin sizes. It can be straight, angular, semicircular.
Shower cabin design plan To produce this design with your own hands, you will need a diagram. Afterwards, markings are made according to the plan. Be sure to indicate the supply of water pipes, sewerage and electrical wiring.
Preparing the base for drywall
Diagram for installing a drain pipe in the floor of a shower stall. A plasterboard shower stall starts from the bottom. The pallet is made of brick and cement. In this process, a sewer outlet is manufactured. Afterwards the assembly of the frame begins. The frame must be strong, rigid, and even. It must be covered with moisture-resistant plasterboard. All profiles must be galvanized to prevent metal corrosion.
Creating, covering and finishing the frame of the shower cabin After covering the frame and reinforcing the joints, tiles are laid on the plasterboard surface.
Material calculation
Installation of a plasterboard partition requires a preliminary calculation of the required number of sheets, selection of a frame and profile (beam) for it, as well as glue or screws. In this case, it is necessary to take into account:
- dimensions of the planned structure;
- standard size (and area) of drywall sheets;
- expected loads on the structure;
- the required level of sound insulation (possibly also thermal insulation);
- subsequent surface finishing.
How many panels are needed?
When doing the work yourself, it is important to remember the weight of the plasterboard panels, especially if you have to lift them to a considerable height. Manufacturers offer standard sheets, the weight of which is determined by thickness and size. For a room 8x8 m with a ceiling height of 2.5 m, in which it is necessary to make a zoning (not completely separating the room, but only separating part of it) partition 5 m long, you will need
For a room 8x8 m with a ceiling height of 2.5 m, in which it is necessary to make a zoning (not completely separating the room, but only separating part of it) partition 5 m long, you will need
Naturally, the number of sheets is rounded to the nearest whole number, that is, 9 sheets will be required for the double-sided lining of the partition.
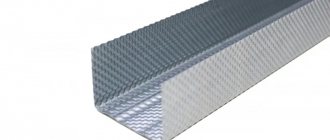
Profile: what and how much
In our country, they mainly use a metal profile designed specifically for installing plasterboard partitions. It has several varieties, used in different parts of the structure.
According to this table, the number of required metal elements is calculated from the condition:
- floor and ceiling guide profiles - along the length of the partition, that is, 5 m each;
- rack profile - the number of racks is multiplied by the height of the room. For an ordinary, non-load-bearing partition, you can take the minimum size of the racks, 50x50 mm. It is advisable to strengthen the outer racks, that is, choose a 75x50 mm or 100x50 mm profile for these places;
- corner profile is available upon request. Its quantity corresponds to the number of corners requiring reinforcement, multiplied by the height of the partition.
Another important point: the width of the guide profile is selected taking into account the planned thickness of the partition. With a PN-2 profile of 50X40 mm, the thickness will be
Here 12.5 mm is the thickness of one plasterboard sheet. If mineral wool or another 50 mm thick insulator is used as a soundproofing material, such a profile is sufficient. If a larger layer of insulating material is planned, a wider profile is laid.
The pitch of the racks is selected taking into account the standard width of the panel and the planned rigidity of the interior partition made of plasterboard. Typically, racks are placed in increments of 600 or 400 mm, then the joints of the sheets fall clearly on the shelves of the rack profiles.
By choosing a pitch of 600 mm, a profile width of 50 mm and the presence of two reinforced corners (one edge of the partition rests against the main wall), we obtain:
- guide profile PN-2 (50x40 mm) – 5 x 2 = 10 m;
- PS rack profile (50x50 mm) – (5: 0.6) x 2.5 = 8.33 x 2.5 = 20.9 m. In reality, we take the number of racks equal to 8 for a 50x50 mm PS and add a 75x50 mm corner PS. That is, the required quantity is 8 x 2.5 = 20 m plus 2.5 m, respectively;
- corner profile PU 20x20 mm – 2.5 x 2 = 5 m.
The number of screws is calculated individually, taking into account the recommended pitch of 35 mm. For this area you will need about 370 pieces of self-tapping screws with a length of 25 mm. The length is chosen taking into account the fact that at least a third of the self-tapping screw must be inside the profile; with a sheet thickness of 12.5 mm, 25 mm is sufficient.
The guide profile is fastened to the floor and ceiling using dowel nails. For the specified length (5 m) you will need 10 dowel nails for each profile, that is, 20 pieces in total.
Additional materials
If it is necessary to soundproof plasterboard partitions, additionally purchase mineral wool or a similar material at the rate of 12.5 square meters. m. To eliminate (reduce) the transmission of vibration from the basic structures of the building to metal profiles, a backing tape is used. It is glued to the back of the profile after cutting it and before installation. In the case of a rack profile, it is advisable to glue both sides adjacent to the plasterboard cladding. The amount of tape and its type are selected individually.
The joints between the plates are sealed with a special putty or sealant; the specified area will require approximately 7...8 kg. The joints are glued with reinforcing tape; 8 joints 2.5 m long require 20 meters of tape.
The surface of the plasterboard sheets is puttied and primed; 15 kg and 2.5 kg of materials are required, respectively (the amount depends on the brand of material and the type of further finishing).
TV stand
Why buy an expensive TV stand if there is drywall left after renovation? You can make a plasterboard cabinet to your liking, the desired length, with an interesting finish. To produce a plasterboard TV stand, you will need dimensions and a drawing. Markings are made on the wall or in the corner with all the necessary points. The drawing indicates the height, length, width of the cabinet. The profile is attached to the wall according to the markings. Another profile is inserted into this profile, and so on. This creates a frame base for the cabinet.
To make the frame rigid, the profiles that create the depth of the cabinet are reinforced either with another profile or with a wooden lath. A sheet of chipboard or other dense material is attached to the top, where the countertop is supposed to be, because drywall can bend and break under the weight. Sheathing with plasterboard does not take much effort and time. You should prepare a plasterboard cutout in advance. All corners and joints are reinforced. Next, the TV stand is subject to the desired decor. The best option is to cover the structure with decorative adhesive film.
Installation of a double-layer partition
In order to improve sound insulation in the room and to enhance the stability of the plasterboard partition, the structure is sheathed with material in two layers. Such installation is carried out under the obligatory condition that the partition is adjacent to the load-bearing wall.
First, gypsum boards are installed on one side of the interior partition, and they are joined on the profiles and cross members of the frame. Be sure to leave technical gaps so that the drywall has a cavity for expansion with fluctuations in humidity and air temperature. The slabs are fixed at a distance of 15.0 cm from the floor, with an interval of 15.0-25.0 cm.
Partition in two layers
Then the insulating material is tucked tightly into the frame without gaps. A rolled version of mineral wool is better suited. The insulation is not additionally fixed.
Mount reinforcing jumpers to join the sheets on the other side, and install the sheets. Now the lining of the first layer is ready.
Seams are sealed without reinforcing mesh. Dry and begin installation of the second layer.
It is important that the seams between the sheets of the first layer of the inner surface of the partition coincide with the seams of the second layer on the outer plane. This will allow the transverse joints to fall onto the already installed additional jumpers. A design drawing or a magnet will help you not to miss.
Drill holes for switches and sockets. Electrical wiring is placed in a corrugated sleeve.
Compliance with safety rules when performing electrical installation work is a prerequisite.
We begin lining the end planes of the partition. Then all surfaces are primed, and then the seams and joints are sealed, now using reinforcing material. They are treated with primer again and finally leveled with a layer of putty. The choice of finishing material is unlimited.
Bar counter
A gypsum plasterboard bar counter plays a big role in a living space. If this is a studio apartment, then separating the kitchen and living room with a bar counter is a great option. You can drink tea and eat at the bar counter. If the plasterboard structure is created with shelves, then this is a place to put cutlery, napkins, and so on. The bar counter can be:
- Wall-mounted – adjacent to the main wall.
- The peninsula is a continuation of the kitchen furniture.
- Island - not adjacent to anything, standing in the middle.
- Mobile – extends, folds, rises.
To create a bar counter, you should decide on its type (it can serve as zoning for the room or stand in the middle of the dining room). Next, you need to know its dimensions, dimensions, appearance (closed, open, with shelves or backlit).
After all the questions, you can begin marking and installing the frame. Creating a frame base begins with the use of a level and guide profiles. Next, a frame is created according to the type of structure and, if necessary, reinforced.
View of a bar counter with lighting After the production of a rigid, reliable and practical profile skeleton, the sheathing is carried out with moisture-resistant plasterboard. Decoration is carried out individually, based on the appearance of the kitchen. Please remember that liquid may be spilled on the bar counter. It is often wiped with damp microfiber. Household members use this design every day.
Arrangement of the first layer
First of all, markings are made. The principle consists of drawing a horizontal axis on the surface, which subsequently corresponds to the location of the outer side of the ceiling being erected or a line for the contour of curved elements. The wall slats of the structure frame are also placed along the applied horizontal line.
Beautiful and reliable
All types of frames differ in the method of attaching load-bearing elements to the racks, and in the type of hanging consoles (brackets). Installation is often carried out according to one of the following schemes:
- To save ceiling height, guide metal profiles are fixed between the main sections, perpendicular to them at the same level, using x-shaped suspensions;
- The guide rails are mounted perpendicular to the main ones on U-shaped consoles at different levels.
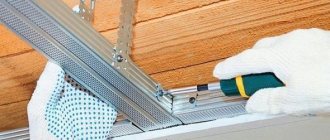
Installation is carried out in compliance with the following recommendations:
- For ease of use, sheets of drywall are marked;
- The maximum step for fixing sheets is 25 cm, hardware is screwed in using stops and strictly vertically;
- Place the hardware at a distance of 1 cm from the edge of the slab;
- the first sheet is laid in one piece, starting from the corner;
- The end edges are chamfered;
- Each panel is attached to two profile elements of the frame;
- The second row starts from half the slab.
Upon completion of installation work, fill the seams and joints with putty solution.