- March 8, 2020
- Construction
- Lyudmila Storozhenko
At first glance, there seems to be nothing complicated in the process of stirring the putty. But if the solution is prepared incorrectly, lumps may form, which will make leveling the walls a difficult and poor-quality process. Therefore, you need not only skills in applying putty, but also knowledge of how to properly mix the solution.
Before performing work, you should read the instructions on how to dilute putty for walls. This will ensure the quality of the material and significantly increase the service life of the finish after drying.
What do you need to know about putty?
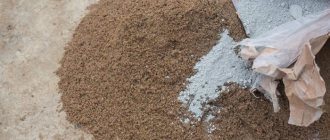
Dry putty has a paste-like consistency. It contains film-forming elements, various fillers, as well as coloring pigments. Depending on the content of the components and the purpose of the solution, it is used indoors, outdoors, for sealing cracks and leveling walls. Therefore, when choosing a putty, you need to consider where it will be used.
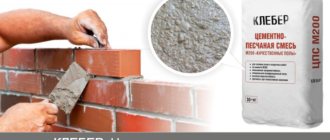
For example, dry cement mixtures can be used on facades or in cold and damp rooms. Since they are resistant to temperature changes and outdoor conditions.
Inside the rooms, gypsum putty is mainly used. Due to the fact that the solution is based on gypsum, it is able to regulate the humidity level in the room, and can also be easily applied to the ceiling and walls. The use of such compounds in a humid environment is prohibited. Otherwise, they will begin to collapse very quickly. This will make the work of finishing the surfaces in vain.
Therefore, when choosing a putty material, you should pay attention to what components the solution is made from and where it should be used.
How to putty a plasterboard ceiling
Wallpaper, tiles, and putty can be applied to drywall. Putty is the cheapest facing material, and the cost of putty work is the lowest.
If you have managed to install sheets of plasterboard on the walls and ceiling, then learning how to putty on plasterboard on walls and ceilings will not be difficult. An experienced master who professionally deals with putty only needs two spatulas, wide (up to 50 cm) and narrow (up to 10 cm). These are the tools that craftsmen need to make the walls perfectly smooth, and there is no need to sand them.
- Building Regulations;
- Emery mesh and a platform with clamps on which the sanding mesh or paper will be attached;
- An important tool in preparing the putty mixture is a mixer with a drill.
Choose a mixer based on the power of the drill you have. If you can install any mixer on a special drill, then on a regular drill you need to install only the one that corresponds to its power.
If the drill has little power, it may burn out during the preparation of the putty mixture. For a regular drill, it is better to take the smallest mixer.
Often people who want to make repairs with their own hands confuse a mixer for stirring paint with a mixer for preparing a putty mixture. To avoid this, you need to consult with sellers, even if you feel ashamed of your ignorance.
Recommendation. If you are using a regular drill, then only use the mixer in the reverse direction, as the rotation speed is very high when rotating in a clockwise direction.
Preparation for puttying
The putty mixture is prepared in a clean plastic bucket. You should not fill it to the brim so that when the mixer rotates, the solution does not scatter throughout the room. We will teach you how to putty a plasterboard ceiling.
- ⚫ You need to start small, namely by mixing water with dry putty.
- ⚫ To prepare the solution, fill the bucket one third with water.
- ⚫ Then add putty gradually, while stirring it with a mixer.
- ⚫ You need to add enough putty so that the resulting mixture resembles very thick sour cream.
- ⚫ Leave the resulting solution for five minutes, and then move it again with a mixer.
- ⚫ Use the prepared solution in a short period of time, no more than an hour and a half.
Preparing the surface for puttying
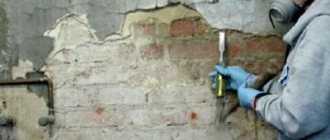
Preparing the surface for applying putty has a great influence on the quality of adhesion of the putty to the surface of the drywall. First of all, you need to treat the surface with a primer.
The more expensive the primer, the better. It can be applied either with a roller or with a brush. The applied primer must be given time to dry. Depending on the humidity and temperature in the room, drying time can be from one hour to a day.
Sealing drywall seams
Puttying plasterboard sheets is complicated by processing the seams between the sheets, adjacent walls and screw holes. All seams and screw holes must be sealed with self-adhesive tape. Then you need to cover the tape with putty and allow the putty to dry for at least a day.
You can use a special putty for processing drywall seams “Fügenfühler”. It costs significantly more, but shows excellent quality. If you used self-adhesive tape, make sure that the threads do not stick out. If necessary, remove them using a utility knife.
Due to its smooth surface, drywall can be immediately treated with finishing putty, without resorting to treatment with primary putty. The layer of finishing putty is very thin, so you need to be careful and focused when applying it. Prepare the finishing putty using the above method and apply it to the ceiling of the living room or kitchen.
Instructions for applying putty
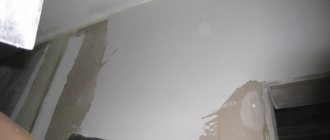
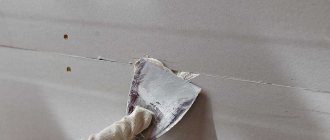
Applying putty to walls and ceilings for the first time is very difficult. However, within a few minutes of work, the first skills already appear. For application, use, as indicated above, two spatulas, wide and narrow. Using a narrow spatula, you need to remove the solution from the bucket and distribute it evenly along the length of the wide spatula.
Distribute the solution across the ceiling with a large spatula as evenly as possible, and then remove any unevenness using the rule. Remove the putty, cut off as a rule, with a small spatula and throw it into a bucket. It will be reused.
After you completely cover the ceiling with putty, you need to give it time to dry, at least 12 hours. On the dry ceiling, stains from the rule and the spatula will be visible; they will need to be scraped off with a small spatula. The ceiling plastering is now complete.
Ceiling sanding
No matter how many times you putty the ceiling, it still needs to be sanded, since stains from the spatula and rules remain on it. Those stains that you removed with a spatula will make sanding easier. After 4-5 days from the moment of puttying, you can start sanding.
Some people close doors and windows in rooms where puttying was done. This is not entirely correct, since putty does not react to drafts in the same way as wallpaper or whitewash. Therefore, if it is not raining outside, then feel free to open all windows and doors.
If the putty has dried well, it takes on a matte color and there cannot be dark spots on it. When the putty becomes like this, it can be sanded. They usually sand with sandpaper by hand, so that they can see with what force and where to rub.
Puttying plasterboard ceilings is not a difficult task, even beginners can do it. Still, it requires patience, skill and effort. After some time, even you, with little experience in construction work, will be able to putty without rules and sanding.
Methods for preparing the solution
As a rule, the instructions do not disclose all the nuances that may arise while mixing the solution. For example, when applying a thick layer of putty to a wall, the solution needs to be made thick. Then it will be easier to work with it, and it will not slide off the wall. To do this, you just need to add a little less water than indicated in the instructions.
When the question arises of how to dilute putty for plasterboard walls, you should understand that the manufacturer’s instructions talk about creating a layer for sealing small irregularities. Therefore, as a rule, the solution should be applied in one thin layer. In this case, the mass should be more liquid.
It should also be understood that a thicker solution hardens faster. The manufacturer's instructions do not indicate this. Therefore, it is recommended to prepare the mixture in small portions. This is necessary to have time to work it out before it hardens. It is strictly forbidden to re-dilute already hardened putty, this reduces its technical properties and minimizes the service life of the final finish. It's better to get rid of the frozen batch. Repeated repairs will cost much more.
The process of mixing the solution should be approached with the utmost seriousness, so that at the most inopportune moment the water does not run out or the necessary tools are not at hand. If there is a delay during the preparation of the solution due to a shortage of one or another component, the material may begin to set ahead of time, and this will affect the quality of the finish in the future. Manufacturers also indicate this fact in the instructions, but it should be recalled that when mixing the solution, water is added to the dry mass, and not vice versa.
Some tips on what proportions to stir the material in, how to preserve it so that it does not dry out
Beginning builders often ask, is it possible to dilute dried putty? No. It is taken in one lump and can no longer be diluted (this is its main essence). Therefore, to clean vessels and instruments, you will have to use a mechanical method.
Please note that lumps may form when loose mixtures are picked up from the wall, especially from the back of the spatula, or if there is residue on the nozzle or in the container. Everything needs to be cleaned in a timely manner.
It is convenient to wash the mixer by immersing it in a bucket of water and setting high speeds, so the mixture will dissolve itself in the water, but you will have to wipe the surface a little.
It is necessary to exclude even small lumps, since the layer thickness is often about 1 mm.
Any lumps will be clearly visible. If it was not possible to prevent the appearance of lumps and they have hardened a little, so that the mixer no longer picks them up, you can use a little trick.
Place a medium amount of mixture on a spatula and apply it to the wall in thick layers. Then turn the spatula at an angle of 60° and, using pressure, remove excess and also crush the pieces.
Don't be afraid to use large spatulas, they are more convenient when working on a large area without external elements that get in the way, like a gas pipe.
They are not only convenient, but also practical; it is easy to see areas with unevenness on the wall using a spatula as a level. It is advisable to have an arsenal of spatulas of different sizes.
Equipment for preparing putty
Before starting work, you should prepare the necessary tools. This will eliminate sudden difficulties when mixing the solution and further working with it. To prepare the mixture you will need:
- Construction or household bucket 7-15 liters.
- Drill or screwdriver.
- Mixer attachment.
- Putty knife.
- Water.
- Dry putty.
Having the right tool at hand makes the work process more comfortable. After completing the work, you should thoroughly wash the tool. So that the solution does not remain on it. Otherwise, the old material may get into the new batch, and then scratches will form on the surface, and pebbles will get into the mixture.
Tools and consumables for work
To make a perfectly smooth and high-quality puttying mass, you need to immediately prepare all the necessary tools and equipment.
Mixing bucket
An ordinary household bucket made of metal or plastic or other hard materials will do just fine as a container for mixing the solution. It must be clean, without remnants of the old mixture, sediment, or impurities. If the bucket is dirty, pre-soak it with water and scrape off all residues with a spatula, scraper, or clean with a hard plastic brush. Then rinse the bucket and dry it.
When you plan to dilute the material in small portions, you should take a small bucket (5-6 liters). For larger portions, use a standard 10-12 liter bucket. After applying the first batch of solution, the container is washed again, and only then the next putty is applied.
Electric drill or screwdriver
If you do not want to mix the solution manually, you can use one of the indicated tools. Both of them greatly facilitate the task of the master. Tool attachments must be clean, without any adhering mixture that may remain from previous work. It is equally important to ensure that there are no traces of rust on the metal nozzle.
During the process of mixing the composition, you should not use a high rotation speed of the nozzle. In this case, too many air bubbles will remain inside the material, and it will splash out. It is better to mix the solution at moderate speed in three steps, assessing its consistency and adding water or powder. After completing this stage, rinse the nozzle well, preventing the composition from drying on it.
Putty knife
A spatula is one of the most popular plasterer tools. It is suitable for placing dry powder in a bucket, for manual mixing of the product, as well as for directly applying putty to the surface. In any case, you should only use clean tools that have been washed and dried in advance.
When manually mixing the solution, move the spatula in the bucket with intensive circular movements in a clockwise direction - this will help get rid of even small lumps. To knead the mass, purchase a medium-sized tool (about 30 cm wide, up to 12 cm long). It will serve as a universal device for all stages of work. However, a small spatula is more suitable for breaking up small lumps. It is also useful for cleaning dry composition from the walls of the container.
Running water
To prepare the putty, you need regular running tap water. There should be no impurities in it - only using clean water will you be able to create a high-quality solution. A liquid with a temperature of +15...+20 degrees is best, although cooler water can be used.
Ice liquid allows you to slow down the setting of the solution and prolong its viability, so when preparing a large portion, it is worth using it. In addition, if the solution thickens sharply, you can pour a little cold water into the solution - this will give additional time for puttying the walls.
Dry mixes
It is recommended to purchase the required amount of dry putty in advance so as not to be interrupted during work. The product is selected in accordance with the requirements, purposes, conditions of application.
Tips for beginners on applying putty
Puttying walls is a very difficult process for beginners. Sufficient experience is required to obtain a smooth surface and correct application. To dilute wall putty correctly, obtaining a homogeneous mass without lumps, you need certain skills. Otherwise, errors can be fatal. To avoid such a situation, you need to prepare in advance.
You need to buy a spatula, the recommended width of which is 30 cm and length - 15 cm. Then you should knead a small amount of the solution to practice applying the putty to the surface. As soon as it starts to work out, you can start working. The putty must be applied to the walls at a certain angle. As a rule, the larger the angle, the thinner the layer of putty. During work, it is recommended to transfer the solution from one spatula to another. This will maintain its elasticity.
How to dilute with a mixer: proportions
A small amount of clean water at room temperature is gradually poured into the dry powder. The mass should be mixed with a special construction mixer, initially at low speeds, then the number is increased by changing the speed to a more powerful one.
The power tool must be clean so that the remnants of the old product do not fall on the surface being treated. Then you should take a short break, about 15 minutes, and then continue kneading. In total, you need to mix until a homogeneous mass is obtained.
The speed of the mixer during mixing should be kept relatively low to avoid excess air getting into the composition and thereby the formation of bubbles on the wall at the time of applying the putty.
The proportions for mixing the solution are taken from the manufacturer's instructions supplied.
Starting putty
Solutions are also divided into groups. They are starting (basic) and finishing. Each type is used in appropriate cases. When the surface has large differences, starting plaster is used. It is applied in a layer ranging from 10 to 15 mm. Some gypsum putties can be applied up to 30mm at a time. This should be indicated on the packaging.
The main task of starting solutions is to eliminate large differences and prepare the base for finishing. The surface after basic plaster has a rough texture and easily absorbs moisture due to large particles.
Application of gypsum plaster
Gypsum plasters are used to level walls in residential and industrial buildings with normal air humidity (this can be apartments, shopping centers and offices). The main purpose of such mixtures is considered to be not only the preliminary leveling of horizontal and vertical surfaces, but also their decoration (finishing).
For rough leveling of a brick, wood or concrete base, gypsum plaster with large grains is used, for finishing the premises - a mortar with small particles.
Finishing putty
Finishing putty is used for small irregularities. It is recommended to apply it in a layer of no more than 5 mm. If initially the differences on the wall are small, then there is no need to apply a base coat. However, it should be remembered that before filling the walls it is necessary to open the surface with a primer. It will increase adhesion (setting) between materials (wall and mortar), also fill the pores and save some mixture.
Standard proportions are used for kneading. The finishing putty for walls should be diluted as indicated on the packaging. Typically you need to mix 25 kg of solution with 10 liters of liquid. It is recommended to pour ¼ of the water into a bucket and add dry powder little by little.
For a comfortable mixing process, it is better to use an electric drill or a screwdriver with a special “whisk” attachment. After preparation, the solution should be left for a few minutes, then stirred again. Then the mass will be more homogeneous.
Breeding
How to properly dilute dry putty without a mixer at home
In general, when it comes to the question of how to properly mix starting putty for walls, there are two main methods, both of which are actively used. Now let's look at the first method. The principle of how to mix putty for floors and walls in this perspective is very reminiscent of kneading dough.
It is enough to take a container, but it must be dry, and pour in the required amount of the mixture, usually determined by eye. Next, water is added in small portions.
In this case, it is necessary to observe exactly this order; when pouring the putty into the water, it is taken in pieces that will have to be pressed manually. To learn how to dilute gypsum putty, you need to consider the issue step by step.
Putty can almost perfectly level any surface, as well as give the layer additional strength. Here you will find out how long it takes to dry.
Sand is a loose mixture that is formed as a result of the destruction of rocks under the influence of water. Here is the calculation of the volume of sand in a ton.
Cement is a mineral material that, when combined with water, becomes durable and plastic. By clicking on the link, you will become familiar with the density of M400 cement.
How to dilute and stir wall putty without a mixer:
- take a small container, plastic containers work well, but must be clean. Pour about 7 trowels of starting putty and add a little water. Everything is thoroughly mixed. A necessary condition for preparing a high-quality mixture is ideally clean dishes;
Pour putty
- if dust, dirt, or pieces of organic matter get in, the mixture will quickly harden, and you will not have time to work it out before that moment;
- After thorough mixing, add the rest of the dry putty and pour in water. Now mix everything again, a homogeneous mixture should come out. Pay attention to the bottom and sides of the vessel, as there is often unmixed putty there;
- When preparing gypsum putty, you should be aware that it dries quickly, but you should not apply it immediately after mixing. You should wait 3 minutes for it to acquire quality properties. Then it is mixed again;
- It’s now clear how to mix wall putty, but the proportions can vary greatly depending on the type of work being done. Most likely, after mixing, you will have to adjust the consistency by adding the necessary ingredients;
- the mixture hardens quickly, so you need to prepare such a quantity of putty that it can be worked out in 20-30 minutes, after which the putty begins to harden. You will have to knead the mixture little by little, which is better than struggling with the dried mixture and ultimately throwing it away;
- There is another nuance in the question of how to properly dilute putty, which lies in the specifics of the gypsum mixture. It absorbs moisture well , which is why it swells somewhat;
- thus, during the hardening process, it dries out a little, which can cause cracks in the corners, which are eliminated using finishing putty;
- it can be used for rooms with humidity, since gypsum absorbs water, but it is better to prevent constant changes in moisture, as well as the transfer of liquid into the walls;
Also, too thick a layer can be a problem, as uneven hardening occurs. Cracking is possible due to the type of material on which it is applied; putty does not stick to wood, or rather, it falls off over time, and cracks will appear in the near future.
In this case, destruction can occur due to poor preparation of the wall, especially if it consists of bulk materials.
In this case, particles of the wall are drawn behind the spatula, and they fall into the mixture, which leads to unevenness of the material, and therefore its fragility.
How to mix and dilute wall putty with a mixer by hand
This option is used much more often if the household has a drill or screwdriver with a mixer attachment. How to properly dilute and mix putty at home:
- pour a little water and add the mixture, add putty until the desired thickness is obtained;
- depending on the type of putty base, it may form lumps, but the mixer easily removes them;
- if you have experience, you can prepare putty in large quantities, but of higher quality;
- prevent the penetration of air in large quantities, otherwise cracks or bubbles in the putty may occur. Use a rotation speed of about 800 rpm . At first, when there is still a dry mixture, it is necessary to knead extremely carefully, otherwise part of the putty will be blown up with air.
Repeat the stirring procedure every 15 minutes if preparing a large portion. This will preserve the diluted putty before it begins to harden.
Dilution with a mixer
Before diluting the putty and specifying the proportions of water and the mixture, it is necessary to determine the purpose and size of the application layer.
Usually the proportion is determined by eye, take a trowel, tilt it at an angle and watch how it stretches.
Definition of proportion
If the entire mixture immediately falls off in one clump, this indicates poor mixing, since there is a layer of water on the trowel, which will greatly interfere with application to the surface.
The prepared mixture should be left for a few minutes and only then applied. Also re-mix to increase the elasticity and plasticity of the putty.
How to spread wall putty manually
Sometimes you don’t have a drill or whisk attachment at hand in your home tools. Then you have to mix the solution manually. This is a more labor-intensive process, so certain rules must be followed to obtain high-quality material:
- First, prepare a container in which the mixing process will take place. It should be remembered that the dry mixture is initially poured, then water is added.
- When you need to dilute putty for walls without a mixer, as a rule, first pour seven trowels of powder, and add the required amount of water to them. Then the mass is thoroughly mixed.
- After the first batch is ready, you can add more dry material and water to the container. Then the putty is mixed until it acquires a homogeneous mass.
- Gypsum-based putties have the property of quick drying. This does not mean that after mixing the solution must be applied immediately. To get a good material, after mixing it needs to be allowed to swell for a couple of minutes. Then the mass needs to be mixed again.
In order for the putty to last for many years after completion of the work, you should adhere to the rules listed above. The proportions of water and mixture must not be violated. You should adhere to the correct preparation technology and do not apply the mixture to a dirty surface. It should be remembered that gypsum mixtures are used only indoors with minimal humidity.
Main stages of kneading
To prepare putty for walls with your own hands, you need to study all the stages with all their features. Let's now try to consider in detail the entire process of preparing putty.
- Cleanliness comes first. Before starting work, clean the surface you are working on from dirt, dust, and other foreign particles.
- Treat the walls with a special primer - this way the putty will adhere better and will stick and not crack.
- You should also make sure that the container and attachment of the construction mixer are clean. The smallest particles of dirt can prevent the creation of a homogeneous solution.
- It is necessary to correctly calculate the time that will be spent mixing the components. First, the powder is poured into water, then stirred and left for some time for the elements to swell.
- After about 8 minutes, begin re-mixing, which prevents lumps from forming.
- The kneading proceeds clockwise, but from time to time turn on the reverse if your mixer has it.
- Let the mixture sit for a while. Just a little bit, about 5 minutes. For gypsum mass - 3 minutes, since it dries much faster.
- Do not neglect the correct proportions. Experienced builders can handle creating a solution without instructions, based on their experience. Beginners should pay attention to the instructions and tips of professionals.
- The application layer must be at least 5 millimeters
Temperature
When puttingtying walls, you also need to take into account the operating temperature indoors or outdoors. The drying process of the mixture depends on this.
The temperature in the room during work and further drying of the solution should not fall below 5 degrees Celsius, and humidity - 10%. This is an important point that must be taken into account, since at sub-zero temperatures the solution will begin to crystallize and quickly crumble. There are also special additives on sale (anti-freeze), which are added to the solution if there is a possibility that the temperature may drop below zero.
The ideal temperature for puttying work is 14-18 degrees Celsius.
Advantages of do-it-yourself puttying
Of course, by entrusting the work to professional plasterers, you take off a huge burden of responsibility from your shoulders and only prepare the required amount to pay for the work done.
Advantages of self-puttying walls, ceilings, and other surfaces:
- It's not a difficult job. The main thing is to properly prepare the room and follow the phased distribution of layers.
- The putty layer is secondary, as it goes under painting or wallpaper. Preparatory coating does not require much expense or skill; it can be applied by any beginner, regardless of his experience in this matter.
- You can rub as much as you like and smooth out roughness. This will not affect the work or spoil the finishing layer.
- Availability. Puttying yourself allows you to save money that would have to be given to a stranger.
- Interest in the process. Only the owner can complete the work assigned to him with full dedication and intelligence. The quality of work will vary greatly. The main thing is to follow all the instructions.
- The process of leveling walls is simple, accessible to men and women equally, and does not require physical strength or finely honed skills.
Types of putties
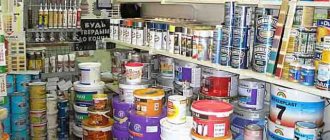
Today, the choice of putty materials is limitless. For each purpose you need to use a suitable solution.
- Gypsum-based putty. Its advantage is its white color, as well as high plasticity. Presents a huge assortment. Its materials are easy to sand and apply. Working with these gypsum putties is convenient even for a novice master. It is a well-known fact that gypsum mixture is capable of absorbing excess moisture from the air, and, if necessary, releases it back. Because of these qualities, gypsum mixtures are able to create a pleasant indoor microclimate.
- Cement-based solutions. Can be used both indoors and outdoors. They are mainly used for finishing brick and concrete bases. This material is frost and water resistant, so it can be used in rooms with high moisture or outside the building.
- Polymer putties. Ideal for final finishing inside a building. In addition, it is used to seal seams and cracks.
- Universal putty. Has high strength. After using it, a smooth surface is obtained. The putty can be easily sanded and does not crumble.
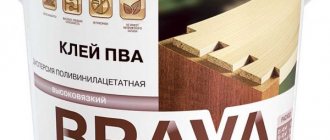
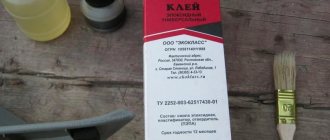
- Adhesive putty. Durable, easy to apply to the base. The composition includes an adhesive base, as well as drying oil and chalk.
- Latex putty. Used indoors. Consists of acrylic components, water, plasticizers and other calcite additives.
- Acrylic universal putty. Produced from chemical elements using modern technologies and quality standards. Can be easily sanded with sandpaper and does not shrink after drying. This putty is considered an environmentally friendly material, safe and of high quality. Ideal for home use.
The building mixtures market offers a huge selection of materials to achieve different goals in construction.
How to mix putty mixture?
Proportions
The dilution proportions of the mixture are indicated on the packaging for the dry composition. It is necessary to accurately measure the components and the amount of water to obtain a working solution. It is impossible to dilute the entire volume of the composition. It is necessary to divide it into small portions in order to apply it to the surface in a fresh, not thickened form.
You should knead enough mixture at a time so that it is enough for about 30-40 minutes of work. Otherwise, the mass will thicken, resulting in a non-uniform layer.
If the mixture is already ready and well mixed, you cannot add additional portions of water to the composition. This deteriorates the quality of the finished composition: layers begin to be applied chaotically and non-uniformly. Of course, the speed of drying is greatly influenced by ambient temperature and humidity. This should be taken into account when mixing the dry semi-finished product with water.
Usually a bag of mixture (25 kg) is used per 1 liter of water.
Advice
If it is necessary to reduce the drying rate of the composition, then fine purified river sand is added to it. The proportions of its addition depend on the mass fraction of the putty material. The ratio must be 1:1.
Using a mixer
Pour the required amount of dry powder into a prepared clean container or construction container, add water according to the instructions. The water should be clean, heated to room temperature. First, apply a small number of revolutions to the mixer to mix and thoroughly soak the mixture particles together. Then the number of revolutions is gradually increased, creating a more powerful mode.
Power tools must also be used clean and dry. When mixing each portion, the mixer must be rinsed thoroughly so that dried particles do not fall into the fresh solution. When kneading twice, a short break is necessary. 5 minutes will be enough to maintain the mass and give it the desired consistency. Then mix all the ingredients again.
The speed of the mixer during mixing is kept relatively low to avoid air getting into the mass and the formation of bubbles on the wall at the time of applying the putty. If the proportions and safety precautions for mixing speed are observed, a mass of ideal consistency is obtained.
The video demonstrates how to mix putty using a mixer:
Manually without using a mixer
You can mix the mixture without a mixer, although this is more labor-intensive and requires additional effort and time.
- Pour the powder into a clean container and add the required volume of clean water at room temperature.
- Lightly stir with a spatula or trowel. Then take a short break, waiting a few minutes (about 3-7).
- Begin stirring the solution more intensively. You can use a narrower spatula for this. The solution will begin to swell before your eyes.
- In this state, it is kneaded again until it becomes homogeneous. The consistency should be non-liquid, similar to sour cream.
When manually mixing putty, the following norms and rules must be observed:
- Up to 0.8 liters of water are added per kilogram of dry gypsum-based powder.
- Cement requires less liquid. It is enough to add 0.4 liters of water to the container.
- The polymer composition is measured based strictly on its dry volume fraction. For 25 kg take 10 liters of water.
Advice from the experts
Professionals advise using the following recommendations:
- When preparing the composition, you must adhere to the fundamental rules. The main thing is to maintain the cleanliness of the container and instrument. Do not leave the prepared solution in the fresh air for a long time. After opening the package with the finished composition, it is important to use it within several hours. Dry formulations can be stored for quite a long time, provided that the operating rules are followed.
- The mixing water must be clean. For this purpose, it is specially recruited from sources. If you use tap water, filter it well and let it settle. During settling, harmful substances leave the liquid, and the water becomes room temperature, which is important for obtaining good material without lumps, uniform throughout the entire mass.
- If the solution begins to harden, it can be softened - a small portion of cold water will delay hardening for a few minutes. But this can only be done once, since the next time the desired effect will not be achieved.
- When you receive the finished composition after aging, you can no longer dilute it with water. If you see that the mass is quickly thickening, you need to prepare a new one, after washing the bucket and tools for work.
Reference
To prepare putty, you need a nozzle with spiral blades. If there is only one spiral, then it should be left-handed, twisted clockwise. This nozzle prevents light particles of cement and gypsum from rising up.
You can mix the putty yourself or ask a professional to do it. The first way will be simple and cheap. There is no need to be afraid to apply a putty layer, since this process does not require any special skills.
How long does it take to dry?
The drying time of the putty mixture is affected by:
- her appearance;
- thickness of the applied layer;
- air humidity;
- temperature;
- type of putty base.
Attention
There are average drying times for the finished mixture. For a starting gypsum base, this period will be one week with a layer thickness of no more than 30 mm. For a “finish” based on gypsum, the thickness of the layer is not important: its drying period is 4-6 hours. The starting cement mortar dries within 5 hours, and the finishing one dries for one hour at a thickness of up to 3 mm.
If epoxy compounds are used, their drying time is about 8 hours. Latex components dry in more than 12 hours, and acrylic components dry in 3 hours with an applied layer thickness of 1 mm. If a thicker finishing layer is applied (3 mm or more), then you will have to wait a day or longer.