Nowadays, almost all cars are painted with automotive paint called metallic. Previously, these were mainly acrylic single-layer coatings. Although at the moment they are also used, but more in other areas than in the automotive industry. Consequently, newbies have a lot of questions about metallic painting the body of their car. In this article I will try to describe very clearly and understandably the entire technology of painting with metallics, various nuances that must be taken into account when performing work.
Before we begin the technological process, let's look at what metallic car base paint is.
Do-it-yourself car painting
First, wash your car. This will make it easier for you to find damage to the body. In addition to corrosion, the bottom and body receive defects during movement from grains of sand, small stones and other abrasives. The painting procedure can be spot, partial or complete, depending on the body damage. We will talk about a radical change in color.
Remove locks, moldings, seals - they will interfere with work. If you decide to leave them and seal them with tape, the moisture accumulated under these elements will cause irreparable damage to the car. The body must be cleaned, covered with primer and puttied. The old coating is completely removed, and corrosion areas are carefully treated. If necessary, welding or straightening of the body may be necessary.
Use materials from only one manufacturer. Often compositions produced by different companies are rejected from each other. Paint applied to such an unstable preparatory layer may fly off.
Scheme of the main stages of work:
- Car wash. Using car shampoo, remove dirt. Make initial preparations.
- Degrease the body, remove grease, bitumen stains, etc.
- Destroy pockets of corrosion, clean off the old coating with abrasive grinding. The sandpaper should be used so that the difference in the size of the abrasive grains does not exceed 100 units. Treat the surface sequentially in five stages. Otherwise, the material will sag, and stripes and scratches may appear after painting.
- Apply the first and second primer, which will create an anti-corrosion coating. The soil will dry in approximately 3-4 hours.
- The main stage is applying paint.
- The last operation is varnishing the surface.
Properties
Metallic differs from regular paint by the presence of aluminum powder in its composition. In general, it is an auto enamel containing a binder, pigment, solvent and small metal particles. The presence of such components allows not only to give the necessary shade to the structure, but also creates the effect of metal shimmering in the sun. However, getting the right results is quite difficult. It is necessary to apply the paint in an even layer, otherwise stains and smudges will appear during operation.
Metallic paint is less susceptible to corrosion than other materials. Over time, the composition does not lose its performance properties and is not exposed to external factors. True, violation of the integrity of the coating leads to gradual destruction of the material.
Due to the high thermal conductivity of the metal contained in the composition, the paint does not overheat when exposed to sunlight and does not fade. The cost of such paint is higher than that of simple enamels, however, it is worth the money spent.
Metallic painting technology
A competent technology for painting a metallic car involves applying a coating in three layers. Its total thickness should not be more than 70-120 microns.
The most convenient way to apply the dye is by spraying. Protect parts that will not be processed with tape, paper, and in some places you can use adhesive tape.
It is acceptable to coat non-painted areas of the car with an aqueous composition based on chalk, glycerin and dextrin. After finishing work, it can be easily removed with ordinary water. Dilute the dye and stir it to the desired viscosity. For primary staining, it should be 26 s. For subsequent layers, paint needs to be more liquid.
For 6 kg of coating, 4 kg of primer is required. Please note that 20% of the working mass of paint should be solvent. For each of the materials used: primer, putty and dye, use different spray bottles or guns. This is necessary because the viscosity level of the compositions is different. If the diameter of the nozzle is chosen incorrectly, the liquid materials will not be sprayed as they should be, but will splash in all directions, leaving an uneven and sloppy layer of the substance on the surface of the car.
Select a gun for painting a car based on the diameter of its nozzle. When the viscosity of the material is 18-22 seconds, then you should choose a gun that has a nozzle of 1.3-1.4 mm. If the viscosity is 30-35 seconds, then the nozzle cross-section should be no more than 1.8 mm.
It is worth noting that a good spray gun allows you to control the configuration of the torch, as well as the pressure of the air flow and the amount of liquid. Therefore, having only one gun, you will have the opportunity to paint the windshield pillars with a round torch, and a wide torch - the hood of the car. In this case, the composition costs will be optimal, and the fog will be small.
Varnish coating
Applying varnish to the surface
Before you start applying the varnish, it must be diluted with a solvent and fixative in accordance with the manufacturer's instructions. It is usually applied in two or three layers. For the first application, dilute less.
Painting technology requires mandatory drying of each layer (as well as the base). Craftsmen often check whether the varnish is dry by touching the surface with a finger in an inconspicuous place. If your finger sticks slightly, but the varnish no longer smears, you can continue painting. But still, there is no need to rush, and it is better to apply the next layer on the completely dry previous one. It is necessary to avoid smudges, since they are quite difficult to remove. This will usually require removing the layer completely. As for the shagreen leather effect that may appear on the surface, you can get rid of it by polishing or sanding the varnish layer (after it has completely dried).
Preparatory work
The beginning of the procedure is priming and puttying the elements of the car body. When choosing the color of the putty, be guided by the future color of the car. Pay special attention to this if it has weak covering properties. These are, for example, red and yellow colors.
A large number of multi-colored putty compounds are now sold. By choosing the right mixture, you will avoid applying additional layers of dye.
Dismantle all parts that do not need to be painted or cover them with masking tape. It is best to start work with the internal parts of the car.
The most important stage of preparatory work when painting a car with metallic paint is degreasing the surfaces and their
blowing The final result depends on the quality of the procedures. If you do not degrease the car enough, this will lead to poor adhesion of the paint to the body, and small dust particles, invisible at first glance, will appear after work.
Please note that this work must be carried out exclusively in a paint booth. What you can see by looking at the material on any special website is the technology of metallic car painting: video.
First, thoroughly blow out the entire body of the car, not forgetting hard-to-reach places, where dust and debris can accumulate. After this, proceed to degreasing using a special liquid. Moisten a clean napkin with it and thoroughly wipe the entire body of the car. Then wipe it with a dry cloth.
Next, repeat the blowing operation and complete the preparatory work by wiping the body with a special dust-collecting cloth to remove the smallest dust particles.
Let's paint it silver!
January 26, 2022, Denis OKOPNYUK
Silver painting sometimes doesn't go according to plan, especially if it's done by an inexperienced or novice painter. To carry out quality repairs, we will move to our body laboratory, where Pavel Nikiforov
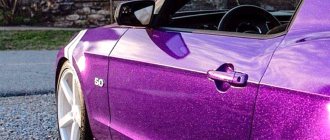
, the head of training, will analyze in detail the features of applying a silver base and varnish. As an example, we will use paint code KY0 - one of the most difficult colors, as in most cases it is applied in spots, streaks and apples. But first things first.
Preparing for work
In this case, we are applying paint to the hood of a Peugeot car. Firstly, for proper high-quality painting we will need a DeVILBISS spray gun with a 1.3 nozzle and an HV30 air cap. This is a classic option for applying a base coat.
Secondly, the output pressure for this head is 0.7 bar. To create such an outlet pressure, the inlet pressure must be set to 1.75 bar (standard parameter specific to this head). Changing the pressure in the spray gun directly affects the quality of the part being painted.
The third thing you should pay attention to is the correct position of the spray gun relative to the part and, in turn, the correct distance from the part to the spray gun. It is important to note: changing the angle of the spray gun during the painting process will be a mistake and will result in streaks or spots.
Before painting, the hood was wet primed with gray Green Line Smart Filler. The gray color here is also no coincidence; we matched it to the silver color of the paint to save on the base coat.
Metallic car painting
According to competent technology, it is necessary to start painting the car as soon as possible - immediately after completion of preparation. This will reduce the risk of accidental contamination of the body. Be careful not to touch grease-free surfaces with dirty or greasy hands. The next stage of work is applying a base coat of paint. When choosing a solvent for enamel, do not save money by purchasing a cheap composition. The best option is to follow the paint manufacturer's recommendations.
It should be noted that light metallics are most susceptible to the quality of the solvent. Your poor choice will lead to the fact that the metal particles in the coating will lie unevenly on the surface of the body and stains will form.
The next important factor when selecting a solvent is the temperature in the painting chamber and the time of year. Here are some recommendations
- At low temperatures, experts recommend using a quick-drying solvent.
- The temperature of the composition, the car body and the temperature in the room should be approximately the same.
- Heating the solvent or the element to be painted is strictly prohibited.
Metallic paint is applied to the car body in several stages. Their number depends on the color of the dye, the quality of the preparatory work performed, as well as on your skills. Usually, two layers of coating are sufficient.
When applying the first layer, the presence of small spots or stripes on the treated surface is quite acceptable. The main task of this stage is to cover the primer and bring the body to be painted to a uniform state.
When performing this operation, proceed carefully, making sure not to spray too much dye. Otherwise, smudges may result. Before applying the next coat of coating, you need to wait for the solvent to evaporate. Depending on the temperature conditions in the spray booth, this process can take from 10 minutes to half an hour.
You can always find out more accurate information from the manufacturer's instructions printed on the dye container. It is highly undesirable to speed up the process of drying the coating with air. If the paint dries too quickly, the metal particles will not have time to properly fit into the dye layer, and this will cause stains.
In a situation where the primer shows through the first layer of metallic, the above step must be repeated. Usually, reapplying the base coat is enough to cover the primer. Spraying the final layer of dye is the most important stage, since it directly determines how the car will look after repainting. At this stage, spots and streaks are strictly unacceptable.
At this stage, the dye should be diluted more with solvent, sprayed more strongly, and applied from a slightly greater distance. But if the distance is too long, the composition will dry out on the fly, which will lead to the formation of stains. After the last layer of coating has dried, you can begin the final stage of work - coating the body with varnish.
Communities › All about Paint and Painting › Blog › how not to paint silver 2 (debriefing)
May the admins forgive me if this post seems unnecessary to them, but nevertheless, here it’s all about paint and painting! And after reading the comments, I was struck by the idea of describing in more detail the fantasies of people’s opinions and my thoughts about them. I’m sure there will be those who agree and those who disagree, but there is one “but”! There were quite a lot of answers where it was possible to answer quite compactly and definitely, but there were a lot of guesses and inventions that seemed to hint at someone’s incompetence. What’s most infuriating is that they really believe in their own inventions and mess up other people’s minds. This is how stereotypes are born. To begin with, I will describe the situation and what actually happened and why I even posted it here.
I work as a painter. He also worked as a colorist. I’ve been to dealerships and garages, I’ve changed a lot of jobs throughout my career, I’ve met countless craftsmen and technologists. I’m not showing off, but I’m warning you that it’s useless to treat me.
Evening. I'm going to paint the roof and trunk lid silver. The colors are spot on. For the first layer I took the substrates from the last shift. Pressure, temperature, flow, materials used are all the same. After the first layer, after interlayer exposure, I discovered a wildly rough surface made of granules. I understood why this happened almost immediately, but in general, lulzov made a post for the sake of reading the comments of people who don’t even know how to read carefully. The reasons for the jamb in painting were revealed as follows:
— it was necessary to wash it off with a solvent; that’s up to everyone to decide for themselves; I don’t like fiddling with napkins with solvents. — it was necessary to rub with 2000 water and sandpaper with an abrasive paste (matting?)
With such bumps, 400-grit sandpaper can barely cope, and 2000-grit abrasive, instantly killed by abrasive paste, will matt the bumps and not file them down. especially since you again end up fussing with rags on the roof with rubbish flowing down the gutters and between the windshield seal, from where you are tormented to remove it.
— why did you varnish it when you could have sanded down the base? The base is mostly aluminum in resin. The resin may remain unvarnished for several hours. What do you think, due to what? Without water (and perhaps even with it), the sandpaper clogs like crazy. And the structure has increased resistance to mechanical stress. I wouldn’t wish my enemy to sand this surface 2000 with water. When sanding the base, the soil is cut down much easier, which is why unevenness appears. I covered it with varnish, because in addition to making up for this horror, it also has insulating properties and dries faster due to the activator.
- activator (hardener/fixer) in the base Up to 20% I calmly used it to imitate a matte or light structured coating without varnish. With a hardener, it seems to me that it dries longer and is more resistant to mechanical stress. A hardener is also added to the base to avoid peeling of the varnish from the base. I really don’t really understand why, but I think many have encountered black, white and three-layer colors that fly around for inexplicable reasons. I can say for sure that this is not the reason for the problem that happened to me) ____________ I can’t write comments for 3 days, I’m swearing