When repairing aquariums, only safe compounds that meet a number of requirements are used. It is necessary to take into account how long it takes for the aquarium sealant to dry, how resistant it is to moisture, and whether the glue contains toxic components. It is advisable to choose special products, of which there are several types.
When repairing aquariums, aquarium sealant is used.
General requirements for sealant
Aquarium sealant helps solve a number of problems, including stopping leaks and creating a beautiful textured bottom. They can be used to fix partitions and create decorative elements. There are many types of sealants, but not all are suitable for these purposes.
What should be the sealing composition for aquariums:
- Safe. This is a key requirement, without which it will not be possible to provide housing for the fish. If the material releases toxic substances, fish and plants will not be able to survive. For example, synthetic glue and bitumen composition are not at all suitable for this purpose, but silicone will be the best option.
- Elastic. Considering that there is constant pressure on the walls of the aquarium, the sealant must adapt. If the material is too strong, cracks may appear.
- No antibacterial substances. Some products contain components that prevent the formation of mold and mildew. They are not suitable for decorating an aquarium, as they have a bad effect on living organisms.
- No dyes. Color additives will negatively affect your health.
- Reliable. The sealant must withstand not only water pressure, but also the temperature difference in the room and the aquarium itself.
- Neutral. There are acid sealants that will not work in this case.
Workflow Stages
Making an aquarium with your own hands is carried out in accordance with the following algorithm:
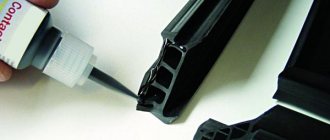
The glass sheets must be prepared. The edges must be processed; they should not be sharp. You can also do this yourself: the canvas is immersed in water and the cuts are processed using a special stone. Next, the glass must be dried and wiped. For the best fixation, degrease the edges and places where the sealant will be applied. For this purpose, acetone or alcohol is used. A canvas is laid on the surface to act as a bottom. An adhesive composition is applied around the perimeter
It is especially important to squeeze out the sealant evenly so that there are no voids or excess areas. Next, the side panels are installed. In this case, the sealant must be treated both outside and inside.
After that, the structure is set aside for a day to dry completely. The next day, carefully turn the aquarium onto its side. Next, the stiffening ribs are attached. After this you also need to wait 1-2 days. After completing all the work, you can trim off the excess sealant. A regular blade will do for this. If colorless silicone was used, then it does not need to be trimmed inside the aquarium. Only after a careful inspection can you begin to fill the aquarium with water.
What cabinet to make for an aquarium
The stand for the aquarium is also important. First of all, of course, you should take into account the interior of the apartment
Next, quality and reliability are selected. The surface of the cabinet must be perfectly flat. The best option is a design in which the top sheet is laid on the side surfaces. This will distribute the weight evenly. If the volume of the aquarium is large, then it is recommended to choose a cabinet with additional support in the middle. It is recommended to lay thick fabric or foam padding on the surface. They compensate for unevenness.
Filter installation
Of course, you can do without a filter, but then you will have to frequently change the water, clean it, and sometimes treat the fish. Therefore, in order not to lose all the inhabitants at once in the future, it is recommended to use a high-quality filter. This can be either an internal design or an external filter. His tasks include:
- Removing any contaminants.
- Purification of water from turbidity and odor (performed using additives in the form of activated carbon).
- Removing hazardous compounds from water. Biological additives cope well with this task.
Compressor
Thanks to the compressor, the water is saturated with oxygen, necessary for both fish and plants. You should not rely on natural ventilation, even if the volume of the aquarium is small. Forced ventilation must be organized. The compressor, as a rule, is mounted on the wall of a row with a container, as it produces unnecessary vibration. Particularly convenient are models with an air supply regulator.
Siphon
You can buy a siphon ready-made, but more often you make it yourself. The simplest option is a tube covered at the end with a large mesh. Cleaning is carried out on the principle of two communicating vessels. But you can also complicate the design. A hand pump is suitable for this.
It is recommended to clean regularly, once every 1-2 weeks. At the same time, a lot depends on the inhabitants of your aquarium. Some residents do an excellent job of cleaning and siphoning may not be necessary for several months.
Gas generator installation
As a supplement, gas generators are often used to supply CO2. You can use a ready-made option, but if you decide to do everything yourself, then you can create a gas generator yourself.
At home, the fermentation effect is used to create CO2. It can be a mixture of sugar, starch, water and soda. The ingredients are mixed, boiled, and then yeast is added to the cooled mixture. The mixture is poured into one container. The second is used as a filter. It can also be used to determine the gas supply rate. In addition, you should consider:
- If the plants begin to grow intensively, it is recommended to reduce the gas supply.
- Gases in a self-made composition will be released only when there is access to light.
- If the fish become slow, reduce the gas supply. To speed up the purification of water from impurities, the speed of filtration and aeration should be increased.
Types of sealants
Each type of sealant is suitable to varying degrees as an aquarium adhesive:
- Acrylics have poor adhesion and are susceptible to moisture, so they are completely unsuitable for aquariums.
- Polyurethane, bitumen, polysulfide are used in construction. Not suitable as a home for fish. Bitumen could be an option, but it lacks strength.
- Epoxy glue can be used, but it takes a long time to dry and requires thorough cleaning of the surface before application, which makes the job much more difficult.
- Cold welding would be a good option for aquariums. This composition is neutral and hardens quickly.
- Silicone aquarium glue is an ideal option. It is elastic, not afraid of water, adheres well to glass, and does not emit toxic elements.
Silicone compounds are marked that they are intended specifically for aquariums and glass. There are no difficulties with this. But you also need to take into account the fact that they can be of different colors - white, black, transparent.
Reference! What kind of sealant to glue the aquarium depends on personal preferences. Color in this case is an aesthetic component.
Why you need to choose silicone sealants - advantages:
- Completely safe for fish.
- Easy to use.
- Maintains strength with high elasticity.
- Hardens quickly (about 20 minutes).
- It lasts a long time.
- Does not require special skills to operate.
- The seam can withstand loads of up to 200 kg.
Black silicone
Black silicone is credited with maximum strength and hardening speed. This is wrong. The composition of black color is no different from others; the color plays only a decorative role. Dark sealants are best used for large aquariums.
Transparent silicone
Transparent silicone aquarium sealant gives the structure a certain weightlessness, which looks beautiful for both large and small containers. He has a flaw. This sealant will change color and make plaque and algae more visible. Transparent glue is recommended for experimental modeling of aquariums.
Compound
Universal waterproof aquarium adhesive. It can be used in different ways in everyday life for gluing surfaces. Its composition is complex. The silicone product contains rubber, vulcanizer, strength enhancer, plasticizer, and adhesive.
Important! Silicone sealants may contain dyes. If the individual composition is not intended for aquariums, it may be harmful to fish. It is also important to pay attention to the fact that the product is neutral.
Recommendations for carrying out work
The aquarium silicone sealant in the cartridge is inserted into the gun, only then can the seams be uniformly filled by leveling them with a damp spatula. Touch dry time is 15 minutes, which is true if the room temperature is maintained at 20°C. Relative humidity is also important; it is 65%. Complete polymerization should be expected after a day.
Subtleties of use
Silicone glue cannot be painted with any paints. Therefore, when applying, you need to ensure that the sealant does not come into contact with decorative elements and the metal frame. Also, it cannot be applied in several layers. To fix the leak, you will have to completely remove the old sealant. If you apply a second layer, it will simply fall off.
Reference! The glass must be cleaned before gluing, otherwise the elements will not be able to be joined. Some aquarists prefer to get a new tank, since gluing an old one together takes a lot of time and effort. If the aquarium is new, there are no special problems.
Dividing silicone glue
Silicone smells like sour vinegar. The tube is marked “A” by the manufacturer. In English it means acid.
Silicone, for gluing aquariums, has almost no odor.
Characteristics of good quality silicone:
- No strong aroma.
- Elastic after drying.
- Retains properties at high temperatures.
- Repels paint.
- When applying a new layer on top of the old one, the first one will fall off.
How to choose
When choosing a sealant, you need to consider the following factors:
- Does it contain harmful substances?
- What color is the composition?
- How long does it take for aquarium sealant to dry?
- Does it contain dyes?
- Is there a “For aquarium” mark on the packaging?
You need to buy a composition for working with an aquarium in trusted stores that can provide documentation for the product. If you accidentally come across a fake, you can lose your fish or significantly spoil the appearance of the tank.
You need to look at the expiration date. When it’s running low, it’s better not to buy it, because the sealant loses its quality over time. For aquariums, you need to buy only high-quality, fresh, properly packaged glue.
Popular brands
Aquarium glue is produced by most sealant companies. Among all the variety, you can choose a high-quality and inexpensive composition.
Aquarists often choose the following sealants:
- Titan - sealants of the highest quality are produced under the brand name. The downside is the high price. Pros - sealing for many years, the ability to reliably glue large aquariums.
- Soudal is one of the best sealants for safe and high-quality work with aquariums. It is used without risks for the largest tanks.
- Krass is a cheaper sealant, but this does not affect the quality. It can be used for internal gluing of small aquariums.
- Okyanus Kimya is not yet a very well-known brand from a Turkish manufacturer. However, the company produces high-quality sealants with an extended service life.
Reference! Domestic sealants are cheaper, meet all requirements, but do not have such a long service life in comparison with foreign samples. In addition, imported sealants dry faster - 24 hours.
How to properly glue an aquarium
Rules for using silicone when gluing fish tanks:
- The glass is taped around the perimeter. This will make the seams correct and protect against contamination.
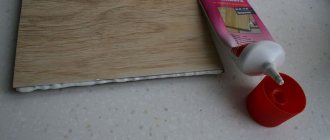
- Surfaces are degreased. Regardless of the manufacturer, the instructions indicate that before gluing the seams must be treated with an alcohol-containing solution or acetone. White alcohol can also be used. After wiping the surface, you need to make sure that there are no lint left from the fabric at the joints.
- A beacon is placed. This is necessary to obtain seams of the required thickness. Apply a small drop of glue in each corner. When it dries, this will be an example of thickness.
- Application of silicone. The product is gently and evenly squeezed onto the glass, then the surfaces are joined. After half an hour, you can move on to the next section, making an interval each time so that the glue has time to set.
When you need to repair the tank by sealing the crack, you need to remove the fish, drain the water and dry the container. The surface is degreased in the same way. You need to drop a little product into the crack that has formed and push it, repeating in both directions. Excess material is carefully removed with a rubber spatula.
Reference! Quite often, the leak is not a leak, but rather condensation. Therefore, before relocating fish, you should carefully inspect the area of the possible crack.
Recommendations when working with silicone glue for aquariums:
- Each time before application, you need to clean and degrease the surface.
- Excess material is removed with a spatula and a rag soaked in vinegar.
- When working with sealant for the first time, you should choose a transparent composition.
- There is no need to apply the sealant layer by layer, the second layer will disappear.
- Silicone cannot be painted, so black or transparent is chosen for the aquarium.
- Even if a crack appears in the upper part, the fish still need to be removed.
- The seams should be cleaned periodically to remove plaque.
Manufacturing stages
To create an aquarium yourself, it is best to choose containers with a volume of 100 or 200 liters. Making large tanks at home will be very problematic. The whole process is quite difficult and requires extreme accuracy, as well as attentiveness at every stage. However, if you do everything consistently and take your time, you will get the job done efficiently.
Over a certain period of time, the glass becomes degreased.
A homemade aquarium is made following the following sequence of actions:
- Two wooden slats are taken, and a blank designed to strengthen the bottom is placed on them.
- The gluing areas are degreased with any alcohol-containing composition.
- Silicone sealant is applied.
- The second part to strengthen the bottom is placed on top and pressed down. The applied glue should be evenly distributed over the surface.
- The glued parts are set aside for several hours until the sealant has completely dried and hardened.
- During this time, the side windows are degreased.
- After this, approximately 2 centimeters are retreated from each edge and a strip of masking tape is glued.
- Glue is taken again and applied to the side surfaces of the already fastened parts of the base.
- The side glass is applied to the bottom of the future aquarium and gently pressed. Excess sealant is removed with hands soaked in soapy water.
- A strip of tape is removed and the side part is supported by a heavy object (chair, chair, etc.). This is done so that the fresh seam does not break and the glass does not collapse on the floor.
- The second side part is glued in the same way, and the product is dried for 24 hours.
- After the specified period of time, the reliability and tightness of the connection is checked.
Dries usually in about 12 hours
- The structure is then turned over on its side.
- Take the front glass and glue it around the perimeter with masking tape. In this case, it is necessary to retreat from the edge at least 2 millimeters.
- After this, a layer of silicone is applied to the side parts of the structure and evenly distributed over the surface.
- The front glass is applied to the desired location and securely fixed. Residues of glue are removed in the same way as when gluing the side parts.
- The masking tape is removed, and the excess silicone on the outer surface is cut off with a sharp knife. This can only be done after the sealant has completely hardened.
- In this form, the product dries in 12 hours.
- After this time, the opposite (back) side of the tank is attached. This is done in a similar way.
- At the next stage of work, the ribs are glued. To do this, a few millimeters are removed from the upper edge of the rear and front glass.
- A strip of tape is glued and silicone is applied.
- The ribs are applied to the structure and glued securely.
- After the glue has dried, two ties are attached (in the middle and on one of the edges).
The lid can be made from various materials
Once the aquarium is assembled, it is left for another day for the glue to completely harden. After this, it is filled to the brim with water and tested for strength and tightness. If everything is done correctly, then there will be no problems during testing.
The simplest version of the cover is a thin sheet of plastic that is placed on the stiffening ribs. For greater convenience, you can attach some kind of handle to it.
Making an aquarium with your own hands is a rather difficult undertaking that requires the master to be careful and able to work with glass. With the right approach to business and following all the recommendations of professionals, you can significantly simplify and speed up the process.
The result should be a well-made aquarium in which you can place several species of beautiful fish. With their appearance they will delight the owner and remind them of the work they have done independently.
Previous AquariumPaludarium: step-by-step instructions for making it yourself, choosing plants and animals Next AquariumAquarium glass: advantages of the shape, types of fish to keep and caring for the vessel
How long does it take for aquarium silicone to dry?
After applying the sealant, initial drying occurs in the first 20 minutes. However, this does not mean that the seam is ready to withstand normal loads. Complete hardening occurs in about 24 hours, and if you use domestic glue, then within 48 hours. It is after this time that the aquarium can be tested, and if everything is done correctly, it can be filled with water and the fish can be introduced.
When choosing a sealant for glass and aquarium, you need to look at the label. This alone is enough to understand what the material is intended for. Before starting work, you should carefully read the instructions and prepare the necessary tools and cleaning products.