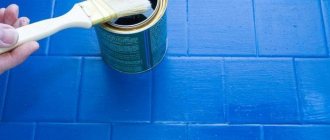
Using ceiling tiles in the interior of a room allows you to make it beautiful and unique. But to achieve the desired aesthetics, you need to choose and glue the finishing material correctly. You should select adhesive for ceiling tiles depending on its features and installation method. Since the weight of the finishing material is small, the glue will not have to hold a large load, but it should set quickly.
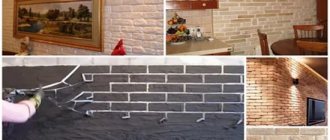
Figure 1 Unique interior of the room.
In addition, it is recommended to select a universal glue, since the base surface can be different, for example, plaster, concrete or lime. But no matter what glue is used, if, for example, a ceiling tile is fixed to a whitewashed surface, the latter must meet certain requirements, which we will consider below.
Properties of finishing material
Typically, tiles made of polystyrene foam, polystyrene foam or ceramics with the following parameters are used for finishing the ceiling:
- Resistant to moisture - this feature is in great demand when installing in bathrooms and other rooms with high air humidity.
- Light weight, allowing the finishing material to be fixed with glue.
- Poor resistance to mechanical damage - during installation, extreme care should be taken and the material should be handled with care.
In addition, the products have low fire resistance and small thickness. Quite often they are almost transparent, which means they will need appropriate glue that is invisible on its surface.
Disadvantages of design
The disadvantage that can ruin everything is the thickness of the material. Most often it is significant. What materials are used to make ceiling tiles? Mainly:
- Styrofoam;
- gypsum;
- drywall;
- tree;
- metal;
- mirrors
There are rooms with low ceilings, and every centimeter that is taken up by ceiling tiles made of foam plastic, plaster, plasterboard, or wood matters. In this case, this design method is not suitable. There are thin tiles, but they make a more modest impression; they are relevant in offices and non-residential premises, where the owner’s character and personal preferences are not so important. Professionalism and knowledge come first. Is it worth showing such modesty? Only if you need it. Most often you want to create a different atmosphere. Soffits and wallpaper with special parameters are useful for decorating the ceiling of residential premises. These techniques create a visual illusion, and a person suffering from claustrophobia, for example, will be more comfortable in a room with such a design.
Metal or mirror tiles also expand the space. With its help, it is easy to create a fabulous, elegant, clear, intuitive design, and bring any fantasy to life. But it costs more, it is more difficult to attach it - most of the advantages are lost. Is it worth trying so hard? You will definitely like the atmosphere. After looking at these photos, you may be able to make a decision, refuse compromises, choose mirrors or metal. Tiles made from other materials in a room with a low ceiling will ruin everything, no matter how beautiful it is. Before you buy it, you should objectively evaluate the room. Coziness and comfort are more valuable than extravagance and style. The impression of interior design should be positive.
Glue requirements
To increase reliability and make the installation process simpler, it is better to glue the ceiling tiles with adhesive that meets the following requirements:
- Viscosity. The liquid composition will not hold the products used, even despite their low weight.
- Set quickly. Increases the convenience of work, because it is difficult to hold the product on the ceiling for a long time while waiting for the glue to harden.
- White color. It is not transparent and allows you to hide the joints.
- Great adhesion. The adhesion of tiles to the surface should occur quickly and firmly.
Attention: In addition to these parameters, versatility is important, since the composition must be suitable not only for the finishing material, but also for the base surface.
After all, it is difficult to decide how to glue ceiling tiles onto whitewash if the composition is not intended for this. Therefore, you should carefully approach its choice, having familiarized yourself with the necessary information. Let's consider which glue is best for gluing tiles to the ceiling surface.
Ceiling preparation
Before gluing the material, you need to carry out some preparation. This will help improve the quality of adhesion. First of all, you should find all places where the whitewash may peel off. You also need to run your hand along the ceiling, if there are few traces left, this serves as a favorable sign. Otherwise, the coating must be removed.
Whitewash removal and cleaning
After carefully looking for flaking whitewash, it is carefully removed with a spatula. This is done until the spatula touches the firmly adhering lime. The rest of the whitewash must be crumbled, then sweep the area with a brush and a rag to remove fine dust. To improve adhesion to the tiles, the ceiling must be washed and wiped with a damp sponge.
When the coating begins to crumble a lot, you will have to remove it completely. This is done by rinsing and sanding:
- put water in a bucket,
- walk over the surface with a dampened roller,
- after 20 minutes the whitewash will get wet,
- remove the top ceiling layer with a metal spatula,
- For thin whitewashing, sand the surface.
You can go over a single-layer coating with a wet cloth, brush, or roller. Washing will help remove all poorly secured areas, and lime from the pits is removed with the angle of a spatula.
Padding
It is impossible to glue tiles onto whitewash without primer; only primer will ensure proper adhesion. You need to buy deep absorption soil. Before use, shake it thoroughly and pour it into a tray. It must be applied with a roller, squeezing so that the primer does not run off, in a thin layer, evenly. In the corners, moisten the ceiling with a paint brush. After complete drying, be sure to apply a second layer. The roller and brush quickly become clogged with lime, so the soil must be poured into the pan in small portions.
People have another method of priming. Laundry soap is used for it. It will glue the lime particles together, which will adhere firmly and will not peel off. Dissolve a piece of dark soap in 4 liters of boiling water. This product is applied with a brush or roller across the ceiling. There is no need to wet the coating too much.
Alignment
Before gluing the ceiling tiles, it is important to level the ceiling. This is required for a surface that has serious differences, holes, chips
Small irregularities will be hidden by polystyrene foam, but significant ones will cause disruption of the pattern and an unsightly appearance of the coating. The alignment rules are:
- Putty is applied to holes 5 mm deep,
- putty and construction mesh are placed in defects more than 1 cm deep,
- a significant difference in ceiling heights will have to be leveled with plasterboard.
The ceiling is measured using a level. With its help, the lowest angle is identified and a mark is placed. According to this indicator, the entire ceiling needs to be leveled.
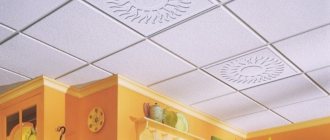
Varieties
The basis of high-quality glue is a solvent, characterized by almost instantaneous adhesion and the absence of traces. Using a good composition, you won’t have to think about how to glue the ceiling tiles. The following types of glue are usually used for fixation:
- Titanium.
- Liquid Nails.
- Moment-montage.
- Eltitans.
- Eco-net.
Of course, there are other compositions, but those listed above are the most common and fully correspond to the assigned tasks, having the necessary properties for high-quality fixation of the finishing material. An important role is played by the affordable price, which distinguishes most of the listed adhesives. Let's consider which adhesive is best suited for installing ceiling tiles, the advantages and disadvantages of one type or another.
Tools needed
To work on gluing slabs, you need to prepare a number of tools. To cut the slabs, you will need a stationery or sharp construction knife; markings are made with a painter's cord. To glue the slabs, you will need high-quality tile adhesive (“Moment”, “Liquid Nails”, “Titanium” and others). Other tools needed:
- a hard spatula or a set of spatulas of different calibers;
- scissors;
- a simple pencil;
- roulette;
- roller;
- sponge, rag;
- construction level.
To dilute the glue, if it is not sold in finished form, you will need containers and water.
Titanium
The adhesive is effective for ceiling tiles and allows them to be glued to almost any surface, such as concrete. Glue "Titan" is characterized by:
- Possibility of use for interior and exterior work.
- Maintains elasticity under temperature changes.
- Ability to be used when installing various finishing materials.
- Fast and high-quality fixation of polystyrene foam materials.
- Affordable price.
- Waterproof and elastic seams.
Attention: In addition, it is environmentally friendly and does not harm health. “Titanium” is divided into universal and mastic.
Figure 2 Titan.
The universal composition is applied in a broken line, allowed to dry for a few minutes, and then the product is pressed against the ceiling. The adhesive mastic is applied pointwise with a spatula and immediately applied to the surface. The product should be corrected quickly, because after 20 seconds the composition will set, and after 12 hours it will completely dry out.
Technological process
To properly glue foam tiles, you need to follow the following algorithm:
Calculation of basic materials
The main materials for this type of finishing will be: foam tiles, ceiling plinth and glue.
Calculation of the required amount of materials is carried out using a simple method:
- It is necessary to measure the linear parameters of the room (length and width), then multiply them together. This determines the area of the room in square meters. For example, a room has the following dimensions: length – 3 meters, width – 2.5 meters. The total area will be 7.5 square meters.
- The area of one standard ceiling tile measuring 50x50 centimeters corresponds to 0.25 square meters. To obtain the required quantity, you should divide the total area of the ceiling by the area of one tile, which in the example is 30 pieces. To this amount you need to add 10 percent - 3 pieces - in case of scrap or damage to the material.
Material selection
When purchasing the necessary materials in a store, you should pay attention to the following details:
- The edges of the ceiling tiles should be smooth, without sagging. Otherwise, it will not be possible to align the tiles evenly, and the resulting gaps between the tiles will look unaesthetic and will cause additional difficulties in eliminating them;
- Since the pattern of the tiles can visually enlarge or reduce the room, when selecting the material you need to make a preliminary layout of at least four tiles;
- When choosing an adhesive or special mastic for gluing tiles, it is worth looking at the adhesion time of the adhesive to the surface. Otherwise, you will have to press the material against the ceiling for a long time, and this can lead to mechanical damage to the tiles.
Selecting the necessary tools and accessories
To quickly and easily cover the ceiling base with foam tiles, you will need the following tools and accessories:
- tape measure 5 meters;
- cutter;
- putty knife;
- ruler;
- roller;
- pencil or marker;
- ladder;
- table.
Surface preparation
Preparing the ceiling surface before decorating it is a mandatory technological condition.
To do this, perform the following actions:
- cleaning the surface from old finishes. It is imperative to remove blisters of old paint or peeling whitewash with a spatula, and then wash the ceiling;
- if the ceiling surface has a curvature, for example, due to a difference in floor slabs, then it is necessary to level the surface or repair potholes and chips with putty;
- For better adhesion between the ceiling base and the adhesive composition, the ceiling surface must be treated with a primer.
Tile gluing technology
Before you start gluing tiles, you should first draw a ceiling marking diagram and tile layout.
There are two main options for covering the ceiling surface: parallel and diagonal. With the parallel method, the tiles are laid square from the center, parallel to the walls. With the diagonal method - from the center diagonally at an angle of 45 degrees.
After determining the method of laying the tiles, it is necessary to determine the starting point for work. Using a ruler and pencil, the center is determined on the ceiling: a cross - if the layout of the slabs is parallel, an x - if the layout of the slabs is diagonal
It is important to draw this designation correctly, because the entire design of the finish and the composition of the drawing will depend on it
Gluing the tiles is done as follows:
- An adhesive composition is applied to each panel in the center and along the edges, pointwise or continuously. It is better to apply the glue at a short distance from the edge of the tile to avoid contact with the front side of the material;
- The foam panel is pressed tightly against the markings drawn on the ceiling surface and held for 20-30 seconds. It is advisable to calculate the clamping force so as not to damage the fragile product;
- At the beginning of the work, it would be more correct to glue the center of four tiles, so later it will be easier to navigate the surface, making sequential pasting of the tiles according to the intended pattern;
- Tiles that will be laid close to the wall must first be cut with a sharp blade on a flat surface so as not to spoil the facing material. If the cutting edge is not completely smooth, do not be upset, because along the perimeter of the room all the unevenness will be covered by the ceiling plinth;
- If gaps have formed between the tiles, you can seal them with acrylic sealant;
- To give the finishing a complete look, you need to glue the ceiling plinth around the perimeter of the room.
To learn how to quickly and efficiently glue ceiling tiles, see below.
Liquid Nails
Their main components are polymers and rubber, effective for fixing homogeneous and dissimilar building materials. The main advantage of liquid nails is their resistance to rust.
Figure 3 Liquid nails.
The procedure for fixing with liquid nails is as follows:
- Degrease the surface.
- Apply the composition in the form of a snake and dots using a special gun or a construction syringe.
- Press the product against the ceiling.
There are several types of liquid nails and when choosing them, read the properties indicated in the instructions. After all, some compositions are intended for application only to a dry ceiling, while others can be applied to a damp one. Some types of liquid nails are characterized by quick adhesion and increased strength.
Wallpapering
In fact, the technology for gluing wallpaper on whitewash is practically no different from the methods for finishing any other base. Instructions on how to hang wallpaper:
Select a vertical landmark and, taking it into account, apply height markings. It is applied using a ruler and a marker or pencil and is checked with a laser and a regular level. Roll out the material on the floor and cut it into pieces of the required length. It is better to leave a reserve, since the excess can be removed, but gluing the missing is problematic. Prepare wallpaper glue. To do this, you need to follow the manufacturer's instructions. Typically, the dry mixture is poured into a clean container, after which water is slowly added, stirring constantly. Then you should leave the solution to infuse for 15 minutes, then repeat stirring. Apply glue to the wall and the back side of the wallpaper (if technology requires it). Strictly follow the markings and lean the first piece of material against the wall. To avoid problems with falling parts of the coating later, you need to carefully smooth the glued materials with a rubber roller or spatula. During the smoothing process, glue will appear from under the surface; it must be promptly removed with a rag or sponge. Glue the second fragment taking into account the vertical of the first
At the same time, it is important to form the seams correctly: paper wallpapers are attached with an overlap, all others are attached end-to-end.
Regardless of the type of base, the technology for gluing wallpaper remains unchanged.
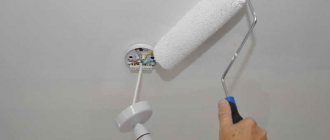
Moment-montage
The main advantage of the glue is instant adhesion and high-quality fixation of the finishing material. The first quality is especially valued, because holding the tile materials until gluing is quite inconvenient.
Figure 4 Moment installation.
Despite its numerous and significant advantages, “Moment-montage” is not as popular as other types of glue, the reason for this is its high cost and high consumption. But to simply and quickly paste, you can’t find a better glue.
Cleaning and caulking
No matter how carefully you try to glue the ceiling cladding, there are still adhesive residues left in the seam lines, and sometimes on the edges of the tiles. If the facing material is laid with an overlap, there are usually no problems. It is necessary to carefully remove the protruding traces of glue with a cutting knife. Leave everything that gets on the front part of the foam until the adhesive mass has completely dried.
Any attempts to wipe off the glue ahead of time and even accidental touching will lead to the appearance of dirty spots, so it is necessary to glue the material only with clean hands, preferably with cotton gloves.
If you have to glue the slabs joint to joint, the resulting seam must be painted over with a special toner or covered with a plastic edging.
Eltitans
For pasting, “Eltitans” has proven itself well, characterized by its strong adhesion. It is considered one of the best adhesives for installing ceiling tiles. The composition can be used for fixing other finishing materials, for example, those made of wood and ceramics. Eltitans is also recommended for mosaics, because it allows you to firmly connect all its elements. It provides not only high-quality, but also durable fixation of materials. Among its advantages:
- Affordable price.
- Low temperature resistance.
- Elasticity.
- Heat resistance.
- Convenience and ease of use.
With the help of glue, it is possible to repair not only residential, but also industrial premises. After application, a transparent, thin layer is formed that is resistant to moisture.
Figure 5 Eltitans.
Attention: The hitch is not only strong and elastic, but also resistant to temperature changes and frost.
Its first-class performance properties are possible due to the presence of organic solvents and polyvinyl acetate in its composition. Many experts consider it the best among similar adhesives.
Before gluing the tiles on the ceiling using whitewash or primer, carefully prepare the base surface - remove cracks and make it smooth. If there is whitewash, treat it with a primer or remove it. To do this, treat the ceiling with a wet roller or brush and wait about half an hour. This time is enough for the whitewash to be well saturated with water and become more pliable and easily removed with a spatula. As you can see, gluing ceiling tiles onto a whitewashed surface with your own hands using Eltitans is quite simple.
Pasting technique
Let's look at how to glue foam ceiling tiles. Advice from professionals will help you cope with the job:
- The option for applying the adhesive composition depends on the type of mixture. If it is acrylic putty or cement mortar, it is better to use a spot application so as not to add weight to the base. Using liquid nails, non-aggressive adhesive compositions, you can apply a path along the entire perimeter, to the central point, and then level the mixture over the entire surface of the decorative part using a spatula.
- Pasting is carried out with doors and windows closed. There should be no drafts so as not to disrupt the drying process of the mixture - this can affect the bonding strength.
- Read the ingredients and how to apply it. There are adhesives that you need to spread, then attach the tiles to the ceiling, peel them off and let the composition dry a little. Manufacturers also produce glue that must be applied to the back of the decor and the base surface.
- Apply glue to the tile, wait 1-2 minutes for setting and glue the element to the ceiling at a pre-marked point.
- Take the next part, attach it to the previous one without glue, visually assess the evenness and you can apply glue. Evenness must be checked in the first row for each element, and selectively in subsequent rows. Thus, the owner gets the opportunity to quickly adjust the layout if a slight shift occurs somewhere.
After the entire plane is decorated, trimmed elements are laid along the edges, you can seal the seams with sealant, applying the composition in a thin layer to prevent thickening. The final touch is to decorate the joint between the ceiling and the wall with skirting boards, baguettes or decorative slats.
The tiles can be painted, painted or varnished, the main thing is that the parts are firmly and securely fastened, the finishing technology is selected according to the requirements and taste of the owner. For example, in rooms with high levels of humidity, the decor is painted to protect it from water, and in open areas with aggressive exposure to wind and sun, the finish can be varnished with waterproof varnish without aggressive components or solvents in the composition.
Source
Is it possible to glue ceiling tiles to whitewash?
Let's consider how to glue ceiling tiles onto whitewash and what features the latter should have. The whitewash must be durable and adhere tightly. This is checked with a spatula - passing over areas with swelling, microcracks and chips. When deciding how to glue ceiling tiles onto whitewash, remember that the latter must be durable, the lime must be frozen, and before installing the finishing material, wet the whitewashed ceiling.
Implementation Features
The instructions for gluing tiles to tiles look like this:
- First of all, immediately purchase and prepare everything you may need:
| Name | Purpose |
| Expanded polystyrene boards | Actually, this is what will be glued on top of the old finish |
| Liquid Nails | Bonding the new coating to the old one |
| Acrylic putty | Sealing seams that are too wide |
| Clean cloth | Removing bleed-through glue |
Liquid nails are perfect for fixing foam boards
- We start working from the center of the room. An exception may be small elongated rooms, where it is more convenient to glue the slabs from the corner farthest from the door;
- Apply the purchased glue around the perimeter of the back side of the first product;
Application of adhesive solution
- Carefully, so as not to push through the fragile foam, we apply the tile to the ceiling so that it covers the junction of the four sections of the old finish. This will ensure greater connection strength;
The new slab must overlap the four old ones
Different methods for placing ceiling tiles
- Immediately remove any glue that appears at the edges with a rag;
- In places where there are significant depressions in the ceiling, we fill them with the same liquid nails. This solution is thick and dense enough that it can be used to level the sections being installed relatively well;
- So we cover the entire ceiling. In the right places we cut the slabs using a stationery knife;
Cutting foam tiles with a utility knife
- Particularly wide gaps between glued products, and there can be quite a lot of them due to the fact that installation is not carried out on a completely flat surface, are filled with acrylic putty;
An example of a suitable acrylic putty
Other old finishes
Is it possible to glue ceiling tiles onto whitewash or wallpaper without first removing them? Well, here, for the most part, the pros and cons of such an idea that I previously listed are true, with the exception that the ceilings will not drop much, and besides, you will have to work a little more.
Before gluing ceiling tiles to whitewash or wallpaper, you will need to do the following:
- We supplement the equipment necessary for work:
| Name | Purpose |
| Metal spatula | Removing weak spots in old cladding |
| Penetrating primer | Increasing adhesive properties and strengthening old cladding |
| Roller | Applying a penetrating primer |
Canister of penetrating primer
- Remove crumbling whitewash or peeling wallpaper using a metal spatula. That is, it most likely won’t work without removal at all, since if you, for example, leave a piece of paper that is poorly attached to the ceiling, it will fall off after a while, weighed down by the foam board;
- Apply a penetrating primer using a roller. This is another additional and very important step. While gluing fragments of polystyrene foam is quite simple, connecting it with other materials can be difficult. The polymer layer of soil adheres perfectly to anything. In addition, this solution will penetrate the dilapidated structure of the previous coating and strengthen it;
- Otherwise, the answer to the question of how to glue ceiling tiles onto whitewash is the same as in the case described above. I will add, however, that synthetic adhesives such as Titan or Dragon can be quite successfully used here.
In this case, the fixation process goes like this:
- Apply glue to the back of the product;
- We attach it to the ceiling;
- We tear it back;
- Wait 30 seconds until the solution begins to set;
- We are finally securing the slab.
Recommendations from experts
It is not so important what kind of glue is used, the main thing is to do the job efficiently and well. So, when using Titan glue, you should press the product against the ceiling, then remove it, wait about a minute and then finally fix it. The procedure allows you to achieve greater reliability and durability, as it allows the composition to dry out slightly and thicken.
Before installation, remove cracked whitewash with a spatula. After all, gluing ceiling tiles onto a whitewashed surface is only possible in some cases.
Figure 7 Preparatory work.
The adhesive surface is processed around the entire perimeter. After all, tiles are often thin and can be subject to deformation. The thin thickness makes the finishing material a little transparent, so it is recommended to use white glue.
Attention: To avoid unevenness, start installation from the corner of the room, where the eye immediately falls upon entering the room.
To achieve greater attractiveness in an irregularly shaped room, mount the product on the ceiling diagonally from the center, which can be a chandelier.
It is not recommended to stick tiles if the ceiling is uneven, as this will only highlight existing defects. It is better to use other finishing materials, for example, install a stretch ceiling.
Preparatory stage
The first step is to check the condition of the whitewashed ceilings; to do this, you need to run your hand over the surface. If marks do not remain on the skin, then the coating is still quite durable. In areas of obvious peeling, it is recommended to scrape a little with a spatula to remove weak fragments. Then you should sweep away the resulting dirt with a broom or dry rag.
At this stage, it is important not to wet the coating so that it does not come off.
Even if the whitewash is held firmly, in any case, before installation, it is advisable to apply a couple of layers of deep penetration primer
Alignment
To properly lay the tiles, the ceiling needs to be leveled. Otherwise, the individual fragments will not fit together, and the overall pattern will be disrupted. You need to do the following:
- Using a water or laser level, determine the lowest point of the ceiling - this is the zero mark.
- Using the same tools, measure several values on opposite and adjacent walls.
- Connect the dots using a tape measure and a marker.
It is convenient to knock off the ceiling along the horizon using an inexpensive hydraulic level
The result will be a level around the entire perimeter of the room.
If the ceiling collapse is from 0 to 5 mm, it is enough to use finishing putty to smooth out the difference, 0.5–1 cm - you should apply the starting mixture and reinforce it with sickle. If the unevenness is more than 1 cm, it is recommended to mount sheets of drywall for leveling. After the putty has completely dried, several layers of primer are applied at intervals of 3–4 hours. This is required to increase surface adhesion and ensure tight contact with the glue.
Marking
First of all, you need to decide where the middle row of material will be laid. The standard dimensions of the tiles are 50x50 cm, so you need to count how many pieces there are in the transverse strip. Let's say the width of the ceiling is 3.5 m, which means that 7 elements will fit on it. The center line will run between the three rows on each side. If the number is even, it will end up at the junction of the tiles; if it’s odd, it will end up in the center of one of the rows.
When marking the ceiling, you should start from the center of the room, but take into account the location of the light source
Based on the data obtained, it is necessary to mark the lanes, and check the level as often as possible. If the markings on the wall are not in a straight line, it’s okay - the tiles can be trimmed and hide the ugly edge. For beginning craftsmen, installation at a right angle is recommended; diagonal installation requires longer and more scrupulous preparation.
Diagonal installation of tiles looks more impressive, but markings for it are done differently