dated June 16, 2016
Paint on the walls has long competed with traditional wallpaper and partially displaced it from our interiors. But high-quality painting requires filigree surface preparation, which significantly affects the cost of finishing. To save money, paintable wallpaper is used. They smooth out defects and visually level the surface of the wall, so careful preparation and sanding are not required. As a result, the cost of work is significantly reduced.
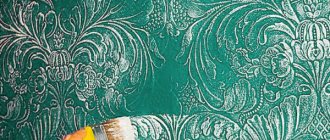
This finishing option has one more advantage - the presence of texture. Painting walls is a very delicate matter. Only the best craftsmen can do this job perfectly. If the surface is smooth, any flaws, smudges and unevenness will immediately catch the eye. On a textured surface, minor imperfections are almost invisible. Therefore, even a non-professional can successfully paint wallpaper.
So, wallpaper for painting is preferable if: a). there is a need to save; b). painting will be done by a person without much experience.
But this does not mean that painting wallpaper is easy. There are some nuances here. Let's look at frequently asked questions related to this type of work.
What wallpaper should I use for painting?
It is recommended to paint only those wallpapers that are labeled as a material suitable for painting. You can paint not only white or transparent wallpaper, but also colored ones.
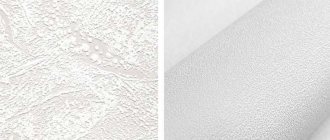
There are different paintable wallpapers on sale: paper, fiberglass, non-woven. When it comes to a dry room, experts unanimously recommend giving preference to non-woven fabrics .
If the surface texture is undesirable, you can purchase so-called painting (repair) non-woven fabric. The optimal density of repair non-woven fabric for painting is 130 g/m2. But if the rough surface does not have cracks or obvious defects, a slightly less dense material will do.
Non-woven wallpaper is very easy to paste and perfectly hides various imperfections. There is no need to putty the already pasted wallpaper. You can paint them several times. glass wallpaper is more suitable for wet rooms - they tolerate such an environment better.
Do I need to prime wallpaper before painting?
Some say it is necessary, while others say it is not. In general, this is not necessary. But it doesn’t hurt to prime wallpaper with an absorbent surface (pure non-woven or fiberglass). Firstly, it will slightly reduce paint consumption. Secondly, the paint will apply a little better, more evenly.
If you plan to paint wallpaper with a non-woven base, but with a vinyl coating, there is no point in priming.
You can do without a primer. In this case, for the first layer the paint must be thoroughly diluted with water (up to 15% of water from the volume of paint).
How can someone without experience paint wallpaper well?
Be sure to practice first. You can paste the wallpaper onto a large piece of plywood or drywall and do a test paint job. Be sure to wait until it dries completely to evaluate the result. You can also train directly on the wall - in an area that will subsequently be hidden from view (for example, behind a large closet).
Test colors help determine both the shade and the optimal consistency of the paint. If it lays down hard and rolls out poorly, you should dilute it a little more with water.
How to paint vinyl wallpaper correctly?
It is necessary to cut the panel of the required length from the roll, apply paint and after drying (after about an hour) begin gluing; If the wallpaper has already been glued, then you should wait until the glue has completely dried (the drying time is usually indicated in the instructions for it), and only then paint it.
Interesting materials:
How to enable volume mixer on Windows 7? How to enable multi-core in Windows 7? How to enable night mode in Windows 10? How to enable mandatory driver signature verification in Windows 10? How to enable cloud protection in Windows 10? How to enable Normal mode in Windows 7? How to enable a disabled device in Windows 10? How to enable the language bar in Windows 10? How to enable display of pictures in Windows 10? How to enable showing hidden folders in Windows 7?
Which roller should I use for painting wallpaper?
It is recommended to paint with a velor or fur roller with short or medium pile. The deeper the wallpaper relief, the longer the roller pile.
The foam roller is not suitable.
New rollers often lose lint during the painting process. They stick to the paint and remain on the wall. To avoid this, it is recommended to carefully roll the new roller along the adhesive side of the tape. Poorly adherent lint will remain on the adhesive tape.
How not to paint over the texture of wallpaper?
If the wallpaper has a texture, it is advisable to preserve it. After all, it, among other things, will allow you to hide both the unevenness of the rough surface and the imperfections of the painting. But how can you not paint over the fine texture of the wallpaper?
Latex water-dispersion paints adhere well to textured surfaces. You need to dilute the paint with water, because the thinner it is, the thinner the layer. You will have to apply at least 2 layers. The first one is a thinner paint, the second one is a little thicker. It is very important to carefully roll out the paint so that it lays on the wallpaper in as thin a layer as possible.
What paint should I use for wallpaper?
Of course, water-dispersed. You can safely use any water-based paint that is declared as wallpaper paint.
In addition, any latex and acrylate paints will do, even if they are not indicated as recommended for wallpaper. Brand and price are more important here. It’s trite, but the more expensive the paint and varnish, the higher its quality.
Share on social media networks:
Wallpapering walls is one of the most popular types of finishing work. There is a huge selection of wallpaper on the market: from traditional paper “trellises” to glass wallpaper. There are also so-called “liquid” wallpapers, which are applied to the wall according to the same principle as plaster. Wallpaper intended for painting takes a separate place. To make your walls truly beautiful, you need to know the technology of gluing walls and applying a colored layer. Let's consider whether priming the wallpaper is necessary before painting, why to do it and what products to use.
How long does it take for primer to dry on wallpaper?
The primer layer must be completely dry before painting. The time depends on the composition of the mixture:
| Type of soil | Drying time |
| latex | 40 min |
| universal acrylic | 2-3 hours |
| deep penetration | 24 hours |
| alkyd | 12 h |
This time is calculated for “ideal” indoor conditions: air temperature 20℃ and humidity 70%. Drying is slowed down by cold, drafts and the use of a heat gun or hair dryer. The wallpaper should dry naturally.
What types of wallpaper can be painted?
As a rule, the initial color of wallpaper intended for painting is white. Depending on the material of manufacture, there are:
Each of the above types of wallpaper materials has its own advantages and disadvantages. For example, glass wallpaper is made of hypoallergenic material. They, in addition, have well-pronounced antistatic properties. Natural raw materials are used in their production, so they are environmentally friendly. The disadvantage of glass wallpaper is the relatively large mass of the finishing fabric. For good adhesion, a special primer composition and special glue are used.
Important! When gluing walls with glass wallpaper, you should not apply glue to the canvas (only on the surface to be pasted). When working, you must observe safety precautions. Work should be carried out wearing gloves and long sleeves. This rule should not be neglected, since the small glass threads that form the wallpaper, when they come into contact with the skin, cause irritation.
What is interlining used for?
In addition to the textile industry, non-woven
widely used in construction and production of finishing materials.
In addition, water-soluble interlining fabric is used
in medicine as a dressing material.
Interesting materials:
What kind of soil is needed for Poinsettia? What kind of soil is needed for rhododendrons? What kind of soil is needed for boxwood? What soil is suitable for clivia? What soil is suitable for a Christmas tree? What land is considered fertile? What is the stiffness of a mattress for osteochondrosis? What 500 rubles are worth? Which iPhones support 4K? Which iPhones support HDR?
Is wallpaper primed before painting?
Like any other type of repair work, this one has its own technology. In order to install wallpaper materials efficiently, the following types of preparation of walls for pasting are carried out:
- Alignment.
- Primer.
- Plastering.
- Grinding.
- Cleaning from dust and dirt.
- Re-priming.
As you can see, not only do you need to prime the wallpaper before painting, it should ideally be done twice. Only after preparatory work is it possible to install wallpaper.
Important! There is also a more economical option, which is offered by companies producing paints and varnishes: a decorative “primer-paint” coating. You perform priming and coloring at the same time, saving time and money.
Why is this necessary?
Usually, beginners begin to have questions after the process is completed, and the freshly glued wallpaper does not want to stay on the wall and tends to fall off. Let's consider a common cause of failure in this matter - the lack of primer on the wall.
Priming the walls
The answer to the question whether the walls need to be primed before wallpapering should be answered positively. Of course, without this they may not fall off; moreover, it also will not provide a 100% guarantee against trouble.
Mixture for preparing walls before wallpapering
However, pre-primed walls make it possible to reduce the possibility of their occurrence by an order of magnitude, so why neglect it? Moreover, the price of the material is so low that it will not affect the family budget in any way.
- Do I need to prime the walls before wallpapering?
How does primer work?
When applied to the surface, it begins to penetrate deep into the surface of the base, filling cracks and pores, as well as binding the remaining construction dust. Thanks to this, the wallpaper will not peel off from the wall, since the glue will completely saturate it. At the same time, the consumption of the latter will be much less.
Another important characteristic of primers is also an increase in the quality of adhesion (adhesion) between the base and the finishing coat. Due to this property of the material, the wallpaper will stick to the wall much better, without moving away in the corners and joints.
Advice: if you doubt whether glass wallpaper needs to be primed before painting, coat it with a special primer - diluted glue, thereby increasing adhesion between the materials.
Types of primer mixtures
Construction markets and stores offer a wide range of primers, which can be specially designed for certain surfaces, as well as universal ones.
Below we will tell you which primer is most often used before wallpapering.
Deep penetration acrylic primer
- Acrylic . When decorating concrete, plastered and plastered walls, i.e. for insufficiently prepared substrates, this type of primer fully copes with its task. In this case, universal (deep penetration) or regular is best. Try to purchase a product from well-known manufacturers so as not to fall for a fake and not get the expected result.
We can recommend the following companies:
- Prospectors;
- Knauf.
Tip: do not pay attention to the phrase “for wallpaper” on the label, this is a marketing ploy.
You can also find similar materials on sale, usually diluted PVA, the price of which is several times more expensive than glue. Be sure to read the composition of the primer before purchasing, where it must be indicated that it is based on a mixture of acrylic polymers.
The consumption of high-quality material depends on the porosity of the surface and is 100-200 ml/1 m2. For application, prepare a paint roller, and for corners and hard-to-reach places - a brush. You can glue wallpaper onto a wall treated with primer after 2-3 hours, when it dries.
Adhesive primer for glass wallpaper
- Wallpaper glue . Anyone who has applied wallpaper themselves at least once knows that often the glue packaging contains instructions that recommend using it as a primer. Strictly observe the proportions of dilution of the material, otherwise you will have a large overconsumption of the product, which will lead to higher costs for repair work.
We recommend: Primer for liquid wallpaper
If there is no such note on the packaging, therefore, the glue is not specifically intended for such purposes. In this case, it is better to use an acrylic primer, which will cope with the task much better.
- Primer for wallpaper based on PVA . There is no shortage in the building materials market today, the main thing is that there is money. However, the traditions of repairing past times are still alive today. For example, primers based on PVA glue have always been used in construction work. There are even craftsmen from past times who do not recognize other materials, believing that purchasing special primers for wallpaper is a waste of money.
PVA based primer
The cost of PVA is indeed lower, which is its only advantage over other specialized products. For example, the material is significantly inferior in durability and adhesion. Moreover, it is now problematic for a non-specialist to find more or less normal PVA glue.
PVA is usually used when carrying out very low-cost repair work, when every penny counts. Method for preparing a primer for walls under wallpaper: 1 liter of glue per 7-10 liters of water.
Wallpaper for painting
A slightly different type of material, which makes it possible to change the color of the interior from time to time with maximum effect and minimal cost. To do this, you do not need to remove old wallpaper from the walls and plaster the base, you just need to apply a new layer of paint on top of the old one.
Is it necessary to prime the wallpaper before painting? The masters differ on the final answer.
Types of primers for working with substrates
Some argue that this should not be done, as the wallpaper may simply become very wet. The latter believe that this must be done, since this way you can even out the absorbent base of the wallpaper and reduce paint consumption. In any case, you must read the instructions carefully and follow them strictly.
How to prepare and paint a pasted surface?
So, the work on gluing the walls is finished. How to paint walls correctly? Will a primer be needed for the decorative coating? Which one is best to buy?
When choosing a primer mixture, consider 2 factors:
- Wallpaper material.
- Chemical composition of paint.
Important! Any primer is suitable for glass wallpaper, including wallpaper glue diluted with water. In other cases, the primer is selected so that it matches the chemical composition of the wallpaper: latex for latex, acrylic for acrylic, etc.
Rules for using primer:
- Before painting, apply wallpaper primer to the pasted wall using a wide brush and a paint roller.
- Before priming, be sure to make sure that the wallpaper glue is completely dry.
- This means that you can treat the walls a few hours after pasting, or even better, the next day.
- Treated wallpaper should be left to dry for at least half a day.
Important! If you plan to use water-based or water-based paint, you need to choose a primer with a water-repellent effect.
Coloring rules:
- Before applying the paint, it must be thoroughly mixed.
- If it is too thick, then dilute it to an acceptable consistency.
Important! Liquid paint covers the canvas with a thin layer. This is of great importance for high-quality wall painting.
- According to experts, it is better to paint in two thin layers than in one thick one.
- Before applying a new coat, the previously applied paint must dry completely.
- The duration of the work break depends on the characteristics of the paint material.
Important! Practice shows that paintable wallpaper can withstand 6 cosmetic repairs. Of course, too many layers of paint make the surface less attractive.
For interior work, interior paints are usually used. They can be divided into two main types: alkyd and water-dispersion.
Alkyd paints
They are used mainly for painting glass wallpaper. Alkyd paint is capable of creating a durable protective film on the surface, thanks to which the wallpaper can be washed with various detergents without fear of damaging the top layer.
The same property also applies to its disadvantages, since the walls under such a film stop “breathing”. In addition, the use of alkyd paint composition is prohibited in the children's room, bedroom and kitchen due to the content of some toxic substances. It is also not recommended to use alkyd paint for embossed wallpaper; it can smooth out its pattern, so in this case it is better to choose smooth wallpaper.
Water-dispersion paints
This includes water-based coloring compositions using various binding emulsions and latexes. They are very popular because of their qualities, first of all.
Water-dispersion paints are odorless, dry quickly and are environmentally friendly. The film formed on the painted surface protects the wallpaper from minor damage, but at the same time allows air to pass through. This property helps prevent the formation of fungi and mold. Moreover, water-dispersion compositions have high moisture resistance, which allows them to paint surfaces in rooms with high humidity.
Why apply primer to wallpaper?
The soil on the wallpaper performs several functions:
- improves adhesion of the base and topcoat;
- protects wallpaper;
- increases the wear resistance of the finish;
- reduces paint consumption;
- improves the quality of coloring.
The paint applies evenly to the prepared walls; without a primer, there is a risk of stains and stains. This is especially true for wallpaper that is not intended for painting.
When using water-based and water-dispersion dyes, the primer imparts water-repellent properties to the surface. Untreated wallpaper can simply become wet from the paint and slide off the wall due to its own gravity.
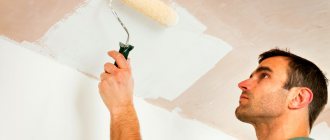
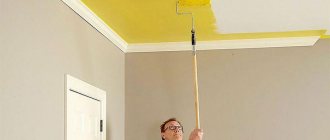
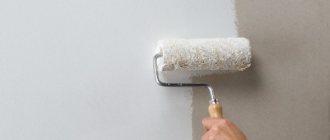
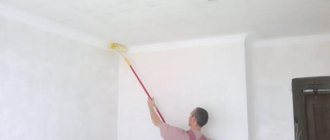
Wallpaper coloring technology
Before you start painting, you need to decide what paint to paint the wallpaper and stock up on the necessary tools. For this you will need:
One of the most important painting tools needed for painting large surfaces is a roller. The quality of painting will depend on it. The best option would be a fur coat with long pile. This is especially true for embossed wallpaper. Foam rollers are not suitable because air bubbles will likely appear on the surface during painting. Velor - absorb little paint; they are used if it is necessary to paint only the top layer of the relief pattern on the wallpaper.
To paint corners efficiently, use narrow rollers or brushes.
Brushes are an indispensable tool for painting corners
Before starting work, floors, window sills and radiators must be covered with plastic film or newspapers to prevent paint from getting on them. Skirting boards, sockets and switches can be removed or sealed with wide masking tape.
To obtain a high-quality result, it is very important to adhere to the manufacturer’s recommendations, which can be found on any can of coloring composition. It is possible that before using the paint, it will need to be diluted with water and everything must be mixed thoroughly until a homogeneous consistency is obtained.
First, use a flat brush to paint the corners, then the stripes along the floor and ceiling. It is necessary to paint the wall in parts, and not along the entire perimeter of the wall at once. In order to avoid spots and streaks, the work must be done quickly so that the previously applied paint does not have time to dry completely.
Wall primer for wallpaper: how to choose and use it correctly
Preparing the walls for wallpaper:
When starting to wallpaper, the base needs to be processed. Any master will tell you that priming is a mandatory step. But people who are far from repairs are unlikely to answer the question of why this is being done. After all, there is no visible effect from this. And if you need to do it, how to choose it? On the shelves of hardware stores there is simply a frightening assortment of cans, canisters and buckets. Let's figure out how to find a suitable primer for walls under wallpaper, apply it correctly, and what subtleties to take into account.
Is it necessary to prime under wallpaper?
The walls are not perfectly smooth. There will always be roughness and irregularities on them that can spoil the appearance of the finish. Primer comes to the rescue. It not only eliminates external defects, but also improves performance:
- prevents cracking and shedding of the base;
- strengthens porous and loose surfaces;
- increases the adhesion (adhesion) of wallpaper to the surface;
- prevents the appearance of mold and mildew in treated areas;
- reduces glue consumption when gluing wallpaper;
- reduces moisture absorption;
- maintains a favorable microclimate in the room without blocking the pores of the processed material.
Which primer to choose for walls under wallpaper
By purpose
According to the tasks to be solved and stages of processing, the following are distinguished:
- for initial finishing - deep penetration (primer);
- for final finishing - adhesive, coloring and moisture-proof.
Deep penetration soils strengthen the treated base, penetrating 10 cm deep. They are used for the primary treatment of surfaces made of concrete, brick, plasterboard, foam and aerated concrete. They consist of water, acrylic, polymers, silicone and latex additives. Antiseptics are added to some formulations to prevent the occurrence of mold and mildew. For heavy types of wallpaper, it is recommended to use this particular type. However, it is not recommended to use it for materials that do not absorb moisture well.
Primer Ceresit CT 17 deep penetration
Adhesive ones penetrate the base by 2-3 cm and improve its adhesion to the next layers of finishing. They are used on poorly absorbent surfaces such as smooth concrete or areas painted with oil paint. The most famous adhesive primer is concrete contact (beton-contact, betokontakt). It contains quartz sand, which causes a rough film, similar to sandpaper, to form on a smooth surface. Heavy types of wallpaper, for example, embossed vinyl on non-woven fabric, fit very well on it. To visually identify the treated area, manufacturers began to pigment the solution. For example, the most famous concrete contact from Knauf is pink.
Primer Prospector Beton-Kontakt (20 kg)
Moisture-proof ones are used in rooms where the humidity level is above average, such as the kitchen. Wallpaper for such rooms is chosen special, resistant to dampness. To prevent them from falling off or becoming deformed, the base is treated with moisture-resistant primer before gluing. It allows water vapor to pass through, but does not form condensation.
Coloring agents are used before gluing non-woven wallpaper for painting. In this case, not only the flat plane of the walls matters, but also the uniformity of the shade. Under a thin layer of non-woven fabric, dark spots will be clearly visible. For these cases, they take a pigmented primer for wallpaper. It gives the surface a uniform color.
Experienced craftsmen usually use both types of primer: for initial and final processing.
We recommend: Purpose, composition and rules for applying primer EP-057
According to the composition of the base
Primers that are used for renovations in residential premises are divided into acrylic, latex, mineral, alkyd, and glyphthalic.
Acrylic or water-based are universal. They are used for concrete, brick, wood, plastered, and plasterboard materials. They cannot be used only for metal. They are odorless, which is convenient when working in an apartment. After treatment, the material remains breathable. Complete drying time is four hours. Acrylic is considered an ideal material in combination with vinyl or non-woven wallpaper.
Latex reinforces loose, crumbling structures and has excellent waterproofing properties. They are used for concrete, drywall, plaster, wood and its derivatives. It is based on synthetic latex, which has all the properties of natural latex: elasticity, strength, water resistance, resistance to stretching.
Mineral ones are suitable for processing concrete, brick, gas silicate blocks, and plaster. They consist of lime, gypsum and cement. Because of their consistency and color, they are called “cement laitance.” Most often used for initial processing and leveling the base at the beginning of repairs. Drying time from 2 to 24 hours (depending on the manufacturer, layer thickness and the substrate being treated).
It is better to choose a primer and the main finishing material, such as putty, from the same manufacturer.
Alkyd specialists specialize in wood, chipboard, OSB and fiberboard. The processed material becomes looser, which provides tighter adhesion for subsequent finishing. Drying time 10-16 hours. Not recommended for use on plaster and drywall.
Glypthal - designed for processing metal and wood. Before application, it is necessary to thoroughly clean the surface from rust. They dry in about a day.
According to wall material
For untreated concrete bases, it is recommended to use mineral compounds. Depending on the porosity and looseness, one to three layers are applied.
What primer is needed for liquid wallpaper? It is necessary to prime them before applying them. This will level and smooth out minor defects in the base and ensure good adhesion to the plane. In addition, this will reduce the absorption of moisture and save solution consumption. Acrylic universal and adhesive compounds are best suited for these purposes. The former strengthen the upper part of the base, the latter create a rough film on it, on which the liquid finish fits perfectly.
Drywall must be primed. Otherwise, during the next renovation, you will have to remove the wallpaper yourself, along with the putty or the top layer of the panels. Drywall is treated with acrylic impregnation. The first time before puttying, the second time before gluing.
Solution consumption rates
Soil consumption is usually indicated on the packaging per 1 square meter of surface area. It depends on the absorbency of the base and the type of soil.
Concrete contact has a higher consumption than conventional soil, but since it is not absorbed, a second layer is not required. More doesn't mean better. If you do not comply with the standards stated by the manufacturer and spend more, this will lead to an increase in drying time, which can delay the repair for a long time. The optimal result of priming is in the form of a shiny polymer film.
How to apply wall primer under wallpaper
The following tools are needed for work.
- Container for solution.
- Roller. To reach the top edge, you will need a roller with a long handle. It is convenient to purchase a model with a telescopic handle. It is better to choose a polyamide roller with medium or short pile.
- Brush for corners and hard to reach places. It is better to choose a wide, soft model with long pile.
- A spray bottle - if you feel more comfortable using it rather than a roller. In this case, you need to think about protecting your eyes and respiratory tract by wearing a respirator and construction glasses.
It is recommended to apply primer to concrete or cement with a brush. Apply a spray bottle to the putty surface. It is better to paint drywall with a velor roller.
Operating procedure
Before you begin to prime the base, it must be cleaned of old coatings, grease and oil stains, mold and dirt. Remove or cover sockets, switches and glass to prevent the solution from getting on them. It will be impossible to wash it off after drying; you will have to replace it.
Use putty to level the walls. Pour it into the cuvette and evenly saturate the roller or brush. Then apply to a clean surface. It is better to start from the window of the room.
Drying time
Many people are interested in the question of how long it takes to glue wallpaper after priming. This directly depends on the percentage of water in the mixture. Other indicators are also important: the optimal temperature in the room is 20 degrees Celsius, atmospheric humidity is 70%!
We recommend: Features and rules for applying primer GF-0119
It is best to follow the drying times indicated on the label, since with a similar name from different manufacturers, the solution may contain special substances that affect the drying speed. Approximate drying times for different materials are presented in the table.
| View | Consumption rate, g |
| Concrete contact | 350 |
| Deep penetration | 100-200 |
| Universal acrylic | 100-150 |
| Latex | 100-150 |
| Mineral | 200-300 |
| Alkyd for wood | 100-130 |
| Glyphthalic |
| View | Surface | Time |
| Concrete contact | All | 6 hours |
| Latex | All | 40 min |
| Universal acrylic | concrete | from 1 to 3 hours |
| drywall | 12 h | |
| brick | from 6 to 8 hours | |
| plaster | from 2 to 4 hours | |
| Deep penetration primer | All | 24 hours |
| Mineral | concrete | from 2 to 6 hours |
| Alkyd | tree | 10-12 h |
| metal | 10-15 h | |
| Glyphthalic | metal | 24 hours |
The main mistakes made when drying:
- drafts - open windows and doors will cause uneven drying;
- using a hairdryer or heat gun - the outer layer of the mixture will dry faster than the inner one;
- temperature changes - the lower the temperature drops, the slower the material dries.
How to store the solution
The shelf life depends on the composition of the mixture. The manufacturer indicates it on the packaging. In this case, compliance with storage conditions is especially emphasized. The liquid is stored in the original container, closed. If the canister is opened and poured into another container, the shelf life is reduced. Storage at sub-zero temperatures is not allowed. It is necessary to protect the container from direct sunlight and heating devices. A concentrated solution diluted with water is best used on the same day. It makes sense to dilute not the entire package, but the required volume.
Typically, primers are stored longer than the period specified by the factory without loss of quality. Unsuitable for use can be determined visually. Lumps appear in the composition, it separates and a dense sediment settles to the bottom. Spots or film appear on the surface. A strong swampy smell is also an indicator of the unsuitability of the product.
Features of coloring non-woven wallpaper
There are several technologies for coloring non-woven wallpaper. If the structure of the selected wallpaper is fairly uniform or there is a relief pattern on it, but you want the resulting shade to be uniform, then the wallpaper must be painted from the outside.
How to paint non-woven wallpaper to get a more embossed pattern? To do this, you need to apply the coating from the reverse side, using a more saturated color. Due to its hygroscopicity, non-woven fabric will absorb the pigment, and the shade will become visible from the front side, and the convex pattern will remain white. Painting must be done immediately before gluing the wallpaper to the wall.
Video on how to paint non-woven wallpaper:
Is it necessary to paint non-woven wallpaper from the reverse side if you want to emphasize the design? No. You can also paint from the front side, but in this case it will be necessary to remove the coloring composition from the polymer layer with a damp sponge. This will result in a more contrasting pattern.
From wallpaper to painting: a guide to updating walls
Tired of old wallpaper and can't wait to refresh your interior with a new color, but you don't know how to approach this difficult task? We tell you how to remove old coatings (and everything that is found under them), prepare the wall and paint it correctly. It's not so scary: even beginners can cope with a complete transformation of a room in one weekend.
Part I: removing wallpaper
What you need
- Film;
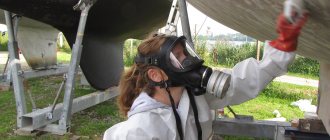
- Mask or respirator;
- Putty knife;
- Cord brush;
- Paint brushes;
- Wallpaper steamer;
- Ladder;
- Bucket and sponge;
- Wallpaper removal solution;
- Putty.
Why you shouldn't paint over old wallpaper
In some cases, this option seems to be the only option, but it is usually temporary. For example, you bought an apartment, set a date for renovation, but it’s not tomorrow, and the idea of living a “flowery” life is perceived as aesthetically unacceptable. Remember: in the future it will take much more effort to remove wallpaper primed in this way: when paint is applied, it becomes waterproof, and you will need special tools to work with it. We will tell you which ones below.
If there is no question of spontaneously painting the wallpaper over the pattern, then the wallpaper can be safely removed. Firstly, this will make the surface of the wall smoother and easier to accept the new coating, be it putty, primer, plaster or paint itself. Secondly, this is the only way to remove the “cultural layer” that certainly accumulates under the wallpaper: dust, whitewash, small fractions of cement, mold and other unpleasant formations.
Preparation for the process
We start with preparatory work: we cover the surrounding area with a protective film. We pay special attention to the area of sockets and switches, close the wiring (just in case, you can turn off all the “automatic machines” on the panel). We wrap furniture and lamps with film if they have not been removed. We put on a respirator or mask, gloves and work clothes. Do not have illusions about your accuracy: repair compounds have a completely different view of things.
Removing wallpaper: the old fashioned way
If the wallpaper is really old, made of paper, and is peeling away from the wall in places, you can try to carefully “pick up” it with a spatula: sometimes old coatings can be easily removed. It’s another matter if the wall has been pasted layer upon layer for decades. In this case, there is a risk that the spatula will either not remove the wallpaper at all, or will remove it from sections of the wall. Therefore, to the question: “Is it possible to remove wallpaper from a wall with your own hands?” the answer will be: “Yes, you can, but it’s better not to risk it.”
Removing wallpaper: using a solution
The solution for removing wallpaper is usually mixed with alkali or a mixture of solvents. The composition exists in the form of liquid or powder. When treating walls with such a product, be sure to use a mask, since the liquid can be caustic. Please note that heavy textured wallpaper or wallpaper applied in several layers usually require several treatments, and one bottle may not be enough.
An analogue of such a solution is sometimes made at home: the composition is based on vinegar, water and washing powder. However, given the relatively low cost of factory-made solutions, it is hardly worth the effort. Moreover, washing powder is also a chemical composition.
Before applying the solution, you need to make cuts in the wallpaper through which the liquid will interact with the wall, then apply the product and wait. Afterwards, the wallpaper can be removed with a spatula, rubbed with a stiff brush or sandpaper. If at the same time you still have potholes or cracks on the wall, get ready to putty on top of them.
The solution works great if the wallpaper is thin. If we are talking about several layers of paper, painted or simply thick textured coatings, you will have to use other methods.
Wallpaper removal: perforation and steamer
For multi-layer coatings, vinyl, textured wallpaper or painted wallpaper, you will need auxiliary tools: a needle roller or a stationery knife, as well as a steamer. An average steamer will cost 3-4 thousand rubles, a standard roller costs around 500 rubles.
A perforation (aka needle) roller is sold in regular building materials stores. Its purpose is to make holes in the surface of the wallpaper to facilitate access of solutions and steam to the lower layers (if the wallpaper is vinyl) or to the adhesive composition. Sometimes the roller is replaced with a stationery knife, but this is not very convenient and, most likely, more thorough puttying will be required before painting.
A steamer is a kind of “iron” for wallpaper, or more precisely, for the glue under it. The device works in the same way as a large amount of boiling water poured onto the wall at once: the wallpaper glue simply does not withstand the effects of steam and loses its structure.
Stages of work
We go over the wallpaper with a roller and make holes;
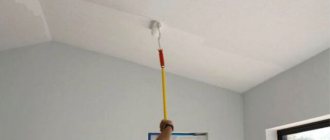
We connect the steamer, treat the wallpaper with hot steam, starting from the ceiling;
Remove the wallpaper with a spatula and remove any remaining glue with sandpaper.
Usually everything works out the first time. Vinyl wallpaper consists of several layers, so you may have to treat the wall twice. If there was a pasting ground paper under the wallpaper, then it usually comes off from the wall relatively easily.
Part II: painting
What you need
Eliminating irregularities
Before painting, it is worth performing two more important procedures: filling up uneven areas and treating the wall with a primer. Then the result will be perfect.
How to putty:
We buy putty, use a spatula to fill the unevenness with the mass so that it becomes approximately the same level as the wall, and rub (sand) it after drying. Grouting can be done using sandpaper.
How to prime:
a special liquid primer is purchased, which is applied in one layer to a clean, dry putty wall with a brush. The drying time for the primer depends on the manufacturer.
Apply paint
| Read about what types of paint exist (and at the same time how to paint old furniture) in our special material. |
In general, the tips for applying paint to horizontal surfaces are approximately the same. The main thing is to make the necessary preparations: apply paper tape where you need to maintain clear boundaries (along the baseboards, if you did not remove them; near the ceiling; around the sockets), select the right painting tools and calculate the volume of paint (consultants of a specific paint company will help you with this : there are special calculators on individual manufacturers’ websites).
Some people use only rollers; others find it more convenient to work on individual areas with a brush. We are guided by experience or simply try the instrument on in our hand. In general, a roller is convenient for large surfaces; the main thing is not to take a lot of paint onto the sponge. When painting, it is very important to follow the instructions of the paint manufacturer: if it is written that a layer of paint dries in one hour, do not repaint the wall after ten minutes, otherwise streaks and unevenness will appear on the fresh coating.
You can, however, try to deliberately paint the walls unevenly - in some interiors this looks like an interesting stylistic device. However, keep in mind: heterogeneity is a decorative effect, and not a bad coloring. It is better to make the first layer even, and you certainly should not neglect puttying and priming the wall before painting.
And remember: the apartment will smell quite strongly (even if your paint is “almost odorless”), so if you have a studio or one-room apartment, it’s better to go to relatives or friends for the drying time.
vote
Article rating