The finishing of building facades is done in different ways. Finishing is not limited to new homes. Finishing is often used in the restoration and repair of ancient buildings. Cladding not only gives the building a beautiful appearance, but also preserves the walls when exposed to weather factors. The service life of the entire building depends on properly completed finishing. Any finishing material has its pros and cons. It is necessary to choose the most beneficial one for the owner. One of the most common methods is finishing with PVC panels. This method differs from others in ease of installation and low cost compared to others.
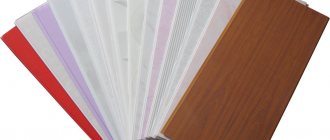
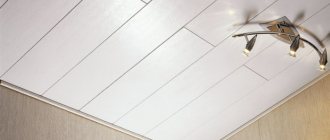
The panels themselves are of high quality. The panels look good next to any type of coating. PVC panels are divided into two types - panels for walls and panels for ceilings. They differ from each other in weight and degree of rigidity. The ceiling panel does not need special strength, so their weight is less and the walls are thinner. They crumple easily, even with your hands. Of course, you can install wall panels on the ceiling, but due to their greater weight, this will increase the load, and the panel may come off its fastenings.
The selection of components also depends on the thickness of the panels. The components are used to hold the panels together and are usually made of the same material as the panels. Properly selected components affect the overall quality of the finish. One of the most important finishing details is the starting profile for PVC panels. Another name is end element.
The starting strip for PVC panels is designed to hide the ends of the panels and to connect the panels with door and window grooves.
Characteristics and classification of accessories
Among the variety of molded products, there are varieties that allow you to mount panels on the wall and have only decorative functions. You can select the necessary profiles for installing plastic panels based on the task that the apartment owner sets for himself.
Start profile
A plastic U-shaped element, or starting strip for PVC panels, is used to finish all ends of the panels if they remain open and do not join with the same material. Starter strips allow you to finish only 1 wall or part of it:
- When installing from corner to corner, the strip is placed on both outer panels of the panels. They allow you to make a neat connection to an adjacent wall during frame and frameless installation.
- When installing wall coverings without skirting boards, the plank is placed at the top or bottom, creating an even joint between the wall and the ceiling or floor.
- When finishing part of a wall or window opening, the transverse sections of the boards remain open. The installation of a starting element allows you to give them an aesthetic appearance. It covers the cuts, forming a thin border. The plank allows you to trim the lower part of the wall with panels, combining it with a painted top, to frame panels in the opening of wall panels, etc.
Connecting element
An H-shaped PVC connecting profile is used to decorate the joint between parts of the same name that need to be lengthened. It is a double U-profile with a common internal partition. When cut, it has the outline of the letter H. The standard length is 3 m. The industry produces connecting strips with a thickness of 5 and 8 mm. When installing, the edges of the joined sections are inserted into the recesses of the joining profile.
Profile with corner
PVC F-profile is called so because of its corresponding shape. Its purpose is to decorate the ends of elements at the corners. The need to install it arises when finishing the slopes of a window or door. Its elongated part covers the place where the slope panels are fastened, and the crossbars cover the end of the wall panel.
Available in 20x30 and 50x30 mm versions. The standard length of the smaller corner is 3 and 6 m, and the larger one is 1.7-6 m. The product is made of white plastic.
External and internal corners
To form neat joints on complex surfaces, an angular profile is produced. These products can be designed for external or internal corners between adjacent walls. On sections, the outline looks like a double corner. During installation, plastic panels are inserted into the recesses between the edges of the corners. The pieces have a distinct purpose: the outer corner looks different from the PVC corner profile for the internal wall connection.
The peculiarity of both models is that they are used only for joints at right angles. If it is necessary to trim an acute or obtuse corner, then use another element.
Rental and universal corner
Plastic guides in the form of a corner are available in 2 more modifications:
- Rolled corners are used to finish external wall joints. This inflexible product is unable to change shape and is only suitable for right angle joints.
- Universal corners are capable of changing configurations and allow you to neatly arrange joints at almost any angle. Available in the form of a roll material: a tape with a recess for bending in both directions.
Ceiling plinth
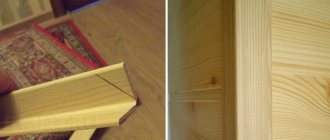
The ceiling cornice is used to finish the junction of the wall and the ceiling, trimmed with plastic panels. Notches located at right angles allow it to be attached to the ends of both surfaces, and decorative molding disguises the junction and looks like a thin border element around the perimeter of the room.
The thickness of the products can be 5 and 8 mm, and the length of each is standard - 3 m.
Useful recommendations from professionals
In order not to make a mistake when choosing one profile or another, you should contact a store where sellers will be able to offer you ready-made kits that are ideal for the corresponding PVC panel. Otherwise, you can buy constructs that will not fit with the coating or not buy something important. When purchasing, you should definitely take into account where such molding will be applied, and depending on this, buy certain types of initial profile. For example, if you need to decorate a part of the surface where there will be no window openings or corners, then only those profiles that form the sheathing are required. If you have to decorate the ceilings, then do not forget about the ceiling skirting boards. Almost all manufacturing companies produce moldings in white, which is ideal for any type of interior. but if there is a need for multi-colored models, then you should either look for them in specialized stores, or order them individually. When choosing plastic moldings, it would be good to find those that have increased strength characteristics. If we talk about technical parameters, then you should pay attention to the groove width that is intended for the panel. To learn how to install PVC panels, watch the video.
Varieties
In addition to the starting one, there are other types of moldings. F-shaped is used when it is necessary to beautifully “close” the joining of the ends. For example, these could be corners where two sheets of PVC, windows or doors, or other slopes meet, or they could be joints of two different materials, for example, plastic panels and wallpaper. In other words, it is used when moving to another plane. Judging by the name, you can guess that this connecting profile is shaped like the letter F.
The next mounting molding - connecting - is selected in situations where two panels need to be connected to each other. For example, when it turns out that the height of the panel is much smaller than the walls, and you have to “grow” it. This profile resembles the letter H and is therefore also called H-shaped.
External corner, as the name suggests, hides the places where the panels form external right angles. The outer corner is considered to be the outer corner. The internal corner, in turn, masks the joining of sheets in the internal corners, which are always straight.
A general-purpose universal corner has approximately the same characteristics as a decorative corner. It is available on the market in several sizes: its sides can be from 10 to 50 millimeters. It is used to hide those places where the panels meet at right angles. This molding can serve both external and internal corners; thanks to its design, it bends in the desired direction.
Galtel, also known as ceiling plinth, is used at the joints of the ceiling and the upper edges of PVC panels. It masks this transition and adds completeness to the overall picture. This molding can be colored and thus fits perfectly into any interior. In addition to the fillets, you can also find profiles at the top called external corners. They are used when peculiar protrusions are created at the top, for example, columns or beams. Finally, interior corners on the ceiling are mounted where the walls form the interior corner.
If necessary, the ceiling plinth is supplemented with a connecting element. This detail secures two skirting boards together when one is simply not enough. It is worth noting that the length of a standard plinth is 3 meters, but in large rooms this may not be enough. Guide rails for sheathing, according to some experts, are also considered a type of profile. The purpose of this element is to simplify the installation of PVC panels. If the sheathing, like the sheets themselves, is made of plastic, then they are connected using special clips.
Finish molding, as again you can guess from the name, is used to secure the last panel. It “completes” the entire structure.
Setting up the foundation
As I already said, attaching the panels to the base is done the same way everywhere. It is much more important to prepare this very foundation well. In general, there are 4 types of bases for such cladding:
- Metal frame assembled from UD and CD profiles;
- Frame made of wooden blocks;
- Installation of panels on plastic guides with movable clamps;
- Gluing panels directly to the ceiling.
Plastic lining on the ceiling of the loggia.
Option No. 1. Assembling an iron frame
A frame made of galvanized profiles is the most reliable, durable and durable option for ceiling cladding. Of course, the arrangement of such a structure, compared to all other foundations, requires time and financial investment.
But take my word for it, the metal frame is worth the sacrifice. After all, if one day you get tired of plastic, you can dismantle it with your own hands in a couple of hours. But instead of it, you can already install whatever you want, sheets of plasterboard, MDF panels, wooden lining and many other worthy facing materials.
I am sure that you have seen similar constructions more than once, but you probably thought that it was too complicated, at least that’s what I thought until I mastered this science myself. Don't worry, there is nothing here that would require fundamental knowledge in the field of construction. If you are not afraid of a drill, screwdriver and grinder, then this instruction is quite up to you.
UD and CD profiles.
In fact, the only disadvantage of a suspended metal frame is that it will make your ceiling lower by at least 5 - 7 cm. For owners of homes with ceilings of 3 m and higher, this detail often does not play any role. But the owners of Khrushchev buildings have something to think about.
Any similar structure is assembled from 2 types of galvanized metal profile. This is the so-called UD profile, in the domestic marking PN (guide profile), and CD profile, in our classification PP (ceiling profile).
In addition to the profiles themselves, you will also need metal perforated hangers and, of course, “Quick Installation” dowels or anchors, this depends on the type of base. The metal profiles and hangers are fixed to each other using small metal screws. People call them fleas or bedbugs, as you are used to.
Profiled hangers.
By the way, we will also attach the plastic cladding to 4.2x16 mm self-tapping screws. My advice to you is to take at least 100 - 200 pieces at once, they will not be superfluous on the farm.
When purchasing material for such work, you need to take at least 10% more. This 10% usually goes towards pruning, defects and other unforeseen circumstances. Plus, it's always better to have a small supply in case of emergency repairs.
Mandatory tools will require a screwdriver and a drill or hammer drill. Metal profiles can be cut with a grinder, but, for example, I find it more convenient to work with metal scissors.
Attachment points for suspension to the ceiling.
It's good if you have a laser level, but this tool is a professional one, and its price is fantastic. Therefore, a hydraulic level is often used instead.
Do not confuse a hydraulic level with a regular building level. A hydro level is a long transparent tube into which water is poured. This device operates on the principle of communicating vessels and has flasks with graduations along the edges. Its price is not high, so it’s better to buy, it won’t hurt.
- Naturally, the work of installing any frame begins with markings . In this case, we will need to find in which direction the ceiling is “filled up”. The fact is that all ceilings seem strictly horizontal, only until you start measuring them. In 90% of cases there are definitely differences in the corners. And we need to find the lowest corner. This is where a laser or hydro level comes in handy;
Fastening panels with self-tapping screws to CD profiles.
- Having found the “littered” corner, you need to measure down 50 mm from it, this will be the level of the plane of our future ceiling . When constructing suspended ceilings of this type, 50 mm is the minimum, but if it is planned to install insulation on the ceiling or any communications pass through it, then the depth can be increased;
- Further starting from the marked corner, you will need to transfer this horizon to the entire room . This is where the hydraulic level comes in handy again. You will need to mark adjacent points in the corners, then rub the cord with chalk, stretch it along the wall between the marking points and beat off the horizontal;
- The UD(PN) profile will be installed along this horizontal line; it will run along the bottom cut of the profile . The profile itself is attached to the wall with “Quick Installation” dowels or anchors in increments of about 60 - 80 cm. Moreover, so that both of its wings are directed into the room, since later we will insert a CD (PP) profile into this groove;
- Now let's talk about how to attach a CD (PP) profile; it will be the basis for PVC panels . Again, you first need to mark the installation locations of the supporting profiles;
Remember, the supporting profile and PVC panels must be perpendicular to each other, and here it absolutely does not matter what the profile is made of, metal, wood or plastic. By the way, not only plastic is mounted this way; any longitudinal panels, be it MDF, lining or siding, are also attached perpendicular to the guides.
Scheme of a metal frame on the ceiling.
- As I already said, the CD(PP) profile will be inserted into the opposite grooves of the UD(PN) profile, but such fastening alone is not enough, so the CD(PP) profile will still need to be hung on perforated hangers from the ceiling;
- Perforated suspensions are attached to the ceiling with the same “Quick Installation” dowels or anchor bolts . But in order for them to pass clearly above the CD (PP) profile on the ceiling, a straight line should be struck using a coated cord;
- After marking, you can begin installing the hangers according to these markings . For plastic, it is enough to install hangers at a distance of 80 cm. But I usually install them more often, at a distance of about 60 cm. This is in case the owners then want to cover the ceiling with a heavier material instead of plastic, for example, MDF panels or clapboard;
Metal frame covered with plastic.
- Then everything is simple. We insert the CD(PP) profile into the grooves of the UD(PN) profile, bend down the wings of the perforated hangers and fix the structure with small self-tapping screws at all points of contact . That's all, your frame is ready and you can start installing plastic panels on it.
Option No. 2. We mount a wooden sheathing on the ceiling
Compared to the option described above, wooden sheathing is much easier to install. But it has both its pros and cons.
The advantages include ease of installation and lower cost of construction. A wooden frame will cost you more than 2 times less than a metal one.
Ceiling lathing made of wood.
But it is extremely undesirable to install wood in damp rooms, for example, in services. Modern impregnations will still protect against mold and mildew, but in this case there is no protection against deformation due to changes in temperature and humidity.
There is one more nuance here: perfectly smooth dry bars are expensive. And if you take the budget option, then almost all the slats are slightly crooked. Accordingly, in order to bring such a frame to fruition, you will have to tinker quite a bit. The cross-section of the bar starts from 25x25 mm, if you take it thinner, it may crack.
Fixing the panel with a self-tapping screw on a wooden block.
In this case, the wooden bars of the frame are attached directly to the ceiling, using self-tapping screws or anchors in increments of 60–80 cm. According to the rules here, it is also necessary to display the plane strictly according to the level.
But if the ceiling is visually flat, then you can simply stuff the sheathing bars onto it and not bother with setting it to zero. After all, if a slight curvature was not visible before the cladding began, then it will not be noticeable after its completion.
If there are large defects on the ceiling, then wooden wedges will help you. Personally, I level strictly horizontally, using wedges, and first set the 2 outermost strips.
Ceiling cladding with plastic PVC panels over wooden sheathing.
After that, I stretch 3 nylon cords between them (along the edges and in the center) and use these cords to install the rest of the sheathing strips. The distance between the planks of the wooden sheathing is maintained at around half a meter.
Option No. 3. Installation of plastic sheathing
The plastic sheathing is very convenient and very durable. But the problem is that it will cost no less than installing a metal frame. At the same time, you can only attach plastic PVC panels to such a base. It will no longer be possible to hang any other facing material on it.
The plank of such a sheathing is a U-shaped profile with edges curved inward. The clamps move along this unique guide, with the help of which the plastic panel is actually fixed.
The principle of fastening to a plastic sheathing with clamps.
They are attached to the ceiling according to the same principle as wooden sheathing. Only compared to wood, plastic is less durable, and if you have to use wooden wedges for the substrate, then the fastening screws or anchors are driven into the ceiling through the wedge.
This is important, because if the fixation point is in a different place, then if the wooden wedges are deformed, the expensive plastic sheathing strips may crack.
The big advantage of this version of the sheathing is not only that it is easy and quick to install plastic on it, but if necessary, you can also quickly disassemble this entire structure.
Plastic guides on the ceiling.
Moreover, both the plastic panels and the sheathing strips will remain in their original form, and all this beauty can also be collected in another place.
Option number 4. “Liquid nails” will help you
The vast majority of ceilings in city apartments are reinforced concrete floor slabs. And if you properly putty the joints between these slabs, you will get a perfectly flat ceiling.
It is not necessary to install any kind of sheathing on it; plastic panels can simply be glued to such a base using a construction adhesive called “Liquid Nails.” Theoretically, you can use another glue, but as far as I have come across, this is the one they use.
Starting U-shaped profile and ceiling plinth with groove in comparison.
Working with Liquid Nails glue has its own characteristics and it is better to take them into account, especially when it comes to ceiling work. If you simply coat the panel with glue and press it to the ceiling, then in this position you will have to stand and wait for the glue to set for at least half an hour. Agree, the prospect is not rosy.
You need to act differently:
- After lubricating the panel with glue, it is pressed against the ceiling so that the glue spreads and immediately comes off;
- Then this panel is set aside and kept for 5 - 7 minutes;
- And only after this the plastic will easily, quickly and firmly stick to the ceiling.
“Liquid nails” glue is certainly good, but in order for it to firmly adhere to a concrete base, this very base must be primed. As a rule, 2 layers of standard deep penetration soil “Betonkontakt” are enough.
Glue "Liquid nails".
Of course, gluing panels onto reinforced concrete floor slabs is quick, simple and inexpensive, and most importantly, it does not make the ceilings lower. But I think you understand that it will no longer be possible to dismantle such cladding without damaging it. This is essentially a one-time option.
Examples of application of components
The picture shows an example of fastening panels using self-tapping screws to the sheathing profile guides. The necessary measurements are taken in advance and holes are made on the slats. In the places where they are attached to the wall, points are marked, holes are drilled, and dowel-nails are inserted. The level determines how smoothly the slatted frame will be fixed to the wall.
Guide rails for cladding
Each component element has its own functions, properties, and purpose.
Start-finish profile
The initial (starting) profile hides uneven cuts of panel products and strengthens the wall structure as a whole. The installation of a plastic wall structure begins with this profile; each panel is simply inserted into the corresponding groove. The process is reminiscent of assembling models from Lego parts. Sometimes you have to practice cutting panels to shape, since pipes and concrete protrusions need to be avoided.
Initial profile for wall finishing
The connecting profile, shaped like a beam, joins the panels along a vertical or horizontal axis to each other, provides a strong and airtight fastening, fitting perfectly into the design of the room. If not only the walls, but also the ceiling are being finished, then a plastic corner for PVC panels is also selected.
Internal and external angle
Decorative corners are used to frame the surfaces of the panels:
- internal angle:
- connects panels at internal corners;
- finishes the junction of two surfaces on the front sides of the corners;
- hides the corner from the connection of the panels of two walls.
- external angle:
- hides the junction of plastic sheets in the outer corner of the premises;
- protects against minor accidental impacts;
- completes the decorative finish.
Corners for PVC panels
A variety of components allows the use of PVC panels in large and small rooms. For example, the internal f corner fits perfectly for assembling a wall structure and creating hidden drawers in hallways. Hidden drawers can be used for:
- viewing readings of hot and cold water meters, apartment electrical panel;
- storage of cleaning products, broom, dustpan.
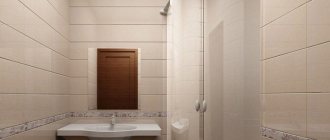
Regardless of size, tiling a bathroom is always a large-scale project. With the help of panels and components made of polyvinyl chloride, you can create a part of your personal space that is unique in every sense, while at the same time meeting the requirements for style and quality.
Important! An outer corner made of plastic creates a smooth edge for curved edges of panels
Profile for PVC panels
Characteristics of the material and the most effective ways to install it
Plastic panels are a universal material. They are impervious to moisture, have good frost resistance and are distinguished by a huge range of models. The material has a simple structure and consists of two sheets of plastic, between which there are peculiar partitions, which also serve as stiffening ribs. The finished product bends well and is extremely plastic, and the variety of textures and shades allows you to diversify any interior.
An example of the internal structure of a plastic panelPlastic panels are rarely used for cladding plasterboard structures and walls that are flat and solid. As a rule, they use fundamentally different finishing materials to work with drywall. PVC panels are rather intended to mask defects on the walls or level them. However, a combination of these two materials is possible.
The main criterion for installing plastic panels on drywall is to protect the material from moisture. It can be considered a budget or temporary alternative to ceramic tiles, which provides full surface protection and has a more sophisticated appearance. Most often, PVC panels can be found in the bathroom or kitchen. They are practically not used for finishing living rooms.
Plastic panels are used to decorate bathroom walls
Walls and ceilings made of plasterboard with plastic panels
The highest quality options for installing PVC on a gypsum plasterboard base are:
- use of glue;
- use of fasteners.
These options have the highest efficiency and solve the problem of installing plastic panels. However, the first of them is less practical, since it provides excessively strong fixation of the material, which complicates its dismantling.
An example of attaching plastic panels to a wooden frame
Fastening PVC panels to the ceiling
Scheme of fastening a plastic panel to a wooden frame
Technology for attaching PVC panels to the wall
Fastening PVC panels to the wall is a current solution for finishing. This material is popular among consumers.
Fastening with staples or nails
The wall to which the panels are attached using liquid nails or staples must be cleaned, dried, and any roughness removed. The surface also needs to be primed. The primer will hold the surface together, remove dust, and provide protection against fungi and mold. After it has dried (after about 8-10 hours), you can begin attaching the slats.
The finishing material must be removed from the packaging and left in the room for a short time so that it adjusts to the humidity and temperature of the environment. Next, cut off the tip of the tube with glue, install the cap, cut it at an angle of 90 degrees and install the tube in the construction gun.
Liquid nails should be applied to the wall in zigzags, grids or dots. After this, you should take the panel and press it to the required area (it is convenient to use a rolling roller). At first, the position of the trim is easy to change. The glue will set in 25 minutes, and complete hardening will occur after 24 hours. After installing all the slats, you need to treat the seams with sealant.
Fastening panels using clamps
To attach panels using special fasteners - clamps, proceed in the following order:
- Measure the height and width of the working plane and select the material according to its length. If the floors and ceilings have no differences, you can immediately cut the elements. If there are significant unevennesses, it will be necessary to make adjustments in place to avoid the appearance of gaps at the junctions with the floor or ceiling.
- Install the first strip of the required size. Using a hacksaw or electric jigsaw, cut off the strips and secure them in the required place.
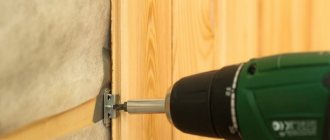
- The lining is attached to the wall using clamps. The teeth of the clip are inserted into the groove, then the fasteners are secured using a drill and short self-tapping screws.
- In this way, the sheathing is installed along the entire plane of the wall. The tenons are inserted into the grooves. The last strip may not match in size, then it will have to be cut to length. The last section is fixed with liquid nails or glue.
Fastening PVC panels with glue
Attaching plastic panels with glue is easy:
- It is necessary to evaluate the evenness of the walls and prepare them in advance.
- The material should be unpacked: the slats must lie outside the packaging for at least 24 hours before placing them on the wall; they must be given the required dimensions. The side on which the plastic panels will be adjacent to the wall is degreased.
- Install PVC panels. The first element should be placed in the corner of the room, first installing a corner profile on it. The tenon of the next lamella is inserted into the groove of the first. Continue assembly in the same way. Having reached the corner of the room, you should cut off the excess board, secure the corner element and fix the panel. The finished finish is wiped with a rag to remove dust.
You can find out which glue is best for the job from this video:
Profile Features
The starting profile is a structure similar to the letter P, with sides of unequal length. This device facilitates the installation of the profile. The entire structure begins to be assembled from its fastening. Then the panel itself is installed in its grooves. If the ends of the panel are not closed, or do not join other panels, then they are framed with a starting strip. When installing, the strip is placed on both panels of the panel.
This ensures correct connection to the wall during installation. To ensure an even connection between the wall and the ceiling or floor, the plank is mounted at the top or bottom, respectively.
Installing a starting profile allows you to hide the remains of cut boards and give them an elegant look when making a border. Using a plank, you can trim the bottom of the wall so that it is in harmony with the top part.
It’s somewhat similar to assembling a children’s construction set. There are times when panels are cut to fit around pipes or overhangs. The profile is very flexible and this facilitates the connection of the panels, creating a strong fastening. If it is necessary to finish the ceiling, use a plastic corner.
Purpose of the corner:
- joins panels in corners;
- performs decorative finishing functions;
- provides protection from impacts.
Corners are not only plastic, but also metal. They are also used when applying plaster so that the ceilings and walls are smooth. Installing corners helps cover internal joints and transitions from one type of finish to another. The PVC corner is very flexible, resistant to deformation, and easy to glue. Thanks to these properties, it is the most popular of all types of corners. Corners are produced in different colors and sizes, based on finishing conditions. If for interior work dimensions of 10x10 mm are sufficient, then for facade work corners of 50x50 mm are already needed. Thanks to the profile, PVC panels can be used in rooms of any size.
Selection of materials
Profiles are made of plastic and metal. It is important to note that you can buy a plastic profile inexpensively, but it is not suitable for high-quality work. The plastic profile performs better decorative functions. If we consider the technology of connecting the panel to the profile, we will see that the panel actually fits into the profile and is already attached to it there. Therefore, to ensure fastening strength, you need to use a profile made of metals - steel or aluminum.
To prevent such a profile from rusting, it is coated with special compounds. Sheathing slats can be made from wood, but this material is not very reliable. The tree may rot, and fungus or mold may appear on it. Therefore, it is better to use other materials.
Types of starting profiles
Structurally, the installation of plastic slopes is in many ways similar to the assembly of a construction set. This is achieved by maximum unification of all parts, as a result the entire structure becomes very technologically advanced and functional.
Each of its elements is intended for strictly defined purposes and performs a specific function. To attach plastic panels to the load-bearing base and to join them together, a starting profile for slopes is used.
Today there are several types of starting profiles, which significantly expands the scope of their use. Depending on their design, they can be used to fasten elements of decorative finishing in various ways in different places of the opening.
They are classified depending on the shape of their section. The profiles are designated by Latin and Russian letters, with which the pattern of their cross-section is similar. On the modern market of finishing materials there are the following types of PVC starting profiles:
I-profile
This starting profile has a cross-section in the form of a capital English letter I: one wide central shelf and two short side ones. The I-shaped profile is installed directly on the wall and is intended for attaching plastic or plasterboard slopes to it.
The special shape of the part allows it to be attached to the opening in almost any position. The main condition is that it should be positioned with a long shelf perpendicular to the load-bearing surface, that is, “stand” on short shelves.
F-profile
One of the most popular types of plastic profiles. This PVC profile is made in the shape of the letter F - it has one long shelf and two short ones adjacent to the long one on one side. Using F-profiles, slopes can be installed from a wide variety of materials:
- Polyvinyl chloride.
- Sandwich panels.
- Wood-based composite materials (MDF, LDVP, laminate, etc.).
- Plasterboard sheet.
Thanks to its design, the F-shaped profile performs two functions at once - fastening and decorative. The presence of a second narrow shelf allows you to close the joint of the facing panel with the F-profile without the use of any additional elements in the form of decorative corners or putty.
L-profile
Using this starting profile, standard slopes made of plastic or plasterboard sheets 10 mm thick are installed. Its cross-section consists of three shelves: one wide and two narrow.
The L-shaped profile is attached perpendicular to the plane of the window: the wide shelf is adjacent to the wall of the opening, the narrow one adjacent to it is to the window frame, and the narrow shelf opposite the long one serves to mask the joining seam at the junction of the finishing panel.
U-profile
The installation scheme of the U-shaped element is similar to the installation of the L-profile, only the outer plastic plate, designed to hide the joint with the slope, is wider. This makes it possible to cover wider or uneven seams.
Advantages of such solutions
Although metal for PVC panels is not used as often as wooden slats, it has certain advantages over natural material. In some cases, metal may be the only option for assembling the base. The main advantages of lathing made of metal components will be as follows:
- The metal that is used in the production of such parts either undergoes special processing in the form of galvanization or is an aluminum alloy. This allows you not to worry about the effects of moisture on the assembled sheathing. In bathrooms and kitchens, this is practically the only suitable option for creating a solid base for the panels.
- The metal does not burn, and this, in turn, makes the entire composition safer from the point of view of fire.
- The design is relatively light and does not load the floor.
- Durability will also be one of the advantages of metal sheathing.
- Standardized overall dimensions of parts greatly simplify the assembly process.
- The base is assembled using a minimal set of tools and does not require any special skills or experience.
The only disadvantage of the solution is that all such structures are an excellent conductor of sound vibrations. If this moment is critical, there are special fasteners that can minimize possible sound vibrations.
Methods for finishing slopes
Slopes can be internal and external, and both of these types require proper finishing. Of course, their design is aesthetic in nature, because appearance plays a big role. However, this is necessary not only for beauty. The foam that fills the space between the window and the wall of the house must be protected from adverse conditions. Everyone knows that it is afraid of moisture and tends to absorb it, after which it swells and deforms the plastic window.
There are several ways to improve the appearance of the window space:
- Plastering is an old finishing method that takes a lot of time and effort. Unfortunately, it does not have the property of heat and sound insulation and over time may move away from the surface due to shrinkage of the house. Since the finishing work takes place in several stages and requires subsequent painting, I decided that I would not bother using this option.
- Plasterboard - this option is better than the first and if you insulate such slopes, they will last longer and will retain heat in the house. But one significant drawback made me refuse to use drywall - the fear of moisture. A prerequisite for long service life is a dry room with a low level of humidity. And the installation of such slopes is not far removed from plaster, and I already said that I wouldn’t want to bother.
- From PVC panels - a simple and affordable way that I immediately liked. Long service life and quick installation prompted me to choose plastic slopes, and most importantly, they are not afraid of moisture.
When I decided which method I would use, all that remained was to get acquainted with additional components for PVC and learn the installation technology.
