Polyurethane is a universal material that has many advantages over its analogues. It is made from a plastic material to which PVC (polyvinyl chloride) and foam are added. Various products are made from it, in particular, polyurethane panels for walls. Area of use: interior decoration of premises of various types, as well as exterior decoration. In this case, the finishing not only serves as a decorative layer, but also protects the walls. In addition, moldings and baseboards are made from polyurethane.
Advantages and disadvantages
The material has gained popularity due to a lot of advantages:
- high thermal insulation properties;
- durability: panels are resistant to fungus, mold, and temperature changes;
- moisture resistant;
- refractory;
- a light weight;
- not a high price;
- suppress noise and sound;
- The panels are easy to care for; just wipe them off dust and dirt in a timely manner;
- when building a house, a reinforced foundation is not required;
- easy to transport;
- are made of safe material.
The disadvantages include high flammability. In fact, polyurethane does not burn, but melts, emitting toxic smoke, so it is extremely important to take care of fire safety in the room where they are installed. In addition, it is susceptible to ultraviolet radiation.
Which polyurethane panels for walls are better?
There are several types of panels:
- Simple, low density and small thickness. Available in smooth, textured and flexible. Great for decorating any room.
- Medium and high density panels. The level of deflection is minimal; it is often used as an independent covering or a decorated element.
- Colored. A coloring pigment is added to the composition.
- 3-D panels are used to emphasize one or another area of the room. They have a three-dimensional image and texture on a flat base. The price of the material is higher than simple polyurethane foam.
- In the form of a corner and a plank. Used to decorate corners or small areas of the wall. It looks presentable and is cheaper than real stone or plaster.
Depending on the desired effect in the interior, you need to choose one or another type. The material is in harmony with other cladding elements.
The material is produced in different variations: square, rectangular, textured, flat. Therefore, choosing the right option for finishing a particular room is not difficult.
Choice of colors
The selection of coating color should be approached taking into account all the details of the finishing and decoration of the room. The tiles are available in the following color options:
- Brickwork styling - a wide palette of shades from light yellow to rich brown;
- Styling as natural stone - options with the texture of marble or granite;
- Solid color models - the whole range of color solutions to create a bright and unusual decor.
If you choose the option for brickwork, it is recommended to purchase tiles of several colors and lay them in a chaotic order, diluting the main selected color with contrasting dark or light splashes. This will give the surface irregularity and depth, otherwise the coating will look flat and painted on.
Brick or stone tiles are often used to create interior accents. The contours of window and door openings, internal and external corners of the room are lined. In order for the decor to look appropriate, you need to choose contrasting solutions. If the color of the walls or wallpaper is light, use dark tiles; if the color of the main surface is dark, use light tiles.
How to attach
Installation of the panels does not require skills or specialized equipment; do-it-yourself installation is possible. To do this, follow the general recommendations:
- The wall must be prepared: level and eliminate all defects, achieve a flat surface. The extreme points of the PPU location are marked on the wall in accordance with the design.
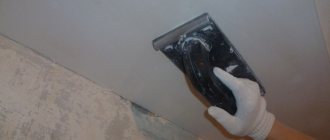
- The wall must be primed with a liquid with a special strengthening compound to remove residual dust and seal the layers of putty.
- The panel is attached to the wall using mastic or liquid nails. Some people use gypsum putty for installation. This method allows you to do a large amount of work in a short period of time. You can use the method of fastening to the sheathing. It can be made of metal or wood.
- The rest are attached according to the same principle to each other.
- The 3rd – D panel, after installation and drying, can be lightly sanded with sandpaper and then painted in the desired color.
Do not use aggressive chemicals and solutions, sealants and grouts based on them!
With proper installation, the service life of polyurethane foam is more than 20 years. During this time, the seams between the panel and the wall may dry out, but they can be easily restored by adding mortar to the area.
Polyurethane panels are an excellent choice for wall cladding. A wide range allows you to fulfill many interior ideas and transform the look of an apartment or house, and thanks to its characteristics, the material will last a long time.
Examples in the interior
Using tiles, you can create an interior accent on individual walls, columns and other architectural forms. The solution is relevant in interiors where other surfaces do not have such a pronounced relief.
Carelessly glued textured tiles can be used to imitate old masonry in interiors designed in the loft style or similar styles.
Using tiles, you can highlight areas of doorways and corners, placing original accents and optimizing the geometry of the room by removing unnecessary sharp corners.
Using tiles of different shades will make the coating deeper and more heterogeneous. It is recommended to purchase tiles in two colors to decorate one wall.
The tiles are perfect for finishing complex, relief areas, columns, smooth curves and contours, if there are any in the interior.
When using red brick tiles with warm light, you can significantly improve the perception of the interior. The effect of warmth and homeliness appears, at the same time, the room retains a modern and original style.
Polyurethane wall panels
Polyurethane is a universal material that has many advantages over its analogues. It is made from a plastic material to which PVC (polyvinyl chloride) and foam are added. Various products are made from it, in particular, polyurethane panels for walls. Area of use: interior decoration of premises of various types, as well as exterior decoration. In this case, the finishing not only serves as a decorative layer, but also protects the walls. In addition, moldings and baseboards are made from polyurethane.
PVC tile installation technology
In the bathroom, PVC floor tiles are most often used, although there are options for both walls and ceilings. Preference is given to the adhesive installation method, as it is more reliable in conditions of high humidity. First, let's take a closer look at surface preparation.
Preparatory stage
There are certain requirements for the rough base for PVC coating:
- absence of potholes, cracks, delaminations;
- the humidity of the concrete base is not higher than 5%;
- maximum smoothness, evenness and rigidity of the surface;
- no dust, grease or oil paint stains on the rough base.
These conditions can be ensured by a leveling screed or pouring a leveling mixture. If you want to glue tiles over tiles, you must first thoroughly putty the seams and eliminate differences in height, otherwise all irregularities will be visible under the new coating. In addition, bulges under the tiles contribute to damage to the material during operation.
After preparing the surface, be sure to bring the tiles into the room and leave them for at least a day. The recommended temperature in the bathroom should be between 18-24ºС.
Requirements for glue and gluing process for PVC floor coverings
Advice. If PVC tiles will be laid on a “warm” water or electric floor, the heating equipment must be turned off several days before finishing. In this case, a distance of at least 1.5 cm must remain between the “warm” floor and the plastic coating. This can be ensured by pouring a cement or polymer mixture.
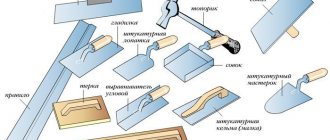
Tools for work
If flexible tiles are laid using the adhesive method, the work will require:
- large scissors for cutting material;
- notched spatula for applying glue;
- rubber roller;
- rubber hammer;
- roulette;
- coated cord.
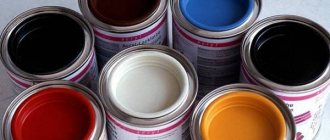
The glue should be taken special, waterproof, intended for PVC products. For example, universal glues KESTOPREN, KIILTO EXTRA, Homakoll give excellent results. As a rule, on the packaging of the tiles, manufacturers indicate which adhesive is best to use when laying.
Laying PVC tiles with glue
First you need to determine how you will lay the tiles - straight or diagonally. It is best to lay the tiles on a dry floor and see which one you like best. The marking of the base, which allows you to mark the center of the room, depends on the chosen method. Take a coated cord and mark perpendicular axes either from the corners of the room or from the center of opposite walls. That is, the guide lines are placed diagonally in the room or parallel to the line of the walls, but they must intersect strictly at an angle of 90 degrees. From the intersection point they begin installing the tiles along one of the guides.
Marking the room
Step 1. Strictly according to the instructions on the package, observing the indicated proportions, prepare the glue. When mixing the composition, be sure to take into account its polymerization time in order to complete the work in time. If you have no experience, it is better to prepare the glue in small portions.
Step 2. Using a spatula, apply the adhesive composition to the floor near the starting point on one side of the guide axis and distribute it evenly so that the covered area is enough for 3-4 tiles.
Glue distribution
Step 3. Take the first element, apply it to the floor so that the side edge and end coincide with the guide lines, and the angle falls on the point of intersection of the axes. Gently press and smooth, squeezing air out from under the tile.
Step 4. Attach the next element according to the selected installation scheme. There are arrows on the back of each tile, so when installing the covering, make sure that the direction of the arrows coincides. The tiles are laid end-to-end, without gaps, carefully pressing and smoothing the edges.
Step 5. Having laid the first section, roll it with a rubber roller, and gently wipe off the exposed glue with a slightly damp cloth. After 25-30 minutes you will need to roll it again to consolidate the result. In the meantime, you can prepare the next batch of glue.
Applying adhesive and laying tiles
Panel gluing process
Pressing PVC tiles during installation
When cutting material, mark and cut from the front side. Along the marking line, first make a shallow cut through the entire tile, then bend it and trim the base.
The cut fragments are first applied to a dry surface, corrected if necessary, and only then attached with glue. It is recommended to cut tiles that will be located on curved surfaces (near pipes, near a doorway, podium) using a template made of thick paper. To increase the plasticity of the material, the tiles must be heated with a hairdryer. After two days, you can install plumbing in the bathroom and carry out final repair work.
Self-adhesive PVC tiles are laid on the floor according to the same principle, but without the use of an adhesive mixture. This method is simpler and requires less time and effort. At the same time, the preparation of the rough base must be done much more carefully, otherwise the tiles will not adhere well to the surface and will very soon begin to peel off.
Tile laying methods
Tiles with and without lock
Glueless installation method
Interlocking tiles are also quite often used in the bathroom. This coating is a floating floor and cannot be secured to the base in any way. The preparatory stage is carried out in the same way as when installing with glue, so we will not dwell on it in detail. Before starting work, carefully read the instructions - each manufacturer of PVC tiles may have some differences in laying technology.
Step 1. The first tile needs to be laid in the corner farthest from the doors with the groove facing the wall. The lower protrusion of the groove on the tiles of the first row should be cut off with a stationery knife so that it does not interfere with the abutment of the surfaces. Be sure to leave a gap of about 5 mm between the edge of the tile and the wall.
Step 2. Take the second tile, lay it next to the first, snap the end edges of the planks into place. Repeat until the end of the row. The laid tiles should form an even line without differences in height.
Step 3. The second row must be fastened with an offset of no less than a third of the width of the tile. To do this, one fragment is laid on a flat surface, an incision is made under the ruler on the front side, bent in half and the base is trimmed.
Tile gluing scheme
PVC tiles in the process of installation
Rolling out tiles with a roller
Laying the last tile
All other rows are fastened in this way; the last tiles are cut to length if necessary. If the locks are tight, you can use a rubber mallet. In general, this method is practically no different from laying laminate, except that the coating elements are smaller. Cast iron bathtub with hydromassage, read the link.
Operation of floors coated with PVC tiles
Below is a video review of laying flexible vinyl tiles.
What are polyurethane wall panels
A wall panel is a type of finishing material that is installed on a surface. It has standard sizes and can consist of one or several layers. PPU is a type of finishing material. It itself is soft and has good sound and heat insulation properties.
If we talk about PPU boards, they are also available in the form of sandwich panels. This design is like a sandwich. The base is polyurethane of varying thicknesses, which is protected on the outside by galvanized metal. PPU panels according to their purpose are divided into two groups - wall and roofing. The material gained its popularity due to its large assortment, excellent characteristics and simple installation.
Types of polyurethane panels
Despite their apparent simplicity, materials are available for sale in a wide range. There are several criteria by which products can be classified. They are:
- Low density panels, small thickness. This is the simplest and cheapest option when it comes to production. Polyurethane boards are flexible, with a textured or smooth surface structure.
- Medium or high density products. Typically, such materials are used as an independent decoration for a room or as a frame or background for mirrors and paintings.
- Colored polyurethane panels. They are made using standard technology, but with one difference - an additional component is a coloring pigment. Often colors are chosen neutral to blend with the interior of the room.
- 3D polyurethane panels have excellent decorative qualities. This material is used to emphasize certain areas in the room. Plastic is added during manufacturing. But the main difference between 3D polyurethane products is that they are three-dimensional and have a semblance of a three-dimensional image and texture located on a flat base. The cost of their production is higher than that of conventional panels.
- The last type is pre-built elements made of polyurethane. We are talking about moldings, corners, narrow strips, which we call baseboards. They are used to complete the composition and are mounted at the junctions of walls and ceilings. Moldings are often used to make frames for paintings, photos, and mirrors. In appearance, the product can imitate plaster or wooden baguettes.
Thanks to such a wide range, everyone can choose a product for a particular task.
Pros and cons of polyurethane products
Like any building material, polyurethane panels have positive and negative characteristics. Here's why the products are valued:
- Low cost polyurethane wall panel. Finishing does not require a large investment, so everyone can afford it.
- Ideal thermal insulation properties. The polyurethane foam itself is insulation. Therefore, using panels from it you can kill several birds with one stone. The room will be warm and comfortable. In addition, like all insulation materials, polyurethane foam has soundproofing properties.
- Long service life. The material is not afraid of fungus, mold or temperature changes.
- Moisture resistant. Polyurethane does not rot and, like polystyrene foam, repels and does not absorb moisture.
- Fire resistance. Even an open source of fire will not cause the material to ignite and maintain combustion.
- Light weight. The products are as light as possible, easy to transport, do not load the wall structure, and installation work is carried out alone.
- Easy to care for. It is enough to regularly wipe the surface from dust and remove dirt from it.
- The composition is safe for humans and does not harm health.
If we talk about disadvantages, then they also exist:
- Although the panels are fireproof, they melt if exposed to fire for a long time. This process releases toxic substances.
- Ultraviolet rays negatively affect the condition of the panels.
- Insufficient decorative characteristics.
How to install
One of the advantages that polyurethane wall panels have is ease of installation. Even a beginner can successfully complete all the work and save money. It is enough to read the instructions and recommendations and follow them. Installation technology:
- Select a location for installation. The entire wall is not always treated with panels; they are used to highlight certain areas. According to the project, markings are made on the wall with the extreme points of the panels. Important: the wall is brought to a perfectly level state; it must be clean and primed.
- After preparing the wall, polyurethane panels are glued. For this purpose, liquid nails or special mastic are used. Some manufacturers recommend fixing the elements using gypsum putty. This application technology allows you to quickly cope with the task even with a large volume of work.
- When the glue has dried, the panels can be lightly sanded with fine sandpaper. This removes the remaining putty, glue and nicks. If desired, the surface can be painted.
What materials will you need?
To work with flexible tiles, you will need a minimum set of working tools, including:
- Flat and notched spatula for applying glue;
- Scissors, a stationery knife and an iron corner for trimming;
- Pencil level and cord for marking;
- Rubber roller;
- Small round paint brush for grouting;
- Drill and mixer attachment if you purchase dry glue, if ready-made, then these tools will not be needed.
Be careful when choosing glue. The tile is suitable for application on surfaces made of concrete, plasterboard, plywood, wood, and mineral putty coatings. The glue purchased for work must be suitable for a specific type of coating and material. You can verify this by studying the information on the packaging.
Installation is only possible on a level base. If the wall is uneven, then it must be leveled using cement-sand mortar and plastering the surface. GCR sheets are suitable for leveling large areas, but this solution is more expensive and more difficult to implement. If the surface has minor defects: pores, small cracks, small chips. Then you can level it with ordinary putty in two layers. To improve adhesive properties, the surface is treated with penetrating primers.
Polyurethane wall panels
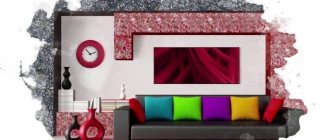
For modern decoration of an apartment or private house, panels made of various materials are often used, which differ in their technical characteristics, price and functions. Among such products, polyurethane wall panels, which are made of plastic material with the addition of polyvinyl chloride and foam, have earned particular popularity. Particularly popular is the corner, which imitates a natural plinth cast from plaster. In most cases, these products are used to decorate walls in the living room or hallway, as well as in the bedroom, while combining them with painted walls or monotonous wallpaper.
Wall panels in the interior
TOP 3 manufacturers
In the field of manufacturing flexible PVC tiles and their analogues with the addition of mineral materials, there are not many manufacturers and in most cases they are represented by domestic enterprises. When choosing, you need to pay attention to the quality of the material, namely its uniformity, the absence of external damage that could occur during transportation and storage. The products are manufactured using the same equipment and in most cases have similar quality. The exception is companies producing materials using artisanal methods.
When choosing material by brand, you can focus on the following manufacturers.
- Delap
The company produces tiles with brick and natural stone styling. It has a good collection of textures, which significantly expands the possibilities of choice.
- EcoBrick
The main specialization of the company is the production of materials with stylized brickwork. Several colors and textures are available. The quality of the products meets all standards.
- Kreta
The manufacturer specializes in the production of interior and facade flexible tiles. It has been on the market for a long time; high-quality equipment is used for production. Offers the best combination of cost and performance characteristics of the material.
Types of polyurethane panels
Polyurethane panels for wall decoration can be classified according to the following criteria:
- Products of low density and thickness are less than average. These parts are considered the simplest; from a production point of view, they can be smooth or embossed, and also have a flexible structure;
- Medium or high density polyurethane decor. Here the product consists of a more complex mixture of elements, so the level of panel deflection is low. Most often they are used as an independent finishing detail, as a frame or background for paintings and mirrors;
- Many manufacturers produce colored panels, which are made from the same material, but with the addition of coloring compounds. Usually these are neutral colors that are chosen in accordance with the concept of the entire room;
- 3D polyurethane panels used as wall parts to highlight a specific area. They are made from polyurethane foam with plastic additives; their main difference from other products is that the products have a three-dimensional image and texture, which is located on a flat base. The production of such a panel is a little more expensive, and accordingly the final cost will be higher than average;
3D mosaic panels
- A separate type are additional elements made of polyurethane foam, such as a corner or a narrow strip. Most often, these details are used to decorate the corners between the wall and the ceiling, and also to frame paintings, photographs or mirrors. Such a corner creates the appearance of a high-quality molding and is much cheaper than plaster or wood.
Installation of polyurethane wall panels
All work on installing these parts can be carried out independently, without the help of qualified specialists, which allows you to save personal funds. For proper installation of polyurethane wall panels, you must follow the following procedure:
- Selecting the location where the part will be installed. In accordance with the designer's project, markings and determination of the extreme points of the panel location are carried out. It is worth noting that the surface of the wall must be absolutely flat and prepared for finishing;
- Priming the wall with a liquid containing a strengthening compound. This procedure will remove residual dust and bind the layers of putty together;
- Gluing the PPU panel to a section of the wall. Parts of this type can be installed using special mastic or liquid nails; some finishers recommend gluing them to gypsum putty. This method allows you to complete a large amount of work in a short time, moreover, the appearance of such a panel, without seams and gaps, will resemble real gypsum stucco;
- After the 3D panel has completely dried, its surface can be lightly sanded with fine sandpaper to remove any remaining putty and nicks. Then it is painted with interior paint in any color.
This installation is easy to perform, and the result is quite durable, the service life of such parts is over 15 years. If over time the seam between the panel and the wall dries out and cracks, it can be restored at any time by simply adding the mixture to the deformed area.
Specifications and Benefits
Manufacturers produce panels in various variations, depending on the design problem being solved. There are products of rectangular or square type with a textured pattern or completely flat. The average size of such panels is 55*75 centimeters or 55*55 centimeters, but there are also smaller parts that are 55 centimeters long and 22 centimeters high. Such panels are mainly used as a plinth or a divider between two levels.
When choosing the type of building material, it is important to consider that polyurethane is a flammable element and can completely melt if it catches fire. To comply with fire safety, you need to choose only products that have a quality certificate and test reports in accordance with the standards of the Ministry of Emergency Situations. Therefore, you should not choose a decorative panel based on its cost, since cheap parts are almost always manufactured in violation of such standards.
A PU foam corner can also have a different structure, pattern, or be completely smooth. Its length varies from 1.2 to 2 meters, and the profile width can be 3-15 centimeters in each direction. In addition to the flow and walls, protrusions and square columns are often trimmed with corners, for which they are glued on three sides, and the junction with the load-bearing surface remains open.
The main advantage of such elements is their low cost. Production is much cheaper than casting a product from plaster or concrete; moreover, the weight of the panel is much less, which means there will be little pressure on the supporting structure.
Also, the panels are not afraid of moisture, since the material is synthetic. The surface of the product can be washed with plain water and a cloth during wet cleaning, and if the paint is damaged, it can be simply restored by selecting the desired enamel color. The appearance of the installed panel is in no way inferior to decorations made from natural materials and allows you to achieve high-quality results for little money.
Thanks to a wide range of PPU panels, every owner will find the right texture and pattern that suits their interior. The corner can be used as an additional element to divide wall sectors into different sections with different types of finishes, for example, to transition from wooden panels to regular wallpaper.
Flexible ceramic tile finishing technology
Laying flexible stone or flexible ceramics differs from laying PVC tiles, although not by much. To cover all the nuances, we will consider each type separately. But first, you should carefully familiarize yourself with how to properly prepare surfaces for cladding, especially since this process is the same for all finishing materials of this type.
Surface preparation
The quality of adherence of flexible tiles to the base depends on three factors:
- smoothness of the base;
- adhesive properties of glue;
- correct fastening and pressing of elements.
The first factor matters the most and is where many people make unfortunate mistakes that result in the finish peeling. Crumbs of plaster and cement mortar, peeling paint, cracks, moldy areas - all this interferes with the normal adhesion of the tiles to the wall or floor, and during operation contributes to the deterioration of the coating.
So, they start by dismantling the old finish. If the walls are simply painted, it is not necessary to remove the paint, the main thing is that it adheres firmly. If there are peelings, bubbles on the surface and other defects, these areas should be thoroughly cleaned and sanded with fine-grained sandpaper.
How to remove paint from walls
Inspect the areas near the pipes especially carefully - plaster usually comes off there, debris and rust collect.
Scrub the fungus-infected areas thoroughly and treat them with “Belizna” or another chlorine-containing preparation.
White against fungus on walls
If there are large cracks or deep chips, mix a little cement mortar and repair them.
Repairing cracks in the wall
If no such defects are observed, you can proceed to priming and leveling. For priming, a universal, odorless acrylic-latex primer is best suited, and for leveling, a waterproof plaster mixture (for example, Vetonit TT).
Pictured is a universal latex-based primer.
Putty can be applied only after the primed walls have completely dried. After leveling, the surface is sanded and wiped with a clean cloth to remove dust. Then the walls are once again coated with a primer. Now they are ready to install flexible tiles.
Primer of walls
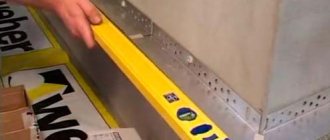
If you plan to lay tiles on the bathroom floor, it should also be prepared. The best base for flexible stone would be a cement-sand screed or self-leveling floor. It is not recommended to lay it on tiles: the material adheres very tightly to the surface and outlines the slightest irregularities, which means that seams may appear. When leveling the floor with a screed, be sure to control the plane with a level, because the surface should be as flat as possible.
Determining the flatness of the floor
The photo clearly shows the differences in height
How to level the floor
After the solution has dried, the floor is primed to increase water-repellent properties and increase glue adhesion.
Priming the floor with a roller
Tools and materials for laying tiles
During the work you will need:
- thin metal ruler or tape measure;
- pencil;
- sharp mounting knife;
- construction hair dryer;
- rubber roller;
- fine-pile paint roller and brush.
When choosing an adhesive, pay attention to its hydrophobic characteristics; conventional compositions are not suitable for the bathroom. Experts recommend choosing tile adhesive marked FLEX (flexible), for example, MAPEI Keraflex, Litoflex K80, Knauf Flex. When purchasing, correctly calculate the required quantity: on average, 2.5 kg of adhesive composition is consumed per square meter of area.
Description of adhesives
If you have chosen flexible “wild stone” tiles with an asymmetrical shape for finishing, you will additionally need to purchase waterproof grout.
Grout CERESIT CE 40 elastic, water-repellent, antifungal
This coating looks much more impressive with seams of various thicknesses, and there is no way to do without grouting. But laying elements of a geometrically correct shape allows you to make the coating seamless, monolithic, and in this case, grouting compounds are not needed.
Bathroom wall cladding
Flexible ceramics
Step 1. The tiles are unpacked and laid out on the floor to determine how best to join the fragments together.
Step 2. According to the manufacturer's instructions, prepare the glue: take a suitable container, pour in water, gradually add the dry mixture and stir. Here it is very important to strictly adhere to the proportions indicated on the packaging; the quality of installation depends on this. You can also purchase the ready-made mixture right away and save time.
Step 3. If you have no experience in finishing work, it is better to fix the tiles not from below, like ceramics, but from above - in one of the corners. This is due to the fact that when cutting the material with a knife, the cuts may not be as neat as the factory ones. At the very bottom of the wall, this defect is practically unnoticeable, in contrast to the upper part, where everything is visible. But professional finishers prefer to glue from below, like standard tiles.
The glue is applied only to the tile, evenly covering the entire back side.
Applying glue
As a rule, this is quite enough to secure the material. Some experts recommend applying the adhesive to the surface of the wall, not the tiles, and using a notched trowel to do this. Both methods are widely used, but the first is more convenient.
Step 4. Take the first element and apply it with its back side to the wall, immediately leveling it vertically and horizontally. As soon as the tile lies flat, it is carefully pressed against the wall with both hands, and then rolled out with a rubber roller from the center to the edges, squeezing out excess glue and air bubbles. The glue must be wiped off immediately.
Gluing tiles
Step 5. The next element is attached end-to-end with the previous one. If the edges do not fit tightly (and this happens very often when laying end-to-end), they are slightly heated with a hairdryer and smoothed with a roller. The bottom edge of both tiles should form a straight, horizontal line, so make sure to line up the pieces well before pressing them into the surface. The rest of the tiles in the row are fixed in the same way.
Step 6 . The end element is first applied without glue to the wall and it is determined whether trimming is necessary. If necessary, measure the remaining distance to the corner with a tape measure, lay the tiles with the back side up, step back the required width from the edge and draw a line under the ruler with a pencil. Then use a sharp knife or scissors to cut off the excess.
Advice. If you need to tile a corner, area around pipes or another protrusion, the tile is additionally heated with a hairdryer after pressing. When heated, it becomes more elastic and adheres well to complex surfaces. To make the adhesion more reliable, you need to press the material against the wall for 15-20 seconds.
The corners are not always strictly vertical, and then it is impossible to lay adjacent elements exactly end-to-end. In this case, you need to overlap the material: one tile overlaps the other by 10-20 mm, without applying glue to the edges. Next, use a knife to cut through both sheets, remove the cut strips, slightly lift the edges of the tiles and apply glue, and then carefully smooth the material.
If, despite all efforts, small gaps remain here and there (up to 3 mm), they can be eliminated in a very simple way. To do this, take scraps of tiles, moisten their front side with a primer and lightly rub the seam until it merges with the canvas. After 15 minutes, you need to remove individual grains of sand using a soft brush. This method is not suitable for wide gaps; they will have to be sealed separately.
Grouting and jointing
Step 7. After gluing all the tiles, it is necessary to treat the surface with a hydrophobic compound, which is usually included with the tile packaging. This composition increases the water resistance of the coating, facilitates maintenance, and extends the service life of the finish. Apply it with a wide brush or short-haired roller from bottom to top.
Water repellent
Treatment with water repellent
In exactly the same way, flexible tiles are glued to the floor, bathtub bowls, partitions and other surfaces are lined.