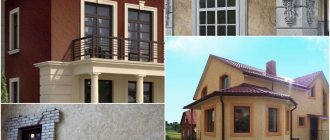
ADVANTAGES OF MACHINE PLASTER
BETTER QUALITY
A perfect surface that does not require putty. The surface is suitable for wallpapering, decorative plaster or textured painting.
FASTER
A team of four people will complete 100-150 m2 per day. The team manually completes this volume within a week.
CHEAPER
Automation of rough finishing, less material consumption, and no need for further surface treatment.
The main purpose of adding modifiers
Hardware plaster is more often used when it is necessary to quickly process large surfaces and obtain a quick connection to the base material. Improve the quality of the adhesive properties of the solution.
Mineral additives in the composition do not shrink, increase density and improve structure. Allows you to eliminate the entry of excess air, the formation of bubbles, and the subsequent formation of small cracks. The walls take on an even appearance and look smooth.
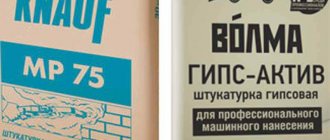
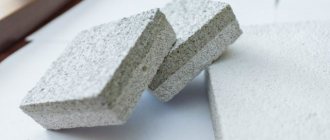
Machine plastering of walls is mainly carried out using ready-made building mixtures. On sale you can find:
- Knauf MP-75
- POLIREM 323
- Duogips
The difference between this composition is the presence of a polymer additive with a water-repellent effect. The affordable price allows it to be used in “economy” facilities and large areas.
from 0R/M2
Stages of work on mechanized plastering
1. Delivery of materials to the site 2. Protection of windows and doors 3. Primer of surfaces 4. Reinforcement of walls (if necessary) 5. Installation of beacons 6. Installation of plaster corners
8. Applying the mixture by machine 9. Alignment with beacons 10. Removal of beacons 11 Sealing the grooves with mortar 13. Trimming the plaster 13. Glossing.
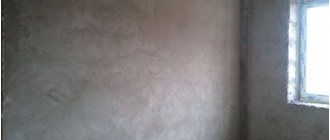
Mechanical gypsum plaster of walls with gloss is suitable for wallpaper (does not require additional putty). You immediately glue the wallpaper, the result is excellent.
Materials
The main materials are plaster mixtures. For machine plastering, ready-made mixtures are purchased in the form of powder or ready-made solution. Buying dry mixtures will cost less. But this option will not be suitable if there is no possibility of supplying water to the machine on site: here the only solution will be a ready-made solution.
It is unacceptable to mix sand, cement and other additives for machine plaster yourself. This is fraught with blockages and breakdown of the machine, as well as poor-quality coating that will have to be redone. You can only use ready-made mixtures from manufacturers.
All plaster mixtures are usually divided into 2 large groups:
Cement
Pros:
- versatility for indoor and outdoor use;
- resistance to moisture, temperature changes and atmospheric influences;
- budget price;
- durability of the coating.
Minuses:
- environmental friendliness;
- sound insulation;
- ease of coverage;
- Fire safety;
- often no putty is required;
- aesthetic appearance.
Plaster
Pros:
- the severity of the coating;
- long drying;
- the need for putty;
- incompatible with wood, plastic and traces of paint.
Minuses:
- high price;
- not suitable for outdoor use and wet areas;
- fragility of the coating compared to the cement layer.
Expert opinion
Kukushkin Anatoly Sergeevich
Repair specialist
The mixture is selected based on the parameters of the starting coating and the type of equipment. Among professionals, mixtures of the following have proven themselves well: “Osnovit”, “Starateli”, “Knauf”, “Unis”. These brands offer both purely machine-made compositions and universal mixtures for manual and machine plastering. They have an expanded product line that allows you to select both starting and finishing options for gypsum and cement mixtures.
Mechanized wall plastering is the optimal method for high-quality leveling
Mechanized (also called machine, mechanical, automatic or automated) plaster allows you to level rough walls built from any material. The application process consists of a machine method of spraying the finished gypsum or sand-cement mixture onto the surface to be leveled. This layer of plaster varies from 1 to 5 centimeters and helps protect against moisture penetration. The applied gypsum mixture is an environmentally friendly product with heat-saving properties.
Equipment
The process of plastering walls can be mechanized and simplified using various equipment: both the simplest and the more complex. Let's consider the options for such devices, starting with the simplest.
Air guns and hopper buckets
These are simple and inexpensive solutions for mechanical plastering of walls. The hopper bucket is a reservoir for the finished plaster mixture, on which nozzle holes are located for the exit of the solution. This reservoir is connected to a tube to supply pressurized air. There is a trigger lever on the tube, when pressed, air pumped by the compressor enters the tank and pushes the solution under pressure onto the surface to be treated. This eliminates the need to manually throw the mixture onto the wall, which saves time and consumption of the working mixture.
You should not purchase models of hopper buckets and cartouche guns with a very large reservoir. Holding a large volume of mixture suspended while working is tiring. It is better to give preference to models with medium capacities.
The design of a cartouche plaster gun is similar to the design of a hopper bucket. There is also a reservoir, a hose for supplying air from the compressor, a handle-barrel with a starting lever, nozzles with inserts of different widths for adjusting the supply of the mixture, and a cleaning rod for blowing. But in cartouche mechanisms the mixture is supplied by suction, while in a hopper bucket the solution is simply released under the influence of gravity.
It is preferable to choose a hopper bucket with a tank made of stainless steel or galvanized steel. They are easier to clean.
These tools have their pros and cons:
Pros:
- increased productivity compared to manual plastering;
- saving solution;
- more uniform application;
Minuses:
- not suitable for very large areas or multi-layer coatings;
- inconvenience and fatigue at work;
- the need to prepare a lot of solution and load it;
- Frequently clogged injectors.
Plastering robots
A fully automated design that mechanizes the entire plastering process, from its application to leveling. It is connected to a compressor or already contains a built-in compressor element for pushing out the solution. The movement is carried out along the wall along the guides specified using the control program. Moving smoothly, the robot applies the mixture and levels it using built-in rules. It is not used so often, it has pros and cons.
Pros:
- automation of the application and leveling process;
- saving solution;
- smooth coating.
Minuses:
- very high cost;
- does not prepare the solution;
- Suitable only for smooth walls indoors;
- not suitable for facades and stairs;
- you will have to clean the surface yourself;
- expensive service.
Machines and stations
They are often meant when they talk about mechanized plaster. The design of such machines at a minimum includes a supply line, a tank for mixing with a mixer, a hose with air blowing and a gun with a nozzle at the end, a hopper, a motor, a screw pump, a water supply, an electrical panel, a system and a control panel - all elements are combined in one body.
The operator supplies the dry mixture, turns on the machine, sets the parameters on the control panel, and the flow of water, mixing and aeration of the solution begins. The mixture is picked up by a stream of air and rushes to the surface under pressure, which increases the adhesive properties of the coating.
Expert opinion
Kukushkin Anatoly Sergeevich
Repair specialist
The layer applied by a plastering machine is always much smoother than the layer obtained by hand-applying plaster. This significantly saves time and effort on leveling.
We already mentioned the pros and cons of such machines at the beginning of the article, listing the advantages and disadvantages of mechanized plaster. When choosing a machine, you need to take into account its productivity and the area being processed.
For houses, apartments and cottages, a capacity of 13-18 l/min is sufficient. with pump power up to 3.5 kW. For large industrial facilities, the optimal performance indicator will be 22 l/min. Their pump has a power of up to 7.5 kW, and such machines often require a high-voltage three-phase connection.
Plastering machines such as those from Knauf are in demand among professionals, and the PTF Ritmo and UShM-150 models are also popular.
Answers to frequently asked questions about machine plastering
Preparatory process
Plastering is the most important stage in interior finishing. The walls should be dry and the room temperature should be positive. Before applying plaster, it is necessary to clean the wall from dust, dirt, and metal inclusions (later they will rust and protrude on the surface). To eliminate differences, unevenness and blockages, vertical beacons are installed using a laser level. After priming, plastering of the walls begins using a mechanized method. As soon as the mixture dries, the beacons are removed and the grooves are sealed. The plastering process should not be interrupted in broken areas so that drying is uniform.
Machine plastering technology
Machine plastering is often compared to the manual application method. Obviously, completion times increase many times over due to the use of an automated method. An important feature of gypsum plaster is that it dries quickly, so it is prohibited to carry out work in sub-zero temperatures and drafts. The thickness of one plaster layer should not exceed 4 centimeters. For curved walls, it is possible to use several layers, which are applied in stages with a special bonding mesh for better adhesion.
Stages of work
Applying plaster using a plaster station is divided into several stages, each of which must be followed perfectly.
Surface preparation
This is the most critical stage, because the quality of application of the mixture depends on it.
- It is necessary to thoroughly clean the surfaces from various contaminants and grease stains, dust and construction debris.
- The wall must be virtually sterile for the mixture to adhere perfectly to the surface.
- Dust removal is carried out using a pneumatic device, this allows you to remove up to 100% of all dust using compressed air pressure.
Primer
The second stage is priming the surfaces. For this purpose, acrylic impregnation is used; during this stage, the surfaces that are planned to be plastered are additionally inspected. All detected weak points, cracks and depressions are reinforced with a reinforcing mesh, which strengthens the wall.
Checking slopes
At this point, the degree of inclination of the wall is checked, special markers are used that will simplify the further work of applying the mixture. This stage is also applied to horizontal surfaces and various angles.
Checking and setting up the automatic station
At this stage, a full check of the automated station is carried out, and the equipment is configured. This allows you to set the optimal percentage of mixing the components from which the plaster is created. This way it is possible to achieve the optimal consistency.
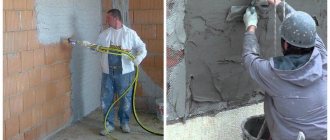
Application and leveling
To apply plaster to the surface of the walls, 1 specialist is required to operate the sprayer.
- To achieve an ideal result, you need to maintain a distance from the wall of no more than 20-30 cm.
- The application inclination should be 90 degrees.
- When applying, you need to achieve uniform distribution of the mixture not only in the center of the wall, but also in the corners and joints.
- The thickness of the mixture should be from 3 to 20 mm, depending on the task.
- Next, without waiting for the plaster to dry, you need to carefully level it using the rule; for this you will need another specialist.
The time required for the process of mechanized plastering of the entire room depends entirely on the total area.
Applying plaster mortar
Mechanized plastering work occurs as follows. You need to take the gun in your hand and bring it to the surface to be treated at a distance of no more than 0.3 meters; the device should be positioned so that the jet and the wall structure form a right angle. The gun must be held with both hands and the air valve must be opened. The first step is to process corners, joints and other hard-to-reach places, and then begin processing the main part of the surface.
During application, it is necessary to move your hands back and forth, and thus cover the entire surface of the wall structure with a layer of plaster material. During work, it is very important to ensure that the next layer of material overlaps the previous one by half.
Automated plaster application
You adjust the thickness of the layer yourself - the faster the hand with the gun moves, the smaller the layer.
Return to content
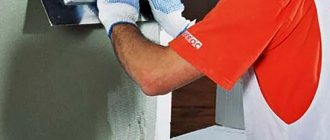
Leveling and shaping the surface
After applying the composition, it is necessary to carefully level it to obtain a smooth surface. This procedure must be carried out promptly, since the mixture hardens on average in 40 minutes; after this period of time, the solution loses its mobility and it is no longer possible to create a truly flat surface.
So, at the preliminary leveling stage, the applied composition must be pulled along the previously installed beacons. This operation can be carried out using a rule, a trowel or a wide spatula.
After this, the plaster composition should set a little. The time required for this is indicated on the packaging. While the solution dries, you can begin preparing other areas of the wall structure for applying plaster. In most cases, to level the layer of applied material, an h-shaped rule is used. If you notice that in some places there is too little solution, you will have to reapply it and smooth it out.
Leveling the plaster
Return to content
Machine plastering technology for walls
This procedure should be carried out with the participation of beacons that are mounted along the perimeter of the structure being processed. They greatly simplify the process, since applying “by eye” does not end well. The plaster layer must be at least 3 millimeters and no more than 20. The thickness is dictated by the surface material and the wishes of the building owner. After completing the plastering work, the surface of the wall structure must be puttied and leveled.
Return to content
Surface filling procedure
This procedure should be carried out approximately two hours after applying the material to the surface of the wall being treated. To do this, you need to generously moisten the surface with liquid using a spray bottle. Then you need to wait for the water to dry completely, this will take about 5 minutes. This is determined visually - the surface ceases to shine, which means it is dry.
Then you need to use a special grater and treat the surface of the wall structure with it. After this procedure, so-called putty milk should appear. If necessary, this procedure is carried out several times. At this stage, you should also cut the corner lines with a special tool (corner plane), and then putty them using a corner spatula.
The final stage of plastering the walls
From all of the above, we can conclude that the automated application of plaster composition to the surface significantly facilitates the physical labor of workers on the construction site. Do not forget about the speed of work performed, which is 5 times faster than the speed of manual processing of walls. The cost of material for automated processing is much cheaper, and much less is required. Using high pressure, high adhesion is created, which provides a durable layer of applied material.
Return to content