What does improved or high-quality finishing of an apartment mean?
What does improved or high-quality finishing of an apartment mean?
Simple plaster is usually used for finishing utility rooms, warehouses, and attics. Improved plaster is used in rooms directly used by people (for example, apartments), and high-quality plaster is used when there is a direct indication of this type of finishing. Currently, when renovating apartments, in most cases, the quality of the plaster layers is applied to the indicators of high-quality finishing.
The main indicators that differentiate the quality of work in accordance with the provided types (classes) of finishing are:
deviations of the plane from the horizontal or vertical.
the number and size of irregularities on surfaces.
the height of the ledges between individual finishing elements.
It is possible to ensure compliance with these conditions if the contractor performs a certain scope of work and their sequence.
Thus, the installation of a plaster layer under conditions of improved or high-quality finishing implies the use of beacons (clause 3.17 SNiP Insulating coatings.
When painting plastered walls with aqueous compounds (i.e., painting work), the appropriate finishing class requires surface preparation.
simple painting: cleaning the surface, priming it, filling cracks and holes, removing dust and painting directly.
improved painting, in addition to the work provided for simple painting, also partial lubrication of uneven areas in two times, sanding such places in the number of layers, priming each layer of lubrication, a second priming of the entire surface.
high-quality painting, in addition to the work provided for improved painting, also continuous puttying in two times with sanding of each layer and an additional (third) continuous priming.
The given example of standardization of finishing work means that when specifying in the estimate the condition of high-quality painting, the contractor must level the surface of the walls with a layer of plaster (in the absence of such a layer, for example, in a new building) in compliance with the appropriate tolerances in terms of deviations of the prepared surface from the vertical, quantity and size unevenness, and also putty the entire surface twice under the condition of grinding each layer.
After drying of aqueous compositions, surfaces must be uniform in color, without stripes, stains, smudges, splashes, or abrasion (chalking) of surfaces. Local corrections that stand out against the general background (except for simple painting) should not be noticeable at a distance of 3 m from the surface.
In places where surfaces painted in different colors meet, the curvature of the lines should not exceed (per 1 m of surface), mm: for simple painting 5, for improved 2, for high-quality 1.
It should also be borne in mind that compliance with the maximum permissible values for the selected finishing class cannot always be ensured by the contractor due to poor quality of the base. In such a situation, it is most reasonable to draw up a report on the condition of the base even before the start of work and carry out subsequent work taking into account its condition and the requirements stipulated by the manufacturer of finishing materials (for example, regarding the maximum thickness of the plaster layer.
By the way, often, answering the question of what European-quality renovation means. Attempts are being made to present this concept as a phenomenon identical to high-quality finishing. This approach is fundamentally incorrect. It should be assumed that this type of finishing only takes into account European building regulations.
If you have any questions, write! We will try to answer them.
Author: Attractive Repair Studio.
The following repair documents are cited.
SNiP 3.04.01-87 Insulating and finishing coatings text.
Source
Options for choosing water-based paint
When repainting walls a different color, it is necessary to take into account the purpose of the room. For example, for bathrooms or kitchens you will need moisture-resistant paint; for hallways, the material will determine its wear resistance.
Water-based dyes are selected according to the following parameters:
- viscosity – determines the possibility of dilution with water;
- drying speed – from 1 hour to 1 day;
- specific gravity 1 l (average value - 1300 g);
- consumption per 1 m²;
- best before date.
It should be remembered that such paints are applied to any surface except metal, since the water contained in the composition can contribute to corrosion. In addition, water-based compositions cannot be used to coat surfaces in the apartment that were previously painted with oil paints.
Preparing for painting work
Before you start painting, you must:
The following tools are required for painting work:
For whitewashing ceilings, adhesive, lime, and water-based compositions are used. The walls of the rooms are painted with adhesives, water-based compositions, enamels and varnishes.
Many colorful compositions cannot do without glue. When painting, animal glue is used. It can be fleshy or bone. Hide glue has a darker color. Available in the form of bars, powder, cereal. Bone - lighter, sold in the form of tiles. Good-quality wood glue has a light brown or brownish-yellow color without spots, and shines when broken.
A solution of animal (carpentry) glue is prepared as follows:
The tile adhesive is crushed into pieces, placed in a jar, poured with cold water so that it slightly covers the layer of glue, and left to swell for 12-18 hours. The jar of glue is placed in another large bowl with water and put on fire, stirring continuously. When the glue dissolves in water, it is ready for use. 10% strength glue used in finishing work is 100 g of glue dissolved in 1 liter of water. It must be prepared in small quantities, since after 3-4 days it rots and loses its properties. Instead of animal glue, you can use synthetic CMC glue: 400 g of CMC glue, up to 1 kg of chalk and pigments are dissolved in 10 liters of water. Such compositions are stored for a long time. Adhesive painting can be simple, improved and high quality. For simple painting, the surface is cleaned, smoothed, primed, and painted.
Improved painting includes the following operations:
cleaning, smoothing the surface, bridging cracks, first priming, greasing, sanding the greased areas, second priming, painting. With high-quality painting, in addition, two more continuous putties, sanding, a third priming, and trimming are performed. Adhesive painting is carried out only in dry rooms. Oil painting of plastered walls in living rooms is not recommended, as the natural ventilation of the premises is disrupted. Sanitary equipment is painted with oil and enamel paints. Before painting, the surface is cleaned of dust and dirt. The cracks are opened and sealed with mortar. Grease stains are removed with caustic soda or a warm solution of laundry soap. Red stains (smudges) formed on the ceiling are removed with copper sulfate.
Vitriol is dissolved in hot boiled water:
after the ceiling has completely dried. Painting should be done vertically from top to bottom. Adhesive paint should be applied to the surface while it is warm, then it comes off better with a brush or paint roller. When applying paint with a brush or roller, you need to move it over one place no more than 2 times, otherwise the applied paint will peel off and drag on the brush or roller. To make it easier to remove old oil paint from the wall surface, iron it with a hot iron through foil until softened, and then scrape it off with a spatula. When painting with oil paint, the old paint, if there are no blisters or peelings, is not removed. Varnishes are washed off with appropriate solvents.
Removing the tailgate trim w164
Surface preparation
At this stage the following is carried out:
- removal of old coating;
- removal of contaminants;
- leveling walls;
- surface priming.
Removing old coating
This process involves performing actions depending on the type of old coating:
- The repeatedly painted surface is cleaned with a spatula;
- the whitewash is removed with a brush, which is soaked in water;
- the adhesive surface is moistened with hot water and then removed with a spatula;
- if the adhesive surface cannot be removed, then a solution of hydrochloric acid (2-3%) is used.
In most cases, you will have to deal with removing old wallpaper. To remove ordinary paper wallpaper, just moisten it with water. When it comes into contact with water, the wallpaper swells. Moisture gets to the glue under the wallpaper. As a result, wallpaper can be easily removed from the walls along with the glue.
The situation is a little more complicated with waterproof material (vinyl wallpaper). In this case, the wallpaper is soaked in several layers of water. It is recommended to mix water with cellulose glue, due to which water is retained in the pores of the glue for a longer time. You can also remove wallpaper from the wall using a special electric steamer.
Removing contaminants
Dirt, rust, soot, grease stains - all these defects must be eliminated before painting the walls. If this is not done, the contaminants will appear through the film of the paint product.
Removal of soot and greasy stains is carried out using a 5% solution of soda ash. To do this, dissolve 0.4-0.5 kg of soda in a bucket of water. To clean the surface of soot, you can also use a 3% solution of hydrochloric acid.
Hot water may be enough to remove rust. After which the surface is treated with a 10% solution of copper sulfate. If rust stains still remain on the wall, then you can make them invisible using rosin varnish, metal primer or white enamel, which dries quickly.
If there is a reinforcing mesh under the plastered surface, rust can be prevented from appearing on the wall by applying an acrylic primer.
Alignment of walls
An integral part of wall painting technology is leveling the surface. Nowadays, drywall or plaster are used for these purposes.
Using drywall you can perfectly level the surface. There are two methods for installing it:
- on a metal frame;
- directly to the wall using special KNAUF glue.
Naturally, using drywall to level the surface will significantly increase the cost of painting the walls. In addition to paint and varnish products, you will need to purchase finishing materials, galvanized profiles and other elements to create a frame (crabs, hangers, screws).
Then you will have to deal with sealing the seams. This will increase the preparation time for painting the walls. If financial possibilities allow, then using drywall will be the best solution for leveling the surface.
Leveling walls with plaster is a rather labor-intensive process. This is due to the fact that it is necessary to apply several layers of material. And each layer must dry completely.
Surface priming
Coating the walls with a primer is the final mandatory stage of the preparatory phase. Without priming the surface, the paint will absorb more. Matte spots will appear that will stand out from the main color of the wall.
The primer is applied twice:
- after cleaning the surface;
- after sanding the finishing putty.
A deep penetration primer is used, which has improved performance qualities. To apply the composition, you can use either a roller or a spray gun.
Adhesive painting technology
The surface prepared for painting is primed. Without primer, the paint will be uneven and patchy. Primers can be used for a specific purpose, for example for adhesive painting, or universal.
You can prepare a vitriol primer for adhesive painting. To do this, dissolve 100-150 g of copper sulfate in 3 liters of boiling water, separately boil 200 g of dry wood glue in 2 liters of water, and dilute 250 g of 40% laundry soap in 3 liters of water.
If the amount of drying oil indicated in the recipe is slightly increased, the quality of the primer will not deteriorate, but, on the contrary, will improve. When preparing a vitriol primer, you cannot use soap without drying oil, otherwise it will curdle in the vitriol solution.
Cover the surface with the prepared composition, allow it to dry and putty. For putty, 1.5 liters of a 10% solution of animal glue is mixed with 10 liters of vitriol primer and sifted chalk is added until a dough-like consistency is obtained.
When preparing vitriol primer and putty, you must remember that vitriol should be diluted only in non-metallic containers (enamel, clay, plastic). Vitriol primer can be stored for no more than 5 days.
After drying, the surface is cleaned, primed and, after allowing the primer to dry, begin painting. All pigments can be added to adhesive colors, with the exception of red lead. If the color is prepared from different pigments, then each of them is soaked in a separate container. Adhesive paint compositions are prepared as follows. For a day or two, soak the sifted chalk and pigments in a separate bowl.
Pour enough water to form a creamy mass. The pigments are mixed well 2-3 times. The soaked pigment is added to the white color in separate portions. Mix everything well. To check the color of the pigment, spread the resulting color onto a piece of glass and dry the glass over a fire.
If the color needs to be enhanced, then add more pigment paste; if it matches the given color, it is fixed with glue, gradually pouring in the adhesive solution. After the first portion of glue, the solution thickens greatly, but you cannot add water to it, you need to wait a little. After mixing, the adhesive paint liquefies.
The color must be of sufficient thickness. They check it like this:
It is recommended to add ultramarine to a white color to give it a bluish tint. White color composition:
Painting Whitewash is easy to use .
Adhesive paints (casein, dextrin and bone glue), ready-to-use varnishes are produced in the form of dry paint compositions, which must be diluted with cold water immediately before use (1 liter of water per 1 kg of dry paint). First, dry paint is dissolved in 0.6 liters of water, then 20-40 g of drying oil and the remaining water are added to the solution and everything is filtered through a sieve. The prepared solution should be stored for no more than 24 hours.
Dextrin paints or bone glue paints should be mixed with warm water in a ratio of 1:
1, let the mixture sit for 5-6 hours, and then stir again.
There is no point in preserving adhesive paint for a long time, since its color changes after just a few hours and it becomes lighter.
Preparing paint for work
The primary material for painting walls has a fairly thick consistency. You will have to add a small amount of water to the paint (except when creating textured patterns). To mix paint with water, it is better to use a drill with a mixer attachment.
After obtaining optimal density, one or more colors are added to the paint. The combination of colors can be done indefinitely. You just need to study the instructions, which indicate the proportions of the colors to be mixed to obtain the desired color. It should also be noted that the paint may change color as it dries.
To determine the material requirement, the length of the wall is multiplied by its width (the surface area is found). Paint consumption per 1 m² is indicated on each can. By multiplying the paint consumption by the wall area, you get the required amount of material per layer. If two layers are applied, the amount is multiplied by another 2. Experts recommend adding 15-20% to the final amount.
It is better to paint walls at temperatures from +5ºС to +20ºС. If the temperature is too high, the paint dries quickly. And this is fraught with uneven surface coverage and the appearance of sagging, which will become noticeable after the wall dries.
The minimum air humidity should be 80%. When humidity is low, walls dry out quickly. If necessary, you can increase the humidity. To do this, use a humidifier. There should be no drafts in the room where the walls are painted.
Lime paint technology
The surfaces are cleaned, as for adhesive painting, moistened with water and primed. There are several primer recipes. Here's one of them. Mix 5 kg of lime dough in 10 liters of water. Separately, 100-200 g of table salt or 400 g of aluminum-potassium alum are dissolved in 4 liters of boiling water.
This solution is poured in a thin stream into the lime dough and diluted with water to 20 liters. Everything is filtered through a sieve with 1X1 mm cells. To fix whitewash compositions, alum, drying oil or table salt are used.
The whitewash composition using salt is prepared as follows. Table salt is dissolved in hot water (100-150 g per bucket of lime mortar). Stir 3-4 kg of lime paste into 5-6 liters of water, add a solution of table salt and dilute with water to obtain 10 liters of solution.
To it you can add pre-soaked dry alkali-resistant pigments (ochre, red lead, soot, mummy, chromium oxide, umber, burnt bone) in the form of a paste.
To prevent the white solution from giving a yellowish tint when painting, ultramarine (blue) is added to it.
On the top of the wall, paint is applied strictly horizontally, for which a strip is drawn with a brush along a horizontal line marked with chalk at a distance of 15-20 cm from the ceiling, and then the walls are painted with a roller or brush. Paint 2 times.
Lime paints are mainly used for exterior work when painting plastered facades . Indoors they are used for finishing basement walls and ceilings, as well as other damp rooms.
Since lime is usually easier to obtain than high-quality chalk, it is advisable to use lime paints when finishing dry rooms. For example, ceilings can be whitewashed with lime, plastered wall surfaces can be painted with lime paints, etc.
If you need to paint with lime a surface that was previously covered with an adhesive composition, be sure to remove the old chalk from it, as lime paints can peel off
Painting the wall
The best tool for painting is a roller with medium-length bristles. With its help, the material is evenly distributed over the surface. Brushes are used to apply paint in joints and hard-to-reach places.
The technique of painting walls includes the following steps:
- a small amount of paint is poured into the tray;
- the roller is lowered into the container;
- The roller is rolled out onto thick paper (it should be soaked normally);
- painting begins from the top of the wall, gradually moving down;
- apply 2-3 layers.
If you need to paint wooden walls, then you need to carry out the following preliminary work:
- treat the walls with an antiseptic;
- replace wood in areas affected by rot;
- drown the nail heads in the wood;
- cover with putty the places where the knots have fallen out or the boards have dried out;
- sand the surface with sandpaper;
- Wash off any remaining skin and wood with water.
Wooden walls are painted with the same material that was previously finished. Otherwise, this will lead to swelling of the old paint with subsequent appearance of cracks on the wall.
Oil painting technology
After cleaning and repairing the plaster walls, they are covered with drying oil with the addition of pigments or grated paint. The pigment is taken within 10% of the mass of drying oil. Drying oil can be used in any color and grade. The preferred pigments are ocher, red lead and mummy.
Dry pigments are better than grated paint because they create a roughness on the surface that ensures strong adhesion of the paint. The drying oil is preheated. Sometimes the oiling is performed twice. With improved or high-quality painting, the walls are primed with liquid paint to match the color of the main color in the proportion:
Putties for oil paint are used semi-oil or oil. (For the recipe for oil putty, see p. 379.) To obtain semi-oil putty, dissolve 20 g of liquid soap in 200 g of 10% hot glue solution. Add 1 kg of drying oil, 250 g of turpentine or white spirit (varnish kerosene), 50 g of drier and a little chalk, stirring continuously. Then add the rest of the chalk until you get a loose dough. After the putty has dried, the wall is sanded and painted.
Oil paints come in ready-to-use (liquid) and thick-based (paste-like) forms. Before use, thickly grated paint is diluted with drying oil (150-600 g of drying oil per 1 kg of paint).
If an oil color scheme is prepared from several paints, then pour drying oil into the paint, which is the most in the color scheme, to a working thickness and, thoroughly mixing, in small portions the rest according to the color of the paint until the desired color is obtained. If necessary, it is diluted with drying oil.
Thickly grated oil paint can also be diluted with turpentine, but then the surface will be matte. You can adjust the degree of glossiness of the surface by adding turpentine to the paint diluted with drying oil. The strength and gloss of a surface painted with oil paint will increase if it is coated with oil varnish.
To speed up the drying of the paint, driers (liquid oxides of some metals) are added to it. They are used to speed up the drying of oils, oil paints, drying oils and varnishes, and light siccatives are added only to light paints and no more than 3-4% of the paint weight, otherwise its strength will decrease. When applying the last layer, no drier is added to the paint.
TechnoNIKOL soft roof installation technology
You can improve the shine of oil paint by adding 4C oil-resin varnish to it.
To get the right color of oil paint, sometimes you have to mix several different paints together. However, some paints cannot be mixed.
With all paints you can mix emerald green, chromium oxide, ocher, mummy, yellow mars, umber, red lead, malachite, burnt bone, black grape and some others.
The paint is applied in a thin layer in two steps. The second layer is applied after the first has dried. Apply oil paint in broad strokes along the surface, and then shade it across the stroke and paint along it again.
A little more about paints, varnishes, enamels. Briefly, the words “enamel”, “varnish”, “paint” are deciphered as follows:
After the letters there are numbers. They mean the following:
Solvents for these paints are turpentine, white spirit, and RS-2 solvent.
Drying oils . For renovation work in the house, natural, Oxol and combined drying oils are most often used.
Natural drying oil is made from hemp or linseed oil by heating with the addition of a drier. It is used for impregnation of wooden surfaces before coating with paint, as well as for diluting thickly grated oil paints and whitewash, and preparing primers.
Paint diluted with natural drying oil gives a hard and quickly drying film and can be used for both interior and exterior work.
Drying oil "Oxol" is produced by oxidizing vegetable oils (sunflower, soybean, etc.) with the addition of a drier and solvents (turpentine, white spirit). Paint diluted on this drying oil dries longer than paint on natural drying oil; the film is less shiny and hard. . Oxol drying oil is used only for interior work. It is not recommended to use it for diluting paints intended for painting floors.
Combined drying oils (K-2, K-3, K-4, K-5) are used mainly as a semi-finished product for the manufacture of oil paints.
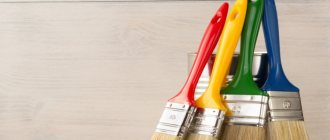
Paint selection
The most suitable material for DIY painting of walls in a residential area is water-based paint. This is explained by its excellent characteristics:
- environmentally friendly (does not contain toxins);
- no pungent odor (does not cause an allergic reaction);
- ease of use (no need to dilute with solvents and other “chemicals”);
- quick drying;
- preservation of the original appearance over a long period of time;
- a variety of colors (suitable for any interior);
- compatibility with other finishing materials.
Water-based paints are divided into:
- acrylic;
- latex;
- silicone.
Acrylic products are in greatest demand. They are characterized by:
- minimum cost;
- resistance to fading;
- uniform application the first time;
- strength and elasticity (thanks to acrylic resin).
The main advantage of latex water-based paints is increased wear resistance. After it dries, the surface is covered with a moisture-resistant film. Thanks to latex paint, you can even seal small cracks (up to 1 mm).
The most expensive products are silicone paints. Due to its excellent moisture-resistant properties and high elasticity, the material is used for painting the walls of rooms with high humidity (bathroom, kitchen, toilet).
You can coat walls with silicone paint when the plaster has not completely dried. This is due to the fact that the material is vapor permeable. Walls on which silicone paint is applied can be washed with any detergent.
Video about painting walls:
Painting with hair-emulsion (water-dispersed) paints
Water-based paints are used for both exterior and interior work. They can be used to paint wooden, concrete, plastered, stone, primed metal, glass, plastic and other structures.
They cannot be used for painting coatings made from adhesive paints or varnished surfaces.
The surface before painting should be prepared in the same way as before painting with oil compositions. You cannot prime with solutions containing copper sulfate - it forms chemical compounds with the paint, as a result of which the properties of the latter deteriorate.
Before use, the paint must be thoroughly mixed and, if thickened, diluted with water to a working viscosity.
Surfaces painted with these paints are easy to clean with water.
When working with water-based paint, the windows in the room should be closed until it dries. The paint is “afraid” of drafts and frost. Once frozen and thawed, it is not suitable for consumption.
After work, you should immediately thoroughly wash the dishes and brushes with water, since dried water-based paint cannot be washed off. When starting painting work, cover the floor and furniture. Furniture can be wrapped in plastic and tied. Newspapers should not be laid on the floor:
They easily get knocked down, tear, and dirt still ends up on the floor.
It’s better to take thick paper and glue it together into one large “carpet” right on the floor. After finishing the whitewashing and painting work, you can roll it up with the trash and throw it away.
Before painting, window frames and doors must be washed or wiped with a damp cloth. It is recommended to rub the glass with an onion cut in half or a swab soaked in vinegar:
This will help you easily remove oil paint stains from glass. You can cut strips of thick paper and stick them onto the glass with flour or starch paste.
After two days, wet the paper and remove it, and remove traces of paste with a damp cloth.
It is recommended to unscrew the devices and put them back in place after the paint has dried.
Before starting whitewashing, lubricate your face and hands with rich cream and put on gloves. When you're done, give your hands a warm bath to remove any limescale that can corrode your skin. When whitewashing, be careful not to get lime on your face or eyes, as it causes severe burns.
What color should I paint the walls of the rooms? This is important not only from an aesthetic, but also from a hygienic point of view. It is known that different colors have different effects on people:
It is not recommended to paint walls in dark and harsh colors (red, green, ultramarine, cherry), as they visually reduce the internal volume and irritate the organs of vision.
You should not paint the walls of the same room in different colors. Changing the tone is possible in a niche (darker) and other selected parts of the room, provided that the shades vary within the same color.
It is not recommended to paint the ceiling the same color as the walls, as this visually reduces the already low ceilings in our apartments. According to tradition, the ceiling should be white, and the wider the white stripe between the edge of the ceiling and the colored walls (at least 15-20 cm), the higher the room will appear. It is also better not to highlight a frieze on the wall that separates the color of the wall from the color of the ceiling.
The walls in the apartment should be covered with light paints in soft colors.
There are 3 groups of colors:
When choosing wall colors, you should remember that adhesive paint becomes lighter after drying, while oil and emulsion paints darken. Therefore, before making a final decision on choosing a color, do a test on the wall (paint a small area), which will show the true color of the prepared paint. If the room is painted in one color, first prime the ceiling and walls, then paint.
After this, they wipe off dirt and paint from window frames, doors, window sills, and trim and paint them with oil or enamel paints. The baseboards and floors are painted last.
Rub heavily soiled walls with sand or wash with water before whitewashing. If there are rain stains or soot on the walls or ceilings, whiten them first with lime mixed with Zoloif. In places where the walls adjoin the ceiling or each other, forming an angle, there is more total gaps during painting Therefore, these places must first be finished off with a brush, and then, carefully priming the paint, painted in the usual way. To ensure a uniform color, the paint must be stirred more often. To do this, you can use a piece of bent wire inserted into a drill.
It is advisable to cover the top of the jar with a cardboard circle and pierce a wire through it. Having picked up paint with a brush, lightly squeeze it on the edge of the dish.
While working, the brush should be held perpendicular to the surface to be painted. It is convenient to paint large surfaces with a roller. However, before applying it, you should paint the corners of the wall, joints with windows, doors and other places where it is inconvenient to paint with a roller. The width of the strip painted with a brush should be at least 7-8 cm.
the walls of the rooms were decorated with several pictures
Painting with a roller begins with several strokes crosswise, and then rubs them. You can't put a lot of paint on a roller, just like on a brush.
A foam roller is essential for obtaining an even, smooth paint job. It can be quite difficult to dip it in paint so that it is evenly covered with a thin layer of coloring composition.
The paint should be poured into a basin or wide bowl, lightly immerse the roller in it and begin to slowly turn it with a thin wooden stick or sliver until the paint is absorbed over the entire area of the roller.
On walls, it is recommended to apply the last coat of paint vertically.
Wooden surfaces are painted one last time along the grain. In hot weather, adhesive paint should be applied in the morning or evening, when there is no heat. After whitewashing the ceilings and walls, doors and windows can be easily washed from white stains with a mixture of water and vinegar (1 part vinegar to 2 parts water).
Enamels and varnishes should be used heated, for which the dishes with them are placed in hot water, bringing the temperature to 60-80 ° C.
Some enamels are made with volatile solvents, so it is recommended to heat them in a sealed container. It must be remembered that solvents are flammable. A number of enamels are produced only for mechanical spraying. They are not suitable for working with brushes, as the solvent quickly evaporates from them.
To prevent whitened surfaces from getting dirty, you can add starch-replacing chemicals to the whitewash - Alba, White Emulsion, Shershknas, Velte, Luga, Sina, Elegant (with bleach ).
dry pigments to paint and varnish material using the following thinners:
If a film has formed on the surface of the paint, it is not necessary to filter it. It is enough to put part of a nylon stocking into the jar and dip the brush directly through it. In this case, the paint is used completely, without loss. To prevent oil paint from drying out, coat the edges of the jar in which it is stored with paint and cover the jar with a piece of glass.
Before working with oil paints, wet brushes should be dried and worked for 20-30 minutes on rough plaster or brick, soaking them in paint. In this case, the protruding hairs will be leveled out.
During long breaks in work, brushes should be thoroughly rinsed from oil paints:
After enamels, paints, varnish, even long-dried brushes can be restored by boiling them in 9% vinegar. Immediately after working with oil paints, rinse rollers and brushes thoroughly in gasoline and place in clean water. In an unheated room, it is better to store them in a bucket with kerosene, turpentine or the same paint that was used for the work, but so that they do not touch the bottom of the dish, that is, in a suspended state.
To prevent a brush used for oil paints from drying out, it should be placed in a jar of solvent, put a plastic bag on top of the jar and the handle of the brush and tighten it on the jar with an elastic band. After nitro paints and nitro enamels, brushes can be washed with solvent No. 647, then placed in clean water. For the winter, when stored in cold conditions, it is better to fill them with the same solvent or rinse them well, dry them and wrap them in rags.
Painting built-in or wall-mounted cabinets begins with hard-to-reach interior walls. It is most convenient to paint the frames of window frames, baseboards, panels and the bottom edge of doors with a small flute (about 5 cm in diameter). When painting window frames, pay attention to the corners. Paint or enamel is shaded along the binding bars. Painted bindings are left open for two days so that the paint is completely dry and does not. stuck to the boxes when the binding was closed. The door begins to be painted from the panels, then moves on to the protruding surfaces. Smooth the paint with an almost dry brush using light strokes from bottom to top. The paint is first applied across, then shaded along the door. Platbands are painted in the same way.
Skirting boards are painted lengthwise using shields. Chairs, tables, stools begin to be painted from the inside, placing them with their legs up, and then they are turned over and painted from the outside. To avoid staining the floor with paint, place tin can lids under furniture legs. There is a known simple and high-quality method of painting wooden surfaces. Fresh, good quality cement is ground on a stone with milk until the thickness of oil paint is applied and applied to an unpolished wooden surface using a brush in 2-3 steps. This treatment not only protects window frames and other wooden objects from the influence of weather, but also makes them fire-resistant. When painting walls with lime and adhesives, other defects are often discovered
You need to know them and be able to correct them. Here are the most common:
Before priming, the product is degreased with gasoline. Sinks and scratches are filled with putty NTs-008. After priming, nitro enamel is applied. It is available in the form of aerosols. “Grunt 147” can be replaced with BF-2 glue diluted with alcohol. But in this case, the product should be heated as indicated in the instructions for using BF-2 glue.
When painting a metal roof, you must first clean it of rust. To do this, the roof is cleaned with a wire brush, degreased with gasoline and one of the rust removal compounds, for example “Auto-Rust Converter,” is applied. After 4-5 days the roof can be painted. (Wear rubber gloves and safety glasses when working.) When starting to paint an iron roof, you can prime the sheets with alkyd resins containing iron or lead lead. Ready-made alkyd resin formulations with melamine-formaldehyde and urea-formaldehyde resins are impermeable to moisture and will not crack. After priming, the sheets are painted.
When working with paints, you need to remember that:
some pigments are poisonous; splashes of vitriol or water-based paints are difficult to remove after drying or are not removed at all; lime corrodes the skin; thinners for oil paints and varnishes are flammable; contact of caustic soda on the body causes burns; work with it in glasses and gloves; hands stained with enamel or oil paints cannot be washed with solvents or turpentine, since this can cause skin irritation; the use of red lead in adhesive paints can cause lead poisoning; while working with enamel paints and drying them, the room must be well ventilated.
Technology of high-quality surface painting with water-based paints
Home \ Technology of high-quality surface painting with water-based paints
Painting surfaces with water-based compositions is the most popular type of surface finishing. Its advantage is such factors as this type of finishing is inexpensive and does not require very significant skills in its implementation. The materials used to carry out this work are environmentally friendly and fireproof. Does not cause an unpleasant odor, dries quickly. Quite durable.
High-quality painting finishing of surfaces at the present stage of development of finishing works is the most commonly used finishing. Although there are three types of surface painting based on the quality of execution, in addition to high-quality painting, there is also simple and improved painting. High quality is the most common. Since the scope of its application is growing. Water-based compositions are used in almost all types of buildings: residential, industrial, shops, offices. which require high quality finishing. At present, it is possible to use simple improved surface painting only in the utility room. Water-based compositions are used to paint plastered, concrete surfaces. As well as surfaces finished with sheets of dry plaster. Structural wallpaper intended for painting.
It is impossible to improve the technology of painting work without mechanizing all technological processes, therefore, in the textbook, much attention is paid to the mechanisms used in the production of painting work for the preparation and application of various painting compositions, for heating and drying premises. The paint composition applied to building structures during the finishing work in accordance with the requirements of the project forms a paint coating. Painters carry out the coating according to the samples provided.
Paint and varnish coatings are classified according to a number of characteristics.
By purpose: technical - protection of painted structures from corrosion, rotting, moisture absorption, fire, action of chemicals, etc.; sanitary - creating proper sanitary conditions in the premises, maintaining cleanliness; decorative - architectural and artistic decoration of a building, structure or its individual premises.
- Tools, materials, devices
The greasing spatula is intended for greasing small cracks. And also as an auxiliary spatula for large volumes of surface filling. This spatula can be used as a scraper when cleaning the surface.
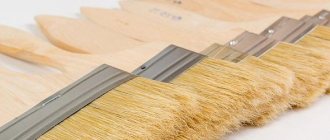
Fluted paint brushes
Widths of fluted paint brushes: 25, 60, 62, 76 and 100 mm. Flutes are made from badger hair or high-quality bristles. The fastening is a metal frame, the handle is wooden, short. Flutes are used mainly to smooth out marks from a hand brush or handbrake on freshly applied paint composition. However, flutes can also be used for applying paint composition.
Macks can be round or rectangular. The bristles are made from half-back bristles with the addition of up to 50% horsehair. Used for painting primer surfaces.
Hand brushes are small paint brushes with a wooden handle. Hand brushes are designed for painting with adhesive and oil paints on small surfaces. Handbrake sizes Ø - 26, 30, 35, 40, 45, 50 and 54 mm.
Swing paint brushes
Dimensions of the fly brushes: Ø - 60-65 mm, hair length - 100 mm. Used for surface priming.
Paint rollers
Working with paint rollers significantly increases the productivity of painting work. The paint roller absorbs more paint and covers a larger area in one pass. Paint rollers can be used for both painting and priming
Radiator brushes are equipped with an elongated handle, curved at the base. They are used in painting work on such hard-to-reach surfaces as heating radiators, and they also produce special paint brushes - radiator brushes.
A rubber spatula is used for filling and filling small cracks and holes. These types of spatulas are also made of plastic.
Applying putty over large areas
Metal spatula is designed for applying putty over large areas
The plastic roller is intended for rolling out the roller during painting or priming the surface.
The paint block is intended for sanding the surface.
The paint spray gun is designed for applying water-based paint compositions to the surface.
The finisher's table is used for painting work at height.
- Materials
Properties of building materials.
Painting or paintwork materials are compounds that are applied to the surface to be finished in liquid form, in thin layers, and which form a thin protective film. Firmly adhering to the base. Painting materials have a number of properties characteristic of all building materials in general. But they are the ones that make it possible to give building materials the protective resistance of the finished surface.
These are physical properties (density. Porosity, water absorption, humidity, moisture transfer, frost resistance, thermal conductivity, color, shine, light fastness, weather resistance).
Mechanical properties (strength, elasticity, ductility, fragility, hardness, abrasion, elasticity). Chemical properties (acid resistance, alkali resistance, water resistance, oil resistance, corrosion resistance, toxicity)
Paint compositions include water-based and non-aqueous pigments and binders. In aqueous paint compositions, lime, cement, liquid glass, various adhesives are used as binders; in non-aqueous paint compositions, natural and artificial drying oils, synthetic resins, bitumens, etc. are used. Binders determine the type of painting (adhesive, oil, synthetic) and its area applications.
Adhesive compounds are usually used to paint walls and ceilings indoors with normal humidity. Synthetic, silicate, water-based paints are more versatile. They are used for finishing any type of surface except metal. They quite reliably protect structures and products under conditions of variable temperatures and exposure to aggressive environments.
After drying and hardening, the applied paint compositions form a protective film firmly adhered to the surface being painted.
Classification of painting compounds
Painting compositions are classified according to the type of film-forming substance and the operating conditions of the coatings.
According to the purpose of the coating, the following types of painting compositions are distinguished: primers, which ensure adhesion of the coating to the surface; putties and lining pastes that level the surface to be painted; painting compositions that impart decorative, protective and technical properties to surfaces.
The alphanumeric designation system for basic painting compositions consists of five groups of symbols for paints, enamels, primers, putties and four groups of symbols for varnishes.
The first character - the full word - indicates the composition group (paint, varnish, enamel, primer, putty).
The second character (two capital letters) shows the film-forming substance (a type of resin, copolymer, drying oil, etc.). If the composition includes a mixture of film-forming substances, then the second group of signs is designated by the type of film-forming substance that determines the main properties of this composition. Between the second and third groups, an index is placed that determines the type of paint composition (for water-based, water-borne, powder, organosilicate, etc.): B - without active solvent, B - water-borne, OD - organodispersed, P - powder, E - emulsion.
The index is separated from the second group of characters by a hyphen.
Composition of paints
Pigments are one of the components of paints and enamels. The color of the paint coating, its hiding power, as well as resistance to atmospheric factors, chemical reagents and high temperatures depend on the type of pigment. Pigments have a certain color because they are able to selectively reflect the rays of daylight. When a light ray falls on a pigment, part of the radiant energy is absorbed, while the other is reflected, coloring the pigment in the color of the reflected rays.
Characteristics of water-based compositions
Water-based paints of various colors are divided into 2 types according to purpose: for external and internal work.
Water-based paints of different colors for interior work
They are a suspension of pigments and fillers in a plasticized polyvinyl acetate dispersion (emulsion) or styrene-butadiene latex. Designed for interior work on wood, plaster, cardboard, polyvinyl acetate dispersion (emulsion) or styrene-butadiene latex.
And also on old coatings with oil paints, enamels, and water-based paints.
Water-based paints are not recommended for use in bathrooms, showers and laundry rooms.
Before use, the paint is diluted with tap water to a viscosity according to the VZ viscometer - 4: 20...25 s - when applied with a paint sprayer, 30...40 s - when applied with a roller and 40...50 s - when applied with a brush. - when applied with a roller and 40...50 s - when applied with a brush. The paints are stable when applied with a roller and 40...50 s when applied with a brush. to freezing (up to 400C) and thawing. The paints are non-toxic and explosion-proof. The shelf life of paints is 6 months from the date of issue. For household needs, paints are packaged in containers from 0.5 to 3 liters. The main characteristics of these paints are indicated on the labels.
Water-based paints of different colors for exterior use are a suspension of pigments and fillers in aqueous dispersions (emulsions) of synthetic polymers with the addition of various auxiliary substances for primed surfaces, as well as for old coatings.
Primer for interior work is designed to prepare highly absorbent substrates for subsequent coatings. A primer for interior work is used before applying paint (The presence of small particles in the primer that can penetrate into narrow pores allows for good adhesion to the surface.
A primer for interior work allows you to achieve high strength and durability of the final coating and reduce the cost of subsequent work by reducing material consumption.
The primer for interior work is used for pre-treatment of concrete, brick, plastered and other types of mineral surfaces;
facilitates the application of paints;
reduces paint consumption;
after drying, it forms a smooth matte translucent milky surface;
subsequent application of paint is carried out only after the primer has completely dried;
Oil-adhesive putty is intended for finishing the interiors of buildings.
Oil-adhesive putty is used in construction and repair for finishing and leveling various concrete, brick, plastered, wooden and other surfaces, sealing joints and crevices, filling cracks and then painting them with water-based paints.
The quality and durability of the final finish is determined not only and not so much by the quality and durability of the finishing materials themselves. This is much more influenced by the quality of the base on which the finishing coating is laid.
At the same time, it is well known that finishing layers (paint, wallpaper, other decorative materials) are not applied directly to structural materials: concrete, plaster, blocks, gypsum boards (gypsum plasterboard, gypsum board). The immediate basis for finishing materials is a certain intermediate layer - putty .
The main purpose of putty is to eliminate surface defects, repair and level it, and correct planimetry. With the help of putty, a number of other problems are solved - the creation of complex curved surfaces (domes, columns, arches, rounded corners, etc.), as well as various architectural details (rods, cornices, moldings, etc.)
First of all, putties are divided into 'dry' and ready-to-use.
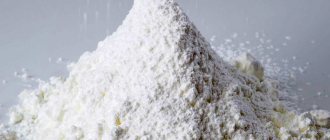
A high-quality dry putty mixture is a complex multi-component composition containing all the necessary components (binder, filler and various additives); it is the components that determine the properties of the putty.
Immediately before use, the mixture is mixed (diluted) with a strictly defined amount of clean, cool water.
Ready-made putties are an excellent material for finishing work. The solvents that are initially in the material evaporate after it is applied to the surface, which leads to some shrinkage. This unpleasant property limits the use of ready-made putties in thin finishing layers and practically does not allow them to be used for pre-leveling and repairing the base in thick (more than 5 mm layers). To be fair, it is worth noting that today there are already ready-to-use putties that can be applied in a layer of up to 15 mm, but, as a rule, these are expensive specialized compounds used only for special cases.
Based on the type of main binding component, putties are divided into gypsum, cement, and polymer.
The most important thing is the classification of putties by purpose. How to choose leveling putty (or putty of the first layer), finishing (or putty of the second layer) and universal.
Leveling putties (or first layer putties) are the most common type of putty. They are intended for preliminary leveling of the surface of the base. Their choice depends on the type of base, its basic properties and characteristic features, and operating conditions. The properties (characteristics) of the leveling putty are the determining factor in the strength and durability of the entire system, because It is she who bears all operational and temperature-humidity loads.
The leveling putty of the first layer must meet the following three basic requirements:
have good adhesion to the existing base and be fully compatible with it;
easily and reliably fill all defects in the base, correct the planimetry (geometry) of the surface;
have the necessary strength and durability of the base surface.
For leveling putties, especially in the real conditions of our construction sites, an important parameter is the possibility of applying them in a layer of variable thickness (usually from 0 mm to 15 and even up to 25 mm). In cases where the use of plaster is not yet effective. In this case, the appearance of visible shrinkage, shrinkage cracks, peeling and other defects is unacceptable.
It is important to note that manufacturers of the highest quality modern leveling putties do not require the additional use of reinforcing materials. The characteristics of the product itself must guarantee the absence of cracks under standard conditions and exclude the occurrence of shrinkage. The use of reinforcing materials is necessary only in places of increased structural deformations or in particularly difficult working conditions. These locations are determined at the design stage or preparation of the Work Project.
It is quite convenient and useful to use materials that have a long or precisely standardized lifetime (the time of use of the prepared composition). For stable operation throughout the working day, for large volumes of work, materials with a lifetime from 8 hours to 24 hours are used. If it is necessary to carry out urgent work or work in small volumes, you can use special materials with a lifetime of 30 minutes to 3 hours.
The use of special leveling putties for mechanized application offers great prospects for reducing costs and accelerating finishing work. This ensures production of up to 400 m2 per shift. The technology of mechanized application of putties has not yet found wide application in modern construction, but this is a matter of the very near future.
Finishing putties (or second-layer putties) are putties designed to obtain a surface completely ready for application of the final finishing coating. The choice of finishing putty mainly depends on the set of requirements that the finishing coating places on it.
Base for painting
The main requirement when preparing for painting is the evenness and smoothness of the surface. The main attention should be paid to the grain size of the putty filler and its composition. The finer the aggregate grain, the smoother the surface. The best examples of finishing putty, having a filler fraction of up to 100 microns, give a perfectly smooth (no sanding required), silky, non-chalking white surface and allow you to eliminate the smallest defects in the base. In addition, such putties are very plastic and easy to apply, they have a fairly long lifetime, during which the plasticity of the material does not change during application. All this provides an excellent basis for high-quality painting.
It is also very important that the finishing putty be fully compatible with both the underlying layer of leveling putty and the paint. Different paints are quite different from each other. They have H, different penetrating and even dissolving abilities. Because of all this, spots may appear on the painted surface due to uneven absorption or even the dissolution of the paint putty layer. Significant differences in the vapor permeability of the putty and the paint layer can lead to detachment of the finishing layer from the base (the 'stocking' effect). In addition, individual paints can have significant shrinkage deformations during the drying process, and if the underlying layer is insufficiently strong, they can even peel off along with it.
Base for wallpaper or similar adhesive coverings
Universal putties are putties that are both leveling and finishing, and even special. For non-professionals, it is convenient when the same material can be used to perform minor surface repairs, carry out preliminary leveling of various types of bases and perform fine finishing preparation, as well as special types of work (structural decorative finishing, laying gypsum blocks).
The technology for performing high-quality painting of surfaces with water-based compositions consists of several sequential operations. The careful execution of which allows us to consider this finish to be of high quality.
These operations are: surface cleaning, smoothing, filling cracks, priming, partial priming, sanding, first full putty, sanding, second full putty, sanding, priming with tint. first coloring, second coloring, trimming.
Cleaning: removing dust, dirt, splashes and drips from the surface using metal spatulas, scrapers or mechanized methods.
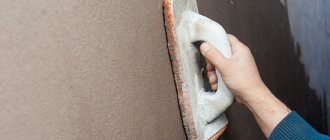
Smoothing (performed only on a plastered surface) - treating the surface with a pumice flake using a piece of wood. Elimination of errors not removed during cleaning.
The cracks are repaired with a knife or a spatula itself in order to prevent its further spread.
Primer – preliminary application of primer compositions to the surface. Done with brushes. Rollers with a spray gun. The composition is applied to the surface, then shaded in a horizontal and then a vertical position.
Partial lubrication is carried out with the aim of eliminating depressions and holes formed during jointing of cracks in order to level the surface. It is carried out using a spatula using the herringbone technique. The putty is applied at an angle of 45 degrees to the crack axis on one side and the other. The filled crack is smoothed with a spatula.
Grinding of greased areas is carried out with the aim of eliminating protruding traces of the previous grease on the surface before applying a continuous layer of putty. So that it lies flat and smooth on the surface. When performing this operation, a block or pumice is used. Grinding is carried out using circular and vertical movements. This operation is carried out only after the putty has completely dried.
The first continuous filling of the surface - Manually performed and leveled with a spatula. The painter puts putty on an auxiliary spatula. Then he transfers it to the main one and a spatula and applies it to the surface with vertical movements, with the edge of each next layer overlapping the previous one.
After the putty layer has dried, it is sanded, and then a second continuous putty is applied in order to finally level the surface. Then this layer of putty is also sanded after drying.
After sanding the second layer of putty, the surface is primed with a tint adding the color of the future coating to the primer. The techniques for applying this primer are the same as for the first primer.
After this layer has dried, begin the first painting.
When painting surfaces with rollers, first remove hard-to-reach areas (joint corners, etc.) with a brush. After applying the pre-tinted paint composition to the surface, it is shaded vertically. The roller moves evenly over the entire surface with smooth movements, with each subsequent layer overlapping the previous one.
After the first layer of paint has dried, apply the second layer.
In some cases, when performing high-quality painting, surface trimming is used to make the surface matte. Lack of shine and rough. Trimming is carried out with miter brushes on the freshly applied second layer of paint using miter brushes in two directions at an angle of 45 and 90 degrees. Hold the miter perpendicular to the surface.
When carrying out work on preparing the surfaces of walls and partitions for painting, it is necessary to conduct strict quality control of the materials used and adherence to the technology for performing the work.
Production quality control of work should include incoming control of working documentation, structures, products, materials and equipment, operational control of individual construction processes or production operations and assessment of the conformity of the work performed.
After the expiration of the shelf life established by the standards or specifications, materials are subject to control testing in a construction laboratory before use.
Putties and primers used for surface preparation must meet the requirements of the technical specifications for their manufacture. These materials must be tested in laboratory conditions for viscosity, adhesion, consistency, and in all cases of doubt about their quality (violation of the integrity of packaging, unclear labeling, non-compliance of storage conditions with technical specifications, expiration of the warranty period of materials, etc.).
Primers used to ensure adhesion of subsequent layers of preparation to the surface should have a viscosity of about 15 s according to the VZ-4 viscometer. The finished primer should be filtered through a sieve with 1200 holes/cm2.
Putties used for filling cracks, cavities and leveling surfaces must be a homogeneous, non-separating mass, have the property of strong adhesion to the surface (1 kg/cm2 after 24 hours), be easy to level, not leave grains or scratches on the surface being treated, not change and do not crack when dry. Putties prepared for mechanical application to the prepared surface must have a consistency corresponding to 12 cm of immersion of a standard cone, and putties prepared for manual application - 6-8 cm.
Primers and putties in the liquid phase are transported in a special container, closed, and powdered ones - in plastic bags or closed metal containers.
It can be transported to its destination at a temperature not lower than + 5°C.
Primers and putties must be stored in closed containers at a temperature not lower than + 5°C in a closed room at a distance of at least 1.5 m from heating devices.
After prolonged storage, primers and putties must be mixed directly in the container before use.
Each unit of container must have a label attached to it indicating:
— name of the manufacturer;
— trademark and address;
— net weight;
— shelf life;
— brief information about the application.
Surfaces of all types must not have:
— contamination in the form of dust, splashes of solution, grease and bitumen stains appearing on the surface of salts;
— cracks at joints (junction angles, joints) and shrinkage cracks with an opening of more than 3 mm;
— shells, sagging, depressions on any surface area with an area of 200x200 mm, more than 5 pcs.
Possible defects in surface painting with water-based compositions.
| Defects | Reasons for appearance | Remedy |
| Oily stains | Animal oil stains remain | Cut out the plaster and refinish it. |
| Yellow rusty spots | Iron Oxide Bleeding Through Paint | Wash the surface with hydrochloric acid solution. And re-prime. |
| Efflorescence | Release of soluble salts from plaster. | Dry. Prime with oil paint and refinish. |
| Showing through previously painted layers | Using a primer of a different color. | Rinse. Dry and re-prime and paint. |
| Nataski | The surface was painted without primer | Clean, prime and paint. |
| Omissions. drips, | Liquid composition applied | Prime and paint again. |
| Joints | Painted over a weak primer | Re-prime and paint |
| Spots of various colors | Painting on a wet surface. | Clean, dry and repaint |
| Rough texture | The surface is not sufficiently puttied. Incorrectly painted. Rough work | Clean with pumice, putty and paint again. |
- Organization of labor and workplace
Labor productivity, profitability of work, quality of paint finishing and safety of certain operations largely depend on the correct organization of work and production culture.
The most progressive form of labor organization in the production of painting works is the scientific organization of labor (SLO) in relation to the conditions and structure of a specific finishing organization. Each construction finishing organization draws up a NOT plan for the types of painting work.
Labour Organization. When organizing a workplace, they are guided by the work production plan, technological maps and maps of labor processes for painting work, developed taking into account the scientific organization of labor.
With the brigade method, a complex mechanized team consisting of 20...25 people is divided into several units and each unit is assigned certain operations.
By performing these operations sequentially, that is, moving one after another, the links form a continuous flow (With such a division of labor, you can entrust the execution of individual simple operations to low-skilled workers, who will gradually improve their skills.
In a team of 20 people, work is usually organized as follows: link No. 1, consisting of 3 painters, cleans surfaces and primes them; link No. 2 consisting of 5 painters - carries out priming of surfaces and continuous puttying in 2 times on the plaster; link No. 3, consisting of 3 painters, prepares all carpentry for the final painting; link No. 4 consisting of 4 painters - prepares walls for painting and performs the first painting of surfaces with paint; link No. 5 consisting of 2 painters - performs painting with water-based compounds; Unit No. 6, consisting of 3 painters, performs the final painting of all surfaces.
According to another method, painting work is carried out by teams of 2-3 people, each of whom completely finishes the premises assigned to it.
Mechanized processes are carried out by painters who are part of the corresponding units.
6 Occupational health and safety
Persons who have undergone introductory safety and production instructions are allowed to perform painting work. During the briefing, the painter is introduced to the working conditions at this site, the mechanisms and devices, and the daily routine on the site; inform about the availability of sanitary facilities and rules of use; traffic rules on a construction site, etc. In addition to the introductory briefing, all newly hired painters undergo safety training for three months, pass exams and receive an appropriate certificate, and when working with high-pressure and electrostatic painting units, undergo special additional training and pass exams.
In accordance with safety regulations, painters, like everyone else working on a construction site, wear helmets while working.
Painting work at height is carried out from scaffolding, scaffolding or cradles (inventory or manufactured according to standard drawings with the manufacturer’s passport on them).
It is possible to carry out painting work simultaneously on several tiers in height only if the end of the grip on one tier is 5...6 m from the beginning of the grip on the other. For a small amount of work at a height of up to 5 m, it is allowed to use ladders.
Workplaces must be sufficiently lit. In accordance with GOST 22844-77, surface illumination must be at least 100 lux for simple painting and at least 150 lux for improved and high-quality painting. Requirements for the design, voltage and operating rules of stationary and portable lamps are set out in detail in SNiP II1-4-80. "Safety in construction."
When lifting loads weighing over 60 kg to a height of more than 3 m, mechanisms or devices are used, which, just like manual machines and tools, must be checked before starting
painting work, Each painter performs only the work that is assigned to him. Unauthorized performance of other work may lead to an accident.
Materials for painting work are used in strict accordance with the technical specifications or instructions of the manufacturer. Painting compositions from foreign companies are used only if you have a Russian-translated and approved instruction manual or passport.
Unauthorized persons are not allowed to be in the sandblasting area, and the area itself must be fenced and marked. The sandblasting operator must be provided with a space suit, and the auxiliary worker must be provided with safety glasses.
When removing old paint chemically, you should wear rubber gloves and use a spatula with an extended handle. The removed paint is collected in a metal container and removed. Alkaline paint removers are applied with wooden or metal spatulas. When treating surfaces with acid, you must wear safety glasses, rubber boots and gloves. When diluting the acid, it is slowly poured into water (but not vice versa!) to prevent strong heating and splashing. If acid has been spilled on the floor, cover the spilled area with soda ash or lime to neutralize the acid. Previously painted surfaces can be cleaned with electromechanical brushes; while wearing safety glasses and respirators.
When cleaning putty surfaces manually with pumice or sandpaper, be careful with your fingers. The sandpaper is clamped into a special device with a handle.
All paint compositions, putties, primers, solvents and thinners used in construction must have certificates or passports in each batch indicating their chemical composition.
It is not permitted to use painting compounds without appropriate analysis and permission from the sanitary inspection authorities.
You can always purchase paints for the work in our PRO Paints store near the Rumyantsevo metro station or on our website:
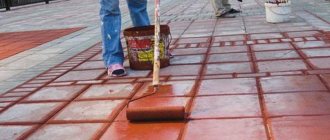
Painting walls over plaster
High-quality wall painting over plaster looks no less luxurious than the most expensive decor. Oil paints on plaster remain one of the most durable and, in addition, attractive in cost. In terms of technology, interior painting of plastered and concrete walls is practically no different from painting facades. But the quality and ecology of the selected paint and varnish composition are especially important, as well as the overall aesthetics and decorative effect of the future finish. The simpler the background, the more impeccable must be the quality of the paint, the smoothness of the base and the evenness of tone, and this is achieved by careful preparation, including puttying of plastered walls.
Putties for interior finishing on plaster under operating conditions in a room without high humidity are possible on an adhesive and oil basis. Eco-friendly paint compositions for finishing layers are traditionally diluted with natural oils (poppy seed, linseed, sunflower). Thick paint can also be diluted with oil. Lead white is also not used indoors for the reason that in the residential microclimate such a composition quickly loses its whiteness and turns yellow. Zinc white is used wherever there is a whitened finish or light color, as well as for repairs and partial touch-ups.
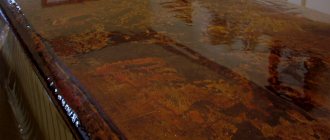
Creating a textured surface
The textured surface design is created using undiluted material. The process of applying the composition is to make the wall look not smooth, but have interesting roughness.
The primary finishing is applied with a nap roller, and the material should be viscous and thick - this way all the pores of the surface are filled. The second coat should be applied with a lint-free tool and a sponge is used for the finishing coat. In order for the surface to be embossed or patterned, the finishing may have a different shade.
Creating texture using a coloring composition
You can also create a textured wall with a paint composition. To do this, you do not need to strive to level the walls to absolute smoothness. If the walls are puttied and primed, then instead of a plaster layer, a painting material is immediately applied. In this case, the rolled surface may have pores, depressions and potholes that will be filled with paint.
In addition to the composition itself, to create a textured wall, rollers with a special pile are used - attached flaps, cutouts, and a spongy surface. However, this requires a larger amount of painting material.