Over time, the factory paint on a car loses its attractiveness. Its protective characteristics are deteriorating. This can occur as a result of environmental influences on the paint layer (heat, frost, moisture, temperature changes), or damage of various types. As you know, painting a car can restore its original appearance and improve its protective characteristics.
Spray painting a car: choice of paint and technology
We use spray paint to paint cars.”>If the driver has his own garage, then the question arises: “Why should I go to a workshop now if I can sort out my car?” The question is correct, but your skills and tools are not always enough to solve any problem yourself. But even from the title of our article it becomes clear that spray paint was created specifically for updating the car body with your own hands. Before preparing and the actual instructions for painting a car, we suggest that you familiarize yourself with the features of the procedure - this information will be useful to all motorists who are going to paint the car body.
Premises requirements
Do not under any circumstances perform this operation outdoors - only indoors.
Any garage will do for this. But before performing work, you need to prepare it:
- Carry out a complete wet cleaning. The slightest pollen falling on the surface will be clearly visible on a bright day, even from a great distance.
- Distribute work areas in advance. If you are painting the VAZ-2114 bumper with a spray can and removing it, prepare hooks to engage the element in a horizontal position. You should not place the part vertically - drips will form.
- Ensure ventilation, as painting work must be carried out with the gate closed.
- Provide quality lighting. The more light, the easier it is for us to notice and eliminate any defect.
Pros and cons of doing this type of painting
First, let's look at the advantages of painting a car body with a high-quality spray can:
- The simplicity of the process of painting a car - you are unlikely to find an easier method of painting it yourself. Spray paint can be easily applied to any part of the car body;
- You don’t need to spend money on additional equipment to paint your car: various brushes, rollers, etc.;
- If you follow the instructions, it will not be difficult to paint a car with a spray can - the layer will be perfectly smooth.
As you can see, there are quite a lot of advantages, but do not forget about the disadvantages that spray paint for the body has:
- Body paint from a spray can does not have clear instructions, which is why unpleasant experiments and additional costs often occur to paint a car;
- The price of paint, unfortunately, does not always correspond to the quality. Therefore, we recommend testing the paint on a metal surface first;
- There is a chance that painting will give the wrong color.
Tags: painting, Lada, for the homeless, spray cans, drift, not cramping.
Comments 121
Video won't open =(
Cool! =) May I repeat? ^_^
Buy varnish in cans and apply it completely. so that it shines and there will be additional protection.
Buy varnish in cans and apply it completely. so that it shines and there will be additional protection.
why does he need varnish? he said that for drifting, especially a combat car. I still need to tint it a hundred times anyway)
Well, the color is good for cramps, it suits them) but in general, it’s not surprising to paint a car with a spray can and on the street, this is news for us, but take the lowriding of California from the 60s - all the cars there were painted on the street, since the area itself has a lot of mountains and the wind has nowhere to walk, and there is no dust at all, and if you take my Southern Federal District or just the Rostov region where I live, then there is only sadness, the wind constantly drives the dust.
Preparatory work, choice of paint
The first step is to decide which car paint in cans is suitable for us to paint the car. We recommend using aerosol paints because... they have the “softest” composition, which will have a positive effect on the car’s paintwork. Before purchasing, it is advisable to read reviews of a specific paint manufacturer. Fortunately, this is now very easy to do using the Internet. The amount of paint depends on how much work you have to do. For a whole body, for example, you can take 10 cans - you can’t go wrong.
Be sure to check with the seller whether the sprayer is suitable for the car or not.
So, you bought paint and are eager to fight. But the next step will be preparing the car. First, the car must be thoroughly washed. To do this you will need warm water and special detergents. Next, you need to let the body dry thoroughly. After this, you can begin to degrease the painting area: treat it with a degreaser (white spirit will do), and then wipe it with a clean non-woven rag. If you find any damage on the car body, then you also need to buy a primer.
Don't forget about masking tape, which you need to cover the area around the part of the body prepared for painting. You can also lay down newspapers or film. When the soil is dry, degrease the area again. Scratches (if any) are removed with a special solution. We wait about 40 minutes and begin sanding the putty area with sandpaper. Remember that the edges are less easy to sand, so you need to spend more time on them. Sand along the edges where the new coating meets the old. And we degrease again - the painting of the car body from a spray can begins.
The benefits of aerosols
Aerosol cans, like containers, offer some advantages. Firstly, the substance “lays down” evenly, which not only simplifies the painting process and improves the appearance, but also significantly reduces consumption. There is no need to correct failed fragments, to paint over areas that turned out lighter with extra layers, and, therefore, to waste extra material.
Secondly, the layer of paint applied using an aerosol can is thin. This can also help save money, because a thick layer of dye is not always necessary. This advantage becomes especially obvious when it is necessary to refresh the color with the same shade, make it a little darker, or simply restore blemishes, scuffs, etc. A small amount will be enough, and careful aerosol application will help you avoid wasting extra milliliters.
Thirdly, an aerosol can allows the paint to easily penetrate into the most inaccessible places and even lay there in a neat, thin layer. This reduces the cost of painting complex shapes, openings, recesses and other similar parts.
And the main advantage of our aerosols is their high quality. High-quality chemicals used in the production of our products and modern technologies that make it possible to package chemicals in modern aerosols will not only reduce consumption, but also add durability and visual appeal.
+7
Central office: Moscow, 1st Nagatinsky proezd 4 Production address: Moscow region. Balashikha st. Zagorodnaya 122
Painting process
Painting your car with a spray can begins with shaking. Shake the can thoroughly with your hands so that the paint is completely distributed throughout the container. To avoid getting a surprise, try the can on a sheet of metal - this is called rehearsal painting. If the paint from a high-quality can also has instructions, then that’s great – study it carefully. If you have aerosol car paint, then painting occurs at a distance of 30 cm from the body.
It is important to maintain a temperature of 20 degrees. You are unlikely to be able to catch this temperature outside. The humidity should not be too high either.
Let's say you have completely covered the surface to be treated with your own hands - this is the base layer. Afterwards you need to apply two or three more layers, depending on the thickness of the paint. After each coat, take a 15-minute break while painting is in progress. The drying time for the final layer is 20-25 minutes. At the end of the work, you need to cover the painted part of the car body with a special varnish. Use exactly the same technology as with paint. Only here there is one feature - wash it off for 15 seconds after applying the varnish, then the painting will be of high quality.
We have also collected the most common problems that can be caused by cheap car paints in cans or non-compliance with technology:
- For example, if paint, even from a high-quality can, is applied to a body surface that has been poorly cleaned or over-primed, then after a few days the paint layer will come off. There is only one solution to the problem - we start painting again, only now more carefully and efficiently.
- If the paint supplied from the can has a high level of viscosity or the sprayer supplies it under too much pressure, then the body will not be painted evenly. Most often this happens when the driver buys paint that, in fact, is not intended for the car. Fortunately, this is easy to fix - just apply a new coat, which will solve the problem.
- If you notice that the treated surface of the car is rapidly fading, then most likely the putty material was selected incorrectly. To eliminate such a defect, clean off all the layers to gain access to the metal and reapply the putty.
How to spray paint a car - step by step guide
No matter how diligently you take care of your car, it is impossible to avoid minor scratches and damage.
Most often, the top layer of paint is damaged when parking, when the doors were unsuccessfully opened or there were stones on the road.
In any case, the damage is not significant, it is not always possible to notice it immediately, but over time it can turn into a serious threat and become a problem.
In this case, you just need to contact a car service. There you will already have to shell out a more serious amount of money.
Therefore, while the problem is insignificant, they prefer to eliminate it at the root, not go anywhere, but simply paint it on their own using spray paint.
The method is very economical and does not require special knowledge.
Spray cans with two-component paint and varnish products
Now there are cans of two-component paint. The container with the hardener is inserted into the valve at the bottom of the can and thus the hardener gets inside and the whole mixture is mixed with a ball while shaking. If the hardener gets in, the shelf life of such paint is significantly reduced.
p, blockquote 42,0,0,0,0 —>
Such cans give excellent results when painting, comparable to painting with a spray gun. Cured paint is more wear-resistant than one-component paint.
Everything about water supply and sewerage
Pumping stations and wastewater treatment plants
Sewer
Plumbing
Firefighters
The Admiral plant produces complete pumping stations for water supply, fire fighting and sewerage needs. Admiral plant website: admiral-omsk.ru
Preparatory procedures, how to paint correctly
If you decide to carry out all the repair work on your own, then you should do everything as soon as possible. Once you discover damage, do not delay the process, as the problem may get worse.
Once the scratch reaches the metal, the oxidation process begins, leading to rust and corrosion. Because of these defects, more serious work will be required.
Before painting, the car is cleaned using conventional detergents. You need to wait until the surface is dry and then degrease it.
For this, special wipes and solvent are used. After saturating one napkin with it, wipe the surface dry with the second. To ensure greater comfort, you need to remove the part that will be worked on.
All other areas of the body that cannot be painted are covered with protective film and masking tape.
To prevent painting defects from appearing, a special chamber is needed; the room must be completely clean of dust and other contaminants. Lights, like devices, should be directed toward the work surface to avoid glare.
Work should not be carried out outdoors, as exposure to sunlight will negatively affect the result. At high temperatures outside, only the first layer is subject to drying out; it will take longer to wait for complete drying.
Therefore, before applying a new layer, wait until the previous one dries.
Before spraying the can, you should shake it well. Try not to go overboard and cover up the rest of the components.
If you are not sure of the result, then you can try your hand at an old part that you have.
Don't forget to follow the existing instructions and stock up on the following tools:
- paint,
- sandpaper of different levels,
- putty and primer,
- antisilicon,
- polyethylene,
- masking tape,
- elements for protection.
When doing all the work yourself, be sure to consider hand protection; use a rubber or silicone spatula so as not to cause unnecessary damage to the surface.
The work of the aerosol begins only after the primer has been applied, dried and polished.
What to consider when using car spray
In order to carry out the work efficiently, you need to take into account some nuances:
- Painting work must be carried out exclusively in a clean and dust-free room, which should not be exposed to mosquitoes, flies or midges. It is worth considering that insects can stick to the surface and deteriorate its quality.
- An increase in ambient temperature causes the paint to dry quickly. To increase the temperature in the garage, heating equipment can be installed.
- Even with partial drying of the surface layer, it is necessary to ensure high protection of the paintwork. It is necessary to strictly follow the recommendations that the manufacturer places on the label.
- Some experts use a hair dryer to speed up the drying process. A construction hair dryer creates a directed flow of high-temperature air.
In addition, attention is paid to the following points:
- Due to the increased viscosity of the paint, it may be applied unevenly to the metal surface.
- Incorrect actions can cause uneven paint application. Therefore, there should be no distractions while doing work - holding your hand in one place can create a smudge, which is quite difficult to eliminate.
- You need to pay a lot of attention to the selection of putty, as it can cause rapid fading of the treated surface.
- Poor preparation of the base and violation of paint application technology lead to peeling of the paint coating. The only way out if this problem occurs is to do all the work again.
Instructions for spray painting a car
The dyeing process is divided into a certain number of stages. At the first stage, preparatory work is carried out, which includes cleaning the body, degreasing work, and the use of anti-silicone.
At the next stage, you need to decide on the shade. Having previously checked the body marking instructions, a specialized store will help you choose the required option.
To prevent an error, colorize the body. Specialized equipment and software will evaluate the level of color fading and other factors.
It is worth noting that you will have to spend a lot of money on the procedure. In addition, paint options such as “metallic” or “chameleon” cost much more, because these shades are the most popular.
If there is already rust on the body, then you need to get rid of it, in this case you will need sandpaper, which will turn the surface matte.
After degreasing, we begin the putty process. If the defects are more serious, then you should use putty with windshield washer.
Do not overdo it with a layer, because it may peel off. Layers are applied gradually until the surface is completely leveled.
To make the putty dry faster, there is a secret - you should add a large amount of hardener to the putty. But in this case, you should not overdo it, because you can turn the putty into a crumbling element.
The putty is considered ready when a homogeneous mixture is created. Apply it as quickly as possible, because it begins to harden instantly, already in the seventh minute. If the procedure is not carried out in a timely manner, lumps may form.
The most optimal technique for applying putty is to apply it across scratches and chips, and then level it lengthwise. Thus, it is easy to fill the voids that appear.
The temperature at which the mixture dries as quickly as possible is 25C. Next, sandpaper is used to level the surface. If the damage is deep, use coarse-grained paper; fine-grained paper for smaller scratches.
The next stage is primer. In the modern world, primer in cans is popular; it is easier to apply and saves time. But you can prepare the primer yourself by mixing everything according to the instructions. As a rule, the required proportion is indicated on the packaging.
The resulting mixture is stirred with a wooden stick and filtered through a filter. Many car enthusiasts use a regular stocking as a filter.
The resulting primer is poured into a spray gun, which will help apply it evenly. Remember that the solution can be used for 2 hours, then it begins to dry out.
The dried primer is treated with sandpaper, but a plane is more suitable to save time. Those areas where the old paint will be combined with the new must be prepared: matte them with Brite tape with abrasive paste or sand parts of the body with P1000 sandpaper.
The surface should be cleaned of chips and dust so that the paint lies evenly on the surface.
To avoid other defects, walk over the surface with an antistatic cloth and treat with a degreaser.
Next comes painting. The spray can is held perpendicular to the surface to be painted and strictly at a short distance. Moving upward, painting is done horizontally.
The distance at which the can is held is 30 cm, painting is carried out at room temperature. Thus, uniformity and absence of drips are achieved. When the first layer has been applied, it is worth letting it dry and applying the next one.
It is not necessary to apply all the paint; once you have achieved the desired color you can stop working. When the paint has dried, it must be varnished and polished.
Recommended sequence of actions
The sequence of actions depends on the condition of the paintwork. There are two types of paint coating condition:
- Small scratches and chips that can form when hit by gravel. Such defects are usually superficial; paint should be placed even in the deepest place of damage. These types of problems can be eliminated by polishing the surface.
- If the damage reaches the primer or metal, then the area must be repainted. The cheapest and most effective method of painting is the use of aerosol paints.
Selecting paint is also a rather complex and important process. The bottles used indicate the exact name of the color, according to which the paint is selected.
How to paint a bumper from a spray can yourself
If painting work is carried out only on the bumper, then no one has canceled the preliminary work; we are talking about cleaning the surface, puttying, priming, and sanding.
After cleaning, the surface should be treated with a solvent, thus removing traces of accumulated resins.
1. The old paint coating is removed with a sanding machine, and the corners are also cleaned. If work is carried out with sandpaper, then the grain size of the sandpaper used is gradually reduced.
All dents are smoothed out with putty. After the solution has dried, sanding and removing dust after it are carried out.
The final procedure is to degrease the surface .
2. One layer of putty is sometimes not enough; additional coating is often required.
3. The primer is applied after degreasing the bumper. Often special cans are used, which make all the work much easier.
The primer evenly covers the affected surface, the sandpaper is processed and as a result you should get a matte surface. If irregularities are found, it is worth repeating all the stages of preparatory work again.
Only after this can you begin to paint. The result of spray painting any part of the body depends 80% on the quality of the preparatory work carried out.
The procedure is very simple and is completed by cleaning with an antistatic cloth.
To avoid leaving fingerprints on the cleaned surface, you must wear gloves. Apply paint from bottom to top to avoid drips and lumps of paint.
After creating the first coat, wait until it dries before applying the second coat. Don’t try to use up all the ingredients in the can, because you can overdo it.
Having done all the work from start to finish once, you will already become a specialist, and eliminating small scratches will not be difficult.
A quick solution to the problem at minimal cost is painting using a spray can. You will appreciate the benefits of the method for yourself; it will help provide complete care for your vehicle at the highest level.
How much paint do you need to paint a car?
Before you buy a product to change the color of your vehicle (or update an old one), you need to correctly calculate how much paint you need to paint your car. If the purchased materials are not enough, it will be difficult to find a completely matching shade. And buying too much paint is an extra expense.
What affects paint consumption?
The consumption of paints and varnishes (hereinafter referred to as paints and varnishes) is affected by the following:
- car model and its condition;
- color and quality of surface preparation;
- material viscosity;
- indoor air temperature;
- dyeing method;
- type of paint;
- number of layers.
Mixing instructions must be followed. When repainting a dark body in light colors, additional layers are required, this increases material consumption by 40-50%. It is also important to consider that the color of the paint applied affects its covering power. This characteristic is worse for yellow, blue and light red pigments.
Analysis of the main factors
Before you move on to choosing a material, you need to know what features affect the consumption of paint and varnish. There are actually several of them.
- Area of the treated area. Will it be a complete restoration of the car's paintwork, or only local repairs where a minimum of material is needed.
- Type and brand of paint. Different manufacturers produce paint with different component compositions, on which the covering ability of the material directly depends.
- Paint shade. The choice of color is also important, since, for example, white or green tones have a higher covering power, and you will need to apply fewer layers of paint. And, for example, red, blue and yellow shades require more layers, which in turn will affect the volume of consumables.
- The quality of surface preparation, especially the structure and color of the primer. Does the tone of the primer match the base paint? If not, then you will need to apply many layers to achieve a high-quality, rich shade.
- Spray gun parameters. The level of uniformity of the layer, the correct setting of the equipment and the remaining material in the device itself will also determine how much material is needed to paint the car.
This also includes such a parameter as skill. It is also important, because if you have already done painting work with your own hands more than once, then you have probably become skilled in the technology of applying layers of paint and will be able to use material more economically.
Taking into account the viscosity parameter
Viscosity is one of the basic parameters of paints and varnishes. If you dilute the paint too thickly, you will end up with a layer defect in the form of an “orange peel”. If you dilute the material too much with a solvent, then smudges may form during application.
To avoid these defects, and this, in turn, is an overconsumption of material to eliminate them, you must strictly follow the instructions given by the paint manufacturer regarding the proportion of material and solvent. To maintain the dosage, you can use the tool as a viscometer, but if you don’t have one in the garage, you can use any containers with marks corresponding to the volume of the substance. You can also use a ruler as an indicator.
Also, the viscosity parameter may depend on the temperature conditions observed in the working area.
We determine the paint consumption per 1 sq.m. area when using different types of paint.
There is a rule among craftsmen that usually per 1 sq.m. For body parts, you need to prepare about 200-250 ml of paint. If we take varnish into account, then the calculation scheme is the same, but also take into account the volume of hardener and solvent. If there are several layers of any material, multiply this value by two.
Average consumption rates
On average, 1 m² requires 200-250 ml of undiluted paint, and to treat various body elements, if up to 50% of the surface is damaged, the following amount will be required:
- on the door or rear fender - 150 ml;
- on the hood - 200 ml;
- on the threshold or radiator grill - 50 ml;
- on the front or rear bumper - 100 ml;
- on the trunk lid - 300-400 ml;
- for the inside of the car - up to 1.5 liters.
If the surface of a part is damaged by more than 50%, paint consumption increases by 1.5-2 times.
Alkyd enamel requires 40-50% more than acrylic enamel. So, for a medium-sized car you will need 3-3.5 liters of the first or 2-2.5 liters of the second paint.
Brands of paints and varnishes of different brands differ in composition and, despite the same color, have different covering abilities. Calculation of the consumption of paints and varnishes is made after determining the scope of work.
Which car paint is better to choose?
For painting your car yourself, there are the following types of paints:
- acrylic;
- alkyd;
- nitro enamels;
- cellulose;
- metallics;
- Griftal.
Each tool has its own advantages and disadvantages.
Acrylic enamel is most in demand; it is suitable for complete repainting of the car. Its features:
- easy to use;
- lays down evenly;
- dries quickly;
- the resulting surface is resistant to solvents, reflects light well, and therefore does not require varnishing;
- due to insufficient covering power it is necessary to apply 2-3 layers.
The surface covered with hard-setting acrylic enamel is durable, while the soft-setting type is highly polished.
Alkyd enamel is suitable when you need to paint a small area. Its features:
- low cost (cheaper than acrylic);
- easy application;
- good covering power, it is enough to apply 1-2 layers;
- dries slowly (this process can be influenced by adding an accelerator to the enamel or increasing the drying temperature);
- The surface is difficult to polish and needs to be varnished.
Nitroenamel is considered an outdated product, but it is used to eliminate minor defects. Its characteristics:
- dries well;
- fades quickly;
- flammable;
- Polishing and varnishing are required to achieve shine.
Cellulose paint has similar properties.
Metal enamels have a complex composition and manufacturing technology. They are used to eliminate small chips or scratches on parts originally painted with this type of paint. Cover the surface with 1-3 layers. It is not recommended to completely paint your car with metallic enamel, because... Without special skills, it is difficult to achieve good quality coating in a garage.
Glypthal paints have the following properties:
- create a thick film;
- takes a long time to dry (at a temperature of +20...+25°C, the coating hardens within a day, and complete drying may take up to 1 month);
- the surface does not need polishing.
Expert advice
By listening to the recommendations of professionals, the painting will be of high quality.
- Firstly, when purchasing paint, focus on cans with replaceable tips. This version will help you adjust the width of the aerosol jet during the painting process.
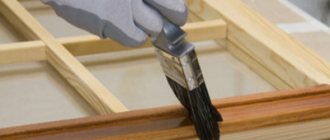
- Secondly, do not rush and immediately apply one layer of paint to another. Be sure to wait until the previous layer has completely dried.
- Thirdly, on objects that are used quite often and regularly, it is worth applying several layers of paint.
By observing these small and simple manipulations, strictly following the stages of the process, and performing all the subtleties of painting, an excellent result is guaranteed.
Base paint and varnish
For medium-sized cars - class C and upper limit B (Opel Astra, Kia Ceed, Ford Fiesta, Volkswagen Golf, VAZ models, etc.) for basic painting you need at least 2 liters of enamel. In most cases, the surface is additionally varnished. It protects against mechanical damage, gives color depth and richness. You need the same amount of varnish as the base paint, or a little more. Its consumption is associated with the following operating moments:
- Number of layers. Apply 2-3 times so that the next layer is thicker than the previous one.
- Hiding ability. It is better for varnishes based on synthetic resins than for acrylic and nitro-combined ones.
An average car may require 2.5-3.5 liters of varnish. It is not bred all at once.
If the car is being prepared for sale, it is recommended that the thickness of the paintwork meet factory standards. For different brands, this value is individual, for example, for the Suzuki Grand Vitara - 77 microns, Lada Granta - 98, and Lexus RX - 140. Changing this characteristic sharply reduces the market value of the car, because it is considered recovered after the accident. In order to maintain the factory values of the new coating when painting (with the appropriate layer thickness on different parts), you should contact the services of a specialized company.
When choosing materials, you need to consider the compatibility of varnish, paint and solvents. It is recommended to buy a little more LKS than calculated, with a margin. What will not be used during repairs can be stored for a long time in a tightly closed jar, and when thickened, diluted with a solvent.
A good result is obtained only when using high-quality tools and enamels, produced in compliance with standards on good equipment and stored in proper conditions.
Metallic painting using a spray can
When painting metallic from an aerosol can, it is better to apply all layers at an increased distance and quickly. Light metallics have low coverage. To completely cover the surface to be painted with such paint, many layers may be required.
p, blockquote 32,0,0,0,0 —>
When spraying metallic paint, too thick a coat of paint or insufficient drying time between coats can cause uneven metal flakes. The last layer of metallic should be sprayed at an increased distance from the surface. This will help position the metallic flakes more evenly.
p, blockquote 33,0,0,1,0 —>
Metallic paint should be top coated with varnish. By itself it is not glossy. Varnish gives shine and protection.
p, blockquote 34,0,0,0,0 —>
It is not advisable to sand such paint before varnishing. If there is such a need, then after sanding you need to apply a thin layer of paint, and only after that varnish. Sanding may be necessary if a lot of dust and debris has accumulated during painting. The paint is sanded after complete drying (about a day) with sanding paper P800-P1000.
p, blockquote 35,0,0,0,0 —>
What are the advantages of this painting method?
Compared to painting using other methods using a roller or brush, painting a car yourself with a spray can has a number of advantages.
These include:
- ease of application;
- simplicity of the process;
- When painted correctly, the layers lie smoothly and neatly.
You can paint a car yourself in the garage
If you paint a car with a spray can yourself, then the owner needs to remember the negative aspects of this method of painting a car:
- paint purchased on the market may not be original or a cheap fake. This will affect the color, which will be different from what is on the body. To avoid the issue of color differences, you need to choose a suitable shade and buy only from official manufacturers. Before applying, make sure the color is suitable. To make sure of this, you need to paint any other piece of metal and let it dry. Then compare both colors;
- If the car owner takes up a spray can for the first time, he may not be able to apply an even layer of paint. You need to practice on individual pieces of metal and find information on how to spray paint without smudges.
If the car owner is confident in his abilities, then he can move on to painting the car.
Work surface cleaning stage
At the preparatory stage, before you paint the car yourself, you need to prepare the place where the work will take place. This is required no matter what type of car paint you like. The room must be clean, dry, free from dust and drafts. Only then will the adhesion of the paint to the surface be reliable.
Taking into account the fact that the process of painting a car is accompanied by the release of chemicals into the air that are harmful to humans, ventilation should be provided, as well as stocking up on protective equipment, such as a respirator, gloves and safety glasses. It is advisable to have overalls for painting work. Another point is the tools. It is also better to purchase them in advance. You will need:
- spray gun (preferably several, although it all depends on your finances);
- compressor;
- industrial dryer;
- electric drill with a vinyl attachment (optional – grinder);
- pneumatic hammer (or regular hammer);
- a set of skins with different grain sizes;
- metal plane;
- spatulas;
- Sander;
- putty of two types (large and finishing);
- priming;
- solvent for degreasing the surface to be painted;
- material for gluing non-paintable parts;
- filters for filtering soil and paint;
- dye.
And of course, don't forget to wash your car thoroughly.
Car painting technology necessarily requires cleaning the working surface. First of all, remove all parts and accessories that will not be painted. These include glass, bumpers, door handles, spoilers. Some accessories cannot be removed without damage, so apply adhesive tape or film to protect them. It is better to buy specialized covers for wheels.
Straightening is another component of the preparatory stage; it must be done before you paint the car yourself. It is the process of leveling the surface of the body. To get rid of all irregularities, use a regular and pneumatic hammer with a smooth surface. During straightening work, dents are tapped from the inside out. On the front side, it is necessary to organize support - attach something weighty and bulky, for example, a hand anvil.
With small ones they do the opposite - they work from the center to the edges. A good effect when straightening is obtained by heating the defect and subsequent sharp cooling. The temperature difference allows the metal to quickly acquire its original shape. If, after hammering and heating, lumps and bubbles remain on the surface of the body, repeat heating followed by cooling. The metal will shrink and the bubbles will disappear.
Preparing for painting
Before you start painting your car, you need to purchase the following materials:
- rubber spatulas;
- sandpaper of different grain sizes;
- two-component primer and putty (acrylic for deep scratches and chips);
- spray paint;
- solvent;
- polishing emulsion or autovarnish.
Preparing the car for painting
Experienced mechanics advise painting a car in the summer so that the paint dries quickly and the room is well ventilated. Since the paint itself is highly toxic.
The room should be free of flies, mosquitoes and other insects that could stick to the painted body.
Steps to prepare for painting after the necessary materials have been purchased:
- Park the car in a garage or any other room.
- Dilute the detergent in warm water and wash the car.
- Let it dry for half an hour at a temperature of 18 to 22 degrees.
- Degrease the surfaces that will be puttied and then painted.
- Dampen a rag with solvent and wipe the scratches.
- Then wipe them with a dry towel.
- Apply tape to those surfaces that should not be affected by the paintwork.
- Prime scratches or severely chipped areas on the body.
- Degrease again with solvent and wipe dry.
- Putty the surface with a special solution using an aerosol can. Spray carefully from the edge of the part. Cover vertically, not horizontally.
- Wait until dry, sand with sandpaper. The sandpaper will be easier to use if you put it on a sanding machine or a small block.
After all the scratches have been primed and sanded, you can begin spray painting the car.
DIY car spray painting
Types of polishing materials
On sale you can find a variety of polishing options. An example is the following classification by purpose:
Based on the type of material used in the manufacture of polishing, it is divided into the following categories:
- Wax base.
- Teflon base.
Recommendations for the use of such material are indicated by the manufacturer on the packaging.
In conclusion, we note that to obtain a high-quality surface you need to be able to use a primer, putty, and also some tools. To ensure the required painting conditions, you need to have your own garage or box, which maintains a temperature of about 20 degrees Celsius and eliminates the possibility of dust.
Everything is simple and clear. We take a terrible-looking car, remove all the body parts, sand it a little, tape up the windows and off we go!
How to properly spray paint a car
The painting procedure is as follows:
- Shake the can for three minutes.
- Apply the first layer, doing it horizontally. The distance between the can and the surface should not be less than 30 cm. And keep the device itself at a right angle to the body being painted.
- Let it dry.
- Apply another layer again. Just paint vertically.
- Now the car owner knows how to tint a car using a spray can.
- After one damaged area of the car has been painted, you need to move on to painting the entire body.
- There is no need to spray all the paint at once, as this will lead to smudges.
Now the car owner knows how to spray paint his car himself. But after painting it is necessary to polish the metal.
The polishing technology is as follows:
- First you need to apply the polishing emulsion to those places where there are still slight smudges or changes in color.
- Wipe with a napkin. It takes up to 3 minutes to grout each section.
- Then apply the emulsion to the entire body and, using a grout polisher, go over the body. If there is no special emulsion, then you can use auto varnish.
After painting it yourself with a spray can, the car will shine and look as if it came off the assembly line recently.
Some car owners don't know how to spray paint with a transition if they haven't found the right color. The border of the flowers should be moistened with a solvent from a spray can. Wait until it interacts with the acrylic and blend using napkins or a lint-free cloth.
For those who don’t know how to paint a car fender with a spray can or always end up painting a car with a spray can only with smudges, experienced mechanics recommend removing it. Paint separately from the rest of the body. And the procedure is identical to the process of painting the entire car.
Aerosol can device
p, blockquote 4,0,0,0,0 —>
First, it’s a good idea to learn how an aerosol can works and how paint is mixed in it. It consists, in fact, of a container (spray can); a nozzle that fits onto a valve that prevents paint from coming out until you press it; tube located inside the can through which the paint flows to the nozzle. Inside the can there is paint and inert gas.
p, blockquote 5,0,0,0,0 —>
There are aerosol cans with very high quality nozzles, manufactured with high precision. Such nozzles are capable of spraying droplets of the same size.
p, blockquote 6,0,0,0,0 —>
The cans contain a high percentage of solvent. The paint is very liquid. This is necessary so that it sprays normally. Thicker paint would require more pressure to spray. In order to paint with this type of paint normally, without smudges, you need to form many thin layers and dry after each application.
p, blockquote 7,0,0,0,0 —>