On pedestrian zones, bicycle paths, squares and parks of modern streets, you almost no longer see dull gray asphalt. It was replaced by such a new material as paving slabs. Possessing a wide variety of shapes, colors, affordable prices and simple installation, these man-made paving stones have become very popular in the design of personal plots.
However, despite all the advantages, this material has one significant drawback - like all concrete structures, this material is very damaged when exposed to moisture.
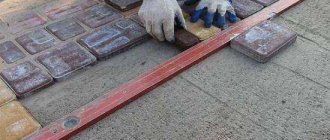
This deficiency of the material can be eliminated and protected from the destructive effects of moisture using a water repellent for paving slabs - a special impregnation applied to the surface of concrete and forming a dense water-repellent film.
Figure 1. Water repellent for paving slabs
Why treat already laid tiles?
Treatment with a water repellent allows:
- protect the material from moisture;
- make concrete more durable and resistant to mechanical stress;
- increase the frost resistance of the coating;
- protect the coating from the appearance of growths of moss and lichens
- prevent the formation of efflorescence;
- increase the abrasion resistance of the coating;
- increase the service life of the coating;
- reduce the frequency and quantity of repair work;
- give the tiles a more saturated color.
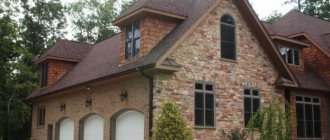
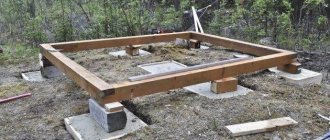
Figure 2. Paving covering with a water-repellent composition applied to it
Let's sum it up
- Choose a color that will harmonize with the facade, fit into the composition of the garden and serve as a background, and not draw attention to itself.
- Natural neutral shades are the easiest to match with the color of your home. In addition, this is now the most trendy solution.
- Use bright colors only as accents; select combinations using the color wheel. The exterior should not have more than 3 - 4 colors.
- The color of the tiles should highlight the design of the site.
Ways to protect paving slabs
To protect paving slabs, the following highly specialized solutions and impregnations are used:
- decorative - impregnations that serve to improve the appearance of the coating, giving it rich color and shine;
- cleaning – special solutions designed to remove traces of various contaminants (small particles of soil, oil, fat, salt deposits), lichen growths, moss from the surface of the material;
- antifungal – antiseptic solutions that prevent the development and spread of various microorganisms on the surface of garden paths and sidewalks;
- water repellents – solutions that increase the resistance of the material to moisture, increasing the strength and frost resistance of the tiles.
Advantages of using factory plasticizers
Using ready-made additives is not always profitable, since they are expensive and are often sold in large containers. Such funds have the following advantages:
- all proportions of the constituent ingredients are met, so the quality of the products will be excellent;
- the purpose, safety measures, method of application of the admixture are indicated in the manufacturer’s instructions;
- There is no need to waste time making your own supplement.
Before buying expensive plasticizers for tiles, you should consider all the advantages of their use, then make the right decision.
Plasticizers for industrial production are manufactured in strict accordance with a recipe tested in laboratory conditions and tested at facilities under construction Source 1beton.info
Types of varnish for paving slabs with a wet effect and which one is better
In addition to the water repellent, partial protection of this material from moisture, as well as improving the appearance of the coating, is provided by a varnish with a wet effect. The most common and widely used acrylic varnishes are of two types:
- water-based - do not contain toxic components harmful to health, which is why they are used for processing tiles in garages and gazebos;
- solvent-based - such varnishes are used for application to areas of paving surfaces located in the open air (garden paths, garage driveways, areas around gazebos, porches).
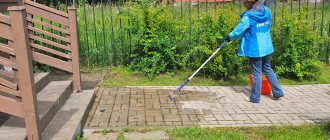
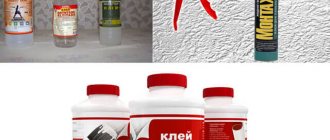
Figure 3. Acrylic varnish on the sidewalk
Important. Solvent-based varnishes cannot be used indoors - the volatile components they contain can cause damage to the respiratory system, the mucous membrane of the eyes, and the skin. The fumes from this composition can be dangerous even when applied to outdoor garden paths. Therefore, in order to avoid poisoning and eye damage, even with small amounts of work, it is necessary to use a respirator and safety glasses.
Proportions of materials
When making plasticizers yourself, it is important to strictly observe the ratio of components. For 20 kg of cement it is recommended to use:
- 30 ml washing powder;
- 25 ml liquid soap;
- 10 ml shampoo;
- 5 ml dish soap;
- 50 g soap.
The volume of lime used should be 5 times less than cement.
It is necessary to add powdered additives only after thoroughly mixing the cement, sand and crushed stone. Liquid is added at the end. Detergents are first diluted with water, then the homogeneous composition is poured into a container to mix the solution.
Procedure for processing tiles
The process of applying water repellent does not require special skills or experience. You just need to purchase the necessary materials, prepare the tools, clean the work surface, and then carefully apply several layers of impregnation to it.
Required materials and tools
The following materials will be required for this type of work:
- water repellent;
- acrylic decorative varnish with wet stone effect;
- special detergents for the care of paving slabs (solvents for removing efflorescence and dirt).
To clean the work surface and apply a protective and decorative layer, you will need the following tools:
- a brush or broom with plastic rods;
- wide brush or hand sprayer;
- 2 buckets for water repellent and varnish;
- roller;
- rags.
Application process Water repellent for paving slabs
Applying a water-repellent layer consists of 4 main steps:
- Cleaning the working surface from large debris - sand, soil particles.
- Removing efflorescence and grease stains from the work surface.
- Applying 1-2 layers of water repellent using a spray gun or a wide brush.
- Applying a decorative layer (varnish with a wet stone effect) using a roller.
How to use it correctly
Plasticizing impurities (liquid or powder) must be added to the solution according to the manufacturer's instructions. If the additive is made in powder form, it must first be diluted with water or added to a concrete mixer while mixing the ingredients.
Method of using liquid plasticizer S-3:
- Mix the solution thoroughly in the packaging container.
- Measure out the additive (per 1 quintal of cement): 1/2-1 l - for moving concrete, 1-2 l - for self-compacting concrete, then dilute with water.
- Pour the resulting liquid into a running concrete mixer, load the required amount of cement.
- Add solid aggregate and stir the mixture until smooth.
If too much plasticizing admixture is added to the original concrete composition, it will harden for a long time.
It’s easier to work with a ready-made liquid additive: you don’t need to dilute it in a certain proportion and spend time on infusion Source prostroymaterialy.com
Water repellent or tile varnish: which is better?
When choosing between these two protective solutions, a multifunctional water repellent is more advantageous and reliable. This is explained by the fact that, compared to decorative varnish, this moisture-proof material has the following advantages:
- it more effectively protects the paving surface from moisture and abrasion;
- The resistance of the water repellent to aggressive substances is much higher than that of decorative varnish;
- a water-repellent layer applied to the working surface of the sidewalk increases its mechanical strength;
- the cost of both the water-repellent impregnation itself and the work required to apply it is significantly less than that of acrylic decorative varnish.
Varieties
Modern plasticizing additives are produced using special technologies. Among them there are multifunctional preparations that improve almost all the main characteristics of concrete, and highly specialized ones that increase only certain properties of the material. Based on their composition, all plasticizers are divided into several groups:
- Modifiers. Designed to strengthen products and maintain the mobility of concrete mortar. The latter contributes to the uniform distribution of the mixture.
- Antifreeze. Concrete hardens even in subzero temperatures.
- Superplasticizers. They are used at high temperatures, prolonged transportation of the solution, and improve its fluidity.
- Strength gain accelerators. The material acquires high strength in the first day of hardening.
- Air-entraining. Small air bubbles form inside the mixture, which increases its frost resistance.
- Self-sealing. Typically used in the process of pouring densely reinforced thin-walled structures.
The best plasticizer is a high-quality composition, selected taking into account the volume of all work and operating conditions.
Plasticizers to increase the frost resistance of concrete are used when the construction process of buildings is carried out in winter at low temperatures Source stroy-podskazka.ru
Popular hydrophobic solutions
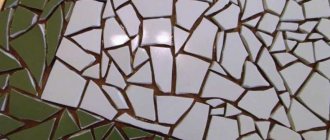
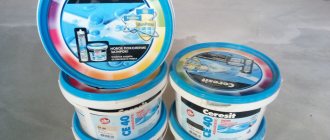
Among the wide variety of moisture-proof solutions for treating paving slabs, the most popular are the following brands:
- "Aquasil";
- "TipromU";
- "Crystallizol";
- "Ceresit ST 10,11,12,13";
- "VOKA".
Figure 4. Characteristics of popular water repellents for paving slabs
Preparatory stage
At the preparatory stage, you need to prepare building materials: granite paving stones, gravel of various fractions, sand. For waterproofing you will need geotextile film. Tools and equipment used: heavy rubber hammer, wooden block, tamper or vibrating plate, shovel and rake, guide rails, sieve for sifting sand, level, tape measure, ruler, thread or twine, wheelbarrow. For curly styling you will need patterns. Now we decide on the place where the paving stones will be laid. The number of layers of the granite “pie” depends on the expected load. If this is a pedestrian path, then the layer diagram will look like this:
- geotextile film;
- gravel layer;
- underlying layer;
- granite paving stones.
When constructing the road surface there will be more layers and their thickness will be increased.
A few words about geotextile film. This is a woven or non-woven fabric used in paving paths to separate layers of soil and building mixtures. Geosynthetics are a kind of filter, drainage, and even reinforcing material. In our case, it will separate the layers of sand and gravel and distribute the load.
Tips for using impregnation
- all work on applying water repellent is carried out in moderately warm and windless sunny weather;
- after heavy rainfall, application should be made after the working surface has completely dried;
- Before applying impregnation, be sure to inspect the seams between the tiles, filling the voids;
- You can check the quality of the applied moisture-protective layer by pouring a little water onto the working surface - if the solution has been distributed efficiently and evenly over the surface of the concrete, the water will collect in small puddles and flow towards the slope.
Preparing the base for laying granite paving stones
Any installation work begins with preparing the base. The first thing we must do is remove the plant layer of soil, reducing everything to one plane if possible, if there are humps or depressions. If any unevenness remains, it’s okay - we’ll get rid of them with sand, screenings or crushed stone. It is also very important before starting work to carry out the correct layout taking into account all slopes. For normal water flow, the slope must be at least 5 percent.
So, the bottom layer has been removed or prepared. The next step will depend on what kind of foundation you have. Perhaps it will be carried out not on the ground but on a concrete surface, then the next step will be to fill the area with a cement-sand mixture. But we will consider the most complex option using several layers. Our lowest layer will be a sand layer - with its help we get rid of unevenness. The next base layer for granite paving stones will be a layer of crushed stone with a fraction of 20-40. The thickness of the layer should be approximately 10-20 cm. Another layer of crushed stone can be laid on top, but with a fraction of 10-20. We carefully compact each layer. It is advisable that you have a vibrating rammer in your “arsenal”, but if you don’t have one, you will have to work well with a manual rammer.
Do not forget that the paving stones must be secured at the edges. If there are sides that require support with curbs, then it is better to install them in advance, observing all the slopes that we set at the beginning of the layout.
Base for paving stones
The site has been selected, everything necessary for the work is there, now we begin to form the “trough” - a compacted base. Depending on the expected load on the covering, we dig the soil with a shovel to a depth of 10-25 cm. If possible, reduce the base to one plane. You can ignore minor irregularities.
Important: in order to drain wastewater, the base must have a slight slope: 1 cm per 1 m of area. Therefore, we take this rule into account in all work.
The border performs two functions, decorative and practical.
After the base is completed, we make grooves for or curbs. They are needed so that when laying the pieces of granite do not move apart. We dig the depth so that the side stones slightly rise above the paved surface. We align the grooves well and compact them, then install the curbs.
Now we compact the base with a vibrating plate. A hand tamper is also suitable for this work. After this, lay geotextiles on the ground to protect the crushed stone layer from particles of soil and clay getting into it and “silting.” Another advantage of such a film is that it evenly distributes the load on the soil base. We fix 2 guide rails along the edges of the prepared area: their upper edges should reach the bottom of the granite paving stones (to the top edge of the soil). At the same time, do not forget about the necessary bias.
A crushed stone cushion (thickness - 10 cm) is laid on the geotextile. We also carefully level and compact it. We lay the underlying layer above. If the load on the area is significant, place a geotextile film between the crushed stone layer and the underlying stele.
The underlying layer can be made of:
- small crushed stone;
- sand;
- sand-crushed stone mixture;
- sand-cement mixture in a ratio of 4:1.
The underlying layer is not compacted. Now all that remains is to remove the slats and fill the remaining space with sand.
Liquid glass in the construction of houses and swimming pools
Liquid glass is a new material obtained from an aqueous solution of sodium silicate. The process of its manufacture is quite complex: fine quartz sand is combined in a certain proportion with soda and fired in ovens. After grinding the resulting material, an aqueous solution is made from it. Liquid glass is sold in pure form, in powder and as part of other products. Based on it, certain types of glue are produced for gluing glass, wood, metal, paper, including the well-known silicate office glue.
- Additional waterproofing - achieved by adding a solution of liquid glass directly to the concrete before pouring. Waterproofing can also be done by applying liquid glass and/or a layer of cement mortar containing it to the finished surface. This method is used to treat storm drains, wells, septic tanks, hydraulic structures, and other structures.
- Increasing acid and fire resistance - the surfaces are carefully primed with a cement mortar prepared using a solution of liquid glass and water. Also, the sodium composition is added directly to the mixture for laying bricks (relevant when creating fireplaces and stoves).
- Bonding materials - liquid is used in its pure form when working with cardboard, glass, porcelain. Composite mixtures are also used to fill voids and cracks in structures.
- Impregnation of structures and materials - applying an aqueous solution with liquid glass allows you to strengthen weak concrete and plastered surfaces (floors, walls). The composition is applied in 2-3 layers to achieve the best result.
- Antiseptic treatment is relevant for wooden structures. They are thoroughly coated with liquid glass diluted with water. This protects against the effects of dampness and the development of fungal lesions.
Important! Any type of liquid glass significantly accelerates the hardening of the mortar. It is recommended to mix small batches that can be mixed within 30 minutes of preparation.