Main causes of defects
There are many reasons for the occurrence of defects: from the unpreparedness of the master to the characteristics of the material and glue. These include:
- Wall surface defects. This problem is faced not only by owners of old apartments and houses, but also by new ones. The plaster also comes off due to humidity in the room. Before gluing, you must carefully remove the crumbling plaster and level the wall with a special mixture.
- Improper preparation of the base. An obligatory step is cleaning, priming, and subsequent complete drying of the surface.
- If the walls are made of plasterboard, it is important to carefully process the joints.
- Incorrect application of the composition. Before starting work, you need to read the instructions for the material: what layer to apply, whether two surfaces are applied, how long to wait before gluing. When applying the layer, avoid dry areas.
- The gluing rules were violated: non-compliance with temperature conditions, exclusion of through air, entry of ultraviolet radiation into the room.
- Purchasing low-quality materials.
If compliance with the rules was impossible, it was necessary to postpone the sticking for another time.
How can you glue wallpaper if there is no glue?
In the absence of the necessary glue and available funds, some craftsmen advise making a paste from flour, starch and warm water in the following ratio:
- flour – 1 glass;
- starch - 2 tablespoons;
- water – 2 liters.
Interesting materials:
What types of flashlights are there? What types of cash registers are there? What kind of wheels does a bicycle have? What types of suit fabrics are there? What types of soft toys are there? What kind of mods are there in Minecraft? What are the types of visual impairments? What types of lung operations are there? What types of pasta are there? What types of moles are there on the face?
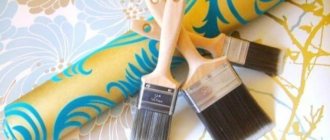
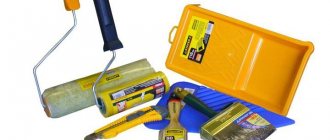
What will you need for gluing?
You will need clean water for cleaning the instrument and cleaning.
Tools
The following tools are used for gluing:
- Brush for applying adhesive base. It is better to purchase several with different widths.
- A rubberized roller for rolling joints and removing air.
- Dry, clean cloth.
- Putty knife.
- Syringe for removing bubbles.
- Hairdryer for warming up some fragments.
Which glue to choose
If the cause of peeling is a poor-quality adhesive composition, then the peeling wallpaper should be glued with the highest quality composition of another brand or with a special glue for gluing joints.
When gluing a large area, you must use an adhesive composition for finishing materials. You need to choose according to the type of material or universal. The composition is presented in dry form, the solution is prepared immediately before gluing.
If the gluing area is small, then glue for joints is purchased. It is available ready-made, in small volume tubes. In most cases it is universal. Masters distinguish the following brands:
- Metylan – suitable for gluing even heavy wallpaper. It can withstand high temperatures, so it can be glued behind batteries.
- KLEO Strong – suitable for gluing all types of material, does not spread. Becomes transparent after drying. Convenient for gluing behind batteries and in corners.
- RACCORD – reinforced, for gluing joints. Has an applicator for easy application. Strong adhesion without traces.
Many people try to use paste, citing its quick preparation at home. Should not be doing that. This method of gluing will not work, since the paste is not capable of gluing paper impregnated with the composition.
Using PVA is also not an option. It is waterproof, which is bad if you need to remove the wallpaper later. If the glued material is light in color, then the appearance of yellow spots will be noticeable. This glue can be used on an area of no more than three centimeters in dark colors.
What to use?
If the wallpaper does come off, you need to understand why this situation happened and try to solve these problems (for example, non-compliance with the temperature regime or uneven walls). If the canvas can simply be glued without completely redoing the work, then you should use the following recommendations.
Tools
Before gluing up the peeled wallpaper, you need to prepare the following tools and materials:
- rubberized roller;
- brush;
- glue;
- large syringe;
- narrow spatula;
- clean rags.
Sometimes you may need a hairdryer to dry quickly.
Which glue to choose?
You can glue the canvas with regular wallpaper glue.
Advice: The glue needs to be diluted to a more liquid state than for conventional gluing.
You should not use the old method of gluing with flour paste. This was once considered a good option, since good adhesives did not exist or were difficult to find, but thin paper wallpaper stuck well to homemade compounds
There are already more advanced wallpapers, for which it is important to comply with the exact norms and rules of pasting
Is PVA suitable?
It is often advised to use PVA, but experienced craftsmen do not recommend this. It is insoluble in water, and in the future during renovation it will be impossible to remove the wallpaper, since it will not be possible to easily tear off a piece of canvas from the wall. When using PVA, yellow spots may appear on the surface, ruining the appearance of the coating (you can find out why the wallpaper turned yellow after hanging and how to fix the problem here). As a last resort, you can mix PVA with wallpaper in proportions of 1 to 10.
Special glue for joints
Especially for such situations, there is an adhesive on sale that is designed for gluing wallpaper at the joints. Its advantages:
- Thanks to the special components in the composition, it provides very fast adhesion of surfaces.
- Does not require dilution, since it is produced ready-made, saving the user’s time.
- Available in tubes with a dispenser, it is convenient to apply.
- Often a brush is included to apply it in hard-to-reach places.
- Excess can be easily wiped off with a damp cloth.
- After complete drying, the glue becomes impervious to water, so the glued canvas will not come off due to high humidity in the room.
This glue can be used for any type of material - paper, non-woven, vinyl, etc. (find out how to properly glue non-woven and vinyl-based wallpaper). There are many manufacturers of this product on the construction market, so it can be easily purchased.
Gluing technology
It is important to adhere to the correct gluing technology, follow the rules and principles.
General rules and principles
The principle in gluing is - do not skimp on material. Don't buy a cheap one or on sale because you only need a little bit of it. Discounted goods may be of poor quality due to improper storage.
Before starting work, you need to prepare your workplace, study the instructions for the adhesive, which layer to apply, how long it takes to dry. If possible, complete the work before the start of the heating season to allow the joints to dry at natural temperatures.
Glue peeling wallpaper with the windows and doors closed to prevent peeling again.
Glue joints
If you need to glue it at the joining place, then:
- Move away the edges of the wallpaper using a spatula and clean the surface of the wall and material from debris and dust.
- Apply glue to the wall and material.
- Press with a rubber roller.
- Remove excess with a clean, dry cloth.
We invite you to watch the training video:
Tears and Bubbles
If ruptures and bubbles occur, certain measures are taken. When a bubble forms, carefully pierce the place where it formed with a syringe with glue and squeeze out a sufficient amount. Wait 5-7 minutes until the canvas is completely softened, then press and smooth with a plastic spatula. Remove excess with a rag.
The bubble can be removed by cutting it with a special construction knife. But this option is possible if the wallpaper is without a pattern. Otherwise, a mismatch will occur. When making a cut, the cavity is also filled with a syringe, time is waited and pressed with a roller.
To get rid of tears, it is enough to treat this place with glue, wait a little and carefully connect the fabric.
Defects are eliminated on a well-moistened cloth. Such corrections cannot be carried out dry.
Wallpapering after the cat
If your beloved cat has ruined part of the covering, then this can always be corrected. To do this, you need to have the same piece of canvas and adhesive. The damaged piece is carefully cut out with a construction knife, the wall is processed, glue is applied, a few minutes are waited and a new strip is applied to the wall. Smooth out using a roller or rag.
If there is an animal in the house or apartment, it is better to glue non-woven material to the walls, or better to paint the walls.
How to re-glue a large area
There are some peculiarities and sequences in re-gluing a large area:
- Before starting work, we eliminate possible drafts.
- We remove debris from the peeled canvas. Debris is also swept away from the wall, excess putty is removed and processed.
- The canvas is spread with the adhesive mixture and soaked for at least 7 minutes. The time increases due to the already existing layer of glue from the first time.
- Apply glue to the wall without touching the glued wallpaper nearby.
- Straighten the strip and apply it to the wall.
- Press and expel excess composition and air with a rubber roller, rag or plastic spatula.
- Treat the joint on top, wait a few minutes, and remove excess with a rag.
Do not open windows until completely dry.
Bonding non-woven fabrics
The non-woven base has its own gluing characteristics. Incorrect application of wallpaper with such a base will lead to its peeling off. There are always instructions for such material, the study of which is mandatory.
This base is glued using glue and a spatula. The joints and the wall are treated with a special mixture, wait at least ten minutes (this material is much denser than ordinary paper wallpaper). Press and smooth with a roller or plastic spatula. Excess is removed with a rag or cloth.
How to glue wallpaper without glue
You can glue fallen wallpaper without a special composition, but prepare your own paste. This option is cheap, but impractical. It’s better not to experiment, especially if peeling has already occurred. It is not recommended to use either paste or PVA during work.
How to glue wallpaper at the joints if they have come apart
It is not advisable to throw away the glue powder remaining after the repair; it will serve as insurance in case of defects in the finishing coating.
It must be diluted with water in the proportions specified by the manufacturer. The joints of the canvases need to be slightly widened to make it more convenient to distribute the adhesive composition. To ensure uniformity, a narrow brush is useful. The glue-treated canvas should be pressed tightly, smoothing the joint with a clean rag. If there are still air bubbles under the wallpaper, you can use a plastic spatula when smoothing.
PVA glue is suitable for working with paper webs, although it should be remembered that it can cause other problems. The “behavior” of polyvinyl acetate products varies depending on the manufacturer; sometimes they leave brown or yellowish stains on the wallpaper. Craftsmen advise diluting PVA with water in a ratio of 1:1 or combining it with wallpaper glue in a ratio of 1:10.
This option is not suitable for vinyl and non-woven materials; for them it is advisable to select glue for the joints. The main advantage here is the versatility of the composition - it is suitable for all types of fabrics and creates a reliable connection. Special glue for joints is easy to apply: it is packaged in tubes with a narrow tip. The product is already ready for use; it does not need to be diluted. When gluing wallpaper, manufacturers recommend maintaining the room temperature at +10 - +25°.
To prevent delamination of joints in the future even at the repair stage, you can glue paper tape between the canvases. This is a special narrow product that enhances the fixation of wallpaper. The solution is not suitable for thin non-woven and paper coverings, but works well with heavy vinyl sheets.
Finding a working glue is only the first stage of joint repair; the gluing process deserves more effort and responsibility. Operation Guide:
The panels at the joint should be carefully unscrewed. Use a vacuum cleaner with a narrow attachment to remove dust and debris. If an old layer of whitewash or loose putty is visible, they need to be removed. If the putty layer is destroyed, the seam area must be worked over again with putty and coated with a primer, and then wait until it dries. Glue is evenly applied to the joint, and the edges of the wallpaper are pressed and rolled with a rubber roller. The entire surface should be smoothed with a plastic spatula, simultaneously wiping off any excess glue with a clean rag.
Often, during gluing, voids are formed - air bubbles; they should be carefully pierced with a needle. Joint glue or wallpaper solution is injected into such areas using a syringe, and excess should be removed with a rag. If simple PVA is used for gluing, craftsmen advise immediately treating the joints with an iron or hairdryer: high temperature promotes the formation of a strong connection.
Do not skimp on the mixture: you need to coat the wall and wallpaper generously. In some cases, in order for them to soak well, you will have to wait 10-15 minutes according to the recommendation of the material manufacturer.
Is it possible to disguise the joint?
The question is relevant in situations where a thin strip of the wall is visible in the restored seam, which is especially noticeable on dark wallpaper. To prevent the light strip from standing out, it can be painted over to match the color of the trim. In such a situation, water-based paint is suitable; if the pigment is too saturated, then a little of the product is diluted with water.
Expert advice
Experts highlight several tips when gluing wallpaper:
- Use high-quality materials for repairs.
- The loose edges are cleaned of debris and coated with the same compound that was used during the repair, only diluted with a more liquid one.
- PVA can help, but in the future there will be difficulties with peeling off and yellow spots may appear. Therefore, its use should be avoided.
- The material will rupture when the wallpaper and plaster come off. In this case, you should remove the canvas, clean it, the wall and make a new pasting.
- The material for gluing is purchased with a reserve, which will allow you to resort to replacement when gluing the room.
- If a whole panel is being re-glued, and there are sockets or switches on it, measures are taken for preliminary removal.
- The moment is taken into account when selecting the composition for working with different types of wallpaper.
- The floor for coating the canvas must always be clean.
- Prepare rags without patterns to prevent the pattern from transferring to the material when wet.
How to dilute thickened PVA glue with water
PVA is a popular product that is used during repairs, for office work, and for joining various parts made of cardboard, paper, and wood. The scope of use is quite wide, this is due to accessibility and ease of use. But it’s still worth knowing how to dilute PVA glue with water. Many people believe that this can reduce the properties of the product, but this is not so; it is important to know the features and rules of dilution.
Is it possible to dilute
Is it possible to dilute PVA glue with water? It happens that the product becomes very thick and even dries out, but this is not a reason to throw it away. It is in these situations that you can add water and leave to stand for a while. The base will acquire an optimal texture and will not lose its properties.
If you don’t know how to dilute PVA glue if it has thickened, then you can use a slightly warm liquid without hesitation. But still, the dilution must be correct and in compliance with the proportions so that the mixture does not turn out to be too liquid.
PVA glue should be diluted with water correctly, the proportions should be 1:10. This means that the amount of adhesive base must exceed the added liquid by 10 times. As the water increases, the base will become less effective and its abilities will decrease.
To properly dilute PVA glue with water, you should consider the following features:
- Before diluting thickened PVA glue, remove the crust or film;
- Often there are lumps in the thick composition; they should not be removed. During dissolution, the base is thoroughly mixed;
- To dissolve, do not use solvent, acetone, or alcohol. This can cause corrosion of surfaces, for example, plastic;
- Completely dried PVA glue cannot be diluted; it is better to throw it away.
If you follow the above tips, you can quickly dilute the product without losing its technical characteristics. Do not forget that when dissolving PVA liquid, you need to constantly stir it, this will quickly eliminate all lumps and thickening.
How to dilute with water depending on the type
PVA glue can be used for household use, office use, or dry glue. The first two species have a similar structure, so their dilution with water is carried out according to the same scheme. In order for the base to retain its properties and not lose its ability, it is important to carry out everything in stages.
How to dilute stationery and household supplies
You can dissolve PVA quickly and without problems, but it is still worth preparing for this process. To carry out the work, you will need slightly warm water; you can first collect it and leave it to stand at room temperature.
If the PVA glue has thickened, then its dilution should be carried out as follows:
- First, prepare a container for stirring and dissolving;
- Next, the product is laid out in it and a little water is added;
- Using a spatula, mix until a homogeneous consistency is formed;
- Afterwards everything is left to settle for a while.
The mixture should not be used immediately, otherwise it may damage the product. It is advisable to leave the glue for half an hour after dilution; this time will be enough for it to acquire the desired structure.
If PVA is used to prime cement walls, then the volume of water should be several times larger.
How to dilute dry
Wallpaper glue is sold as a dry powder. Its dilution must be carried out in accordance with the instructions indicated on the packaging. But it happens that there are leftovers at home, but the preparation diagram is not at hand.
We suggest considering the rules for diluting the powder:
- When preparing, be sure to follow the proportions - add 1 liter of warm water per 100 grams of powder;
- It needs to be diluted in a special plastic container;
- Stir thoroughly, breaking up lumps;
- You should get a homogeneous mixture similar to sour cream.
If it is used for priming walls, then it is worth adding twice as much water. The mixture should be very liquid.
All of the above recommendations will help restore the glue and return it to its original properties. But it’s still worth doing it correctly in compliance with proportions and rules. There is no need to throw away the product, just add a little water and the composition will again become suitable for repair and office work. In the video below you can see the reverse method.
Reasons for peeling wallpaper
Most often, you have to glue wallpaper if a low-priced coating is glued to the walls. However, sometimes it happens that even the most expensive non-woven wallpaper may need to fix the seams. If canvases with vertical stripes or a checkered pattern are selected, then the visibility of the resulting defects is extremely low. And on a glossy, textured coating or on wallpaper with a monochromatic pattern, peeling at the seams, on the contrary, will be very noticeable.
If the wallpaper was stored in rooms with high humidity or was transported incorrectly, this will also negatively affect its performance. So, when you decide to purchase new wall material, carefully examine the sides of the rolls. If the ends are even slightly dented, then it is better to choose another product. Indeed, in this case, with one hundred percent probability, the joints will be visible. In addition, make sure that the roll packaging is initially intact, without tears or cuts to the film. We recommend storing printed material exclusively in a vertical position.
Often the reverse side of the canvas is a dark shade of white. After pasting the walls, it also remains white, thereby creating the effect of a peeling sheet of wallpaper. To get rid of this problem, we recommend painting the joints with a pencil of a shade that matches the color of the coating.
For the most part, paper webs are susceptible to peeling at the seams. The fact is that when you spread glue on paper, it stretches. And when the adhesive base dries, the sheet noticeably decreases in size. For this reason, you need to glue the strips immediately after applying the glue so that they do not have time to swell. You cannot hesitate, otherwise you will not be able to avoid uneven shrinkage.
What can PVA glue?
Invented in 1912 in Germany, PVA went from being a curiosity to a widely used and well-known glue within a couple of years. This happened thanks to two main characteristics: non-toxicity and versatility. Today, the composition continues to be improved and new brands are being produced; PVA glue is acquiring new properties. Therefore, it makes sense to tell in more detail where and how this adhesive material is used, why it is unique and how it is produced.
How it is deciphered and what it is made of
PVA is a product of the chemical industry and is named after the main active ingredient, polyvinyl acetate, which makes up 95% of all glue. Polyvinyl acetate is obtained by polymerization of vinyl acetate monomer using various industrial methods. The substance cannot be dissolved in water (it only swells) and oil solutions. Resistant to low and high (but not higher than 100˚ C) temperatures, but not to their alternation. Inert to air. The main feature is that when used, it increases adhesion between the surfaces of materials.
The rest of the PVA glue is occupied by plasticizers and additives. Depending on what type of adhesive product is made, tricresyl phosphate, EDOS, acetone and other esters are added to it. Plasticizers provide the necessary thickness and also improve adhesion to working surfaces.
Advantages
PVA glue has become widespread due to its many positive properties:
- does not contain chemicals that are harmful to health, so stationery PVA is approved for use by children from 3 years of age;
- does not burn;
- resistant to mechanical stress;
- with increasing internal temperature it becomes more plastic;
- withstands 4-6 freeze-thaw cycles;
- has a neutral odor, which makes it easy to use in enclosed spaces;
- dissolves only from complex compounds of chemicals, but a fresh layer can be easily washed off with water.
Varieties and their technical characteristics
PVA glue is widely used in everyday life and construction. Both a schoolchild, a professional carpenter, and a housewife use polyvinyl acetate. Depending on the type of activity, polyvinyl acetate is divided into types:
- Stationery (PVA - K). Popular in kindergartens and schools. The consistency is thick, white mass, with the formation of a surface film. Non-toxic, not resistant to frost and high humidity. It is used in working with paper and all its varieties.
- Wallpaper (household). Used for gluing paper, vinyl, non-woven and textile wallpaper. Creates reliable adhesion to concrete, plasterboard or combined surfaces. The glue withstands freezing down to –40 degrees.
- PVA-MB (universal). Bonds various types of materials. Used as part of water-based construction and finishing mixtures. Withstands temperatures down to –20 degrees.
- PVA-M is a cheap modification of universal glue. Only bonds paper and wood. Not recommended for use on glass and porcelain surfaces.
- Polyvinyl acetate dispersion is an adhesive emulsion improved for adhesion to surfaces. It is divided into two types: plasticized and without plasticizers. It is found in household chemicals, packaging products, water-dispersed paints and mortars.
- Dispersion adhesive is used in textile, shoe and other industries. Also used in the manufacture of tobacco products - for cigarette filters. It is frost and moisture resistant. It has a creamy yellow tint and a viscous consistency.
- Waterproof class D adhesive. Used in construction and repair of wooden products, furniture making. Moisture resistance range from d1 to d4.
- The most optimal for gluing on wood, fiberboard, chipboard and cork is PVA glue d3. It stands for dispersion emulsion of polyvinyl acetate of 3 degrees of moisture resistance. The consistency is transparent, thick and viscous. Can be used in rooms with a high degree of air humidity.
Correct Application
Each version of the adhesive mixture has its own characteristics of use. Therefore, before use, carefully read the instructions that come with the product. If you don't have one, use the tips below.
How to glue wallpaper: features of choosing glue
So, we have already taken a look at the main reasons why wallpaper can peel off. Now let's figure out what exactly to glue the wallpaper with if a similar situation has already occurred.
So, most people often glue wallpaper seams with the most common PVA glue. In fact, this is a grave mistake. The fact is that PVA has too weak adhesion, and therefore is not able to firmly connect the canvases to the wall. In addition, this adhesive composition will not hold a sufficiently heavy facing material. Therefore, it is important to clearly know which glue to use so that the work is not in vain.
- Wallpaper PVA. The composition will do an excellent job of correcting the joints of paper-based wallpaper. It is important not to confuse its properties with the properties of stationery PVA, because these two types of adhesive mixtures are completely different in composition.
- Wallpaper glue. Naturally, from a practicality point of view, it is the most suitable adhesive. However, most often such mixtures are sold in fairly large quantities. However, after unpacking, some of them cannot be stored for a long period. Accordingly, buying a large package of wallpaper glue in order to cover only a small area is not the most budget-friendly option to solve the problem.
It is important that it is recommended to purchase glue for gluing wallpaper only from trusted brands. Due to competition in the market, it is in the interests of popular manufacturers to fully justify the declared properties of goods, so as not to lose consumer trust. For this reason, manufacturers maintain decent quality of products sold.
What to do if PVA glue has thickened. Tips on how to dissolve glue
PVA glue is rightfully considered the most famous adhesive for use in everyday life. Schoolchildren and their parents are familiar with PVA adhesive mixture as the best assistant for crafts made from paper, wood and cardboard.
In addition to household use, PVA glue is often used in construction and repair work, and it also finds its use in production. The glue is highly valued for its low cost and excellent adhesive properties.
The most popular types of PVA glues
- Clerical. This type of glue is popular in almost all offices in the country. Stationery PVA is used for paper and cardboard materials.
- Carpentry. PVA-based glue successfully copes with gluing wooden baseboards, furniture and various wooden surfaces. Moreover, many leading experts consider PVA the best option for wood. PVA adhesives for woodworking differ in the level of water resistance of adhesive joints D1-D4. You can read more about the features of the glue here.
- Wallpaper. The name speaks for itself; this glue is used when gluing wallpaper. Ideal for washable and paper wallpaper on wooden, concrete and plastered walls.
- Building. Can be used as a mixture in cementitious mortars, plasters and primers. Construction adhesives are often used in laying linoleum, parquet or tiles.
- Universal glue (PVA-MB). This type ideally glues materials made of paper, wood or leather and metal, glass and wooden surfaces. Universal adhesive can also act as a binding element in mixtures of putties, primers or concrete solutions.
- Glue PVA-M. Known as a budget analogue of PVA-MB glue. Version "M" is suitable for adhesion of wood, paper, cardboard. But manufacturers categorically do not recommend using it to join materials made of glass, porcelain and leather.
How to glue wallpaper joints: step-by-step instructions
When the adhesive mixture has been selected, it is time to begin work. In order to glue the joints, change into suitable clothes, prepare a wide brush, a rag, a spatula and a roller. Carry out the process, strictly following the detailed instructions on how to glue wallpaper. Repair professionals glue wallpaper joints according to the following principle:
- bend the joints;
- remove any remaining debris or whitewash from the sheet;
- We check the wall for chips and deformations;
- Lubricate the joints with glue;
- press the peeled sheet to the desired place;
- we go over the area with a wallpaper roller;
- smooth out the residue using a spatula;
- remove remaining glue with a clean, dry rag.
How to remove peeling at corner joints?
If the wallpaper has peeled off at the corner joints, you will need to follow approximately the same instructions for eliminating peeling. It is important that in this case it is advisable to work on both sheets of wallpaper at once, between which a joint has formed.
To simplify the work, you can not completely bend the entire sheet, but carefully apply glue to a spatula and coat the wallpaper with it on the wrong side. This will greatly facilitate and speed up the process of restoring the wall covering.
Adviсe
- There is an opinion that you can get rid of bubbles by cutting them lengthwise or crosswise with a knife. This method is only suitable for professionals and only when a uniform pattern is printed on the covering, otherwise the remaining fragments will not form a single image (read about why bubbles appear and how to glue wallpaper without swollen areas, read here).
- To get rid of bubbles efficiently, you need a syringe filled with adhesive. Puncture the swollen areas with a needle and carefully pour a little glue inside. Wait a few minutes. During this time, the material of the canvas will soften, and all that remains is to smooth out the bubble with a roller.
- Often, new wallpaper develops creases and scratches. You can get rid of them in the same way as in the previous case. A little liquid glue is injected into the problem area with a syringe. Then you need to warm up the area with a hairdryer and carefully smooth out the scratch with a rubber roller.
ImportantIf excess comes to the surface, quickly wipe it off with a dry cloth. This is a quick way to eliminate such defects.
- If the wallpaper comes off the wall along with the plaster, then you need to apply new plaster and a new canvas to the problem area. This is possible if little time has passed since the repair, and the wallpaper has not yet changed color due to the influence of various external factors.
- Do not buy materials for repairs end-to-end.
After the repair, at least a few linear meters of canvas should remain. In case of an unforeseen situation, it is difficult to find the same materials in stores. Even if you manage to find the same sample, the rolls may be from a different batch and may differ in shades.
Peeling wallpaper is not a big problem . To prevent such situations, you need to adhere to the standards for wall covering. If the canvases do come off, this can be easily corrected; the main thing is to avoid making even bigger mistakes when choosing glue and during work.
How to mask a gap at the junction of wallpaper?
Perhaps this is the simplest task of all that you can encounter after covering the walls with a new coating. If you managed to glue the peeled wallpaper back into place by carefully sliding them on top of each other, then there is no gap at the seam.
In cases where this is not possible, we recommend using a simple trick. Carefully draw in the empty joint area with a colored pencil that matches the color of the wallpaper. Naturally, this is only permissible if the gap between the sheets is extremely small.
What is the best way to glue wallpaper onto paint?
Wallpaper is considered the most popular and practical among finishing materials, due to the aesthetics and universal availability of this product. But, despite all these positive qualities, wallpaper requires a well-prepared surface and adherence to technology during the production process. During cosmetic renovations, many apartment owners are faced with the problem of pasting wallpaper onto a painted wall and ask a logical question - how to glue wallpaper onto paint. And this is correct and timely, otherwise you can spoil the material and lose a lot of time.
As you know, surfaces strongly absorb odors, especially in the kitchen and in places where people often smoke. And in rooms with poor ventilation you can often find mold and mildew. In this case, it is necessary to carry out cleaning work; if the painted surface is strong and without signs of mold, then it will be enough to wash off the soot and grease with a detergent. But in case of deep fungal infection, it is recommended to clean the entire affected surface, treat it with a septic tank, prime and putty.
What types of paints exist
In order to carry out the correct set of preparatory work before wallpapering, you must first analyze the paint material on the wall. Therefore, you should find out what types of paints are available and how to work with them:
- Oil paint and enamel paint are similar in appearance; they typically have a durable, smooth finish and each has a sheen or gloss. To determine it is necessary to chop off a piece with an iron spatula and grind it; oil paint has the smell of drying oil.
- Whitewash can be determined simply by swiping your hand, after which white marks remain on the palm.
- Acrylic water-based paint, visually, can be confused with whitewash. But upon contact it leaves no traces. For a more accurate analysis, you can apply water to the surface; the whitewash will become dark; acrylic paint will not change tone.
- Water-based paint is easily washed out if you wet a rag and rub it over the surface. In addition, like whitewash, it darkens when it comes into contact with water.
Removing wrinkles from dried wallpaper
Another thing is if there are glue bubbles on the wallpaper. This can often result in the fact that when the sheet of wall covering dries, quite noticeable folds may remain. Naturally, they can be quite noticeable and will largely spoil the overall appearance of the repair.
If the wallpaper is swollen, then you need to quickly correct the situation. Get to work before the wall covering has time to dry. When the air bubble is too large, it is recommended to simply lift the corner of the wallpaper sheet and carefully stick it in the desired position. A bubble of medium or small diameter should be taken outside the sheet of wallpaper. So, for this you can use a plastic spatula. By gently pressing on the areas around the bubble, you will be able to bring it to the edge of the sheet. Afterwards, if the air does not want to escape, the sheet should be carefully lifted, the bubble released and the wallpaper glued back.
Unfortunately, it is almost impossible to completely remove a noticeable crease after the wallpaper has dried. Some people advise carefully trimming the excess wall covering. The resulting white “scar” can be sketched with a suitable pencil, but such an undertaking is quite risky.
Universal PVA glue technical specifications
The development of PVA glue occurred more than 100 years ago by German scientists. The composition quickly became in demand among the population. At the moment, it is used in almost every field. It is widespread because it is not harmful to humans and is universal. It is noteworthy that even after many decades, additions to its composition are being made to expand the scope of its use.
How to avoid peeling: recommendations for all types of coatings
Naturally, it is quite possible to avoid wallpaper peeling if you adhere to certain rules. So, they need to be glued exclusively with a special composition for this purpose. It is also imperative to follow all the rules stating how to glue each individual type of wall covering. Manufacturers often provide basic requirements for performing this task in the instructions for rolls and adhesive mixtures.
It is important to dilute wallpaper glue in the correct proportions. During the drying period, it is recommended to provide the room with complete protection from drafts and high humidity, as they negatively affect the adhesion of wall panels to the wall surface.
Finally
Before gluing wallpaper at the joints, study the recommendations from both the wallpaper manufacturer and the manufacturer of the adhesive chosen for it. Follow the basic algorithm of work and keep the room dry so that the elimination of cladding defects is effective.
We wish you good luck in your endeavors. If you have any questions, we recommend watching a video on how to remove joints in wallpaper with your own hands:
Wallpapering is a real challenge for some people. But when the work is already finished, it’s even more offensive when the seams that took so long to adjust begin to come apart. Is it possible to do something in this situation? The article will discuss methods of gluing and masking seams between wallpaper, and will also discuss the main reasons why wallpaper peels off at the joints.
Why did you move away from the wall?
It may seem that the materials were glued in compliance with all the rules, and it is unclear why they still came off. Possible reasons:
- Pasting requires smooth surfaces. Irregularities on the walls can often be found in new buildings, but in previously built houses, deformation of the walls is also possible, so before starting work you need to carefully level all surfaces, remove old plaster, and fill up all small cracks (how to glue wallpaper in a new building?).
- If plasterboard was used for finishing, then the reason for the peeling of the coatings may be hidden in poor processing of the joints between the individual sheets.
- The walls need to be thoroughly cleaned of old peeling wallpaper or paint (read about how to quickly and easily remove old wallpaper here, and from this article you will learn about effective ways to remove old wallpaper from drywall). It is especially problematic to stick canvases on walls that have been covered with lime or other whitewash. In such a situation, you need to thoroughly clean the surface and first apply a primer.
- Wait until the plaster or primer dries, otherwise the wallpaper will not stick to the wet surface.
- You need to carefully read the instructions for the wallpaper. Different types of coatings require different types of adhesives; moreover, each manufacturer can indicate its own recommendations for applying the finish (for details on how to weld and use, and where to store the paste, read another article).
- Apply glue onto the canvas tightly and evenly to prevent gaps. This often happens if a brush is used to apply the glue rather than a roller.
- Sometimes, even with ideal wall preparation, materials can come off due to poor-quality glue. When purchasing it, the expiration date is important.
The process of drying the wallpaper after gluing it plays an important role.
To prevent the fabric from coming off, the following rules must be followed::
- Windows and doors cannot be opened in the room being repaired;
- it is necessary to exclude the possibility of drafts, remove ventilation;
- If the windows face south, then you should curtain them so that direct sunlight does not fall on the wallpaper.
If the room is at the same time low temperature and high humidity, then it is better to wait for more suitable conditions, otherwise the wallpaper will peel off or bubble.
Causes of detachment
The success of dealing with any problem depends on correctly identifying its cause. This is also true for wallpaper. The most common reasons why wallpaper peels off are:
- wall defect;
- plasterboard walls;
- poor preparation of the base;
- violation of gluing technology;
- uneven layer of glue.
Often the source of the problem is beyond the owner's efforts. It may lie in how the building material behaves over time. If this is a new building, then the house still shrinks for a certain period of time. During the shrinkage process, some deformation of the walls is observed, which can lead to unsticking of joints or the appearance of tears. This also applies to buildings that were built a long time ago.
Due to certain processes that can occur in soils, rupture occurs along the seam. Another reason could be old building material that begins to deteriorate and affects the wallpaper. To prevent such a problem from occurring, you can analyze the quality of the wall in advance. To do this, you can carefully inspect it and lightly tap to determine if there is any peeling plaster or voids that will lead to the wallpaper peeling off.
The base for wallpapering must go through all stages of preparation; if this has not been done, then problems with joints on the wallpaper may occur. This often happens due to the fact that before gluing a new layer of wallpaper, the old one was not completely removed. You should also not glue wallpaper onto a painted base. It is better to spend more time cleaning, puttying and priming the base than to overpay for a new batch of wallpaper. Preparation will have to be done in any case, but later it will cost several times more.
Each wallpaper manufacturer applies certain recommendations to its products, but some may consider that personal experience is sufficient. It is important to understand that technologies change and what was good yesterday is no longer acceptable today. Sometimes those who apply wallpaper try to finish the process as quickly as possible, which leads to insufficient impregnation of the wall with glue. Before gluing, you must carefully read the manufacturer's insert and follow the instructions exactly. For example, different wallpapers require different waiting times before gluing.
Another nuance that requires special attention when wallpapering is the uniform application of the glue. Don’t think that the more of it there is, the more securely the wallpaper will stick to the wall. In addition, some finishing materials require applying glue not to the canvas, but directly to the wall. If you do not follow the recommendations, then you can count on the fact that the product will definitely peel off, and not just at the seams. A roller will allow you to distribute the glue evenly over the surface. Coping with this task with a brush is somewhat more difficult. Some types of wallpaper require pre-exposure with glue applied before fixing to the plane.
Primer made from PVA glue - save on repairs
For any type of wall finishing, be it putty, plaster, painting, or before wallpapering, you must first prepare the surface. Priming is one of the main stages that must be completed first, because with the help of primer you can achieve better adhesion of the finishing material to the surface. However, the materials presented on the construction market are quite expensive. But there is an excellent economical solution - PVA primer. It is not difficult to make it yourself, and this solution is suitable for both wooden and concrete and brick surfaces.
Purpose of the primer
PVA glue is a water emulsion of polyvinyl acetate. This is a chemical substance of a solid granular substance without a distinct color or odor. The material is used in construction, furniture production, and carpentry. It is actively used by schoolchildren, students, and needlewomen. Polyvinyl acetate glue connects various materials: paper, cardboard, wood, rubber, ceramics.
To obtain a primer, PVA glue is diluted with water. On the surface, such a mixture forms a thin transparent film, which has many of the properties of specialized primers.
A PVA-based primer can be used as an intermediate layer between the surface and the finishing coating, promoting good adhesion of materials and reducing the risk of them peeling off the wall as a result of moisture getting on it. In addition, the use of such a primer will reduce the consumption of putty or paint used.
Advantages and disadvantages
A primer made from PVA glue has its advantages and disadvantages. The undoubted advantages are:
- Increased adhesion. An additional layer is created to securely fix the finish to the surface.
- Reduced moisture absorption. The soil penetrates the surface structure, filling its pores and preventing moisture from entering them.
- Creation of a protective layer. A thin polymer barrier helps combat aggressive environmental influences.
- Reducing the amount of consumables (plaster, paint, glue).
In addition, a primer made from PVA ensures even application of paint and facilitates the process of wallpapering. Of course, all this is sufficiently ensured by commercial primer, which is available in a wide range. But often its high price forces us to look for more profitable solutions. Therefore, using PVA instead of a primer is a completely justified option.
Despite all the advantages, this composition still has disadvantages. These include:
- Ineffectiveness – insufficient penetration into the depth of the material.
- Lack of antiseptic properties - the primer coating will not be able to resist the proliferation of microorganisms (mold, fungus).
- The formation of yellow spots and stains spoils the appearance of the finish.
- The material loses its properties in damp rooms - it is not used to cover walls, ceilings in bathhouses, swimming pools.
Knowing some subtleties, you can turn disadvantages into advantages and improve the properties of an aqueous PVA solution for priming walls. So, for example, you can increase the ability to resist mold by adding a little whiteness to the composition in the proportion: 50 g of disinfectant per liter of ready solution. If you add 3% of its volume of liquid glass to PVA soil, you can increase the permeability of the material being processed, especially wooden bases.
If financial resources are limited, it is better to use adhesive primer in utility or non-residential premises. In the living room and bedroom, combination with expensive wallpaper such a primer will not work, because there is a possibility of yellowing, which will significantly change the interior for the worse.
Prepare the primer yourself
How to make a mixture that has the properties of a primer? You need to take the following components:
- PVA glue – 1 part;
- water – 2 parts;
- cement - the amount is determined by the density.
The preparation technology is not difficult: the glue is diluted with water, mixed, and the required amount of cement is added. The finished solution should resemble liquid sour cream and fit well on the surface.
Important! Before you make a PVA primer with your own hands, decide on its quantity. The mixture should not be prepared for future use, since unspent excess will eventually lose its binding properties.
Diluted primer is an excellent, economical means of preceding the treatment of walls with wallpaper glue, but is not sufficient for a reliable finish. Is it possible to improve the quality of the primer composition? Repair experts advise adding crushed chalk and liquid resin to the mixture with PVA glue. Their mass should not exceed 5% of the total volume of the composition.
Important cooking conditions:
- Work on creating a primer should be carried out in a warm room, away from drafts and sources of fire.
- Use convenient containers: a large bucket, a basin, a canister with a wide neck.
- Water is added to the glue gradually, the classic ratio is 2:1.
- Constant stirring of the composition will prevent the formation of a surface water layer. To facilitate labor and obtain the greatest homogeneity, you can use a construction mixer.
Priming walls with glue is different in that it forms a film on the treated surface without filling small cracks and gaps. But, given the relatively low cost of the components used, the result is an excellent building material that can be quickly made at home.
The finishing goals should be clearly defined. A universal primer that does not require increased water resistance is suitable for wallpaper. Finishing with elite decorative plaster requires a more expensive adhesion coating.
On video: deep penetration primer made of PVA.
Stationery glue
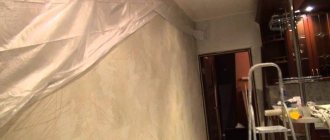
At one point you may notice such a defect, as can be seen in the photo below.
The canvases at the junction diverged quite significantly. On the one hand, this is good, because this state of affairs will simplify the elimination of consequences. On the other hand, the larger part of the canvas has peeled off, the more glue will be needed to carry out the work. There is no point in completely re-gluing the canvases with a new portion of glue, since the situation will most likely repeat itself. The first step is to remove any remaining glue that might remain on the wall, and try to scrape off any grains of sand from the building material from the wallpaper. Next you will need the tool shown in the photo.
This is an ordinary stationery glue stick that can be easily purchased at any specialty store. After partial cleaning has been done, it is necessary to coat with glue not only the canvas, but also the wall itself at the junction, as shown in the photo below.
There is no need to wait a certain period for the glue to set; it is enough to smooth the treated area with your hand, as can be seen in the photo below.
The best option would be to use a special roller for canvas, which can be purchased at a hardware store. In addition, there is always the option of using a lint-free cloth. It will make it possible to quickly and without much difficulty remove air bubbles from under the material. The result will be as shown in the photo below.
Can PVA be diluted with water?
The idea of diluting thickened glue with water is explained by the presence of the liquid itself in its composition.
This is one of the working ways to save glue and solve a problem, for example, with a children's applique, without going to the office supply store. When diluting PVA with water, you need to use a warm liquid (room temperature). If it is hot or, conversely, cold, then the composition itself will lose its technical characteristics and the finished seam will not be so reliable.
In terms of the ratio of components, it is necessary to adhere to the proportion of 1:10. The amount of glue should exceed the added liquid ten times. If the proportions are increased, the finished mixture will partially lose the effectiveness of gluing parts; for example, it may not cope with the connection of wooden bases.
If it has thickened after long-term storage, then first you need to remove the top crust. Glue lumps of jelly-like consistency should dissolve when thoroughly mixed with water. There is no need to remove them.
Do not use acetone or alcohol to dissolve office glue. This then increases the risk of corrosion of the surfaces being joined, such as plastic.
The thickened mixture can be diluted with water (try) or replaced with a new one. The only exception is a completely dried product, which can only be thrown away.
If the PVA glue is household or office, then dilution with water is still possible. PVA super and universal composition can only be thrown away or replaced.
To thoroughly mix the composition with warm water, you need:
- prepare the container;
- pour out the glue and then add water;
- mix the consistency until a homogeneous white mass is obtained;
- let it sit.
If the prepared solution is used immediately, the product itself may be damaged. After mixing, leave the container alone for at least half an hour. If glue will be used as a primer for walls to increase adhesive properties, then the amount of water should be twice as much as glue. You should get a liquid white mixture. This option is used before painting surfaces. In other cases, the volume of water should be less than the adhesive mixture. Even a ratio of 1 to 2 (water to glue) can lead to useless results.
As an alternative, you can try making your own adhesive mass from starch or wheat flour. You need to fill the dry mixture with cold water. In a separate container, you need to boil water and gradually, while stirring, pour in the cold mixture with starch or flour. You need to stir everything together continuously for at least another 10 minutes. You should get a jelly consistency. With flour, the composition will be more durable and effective compared to starch.
Grouting joints
For plain canvases, you can use a method that will not only glue the joint, but also disguise it well. To implement your plan, you will need regular PVA glue and gypsum putty for walls.
The components must be poured into a small bowl and mixed together. The ratio should be 1:1. Mixing must be thorough so that there are no lumps left in the composition, as they will create problems. The photo below shows that you can use a regular spatula and a plastic container for mixing.
After you have achieved the required consistency, you need to carefully apply the composition to the joint. In this case, the wallpaper must be pressed against the wall and moved well together.
The photo above shows that the composition must be applied directly to the joint between the wallpaper, and a rubber spatula for grouting the joints between the tiles can be an assistant in this. After application, the composition must be given a few minutes to penetrate into the materials.
After this, you need to take a good cloth that does not have lint, moisten it and gently wipe the treated joint. The result will be perfect. If the wallpaper is plain, but not light, then you can add a pigment to the resulting composition that best suits the specific canvas.
How can you dilute PVA glue without losing its properties?
PVA glue is in demand in everyday life. This is due to its availability, gluing results and ease of application. It consists of polyvinyl acetate dispersion and water. The applied layer dries completely within 24 hours. They connect paper, cardboard, fabric and wooden parts. It is added to gypsum mixtures and used when preparing walls for wallpapering. It is suitable for products susceptible to high air humidity and is resistant to frost.
The product contains no toxins or flammable components. It can be used in enclosed spaces without the risk of fire hazard. When applying a thin layer of glue, it becomes almost invisible on surfaces.
If the mixture is too thick, if the glue has been stored for a long time after opening, it can be diluted with liquid. This will allow you to save money by doing the necessary work without visiting an office supply store. The situation can be corrected when it is thick. The dried glue can only be thrown away.
Depending on the purpose, PVA can be:
- household (wallpaper), connects paper surfaces with cement and wood;
- stationery, which helps to fasten paper and cardboard;
- construction (additive to primer mixtures), used when working with fiberglass, vinyl and paper;
- extra, reliably gluing different types of wallpaper, plywood and wood;
- universal, used in creativity for connecting paper parts with wooden, glass and metal parts;
- super M, which glues ceramics, porcelain, knitwear and is used for laying flooring (indispensable when working with vapor-tight surfaces).
Corner joint
In some cases, the wallpaper joint does not fall on the straight plane of the wall, but on the corner of the room. In this case, peeling may also occur, which creates an unpresentable appearance.
If we are talking about a fabric that is made on a non-woven base, then there is no point in using ordinary wallpaper glue to eliminate the problem that has arisen. Regular PVA glue will help solve the situation.
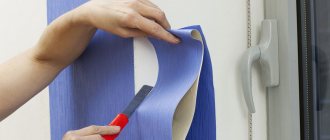
It is enough to move one or both parts of the wallpaper a little and coat them well with glue. It is convenient to do this from a bottle with a dispenser, as shown in the photo below. If you don’t have one in your house, then you can put glue into an ordinary syringe and squeeze it out along the edges of the canvases and onto the wall. Before pressing the wallpaper against each other and against the wall, you need to wait a few minutes for it to absorb and partially set. You can press down the corner joints with a rubber spatula, as in the previous version.
What glue to use for wallpapering?
paper wallpapers are distinguished by minimal paddle, so for gluing them, a composition based on CMC, universal glue, as well as ordinary PVA, drilling glue and even homemade paste are suitable; Vinyl wallpaper is a little heavier than paper wallpaper, but the principle of gluing is the same - the glue is applied to the canvas, and not to the wall.
Interesting materials:
How to get date of birth from Inn in Excel? How can you get Alkene from alcohol? How is white chocolate made? How is a button made? How to make a scraper for collecting sea buckthorn? How to cure a Sim of vampirism? How does the status category change? How do latitude and longitude change? How does the Earth's temperature change with depth? How to change id in VK for the second time?
Masking the joint
In some cases, after restoration of the wallpaper joint, its appearance leaves much to be desired. It is in such situations that it is quite easy to disguise it. The photo below shows how the raw joint between dark wallpaper looks.
To prevent the eye from constantly falling on a white or other stripe at the junction of the wallpaper, it can be quickly and easily removed by selecting the necessary pigment to match the color of the wallpaper. Water-based paint dyes can be used as a pigment, as seen in the photo below.
You need to choose the option that best matches the color. You can always lighten it by diluting it a little with water. Next, you need to place a small amount of dye on a suitable surface. After this, a spatula or knife is dipped into it, as shown in the photo below.
Next, with a gentle movement, the pigment is applied exactly to the joint between the wallpaper, as shown in the photo below. The seam seems to stand out even more after treatment, but this is easily resolved.
It is enough to take a damp cloth and simply wipe the place where the pigment was applied between the wallpaper and the result will be as seen in the photo below.
How to dilute wallpaper glue correctly
When diluting glue, you must follow the manufacturer's recommendations on the packaging
. Anyone who has ever dealt with home renovation is sure that he knows how to dilute wallpaper glue. It seems that there is nothing complicated in this matter.
Everything is extremely accessible and clearly written in the instructions. However, there are some nuances that are important to know not only for those new to renovation, but also for those who have already tried their hand at wallpapering.
Some tips for making wallpaper glue
Professional workers in the repair industry give recommendations that should be taken into account when diluting glue:
- When choosing a universal wallpaper adhesive, you must follow the instructions. However, it is better to change the proportions to suit a certain type of wallpaper. For example, for heavy canvases it is better to make a thicker solution. If, when purchasing a universal composition, you have doubts about how to dilute glue for non-woven wallpaper, then it is better to purchase a specialized composition.
- Do not add PVA glue to the prepared solution. In enhanced formulations it is one of the main components.
- For best adhesion, take the powder in the proportions indicated on the package, and reduce the volume of water by 10%. If necessary, the prepared solution can be diluted with water, but adding dry glue to the prepared mixture is not recommended.
How to make Holocaust glue
This mixture is used for gluing heavy types of canvas. You can prepare it at home from wheat flour.
The economical composition of the paste made it popular back in Soviet times. Of course, now there are many options for choosing mixtures in different price categories. However, preparing a paste can save you in a situation where a little glue is missing.
How to cook Holocaust:
- Pour 150 g of flour into a large container (so that you can mix without the solution spilling);
- add warm water - 1 liter;
- stir everything until smooth;
- cook for about 7-8 minutes;
- strain the solution through a sieve.
Once cooled, Holocaust is ready for use.
How to make glue with your own hands is shown in the video.