Covering the roof with corrugated sheets is one of the most popular finishing methods today. This coating is reliable, durable and attractive in appearance. Often, owners of buildings with stove heating are faced with the need to finish the joints between the chimney and the roofing material. The operational life of the structure largely depends on the quality of these works. This review will help you understand how to seal a chimney on a corrugated roof.
Sealing a chimney on a corrugated roof
Sealing
Finishing the chimney necessarily begins with the arrangement of the point where the pipe protrudes onto the roof.
For this purpose, a protective apron is used, laid in two layers: on top of the covering and under the roof. A prerequisite is the sealing of the junction points. Additional finishing of the chimney pipe on the roof is necessary only if:
- the materials from which the chimney is made do not have synergy with the design of the house;
- chimney decoration is necessary;
- cladding - brick, which the owner of the house does not like from an aesthetic point of view;
- the draft in the chimney system is not enough to fulfill the intended purpose of the system.
Sealing the pipeSource www.baywa-baumarkt.de
Sealing is only the first step for finishing the pipe. Until recently, the SNiP standards had a rule according to which the outlet of the pipe had to have a wide brickwork. This was necessary for high-quality sealing. But modern materials make it possible to get rid of this need.
Now you can get a high-quality seal without setting up bulky additions to the pipe. Now any roofing material can be wrapped onto the pipe laying, which makes it possible to make an apron made of galvanized metal with a polymer coating with a thickness of 2 to 4 millimeters airtight.
But it is best to create an apron from a combination of a metal apron and flexible sealing tape. To glue it, you will need an additive made of polymer or bitumen material. The laying of this adhesive layer goes under the apron. To ensure that the seams are also airtight, silicone sealant is applied to them.
Equipment for the junction of a rectangular pipe
Rectangular pipes are one of the most common, they are used as a chimney or ventilation duct, and are made of heat-resistant bricks or special ceramic blocks. The finishing of the junction of a rectangular pipe with corrugated sheeting on the roof is carried out using a ready-made shaped element - an apron. It is made of galvanized steel and then painted to match the color of the roofing. Sealing the joint using an apron is carried out as follows:
- The waterproofing and vapor barrier material, which was cut when the chimney was brought out, is carefully glued to the outer walls of the pipe using construction tape.
- A shallow groove is made along the perimeter of the pipe to install the upper junction bar using an angle grinder.
- The upper edge of the junction strip is placed in the groove, additionally secured with a heat-resistant silicone-based sealant.
- The lower part of the apron is placed with an overlap of 10-15 cm; special screws for corrugated sheeting are used for fastening.
- A tie is placed under the lower part of the apron - an element made of waterproofing material that prevents the formation of leaks.
Steel apron
To finish the chimney, aprons made of galvanized steel are used. They can later be painted in the desired shade. The configuration of this element may vary. There are ready-made aprons of different sizes on sale.
How is the apron installed?
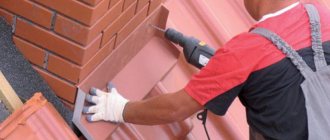
- The edges of the waterproofing membrane and thermal insulation that were damaged when the pipe was brought to the roof must be secured to the chimney with construction tape.
- To install the wall profile, the pipe is grooved along the entire perimeter (before this, markings should be applied). The upper part of the strip is inserted into the recess and fixed with a high-temperature resistant sealant.
- The first layer of the apron is placed under the profiled covering and fixed with roofing screws.
- The second layer of the protective device is mounted on a profiled sheet with an overlap of 10...15 cm.
Installation diagram of a steel apron
All joints are treated with sealant.
The protective apron should be fixed using special self-tapping screws with a rubber seal. If such hardware is not available, you can use homemade rubber gaskets that fit under the fastener heads.
Handmade metal apron
For those who have skills in working with tools and metal, the best option for an apron may be a self-made design.
Table. Tools necessary for the manufacture and installation of an apron.
| № | Tool | Illustration |
| 1 | Screwdriver | |
| 2 | Metal scissors | |
| 3 | Envelope forming pliers (heron) | |
| 4 | Tongs (45 degrees) | |
| 5 | Manual bender (sheet bender) | |
| 6 | Kiyanka |
In addition, you should prepare sheets of metal (smooth) of suitable size and roofing screws.
Important! To cut a metal sheet, you should not use a grinder. Otherwise, the edges of the corrugated sheeting, which is not very resistant to high-temperature influences, will be deformed. It is best to use metal scissors for these purposes.
The task is to make an apron from sheet metal for this chimney.
We will make an apron for this chimney
Step 1 . Dimensions are taken. This point must be taken with great responsibility, since the functionality of the design depends on it. The height of the apron must be at least 15...20 cm.
Step 2 . The four components of the apron are being prepared. To bend the sheet, you need a bender. This handheld device replaces a bending machine.
To bend a sheet you need a bender
Metal cutting is done with scissors.
Metal trimming
You will need four blanks:
- rear end;
The back part
of the edge must be slightly bent so that snow does not fall between the apron and the roofing.
- two sidewalls with stiffening ribs;
Sidewalls with stiffening ribs
The sidewalls should also have bends.
Fold on the side
- front end.
Front
It has a more open angle.
Step 3 . The rear element is mounted first.
Rear element installation
The part is pressed tightly against the chimney and fixed.
Step 4 . The sides are folded into an envelope. This ensures that there are no cuts on the apron. All folds of the envelope are tightly tapped with a mallet.
The sides are folded into an envelope
After the envelope is formed, a semicircle is cut out on the sides (on the side that will be in contact with the back panel).
A semicircle is cut out
A smoothly smoothed transition will also avoid cuts. After processing, the sidewalls look like this.
Sidewalls after processing
Step 5 . The sides are pressed tightly against the pipe and screwed to the roof. Self-tapping screws should be fixed on the protrusion of the corrugated sheet.
Step 6. The protruding part of the back part is cut to the size of the side panel, taking into account a small margin. It is necessary for the subsequent bending of the rear element onto the side.
The protruding part of the rear part must be trimmed with a margin
Step 7 . The back wall is bent onto the sidewall protrusion. This ensures a tight connection between the two parts. The seam is tapped carefully.
The seam is tapped
The same procedure is carried out with the second sidewall.
Step 8. The front element is installed in place and fixed with self-tapping screws to the chimney and corrugated sheet. This apron piece also has envelope folded side edges. They are also cut in a semicircle.
Fixing the front element
The sides (protruding beyond the chimney) are cut in a semicircle 1...2 cm higher than the front part, after which they are folded onto the walls of the front part, creating a lock. The result was a completely sealed chimney lining.
Sealed chimney liner
The only weak point of this design is the connection of the top of the slats to the pipe. Moisture penetration may occur in these areas. To eliminate this problem, the joints must be treated with sealant.
Video - Details about the design of the apron
A protective apron for a chimney can not only prevent leaks, but can also become a decoration for the roof.
Types of possible problems on a corrugated roof
Therefore, high-quality sealing of the chimney on a corrugated roof is so important, otherwise a number of problems may arise:
- Leak. In the process of removing the pipe through the roof, uninsulated areas are formed through which moisture penetrates into the house. As a result, the walls become damp and mold appears on them.
- Destruction of the rafter system. The roof base structure is assembled from wooden elements. Penetrating through joints, water causes wood rotting and destructive processes.
- The appearance of rust
. Improper finishing of a pipe on a corrugated roof leads to corrosion processes. They gradually destroy the roofing covering, reduce its protective performance and make its appearance unattractive. Proper finishing of the chimney on the roof allows you to extend the life of the roof. - Deterioration of thermal insulation properties. After moisture penetrates into the insulation layer, this material begins to lose its ability to retain thermal energy and protect against the penetration of cold from the outside.
If you don't seal the joint
When removing the chimney, a hole is made in the roof. The gap between the coating and the walls of the chimney is sealed with special aprons, collars and seals. They can be bought at any hardware store. These protective elements are easy to make with your own hands.
If you do not seal the seams on the roof in time, the following consequences are possible:
- Increased wear of roofing material. Water penetrating into the gap ends up on the inner surface of the roof, which causes deformation of the coating.
- Reduced service life of the building frame. Water that is poured into the gap between the pipe and the roofing contributes to the gradual rotting of the wood. This is fraught with deformation and destruction of the rafters.
- The insulation loses its effectiveness. Thermal insulating materials with which the roof is equipped can quickly lose their properties when wet. If hard insulation is not very exposed to moisture, then soft insulation quickly begins to rot.
- Increased humidity in the attic. Increased dampness causes stale, heavy air to appear. This can negatively affect the interior decoration of the attic.
The method for eliminating the gap between the pipe and the roof depends on its size and type of coating. The shape of the chimney is also taken into account. For a distance of less than 5 mm, use a heat-resistant sealant. If the gap width exceeds 1 cm, use cement mortar, an apron or a special sealant.
It is necessary to seal the gap between the pipe and the roof for:
- ensuring insulation of the attic space from atmospheric moisture;
- to increase the efficiency of thermal and waterproofing;
- increasing the service life of the rafter system and the entire roofing structure;
- eliminating cold bridges.
Sealing the chimney on the roof avoids destruction of the roof itself.
Consequences of poor sealing
If the work on sealing the seam at the junction of the roof and the chimney pipe is performed poorly, moisture may leak into the gaps formed, this can lead to the following negative consequences:
- rotting of the wooden roof frame as a result of prolonged exposure to moisture or its deformation;
- the flow of moisture leads to the formation of condensation and cooling of the pipe, which negatively affects the draft in the chimney;
- large volumes of liquid leaking into the gaps after precipitation can cause great damage to the interior decoration of the premises;
- corrugated sheeting is subject to corrosion processes from the bottom side, since this part of the material is not as well protected as the outside;
- the roof insulation gets wet, this deteriorates its properties.
Conclusion
The installation of a pipe outlet through the roof should be approached with the utmost responsibility. If the work is done poorly, moisture will regularly enter the attic. This will entail dampening of the rafter system and insulation.
High humidity has a negative effect on the condition of wood. As a result, many load-bearing elements of the attic are deformed. This can lead to sagging of the roof and the appearance of cracks in it. High humidity in the attic has a destructive effect on the internal cladding material. The durability of the roof depends on the correct selection and installation of sealant.
Causes of leaks
On the roof, many holes are made from corrugated sheeting, through which the chimney and ventilation ducts exit; they violate the integrity of the waterproofing layer, leading to leaks. The most difficult thing to do is to waterproof the joint between the pipe and the roofing pie, if the installation is carried out after the roofing work has been completed, in which case it is extremely problematic to ensure a tight fit of the corrugated sheeting to the chimney wall. If the finishing of the pipe passage on the roof is done poorly, the following problems arise in the design:
- Leaks. If the chimney is installed on the roof and the joint between it and the corrugated sheeting is not properly sealed, leaks will occur in the structure.
- Rotting of the rafter frame. The flow of water through the joint between the corrugated sheet and the chimney leads to dampness of the wooden structural elements, and then to rotting and deformation of the rafters.
- Roofing corrosion. When moisture appears under the corrugated sheet, it begins to corrode, since the protection on the inside of the material is not as reliable as on the outside, since the outside of the profiled sheet is covered with a polymer protective film, and the bottom only with varnish.
- Damp insulation. If you do not seal the joint on the roof where the chimney exits, moisture penetrates into the thermal insulation material, reducing the effectiveness of insulation by half.
Installation of pipe passage through the roof
How to protect a chimney from moisture
Practice shows that most often water leaks on the roof near the pipe are associated with poor-quality sealing of the roof section. If the cutting is under the roof, it will leak from below, if on top, it will leak from above. To prevent this, the chimney on the roof is waterproofed by installing insulating aprons.
The work is carried out in several stages:
- First of all, a drainage gutter is placed in the waterproofing layer above the chimney, designed to remove moisture from the chimney.
- Then an internal apron is installed, ensuring complete sealing of the junction of the roofing covering and the chimney.
- Next, the so-called “tie” is laid. This is an element cut from waterproofing material, placed under the lower edge of the inner apron. The structure must reach the very edge of the roof. If the roof is covered with slate or metal tiles, the edge of the tie is brought out between the lower sheets of covering onto the roof surface. Along the edges of the structure, be sure to make a side with the help of pliers, which will prevent water from spreading over the roof, but will direct it down the slope.
- A roof covering is laid around the pipe.
- An external decorative apron is mounted on top of the roof. It is installed in the same way as the internal one. The only difference is that the top edge is fixed directly to the pipe wall.
Sealing the chimney with roofing felt and installing an “apron”
Insulating aprons are made independently, but if desired, you can purchase industrially manufactured units designed specifically for these purposes. They are used for wiring circular chimneys through the roof and are called roof passages. The nodes are an element consisting of a flat sheet of steel in the form of a base, to which an apron made in the form of a cap is attached. A chimney runs inside it.
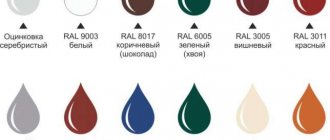
Roofing penetrations are available in different colors to make it easier to choose the right option
To ensure stove draft, it is necessary to install ventilation outlets on the roof. They form air flows, protect ventilation from precipitation and create draft in heating devices. The outlets must be fixed strictly vertically and be equal in height to the chimney; only in this case the air flows generated in them will be strong enough to ensure optimal combustion of fuel in the heating device.
Waterproofing a pipe is a responsible undertaking. Not only the integrity of the roofing pie, but also the safety of using heating devices depends on the correctness of its implementation. Of course, you can do all the work yourself, but you need to calculate your strength and be sure that everything will be installed absolutely correctly. If you still have doubts about your competence, it is better to entrust the installation of waterproofing to specialists and receive a unit mounted in accordance with all the rules in a short time.
Waterproofing a square chimney pipe
From a technological point of view, for the correct organization of work with your own hands, what is important is not the nature of the roofing material - metal tiles, ondulin, but the cross-section of the chimney - rectangular or round.
Waterproofing the chimney is carried out together with laying a waterproofing membrane on the roof.
- The film web in this area is cut so that the material overlaps the chimney. The film is glued to the walls of the chimney using polymer-bitumen mastic.
- A layer of bitumen mastic is again applied over the tightly pressed edges of the membrane. This waterproofing is already quite reliable, but is not very durable.
- A sheathing under the apron is fixed on top of the membrane - the second waterproofing element on the roof. The distance between the wall and the slats is 5–10 cm. It is recommended to treat the bars with fire retardants.
- An apron is installed around the chimney, starting from the bottom element. The apron is located 10–15 cm above the roof and covers an area of 20–30 cm around the perimeter of the chimney. Fastening - dowel-nails in increments of 15–20 cm.
- The joints between the elements and the chimney are treated with heat-resistant sealant.
- Then the roofing material is laid over the lower apron. Roof elements made of metal tiles or ondulin are laid end-to-end, making sure that the gaps are as small as possible.
If we are talking about a roof made of corrugated sheets, then a hole is formed in the sheet under the chimney with dimensions 1.5–2 cm smaller than the parameters of the chimney. Cuts are made in the corners of the hole, and the edges of the sheet are carefully folded back. At the stage of laying the roofing, this fragment is put on the chimney and the bent edges are aligned, trying to reduce the joints to a minimum. For waterproofing, a special device is used, such as bitumen waterproofing tape, or roofing felt and water-repellent sealant.
- A metal upper apron, similar to the lower one, is mounted on top of the roof made of corrugated sheets, metal tiles and other materials. You can use adhesive materials like Wakaflex, Master Flash, Onduflesh, etc.
In the photo you can see the installation of an apron around the stove chimney on the roof.
Waterproofing of a round chimney
This need arose due to the widespread use of sandwich pipes, which are very practical and more affordable. It’s even easier to do it yourself, since here the waterproofing is provided by a special device - pipe penetration.
The penetration looks like a box made of steel or aluminum with a cap made of polymer material.
- A wooden sheathing is installed around the chimney, just as was done in the previous case. Roofing material is laid.
- A hole with the required diameter is cut out in the flexible polymer part of the penetration. The device is put on the pipe and pressed against the roofing material.
- The joints are treated with a special heat-resistant sealant. The penetration is secured with self-tapping screws to the sheathing in increments of 7–10 cm.
The video discusses the waterproofing of round and rectangular pipes.
Tape sealant
Tape sealant is a solid material. Many builders consider it the most cost-effective option for roof sealing. Material Features:
- it is based on butyl rubber;
- The sealant tape is highly resistant to ultraviolet radiation and high temperatures;
- it has high adhesiveness, making it easy to install;
- Ideal for sealing joints between chimneys and roofing.
The tape has an aluminum coating, which increases the service life of the sealant for outdoor use. The tape is easy to install and operate. The average service life of the product is 10 years. Thanks to a wide range of colors, the tape can be used to seal various roofing coverings. The sealant has exceptional adhesion to various surfaces. The tape is used when it is necessary to seal wooden, plastic, and metal surfaces. The tape is also successfully used for sealing translucent roofs.
How to use
The surface of the pipe and roof on which the tape is applied must be cleaned and dried
It is important that the area being treated is level. To apply the tape, you need to cut a piece of a certain length, then remove the protective film and press the product tightly against the joint (slot)
At temperatures below +5, the tape is first kept indoors at a temperature of 15 degrees for 12 hours.
Using the tape in sub-zero temperatures involves heating the surface to be treated. The tape is not used for surfaces with an operating temperature above 80 degrees or when the roof slope is more than 55 degrees.
The need for high-quality waterproofing of the roof passage
Corrugated sheeting is a high-quality and durable roofing material that has good load-bearing capacity, as well as resistance to corrosion and rotting. The roof of the house may have not only holes for ventilation, but also a chimney
The presence of various holes leads to a violation of the waterproofing of the roofing material, so it is extremely important to seal the joints
If the sealing process is carried out incorrectly, the following problems may arise:
- Leaks. If uninsulated cracks are left during the installation of the roof, this leads to the penetration of moisture into the house, dampening of the ceiling and walls, and the appearance of fungus.
- Rotting rafters. When moisture gets through the joints, the wood from which the rafters are made rots and collapses.
- Corrugated sheeting corrosion. The top layer of corrugated sheeting is coated with an anti-corrosion substance. But its inside can be damaged if it gets wet.
- Reduced thermal insulation. When moisture gets in, the roof's ability to protect the house from the cold is reduced.
For high-quality sealing of joints, there are various methods and materials for sealing.
Pros and cons of sealing compound
Homemade polymer sealant is practically not inferior to factory-made analogues intended for roof repair in a private house. Advantages of a composition made from polystyrene foam:
- The price of adhesive-sealant tends to zero. You buy gasoline, use a maximum of 0.5 liters, pour the rest into the car tank or use it in another way on the farm. Any polystyrene foam will do, even small waste.
- The roofing sealant is frost-resistant and suitable for any outdoor work. You can seal roof leaks, cracks on the balcony of an apartment, cracks between the blind area and the wall of a private house.
- If the roof of the house leaks in the middle of winter, the composition can be applied at subzero temperatures.
- High adhesion to various surfaces. The main thing is to remove the dust.
Addition. Home craftsmen use polystyrene foam dissolved in gasoline as glue for joining various materials - wood, plastic, metal.
The junction of roofing iron to a brick wall. Shown on the right is last year's sealant, which is holding quite tightly.
The lifespan of the sealing solution is limited. After 1–2 years, the polymer putty may crack and peel off at the edges. Factory sealants also suffer from a similar drawback, so leaking roofs should be thoroughly repaired - replacing cracked slate, covering it with galvanization, and so on. Covering up is a temporary measure.
Other disadvantages of homemade glue-sealant:
- during the process of preparation and application, the solution emits a strong smell of gasoline, therefore, it is not recommended to seal cracks inside the house;
- the composition cannot be prepared in advance, as it thickens;
- prolonged hardening, after which the crust becomes brittle;
- preparing liquid polymer takes time (30...60 minutes);
- After sealing, the defect site looks ugly.
Cutting a chimney on the roof
The cutting of the chimney on the roof is carried out taking into account several dimensions:
- the minimum distance from the roof surface to the rafters is 250-300 mm;
- if roofing felt or roofing felt is used as a surface covering, the size up to the chimney pipe is from 300 mm;
- if metal or concrete parts are used as rafters, this distance is reduced to 200 mm.
Difficulties arise when pipes pass through layers of roof protection (steam, waterproofing, wooden sheathing of the structure and layers of insulation). We carry out the work very carefully, trying not to disturb all layers of insulation and structure.
To install the glass, we perform additional lathing, connecting 2 adjacent rafters with 2 jumpers according to the size of the sleeve.
We carefully pull up all the old layers and tuck them inward, fixing the edges with a stapler or nails with heads. We fill all gaps with a layer of thermal insulation and sealant.
Waterproofing surfaces is carried out in several stages:
- on the roof we lay a groove over the entire surface of the pipe for drainage and removal of possible leaks;
- we fix and fill all the gaps and install the outer waterproofing apron. It can be made of steel or rubber. We place its edges under the roof covering and fix it on top of the internal apron of the main structure and seal all the joints;
- Now, when water passes through small cracks, it will enter the drainage groove or be removed along the covering of the roof apron.
After laying the roof covering layer, we install the outer apron and seal it tightly to the surface of the chimney and roof.
Scheme:
Deciding on the type of waterproofing material
The development of chemical production makes it possible today to produce a large number of insulating materials for roof carpets. What type of material should I choose: roll, liquid, powder? What composition should it have in order to long-term and reliably protect the house from water penetration under the roof, especially in places where pipes exit onto it?
Waterproofing of pipes along with the base of flat roofs is carried out using liquid reinforced mastics - mixtures of organic binders with extremely crushed fillers. The composition of such mastics is very different, most often they are hot or cold bitumen-gasoline mixtures. Today, more and more often on the market there are branded liquid or powder mastics, intended for subsequent dilution with solvents, with a complex multi-component composition.
Treating the pipe with mastic
On pitched roofs, roll mastics, film and non-woven materials are used, which are also glued to the base using mastics or fastened with self-tapping screws. The well-known roofing material is one of the roll mastics. A special film, polyethylene and polypropylene, or non-woven synthetic membranes can be used as a material for waterproofing. Roll waterproofing has many modifications, allowing you to specifically select the one that will most fully meet the functions of a particular roof.
Special film is used quite often today as a waterproofing material.
The quality of roof waterproofing work depends to a large extent on whether the joints formed by the pipes exiting to its surface are executed correctly or not. It is these areas that often reveal the unprofessionalism of the builders. Based on the foregoing, one should conclude: contacting specialists at the stage of waterproofing pipes and any exits to the roof will help to avoid unnecessary financial and labor costs in the future.
Making boxes
How to insulate an iron chimney pipe was discussed earlier. Now you can move on to the next step. Many people think that making a chimney box is too difficult a task. In reality this is not the case. It is enough to approach the work responsibly and competently.
Required tools:
- Drill;
- Metal scissors;
- Compass;
- Metal sheets;
- Self-tapping screws.
Stages of work:
- Preparing the hole. Along the edges it is necessary to secure the bars, which will act as a support for the body.
- Two blanks are cut from a metal sheet. They are given a U-shape. Then the finished parts are screwed to the ceiling using self-tapping screws.
- Again, two blanks are made, but they are already secured to standing sheets with a small spade. This results in a seamless frame in the ceiling.
- Now the bottom for the box is made from a metal sheet. There should be a hole for the chimney in the center of the workpiece; a compass will be needed here.
- The box contains four two-centimeter fasteners. They are cut out and bent perpendicular to the bottom.
- Walls are attached to the bottom. Now the chimney is inserted into the box, it is additionally secured with clamps. The voids are filled with an insulating layer.
Many people are afraid to make a metal box for the chimney pipe themselves. But it doesn't contain much complexity.
When making a box you need the following tools:
- Metal scissors.
- Galvanized sheet.
- Self-tapping screws.
- Compass.
- Drill.
Further sequence of actions:
- The hole is being prepared. Its edges need to be secured with support beams. They will create support for the box.
- A couple of parts are cut from a galvanized sheet. Along their edges, at a distance of five centimeters, a 90-degree bend is made. These U-shaped parts are fastened with self-tapping screws to prepared holes in the ceiling covering.
- Two more U-shaped blanks are prepared in the same way, and they are overlapped onto the existing sheets. The result is a solid frame for the exit made in the ceiling covering.
- The next part of the action is the bottom for the box. An element is cut out from the same galvanized sheet, the dimensions corresponding to the opening made. In its center, draw a circle with a compass for the entrance of the smoke exhaust billet.
- From the central part of the bottom of the box, 4 fasteners are placed (each of them has a two-centimeter width). Next, they are cut out and bent at an angle of 90 degrees. As a result, a base is formed with a hole and 4 strips for fastening.
- The bottom is attached to the walls. A chimney is inserted through the exit and secured with a clamp. The empty space is filled with an insulating layer.
Using the suggested instructions, making a box is not difficult. If you follow everything exactly, the work will not be difficult even for an inexperienced layman.
Workflow - step-by-step technology
Surely you are wondering whether it is possible to install high-quality and reliable ventilation (chimney) yourself and at the same time save not only money, but also time - our answer is positive. The sections below will describe detailed instructions to confirm that this process is possible for independent mastery.
Stage one - preparatory
Initially, you should prepare everything necessary for subsequent work:
- Purchase a pipe, if not available, and fire retardant material.
- Fastening materials.
- Tool: Building level.
- Welding machine - in case the pipe has to be joined.
- Screwdriver.
- Hammer.
- Jigsaw and grinder.
- Wooden beam.
- Finishing material.
Stage two - roof preparation
Now let's move on to the process where you already need to work with your own hands:
- To begin with, on the roof we measure the distance from any rafter beam, which is half a meter plus the diameter of the ventilation pipe.
- We build another beam in the indicated place to increase the stability of the roof.
- Using a regular plumb line from the center of the measured distance, we measure a point on the floor of the attic or attic.
- Around this point we attach a vertical and horizontal beam so that there is an equal distance from each edge to the pipe (its center is the measured point).
Instead of timber, you can use a metal profile
We drill a hole through in the indicated place so that a hole is formed on the ceiling of the first floor. According to the plan, this should be exactly above the stove or half a meter from this place.
As a result, we should get a reinforced box inside which a chimney will be laid. At the same time, it should be installed only in the attic or attic space; in the living room, it is enough to decorate the pipe with finishing materials.
You can avoid the box if you purchase a galvanized pipe casing
The box is necessary for the safe operation of the ventilation system, which often heats up to critical temperatures - protection for both those living in the house and for flammable materials.
Stage three - through hole
Now let's move on to preparing a specific place for the passage of the ventilation pipe in the ceiling of the first floor/floor of the attic:
- If the ceiling is made of wood, you can cut a circle of the required diameter using a chainsaw. We remind you that you need to add 15-20 sms on each side to the diameter of the pipe itself.
- If you have to work with a concrete slab, then a long drill and a hammer drill will help you with this - the tool drills many holes in a circle. A very weakened piece of the slab is knocked out with a sledgehammer.
It is wooden floors that need to be given more attention, for example, the chimney in a bathhouse is the most dangerous area
Let's move on to opening the roof. The best option is when the roofing material has not yet been laid, but this is only possible if the house is at the construction stage.
We will deal with the process of installing a chimney after the facility is put into operation:
- Before removing the pipe through the roof from the corrugated sheet, we cut the material so that it can be bent and left in this position for a while.
- If you are faced with tiles, then all that remains is to carry out only partial dismantling in the place where, according to the plan, the pipe will come out (with a small margin).
- Now that we have a through hole, we can insert the ventilation pipe into the “hole” on the roof.
- Fixation of the chimney itself is carried out by installing collapsible clamps, which in turn are attached to the protective box we built.
- We close the hole in the roof, from the attic side, with an asbestos sheet that will not heat up.
- Now, using the steam film, we attach it to the walls of the pipe box using furniture staples.
The place where the stove stands and connects to the chimney must also be secured using fire-retardant materials
We connect the free end of the pipe to the furnace; it is better to use a welding machine for this; this method ensures the tightness of the connection. You can also use a connecting clamp, but here everything depends on the ideal shape of the products - if there are no defects, then the tightness will be decent. (See also the article Metal pipe clamps: features.)
Waterproofing a galvanized steel chimney on a corrugated roof
Solving the problem of how to bypass a pipe on the roof with corrugated sheeting is quite simple. For this purpose, special gaskets are used that fit very tightly to the roofing material.
The gasket is made in the form of an aluminum flange equipped with a silicone or rubber connecting part. Flanges have sizes from 3 to 600 mm and can be made in an angular, solid or split form. The products are characterized by a long service life and the ability to be used on different types of roofs.
Sealing in this way allows you to easily and simply isolate the junction of the outlet and the roof, as well as solve the problem of how to close a pipe on a corrugated roof.
The process for waterproofing a chimney is as follows:
The size of the outlet hole is measured and the rubber corrugation is cut in accordance with the obtained values. The outlet of the chimney pipe on the pitched roof must have a hole with a diameter of 2 to 5 cm. Put on a gasket. Select a flange of the desired shape. Sealant is poured into the grooves located on the underside of the flange and pressed firmly against the roofing. Additional fastening is performed using self-tapping screws with rubber heads, which become flat when tightened. These fasteners are used when performing roofing work, since this completely prevents water from getting inside
If fastening is carried out with ordinary self-tapping screws, it is recommended to use rubber gaskets. It is very important that waterproofing work is carried out on a dry and clean roof.
Roof penetrations Master Flash
With the help of such devices, you can quickly and efficiently finish round chimneys. They are much easier to install compared to metal caps. Penetrations are made from silicone and heat-resistant rubber. They allow you to create hermetically sealed structures when the plane is tilted up to 20 degrees. The material can withstand temperatures in the range of 135...240 degrees. The chimney can have a diameter of up to 66 cm.
Roof penetrations Master Flash
Important! You should carefully select the diameter of the penetration, otherwise it may tear (if the size of the chimney exceeds the parameter of the protective element) or not be tightly fixed to the pipe. In the latter case, you will have to use crimp clamps and sealant.
What's good about these products:
- possibility of use on roofs finished with different coatings;
- quick and easy installation;
- resistance to moisture, temperature changes and sunlight;
- budget cost.
Characteristics of the roof passage
Installation technology of elastic penetration.
- A narrow part of the product purchased in accordance with the diameter of the chimney is cut off at a level that allows the device to fit hermetically to the chimney.
- The penetration with the dismantled deflector is pulled onto the pipe until it meets the roof.
- The protection of the self-adhesive base is removed, which is pressed against the corrugated sheet (it must be clean and dry).
- The penetration is fixed using self-tapping screws (roofing). All gaps are filled with sealant.
- Additional protection against leaks and ultraviolet radiation, as well as the aesthetics of the structure, will be provided by a decorative apron, most often made to match the color of the roofing.
Installation steps
As an analogue of Master Flash penetrations, you can use aluminum or steel cone-shaped devices with a silicone connecting part.
When carrying out sealing, you cannot do without sealant. The composition must be resistant to climatic factors and high temperatures.
Prices for Master Flash penetrations
Master Flash penetrations
Installation of Master Flash on corrugated sheets
It is recommended to additionally use a rubberized insulation nozzle, Master Flash, which will prevent moisture from entering the chimney.
What does the device look like?
The penetration vaguely resembles a pyramid with rounded edges or even round, made of silicone material or synthetic elastomers.
- A rubber pad is appropriate when operating temperatures do not exceed a threshold of 110. Above this threshold, the material begins to melt and subsequently ignite. Does not react very well to chemical compounds that contain mineral oils or fat.
- Silicone pads are more popular due to high operating temperature thresholds, because... the material can easily withstand even heating up to 200 and above. However, Master Flash made of silicone has one drawback - weakness to sunlight. Therefore, in the southern regions, where it is warm and sunny most of the time, owners of private houses abandon silicone insulation in favor of rubber insulation due to the frequent replacement of the roofing penetration.
On average, the passage is replaced once every 10-15 years, and its installation will not take more than half an hour:
- the pipe is threaded into the penetration;
- Master Flash is adjusted to the profiled roofing sheet;
- fixed with fire-resistant sealant;
- additionally secured with self-tapping screws.
After sealing the chimney, all that remains is to bring it to the desired height and complete the external finishing of the apron.
Equipment for the junction of a rectangular pipe
Rectangular pipes are one of the most common, they are used as a chimney or ventilation duct, and are made of heat-resistant bricks or special ceramic blocks. The finishing of the junction of a rectangular pipe with corrugated sheeting on the roof is carried out using a ready-made shaped element - an apron. It is made of galvanized steel and then painted to match the color of the roofing. Sealing the joint using an apron is carried out as follows:
- The waterproofing and vapor barrier material, which was cut when the chimney was brought out, is carefully glued to the outer walls of the pipe using construction tape.
- A shallow groove is made along the perimeter of the pipe to install the upper junction bar using an angle grinder.
- The upper edge of the junction strip is placed in the groove, additionally secured with a heat-resistant silicone-based sealant.
- The lower part of the apron is placed with an overlap of 10-15 cm; special screws for corrugated sheeting are used for fastening.
- A tie is placed under the lower part of the apron - an element made of waterproofing material that prevents the formation of leaks.
Chimney finishing, choice of materials
Negative factors affecting the chimney include
:
- atmospheric influences (wind, precipitation, ultraviolet radiation);
- difference in ambient temperatures;
- high temperature operating loads.
Due to the difference between the temperature of the working pipe and the air temperature in the chimney, condensation forms, which provokes destruction of the pipe during the combustion of heating oil
. To avoid the formation of condensation and protect the pipe from external influences, it is necessary to provide reliable insulation of the chimney through lining.
Various materials are used to cover the protruding part of the pipe. When choosing, you should consider
:
- resistance to external factors, wear resistance;
- appearance and color scheme (matching the roofing or wall decoration of the building).
Finishing a chimney on the roof is most often done using
:
- clinker bricks or tiles;
- plasters;
- cement fiber boards;
- roofing material (corrugated sheeting, slate).
Characteristics of finishing materials
Clinker bricks or tiles are a practical option for finishing a chimney pipe, since dirt is not noticeable on such material.
The advantages of clinker materials also include the aesthetics of the masonry; such a chimney goes well with any type of roofing. It is worth noting the resistance of tiles and bricks to weather conditions, temperature changes, as well as the strength of the material. For lining the chimney, exclusively solid clinker bricks are used, laid on a clinker mortar; special compounds are used for grouting joints. Thin, lightweight clinker tiles are usually used for lining tall pipes. Finishing a chimney on the roof with plaster is characterized by
:
- affordable cost;
- simple installation;
- versatility (suitable for any roofing);
- the ability to implement any color schemes (plaster can be painted with silicone paint).
Plastering pipes is carried out using the same technology as finishing facade walls. Traditional cement or lime-cement mortar can be used, but a more durable option is to use mineral, silicone, silicate or acrylic plaster. Painting the dried surface increases the wear resistance and durability of the finish.
Small-format cement-fiber boards are durable, resistant to ultraviolet radiation, moisture, temperature fluctuations, and light in weight. This is an environmentally friendly, non-flammable material. Smooth or structured slabs can be used for lining the chimney; the material is available for sale in a wide range of colors.
If slate is used for roofing, the chimney lining on the roof is usually made of the same material. Slate slabs can be shaped like an arc, flake, rectangle or octagon. The color of this natural material depends on the deposit. This color is usually graphite, green or purple.
A fairly simple and inexpensive option for finishing a pipe is to use corrugated sheeting. It is used if the roof covering is made of the same material. The pipe, finished in the color of the roof, looks aesthetically attractive.
Manufactured in a factory, the chimney elements for the roof passage have an aesthetic appearance and are quite easy to install. They are equipped with a steel chimney duct and can have a ready-made external cladding made of any material, or be prepared for independent finishing so that the chimney is externally in harmony with the roof. The modular steel structure is not additionally finished; it is enough to install it at the point of passage through the roofing pie.
Metal feedthrough
In hardware stores you can find another type of penetration for round pipes - a metal feedthrough. It is used to pass a chimney through a roof that does not have a relief. Finished alloy steel pipes have a standard roof angle, which is adjusted to the roof slope. To perform installation, you must:
Cut a hole of a suitable shape in the roof. To do this, markings are applied to the roof surface using a marker. Depending on the roofing material, cutting is performed with a grinder or sharp scissors, retreating 1-2 cm inside the circle.
- Remove the waterproofing and thermal insulation material from the hole made, freeing the passage for the chimney. If necessary, remove the sheathing elements by carefully sawing them off.
- On the underside of the roof, secure a sheet of fire-resistant material with a hole of the required diameter of such an area that there is a margin of 15-20 cm on each side of the chimney.
- Insert the pipe module into the hole, connect it to the laid chimney, tightening the connection with a clamp.
- Place the outlet pipe onto the pipe, securing it to the surface of the slope with fire-resistant sealant and self-tapping screws with a rubber cap.
- Add new segments to the pipe so that the height of the chimney exceeds the level of the ridge by 0.5-1.5 m.
Installation features
What needs to be done to ensure that there are no leaks at the points where the pipe joins the corrugated sheet? To do this, you need to properly seal the joints
Experienced installers note that when solving a problem, it is important to take into account the location of the chimney. The closer the chimney pipe is located to the ridge, the less water gets to its junction with the chimney
In this case, the risk of leaks is reduced.
In addition, the pipe installed as high as possible along the slope has the smallest section located in the cold air zone. This allows you to minimize the formation of condensation, which contributes to the growth of soot inside the chimney. In addition, if condensation constantly forms in the pipe, the walls of the pipe are exposed to acid, which corrodes the metal.
You should separately consider different designs of chimney pipes in order to figure out how to design their joint with a corrugated roofing.
Varieties
The elements differ from each other according to the material of manufacture:
- Brick chimneys. This is a classic option that is reliable and undemanding in terms of finishing. Red brick is used for the production of products. To lay bricks, you must use a special fire-resistant mortar. Lime mortar works well.
- Steel chimneys. This is a budget option, characterized by ease of installation, light weight and a large selection of section sizes. But steel pipes burn out quickly, and their safe service life is relatively short.
- Sandwiches. These chimneys consist of several metal pipes of different sizes placed inside each other. Between them there are layers of thermal insulation. Sandwiches retain the advantages of simple steel chimneys without their disadvantages. The main disadvantages of such structures are the high price and the possibility of depressurization during sudden temperature changes, which can render the pipe completely unusable.
- Modular chimneys. Like sandwiches, these chimneys are multi-layered. They consist of layers of metal and fireclay (fireclay). Between them there is a layer of basalt insulation. The pipe body is made of lightweight concrete. If there is a layer of clay inside, then the chimneys are called fireclay; if there is a metal pipe inside, then the design is called modular.
Steel chimney
Sandwich
Brick chimney
Modular chimney
There are complex pipe designs that cost a lot of money to produce and install. They are rarely used in construction. This includes glass structures.
CAREFULLY!
It is strictly not recommended to use asbestos cement pipes. Their fire resistance is low, and when heated they release carcinogens that poison the surrounding air.
Causes of leaks
The roof, covered with a profiled sheet, must be equipped with several openings through which the chimney pipe and ventilation channels will be routed. As a result, the integrity of the waterproofing may be disrupted, which will increase the risk of leaks. It is quite difficult to solve this problem if the chimney had to be routed through an already constructed roof.
To ensure high-quality sealing of the areas where the pipe meets the corrugated sheet, you need to put in quite a lot of effort.
If the work is done poorly, many problems arise:
- Water begins to flow. This happens if the sealing of the joint between the chimney and the corrugated sheet is poorly equipped.
- The rafter system began to rot. After water gets inside the roofing pie, the wood from which most of the roof elements are made gets wet. As a result, the structure is deformed.
- The roofing material itself begins to rust. Corrugated sheeting is not very well protected from corrosion from below.
- Aging of thermal insulation. When insulation gets wet, its effectiveness is significantly reduced.
To increase the reliability of the roof, you need to correctly select the location of the chimney and ventilation ducts. This will make sealing the pipes much easier.
Installation features
What needs to be done to ensure that there are no leaks at the points where the pipe joins the corrugated sheet? To do this, you need to properly seal the joints
Experienced installers note that when solving a problem, it is important to take into account the location of the chimney. The closer the chimney pipe is located to the ridge, the less water gets to its junction with the chimney
In this case, the risk of leaks is reduced.
In addition, the pipe installed as high as possible along the slope has the smallest section located in the cold air zone. This allows you to minimize the formation of condensation, which contributes to the growth of soot inside the chimney. In addition, if condensation constantly forms in the pipe, the walls of the pipe are exposed to acid, which corrodes the metal.
You should separately consider different designs of chimney pipes in order to figure out how to design their joint with a corrugated roofing.
Strengthening the rafter system
Often when installing a chimney, the question arises about strengthening and strengthening the rafter system, because it is necessary to form a hole in the roof pie for the pipe. That is, you will need to install a couple of spacers. When creating a roof made of metal tiles, the pitch between the rafters is rare, and the formed opening or the distance between the rafters may be too large. Therefore, it is necessary to install vertical spacers.
Sometimes you have to break the integrity of the rafter leg, that is, cut it. Then, in certain situations, purlins or crossbars are also sawn. In this case, at the place where the rafter leg was cut, it must be fastened to adjacent, undamaged ones. For this, additional spacers are also used, between which bars are inserted vertically. Their function is to replace the rafter leg at the chimney passage.
