Almost any building material comes in different types and modifications. Putty is no exception, but gypsum putty is especially popular, which is divided into three categories, according to its characteristics:
- Starting (preparatory work, for rough leveling).
- Final.
- 2 in 1 (combines both starting and final).
Properties of gypsum putty
Gypsum is unique mainly because it regulates humidity itself, so it helps maintain a pleasant microclimate. Gypsum plasters and screeds absorb moisture in the event of high humidity in the premises, and then release it back into the air.
At the same time, they can absorb heat, ensuring a balance between the temperature of the walls and the interior.
Gypsum putties are suitable for all types of substrates. They not only have decorative and aesthetic properties, but also meet the stringent structural and physical requirements of any interior space. Therefore, they are an exclusive material for interior decoration.
Thanks to putty, the plaster is very thin and smooth. Therefore, it is ideal for rooms that need to convey an impression of luxury. Gypsum putty is applied to flat surfaces in one layer, application is simple. Not suitable for rooms with high humidity (basements, garages, bathrooms).
- Gypsum plaster is applied in a layer of 3-10 mm, the optimal layer thickness is 5 mm.
- A specific and largely advantageous feature of gypsum putties is the ability to process them “in one blow.”
- It is applied in one layer and is completely processed without technological interruptions.
This speeds up construction work, and the fact that gypsum putties take about half the drying time of conventional putties also helps reduce the time required to complete a building or renovation.
Tips for choosing
For those who do not know how to choose gypsum putty, first of all, you need to decide on the type of surface on which it will be applied.
It is important to take into account the moisture content of the dry mixture - the optimal value should be within 0.3% of the total mass.
The mixture should not contain foreign impurities, and the particle size should not be more than 5 mm.
Pay attention to the tensile and compressive strength parameters declared by the manufacturer; they must be at least 1 and 2 MPa. respectively. The adhesion strength to the surface must be at least 0.3 MPa.
When choosing consumables, pay attention to the packaging and details. Remember, the best putty manufacturers care about their reputation, and therefore try to provide as much information as possible about quality, parameters, etc. Check out the recommendations and experiences that can be found on the Internet.
Advantages of gypsum putty
The main advantages of gypsum plasters and screeds:
- They are perfectly smooth, do not stick to dust and are therefore suitable for people with allergies;
- Provide breathability of masonry due to low diffusion resistance;
- They have the ability to absorb and release air humidity;
- They do not absorb pigments from paints or subsequent coatings - there is no need to paint frequently;
- Regulate the microclimate in the room;
- They have the ability to better tolerate small stresses in the base;
- Mixed with water, they increase the volume of the mixture processed and, unlike traditional plasters, increase the yield;
- Suitable for cleaning grooves, for example after electrical and plumbing work;
- They are the best material for repairing window and door trims when replacing them;
- Prevents mold formation;
- Allows the use of various painting techniques and stucco decorations.
Types of putty
Before you start puttingty, you need to choose the right material. This depends primarily on the type of premises being repaired. Suggested options:
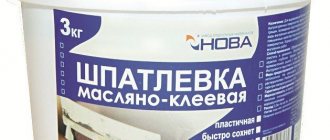
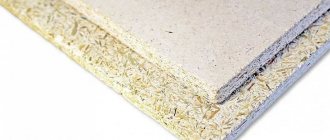
- Based on gypsum. They are elastic, non-waterproof, quick-drying, and non-shrinking. Typically white. They are used to decorate walls inside rooms - dry and heated.
- Cement based. These are moisture resistant and shrink after drying. Mostly grey. The materials are intended for finishing facades and various openings. Used for finishing rooms with high humidity.
- Polymer mixtures. They are the most durable, elastic, without shrinkage. White. The mixtures are the most expensive and versatile.
There are also adhesive, oil, epoxy, etc..
Putties, both starting and finishing, are used for the same purpose, but the former level rough, uneven surfaces, where a large layer is needed, and the latter for the final coating, when very small defects need to be smoothed out.
Both materials must be of the same brand. Only under such conditions will the treated surface remain guaranteed smooth and durable.
Trowels and spatulas for putty
A thin white gypsum trowel is suitable for treating surfaces made of concrete and foam concrete or brick, dry cement or gypsum plaster, as well as for restoring plaster and for sealing the entire surface of plasterboard.
Also suitable for local repair of uneven surfaces and grouting of concrete, for leveling and filling cracks in walls and ceilings.
If necessary, a standard painter's set of notched and shaped spatulas can be used, but the layer of putty should be thicker.
How to use
Puttying seams
The seams between gypsum board sheets and between floor panels are puttied with mandatory reinforcement.
Reinforcement guarantees the absence of cracks at the joints of adjacent sheets.
It can be made of serpyanka (self-adhesive fiberglass mesh with a cell size of about 2 mm) or fiberglass. The method of reinforcement in both cases will be different:
- Serpyanka is glued along the seam, which is then filled directly through its cells;
Serpyanka sticker.
- Rolled fiberglass is glued to PVA glue over the filled seam and covered with a second layer of putty.
The puttying technique is as follows:
- During the first pass, the seam is filled with a narrow (no more than 12 cm) spatula, using crosswise movements. In this case, you will achieve the most dense filling, which directly affects the strength of the seam;
- The second pass uses a spatula about 30 cm wide, which moves along the seam. The second pass should completely hide the texture of the reinforcing material.
A container for mixing the mixture and spatulas for puttying.
The seams between locally cut sheets of gypsum board or gypsum fiber board are unstitched before puttying - the edges are chamfered at an angle of about 45 degrees to half the thickness of the sheet. The tool is a sharp knife.
Joining the seam between the edges of plasterboard sheets before puttying.
Puttying on a plane
When puttingtying walls over the entire surface, the instructions for applying putty will be slightly different. It is applied with a narrow spatula to a wide one and applied by spreading onto the surface of a wall pre-treated with strengthening primer.
Puttying the surface of the walls.
Grinding
How long does it take for plaster to dry?
After the putty has dried, the surface of the wall (or sealing the seams) is sanded. You can start sanding a day after applying the last layer; the interval between applying two layers should be at least 8 - 12 hours.
You can grind with a hand float with a sanding mesh, but using a grinder (even the most inexpensive vibration one) will greatly speed up the process. The work is done in a gauze mask or respirator and goggles: breathing gypsum dust and removing it from the eyes is a dubious pleasure.
Sanding with a hand float.
A sander will speed up your work many times over.
A bright side light directed at the surface to be finished will help you see the smallest surface irregularities when grinding.
Gypsum putty “start-finish”
Materials of this type are characterized by higher adhesion to the base. This property has a positive effect during the work itself, as well as during hardening and maturation.
Increased adhesion places less demands on the preparation of the plastered base, so you can avoid, for example, “splashing” and feel free to apply gypsum plaster to almost any type of masonry, with the exception of the already mentioned uninsulated damp walls.
- Start-finish putty is intended for manual plastering of entire masonry, for local repairs and repairs of damaged areas in rooms with normal humidity, including kitchens and bathrooms.
- Due to its excellent properties, it is widely used in window companies when installing lintels. This is a thin-layer gypsum plaster with a smooth surface for manual and machine processing.
Gypsum light putty is suitable for plastering concrete, cellular concrete, solid masonry and cladding concrete structures of walls and ceilings. Recommended for rooms with normal humidity, including kitchens and bathrooms.
Why do you need putty?
It can be used to level surfaces made from a variety of materials—everything can be puttyed. It's just a matter of choosing the right material.
What can be treated with putty:
- Stone.
- Concrete.
- Brick.
This material has proven itself in working with slopes (doors and windows), when finishing arches, etc. Start putty is not much different in appearance from the finishing mixture, but has a denser structure and is cheaper.
Characteristics:
- Ecological cleanliness.
- Quick drying.
- High resistance to cracking.
Nowadays, there are mixtures for both exterior and interior decoration. This must be taken into account. If facade putty is used for interior decoration, then such a coating will not last long, and the repair will soon need to be done again. And if you take the mixture for interior work and putty it on the facade, it will become unusable even earlier.
In both cases, the result is the same: wasted time, material and money. In addition, the old coating will have to be completely removed, which is not a very pleasant task, considering the amount of dust that will be released during this work. To prevent this from happening, you need to consult sellers and managers of construction markets, and also carefully read the instructions on the packaging.
If you have reason to believe that, due to your inexperience, you can ruin the solution due to little experience in such work, because you are doing it too slowly, then it is better to purchase a product marked “max putty.” It is better to make less solution at first so that you have time to use it before it hardens.
Application area
Start putty is used for preliminary finishing of walls. It can level any walls you like, and quite quickly. It sands well. When processing the surface with a float, the dust does not hang in the air, but simply falls down, which reduces the harmfulness of this production. List of works performed:
- Leveling all kinds of slopes and arches.
- Sealing cracks, grooves.
- Sealing of wall-ceiling joints.
- Sealing door and window frames.
- Aligning corners.
As already mentioned, this material is applicable for both interior and exterior work.
Step-by-step application of gypsum putty
For processing and curing gypsum putties and plasters, the substrate and ambient temperature is min. + 5 ° C.
- Step 1. Preparation. Apply the gypsum mixture onto the prepared base using a stainless steel trowel.
- Step 2. Compare layers. Comparison of the applied layer for gypsum putties is made along the “h” strips crosswise. The strokes to the cross will show where the material is located or, conversely, absent. (We do not perform this step on plaster screeds.)
- Step 3. Dampen with a sponge. After hardening, moisten the gypsum putty with a long stroke of the sponge. (We do not perform this step on plaster screeds.)
- Step 4. Surface treatment. Let the plaster milk soak in and disappear, then smooth it out with a stainless steel spatula. For plaster screeds, level the surface with the newly mixed mixture using a spatula.
- Step 5. Connection at the corners. The corner connection of the plaster is made with a spatula to the internal corners.
Tip: On reinforced concrete panel floors, we press gypsum putty into the joint between the panels and re-bandage the joint with a 20cm wide strip of fiberglass inserted into the gypsum plaster. Subsequently, we will plaster the entire area.
Storage location for gypsum putty
Gypsum plasters and screeds must be stored in a dry place. Due to the exposure of the product to moisture before its processing, a change in the physical properties, resp. decreased reactivity with water.
- To protect the product during or before processing, open or broken bags must be properly protected from moisture.
- With the manufacturability indicated on the packaging, the processing parameters are maintained according to the manufacturer's data.
- After the specified pot life, parameters may differ.
Dry mixture or ready-made
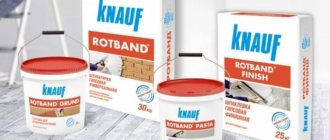
The mixture can be dry, in bags, which still needs to be prepared by mixing with water, but there are ready-made mixtures in buckets. The first ones are cheaper, the second ones are more expensive. What is the difference:
- The first type of material is putty on plasterboard, brick, and coatings made from plaster mixtures.
- The second type does not need to add water or any components - after opening the bucket, the mixture can be immediately put to work. They are usually intended for finishing and have a different base - latex. This material is used for final processing of an already sanded surface to make it perfectly smooth, removing all small roughness and micro-irregularities.
This putty is used to level walls or ceilings for painting..