When performing construction work, you have to deal with the installation of doorways, windows and roofs. Currently, craftsmen widely use foam for installation functions, which has a number of advantages. The product saves a lot of time and makes repairs easier. The substance is used to fill large voids and cracks. The hardened material firmly holds structures with medium and heavy weight, such as windows, doors and other elements. After polymerization, stable temperature and humidity levels are observed in the room, which is especially important for residential buildings. The mounting tool performs several important qualities. It is simultaneously a sealant, a heat insulator and a fixative. The material based on polyurethane foam serves for many years without losing its properties.
Features of polyurethane foam
The minimum service life is five years. After this, the substance is replaced. Destruction can occur for several reasons:
- direct exposure to sunlight;
- infection with fungal flora and pathogenic microorganisms;
- violation of construction technology.
You can extend the service life of polyurethane foam if the following conditions are met.
- Use sealing tape - suitable for indoor repairs, but limited use for outdoor work.
- Treat the sealant with a primer or other analogues.
- Cover the frozen mixture with a special solution. Various options can act as such a substance, which are represented by: finishing plaster;
- cement-sand mortar supplemented with white grout;
- sealant;
- acrylic-based paints and varnishes;
- liquid plastic;
- window putty;
- putty.
When puttying is carried out, the putty is applied to the mounting foam. It performs several functions.
- Protects from the influence of atmospheric factors - ultraviolet rays, high and low temperatures, moisture.
- Eliminates unevenness and large cracks.
- Serves as a base coat for finishing mixtures.
How to cover construction foam on windows: how to achieve optimal results
In view of all of the above, since everyone wants to maximize the service life of window units, the question of how to hide the mounting foam on PVC windows so that neither moisture, nor the sun's rays, nor frost or heat can damage it becomes very relevant. Moreover, in fact, there may be several answers, and everyone is free to choose exactly the option that he likes most, and also seems simpler and more accessible to implement. The only thing that is undeniable is that all this will have to be done quickly, so as not to change the entire structure later, which will cost much more.
Before you start figuring out how to close the foam around a window from the street, you should definitely think about using a special PSUL tape, more details about the properties and qualities of which can be read on our website.
- The most popular method of sealing an assembly joint with protruding foam is ordinary cement-sand plaster. Such a seal will be cheap, but it cannot be called the best, since freezing and leakage are possible, and therefore condensation may occur, which in turn can cause fungus or black mold to appear on the walls.
- There is also the option of sealing polyurethane foam using special sealing compounds, for example, based on polyurethane. But then the surfaces will have to be finished with something additional.
- In-demand and relevant means are the finishing of slopes, and, consequently, the sealing of foam, covering with plastic, sandwich panels, plasterboard or even wood.
- A good way to cover the mounting foam on a window is also a special plaster mixture, which is designed for temperatures well below zero, if we are talking about the external wall of a building.
- Acrylate paint or also liquid plastic is another fairly popular and not too expensive product that will help you cope with the task.
Indeed, there are simply a colossal number of methods and methods for sealing an assembly seam, that is, in fact, protecting the foam from external influences, and one of them can be called the most commonplace window putty. The main thing here is not to make a mistake, and to choose the right material, depending on the final goals, as well as the operating conditions of the structure. On the outside of the window opening, you should use only frost-resistant mixtures that are not afraid of moisture and ultraviolet radiation, always remember about the water barrier and vapor barrier, and from the inside, always remember about temperature changes.
It is clear that if you have absolutely no idea how and with what to cover the foam after installing plastic windows, it may be better to entrust this task to real professionals. They are the ones who can give a guarantee for the work done. If the foam crumbles or loses its properties, it is not at all excluded that even the PVC profile of the frame may become deformed, and then the entire window unit will have to be replaced, and this is a colossal expense. So if you are not sure, then it is better not to do the work yourself, although it is not particularly difficult.
The putty protects the mounting foam from the harmful effects of sunlight
Don’t know what and how to putty the polyurethane foam? The experience I have accumulated allows me to say that all the necessary materials can be found in the nearest hardware store, and anyone can cope with the task. Detailed illustrated instructions will help me prove this.
Technical characteristics and composition
Putty on polyurethane foam is an excellent option for repair work. The composition is capable of creating a film that will eliminate the shortcomings of the sealant. The requirements for the mixture meet the following characteristics:
- exhibits pronounced adhesive properties;
- remains resistant to external influences;
- facilitates grinding and applying decorative coating;
- has strength and high elasticity.
The composition of the putty is determined by the type of solution. The main types of suspensions produced are:
- starting - characterized by a coarse granular structure, eliminates large irregularities and cracks;
- finishing - used to level the base layer;
- universal - suitable for basic and final puttying.
After applying the mounting foam, it is necessary to cover the areas with putty. Finishing with such a solution is important not only indoors, but also outside the building. Therefore, when renovating your home, several options may come in handy. Their choice is determined by the base material, atmospheric factors, and decorative details. The most popular putties include these types.
- With an acrylic component - which has good elasticity and strength, is environmentally friendly, and resistant to atmospheric changes.
- Based on gypsum, it is a universal mixture suitable for the basic and finishing stages of puttying.
- With adhesive functions - contains polyvinyl acetate, practically odorless. Easy to apply and bonds tiles well. However, this option is not recommended for application outside the building, given the high sensitivity to moisture.
- Containing cement - a coarse-grained composition is ideal for the external walls of a house, fits tightly to the material and hides various defects.
Consumption per 1 m2
Before starting installation repairs, it is necessary to determine how much putty will be needed. For this, the following indicators are taken into account:
- surface area;
- nature of the coating;
- type of putty;
- number of layers of solution.
Manufacturers produce packaging that contains detailed instructions for preparing the mixture and consumption per square meter for a layer one millimeter thick. The average consumption of mounting putty ranges from 600 grams to 1 kilogram. It is better to purchase the mixture in advance with a small supply so as not to interrupt the work.
What is it for
Environmental conditions determine the service life of finishing and building materials.
Polyurethane foam is used for various purposes: improves the appearance of structures (fills cavities, cracks, which allows you to level the surface in the future), strengthens it (when installing window blocks, doors), prevents the appearance of drafts, flooding of rooms through leaks.
All these properties are determined by the structure - after hardening, the material becomes dense and porous. This increases the thermal insulation qualities of protected structures.
But under certain conditions, polyurethane foam loses its properties: it becomes brittle, less dense, crumbles, and can crumble even from the slightest mechanical load. Such changes in the structure of the material are a consequence of violating the rules of its use and failure to follow installation recommendations.
The main factors that destroy the foam structure:
- moisture (precipitation and condensation);
- ultraviolet radiation.
When installation rules are followed, such material retains its properties for a long period.
According to GOST 30971-2002 “Installation seams of junctions of window blocks to wall openings”, the service life of hardened foam, which is characterized by its initial properties, is 20 years.
To protect the installation material from destruction and increase its service life, protective coatings are considered.
The most common and effective include:
- silicones;
- ribbons;
- cement;
- decorative panels;
- plaster compositions.
The last option is considered universal. It is used indoors and outdoors (provided that the properties correspond to the operating conditions). For comparison, decorative panels are not used outdoors to protect the foam, since they do not ensure the tightness of the base. In this case, the foam continues to be in contact with the air. Taking these features into account, plaster is distinguished.
Its advantages:
- vapor permeability;
- increased adhesion;
- strength;
- waterproofing properties;
- decorative properties (used to eliminate errors on rough structures).
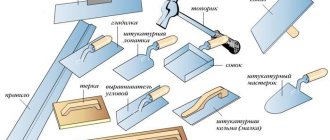
Required tools and materials
To carry out finishing work, it is necessary to take care of additional materials in advance so as not to interrupt the repair process. Experts recommend preparing the following tools:
- spatulas of various sizes;
- stationery knife to remove excess elements;
- masking tape;
- thick gloves;
- container for mixing the solution;
- mixer or drill with attachment.
An additional component is special clothing, taking into account the nature of the work performed.
The main reasons for the formation of cracks in the floor
If cracks appear after laying the wooden covering, it means that the work technology was violated, during which the material dried out and a gap formed.
The formation of cracks is also promoted by:
- Activity of rodents and insects that dig holes through the wood . This reason is the most common, since in order to save money, many people ignore the need to seal the underground space. The cracks in the concrete are open gates, which pests will definitely take advantage of and turn the wooden floor into dust.
- Increased humidity and improper care of the floor - if the ventilation system in the room is broken and high levels of humidity remain, the wood will certainly absorb it. Swelling of the fibers inevitably leads to the development of microscopic bacteria that will destroy the floor.
- Lack of protective coating - when the floor is not exposed to paint and varnish products, the wood wears out faster, and any temperature changes or mechanical damage can cause cracks and large holes to form.
Selecting putty and preparing the mixture
The choice of putty for foam depends on the type of installation work. If repairs are carried out in a room where stable temperature and humidity levels are observed, use the mixture for interior work. When finishing the walls outside a building is required, a solution is used that is resistant to atmospheric fluctuations. In rooms you can use gypsum and acrylic putty. An adhesive formula is selected for tiles or heat-insulating boards. For exterior work, the best choice is a cement-based mortar, which is not afraid of water and gains strength in conditions of high humidity.
In most cases, putties are a dry suspension that must be diluted with water. It should be taken into account that the solution hardens after half an hour. Therefore, after mixing the mixture, you need to immediately start working. It is better to prepare the putty in small portions. To do this, pour a certain amount of powder into the container and add water, gradually mixing the solution. To distribute the substance evenly and prevent the formation of lumps, use a mixer or drill with an attachment.
Protection principle
If the master decides to use putty to cover the foam material, then he needs to adhere to a certain algorithm of actions. You can begin any manipulations only after the foam has completely dried. This process most often takes 10 to 12 hours. If there are areas that protrude above the level of the glass unit, then they need to be carefully cut off using a sharp knife.
During this procedure, it is worth going a little deeper into the base. The surface must be cleaned of debris and covered with a layer of primer. When the applied product has dried, you can apply the putty solution, but not in a thick layer. After complete hardening, the prepared construction mixture is applied again.
Gain
The surface must be sanded, primed and painted. If the master does not plan to use putty, then the excess protrusions are cut off flush with the PVC window. Sandpaper removes all irregularities. At the final stage, all that remains is to paint the surfaces. For these purposes, it is advisable to use an acrylic-based composition.
The product is applied only in an upward direction, gradually approaching the corners of the frame. If putty or paint is applied to the surface, then the final service life of the formed seam will definitely not be inferior to the operation of the building itself.
Important! To putty the foam, it is better to choose a frost-resistant material, which is freely sold in modern construction departments. Many of them are powders, to which a certain amount of clean water must be added to obtain a solution of the desired consistency.
The putty is applied to the surface to be treated and carefully leveled. If the layer turns out to be too thin, then over time it may become covered with numerous cracks. The thickness of the finishing material must be at least 3 mm. To give the seams an aesthetically attractive appearance, it is better to use a construction mesh.
Classic mesh for improved adhesion
Process Features
Foam putty is applied according to certain rules. The work involves several stages, which include:
- Preparing the base for puttying - leveling the surface.
- Tape application.
- Direct application of the mixture.
- Rubbing the coating.
Foam leveling
The first step is performed only after complete polymerization of the composition. To do this, use a utility knife to carefully cut off excess sections of material so that the sealant is level with the wall.
Attention! The time when work can begin is determined based on the drying time of the polyurethane foam.
On average, polymerization of the substance occurs after 12 hours. However, it is better to first study the instructions for use. Small cracks and crevices are filled with plaster and primer. Cleans walls from dust and dirt. Then the coating is treated with a primer and wait until it dries.
Pasting tape
Most often, polyurethane foam acts as a fastener for products of various textures. Therefore, to avoid destruction, experienced craftsmen recommend applying a special sealing tape to the surface before priming and puttying. It is also used to fill recesses in new types of structures. When working with old windows, preference is given to membrane-type tape, which has waterproofing properties. When it is necessary to prevent surface contamination, construction tape is attached to the window frames. After completion of work it is removed. This type of protection is very convenient and saves the builder’s time.
Applying the mixture
The next step is to apply putty, following these instructions.
- Prepare the mixture according to the instructions on the package. The dry substance is diluted with water and thoroughly mixed until smooth.
- Apply the composition onto the mounting foam evenly with a spatula. The layer thickness should be from 3 to 5 mm. However, the width of the layer depends on the type of mixture.
- One layer of putty on the foam is often not enough. Therefore, after the base solution has dried, the composition is reapplied.
- The final stage is treatment with a finishing solution.
When filling the gaps between the wall and the window frame in order to strengthen the materials, serpyanka tape is applied to the first layer of suspension. It is sunk into the mixture and covered with the next layer on top.
Grout
After the putty has hardened, the surface must be sanded. Rubbing is done using sandpaper, mesh or a grinding machine. The result should be a smooth and even surface. After this, finishing and decorative work is carried out. Polyurethane foam is a dense material, so you can apply sufficient force during sanding.
Necessity of soil
In order to increase the adhesive properties of the coating, priming is performed. A special solution is applied after each layer of putty over the mounting foam. The substance penetrates deeply into the pores, polymerizes and seals them. Thus, a protective film is formed, which ensures maximum adhesion of base surfaces of various types with other finishing materials. In order for the repair to be of high quality, it is necessary to wait until the soil hardens. It makes subsequent work easier.
Important! The solution dries completely within 12 - 24 hours.
How to cover polyurethane foam after installing plastic windows
When installing windows or working with other openings, builders often need to use foam to seal cracks of different diameters. After treatment, the surface must be cleaned so that all further manipulations can be freely performed. For these purposes, you can use durable slopes made of different materials or plaster solutions.
Over time, the foam can lose its properties, which is why the quality of the sealing seam deteriorates significantly. In order for the structure to last as long as possible, auxiliary materials must be used. Dry mixtures are in demand, since after hardening they form a durable film through which moisture does not penetrate.
Final finishing of the structure
Tips and recommendations for use
Repairs that include blowing with foam and subsequent finishing of the room are best left to an experienced craftsman. However, you can do the work yourself. To do this, you need to study all the processes, select materials and follow all the steps. There are detailed instructions on the Internet on how to get the desired result. The following tips are highlighted.
- If you plan to use putty, the seam is deepened a few millimeters.
- It is better to cover deep differences in materials with special tape.
- Excess sections of foam must be cut off.
- Old polyurethane foam should be removed.
- The putty must harden thoroughly, only after this is sanding carried out.
- It is necessary to apply primer - the primer additionally protects the putty.
- For large volumes of putty, a construction mesh is placed between the layers, which will hold the mixture on the wall.
Applying putty over polyurethane foam is a mandatory stage of repair, which provides a high degree of protection for the sealed material and insulation from external adverse factors.
Prices for services of masters
The cost of sealing seams depends on their size in width, total length in linear meters, the level of preparation of the treated surfaces, the number of floors the window is located and the protection technology adopted. The work can be carried out comprehensively, for example, during the installation of PVC windows or in individual technological operations.
Average prices for the service of sealing seams after installing a PVC window:
Comprehensive sealing of PVC windows after installation, RUB 2,000. per set.- Sealing of external seams - 600 rub./l.m.
- Sealing of internal seams - 300 rub./running meter.
- Sealing of seams between PVC frames and slopes 300 rub./l.m.
- Filling empty technological gaps between the frame, walls, ebb and window sill with foam - 150 rub./l.m.
- Installation of PSUL - 250 rub./p.m.
- Seam protection with steam and water protective tapes - 300 rub./l.m.
- Preparation of surfaces for sealing - 300 rub./l.m.