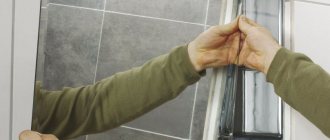
It is impossible to imagine renovating an apartment or house without a spatula; it is a simple but indispensable assistant in finishing work. The types of spatulas are varied, as are the scope of their application. We have previously talked about the angle spatula, what it is and where it is used. The construction portal Firststroy.ru will tell you in this article what types of spatulas there are, in what construction and repair work they are used.
Types of spatulas
The spatula is selected based on the tasks it must perform:
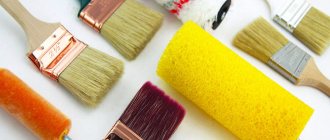
- Painting spatulas. This type of spatulas is the most common; they are usually purchased not one at a time, but in a set of two or three pieces, for example, with a small blade width for fine work, a medium blade, more universal, and a wide blade for working with large surfaces. A wide spatula is used to collect a larger amount of solution, and during the work process, the solution is removed from it in portions with a small or medium spatula. The blade width of painting spatulas varies from 20 to 450 mm.
- Spatulas for removing old coatings (scrapers) - paint, wallpaper, etc. Such spatulas are usually equipped with a blade made of thick and durable steel. This type is not very successful, since painting spatulas are also suitable for these purposes.
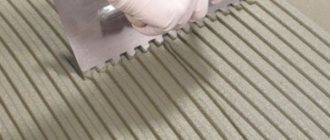
- Notched spatulas. This type of spatulas is intended for applying adhesive compositions when laying tiles, mosaics, carpet or linoleum, plasterboard and porcelain stoneware. The teeth on the spatula allow you to apply the adhesive more evenly and economically. The size of the teeth is different - small ones are for carpet or linoleum, large ones are for porcelain stoneware or ceramic tiles.
- Facade spatulas. The tool is intended for facade work, that is, with large surfaces, therefore, the blade width of such spatulas can be from 200 to 400 mm. Facade spatulas have a thick and durable blade and a strong handle, this is due to the fact that the solution is applied to the facade in a thick layer.
- Rubber spatula. This type of spatulas has a rubber working surface instead of a steel blade; they are necessary for fine and delicate work. There are three types of spatulas:
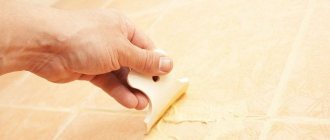
- for driving joints between tiles, the blade is made of hard rubber;
- for applying a thin layer of putty, or for applying primer to wooden surfaces, blade made of medium-hard rubber;
- for grouting tile joints, soft rubber blade.
In addition, there are corner spatulas, which we have already talked about, wallpaper spatulas, which are very useful for expelling air from under the wallpaper, and very exotic Japanese spatulas, which are convenient for puttying.
Putty Tool Dimensions
To process walls, it is rational to choose the tools required in terms of dimensions.
Wide for leveling
To level an uneven base and easily putty the walls, use:
- wide type for facades (up to 600 mm);
Wide
- rule (1500-3000 mm).
Rule
Thanks to this, it is possible to eliminate the most severe and massive defects. They are used to apply the so-called initial putty mixture, and the material is applied in as thick a layer as possible.
Is it convenient to putty with medium
Medium putty tools (with a width of 150 to 250 mm) are used to process large irregularities and dents that remain after the initial treatment.
This spatula allows you to create the smoothest putty layer possible. The main task of such a spatula is to fill holes and eliminate visible defects.
Average
After processing, the spatula may leave minor protrusions, which are removed after complete drying using special ribbed paper.
Narrow for puttying
Narrow (50-100 mm) is suitable for processing minor depressions that remain after using the previous material. After its use, there are practically no flaws left on the surface.
Narrow
It is not rational to use this tool so that the surface is as smooth as possible, because it completely repeats all the chaotic irregularities on the walls. However, it is often used to treat hard-to-reach areas. Using this tool, you can collect the mixture from the container and apply it to the work surface.
conclusions
A spatula is a necessary and useful tool, and having several spatulas on hand is a must. If repairs are not your main activity, and housework occurs occasionally, then we recommend purchasing a set of three painting spatulas; you can also buy one façade spatula. This set will be quite sufficient. If you decide to do the repairs yourself, then it makes sense to think about 2-3 more spatulas of different types, depending on the upcoming work.
Facade
Facade trowel
Traditionally, during repair and finishing work, a facade trowel made of stainless steel is used. This is the most multifunctional spatula designed for filling cracks and unevenness with putty, cleaning walls and ceilings from old building materials, applying tile adhesive and primer, and much more. With its help, you can prepare the surface for work with another more specialized tool.
The façade spatulas are made quite well. They are equipped with a durable two-component handle that adheres well to the steel blade. The material and strength of the spatula allow you to stir viscous materials that can break another, less quality spatula. You can also use it to mix solutions of different chemical compositions. Only a façade trowel can withstand heavy work and harsh conditions.
Option for using a façade spatula
The façade spatula can be used together with a painting spatula. A certain amount of putty is placed on the facade, and the painter selects the required amount and applies it to the surface.
Scope of application of the grouting spatula
Rubber spatulas have become widely used in construction and repair work. They are often used for the following procedures:
- Cleaning up excess grout and construction mixtures;
- Smoothing seams between floor and wall tiles and parquet joints.
The device is designed for carrying out restoration and finishing work of varying levels of complexity, where it is necessary to preserve the completeness of the aesthetic coating.
If you do not listen to the advice and start using painting and plastering spatulas, scratches and other damage will appear on the surface. Different sizes are used, based on the quadrature of the plane being worked on.
They are often offered for sale in sets, with small, medium and large items at affordable prices, and are a consumable item.
How to apply adhesive when laying tiles under the comb
The procedure is as follows:
- Apply the mortar to the wall or floor using a flat trowel.
- Distribute the glue with a notched trowel with the required parameters.
- Press the tile tightly. Sometimes, for better grip, the tiles are tapped with a rubber mallet.
In the next 15-20 minutes, the position of the tile can be slightly adjusted. Then the solution will set.
Important: It is necessary to apply straight grooves with a comb. If you make twists of a complex shape, voids will form in these places, and the tile will hold up worse
Sometimes the mixture is applied to ceramic tiles and pressed against the surface. But this method takes longer.
If particularly strong adhesion is required, the following technology is used:
- Apply the solution to the wall.
- Remove excess.
- Spread on the tile.
- Remove the glue. The remaining 1-2 mm acts as a primer and the tile holds on more firmly.
Features: After installation, the spatula must be thoroughly washed. If this is not done, the remaining solution will dry on the surface and between the teeth. The gaps will decrease and the tool will do the job worse. To prevent the solution from drying out, the spatula can be kept in a container of water.
How to choose a quality spatula for putty
A large selection of tools in a hardware store is, of course, good, but, unfortunately, too large an assortment creates difficulties in choosing. In order not to get confused in the variety of spatulas and choose a convenient and high-quality product, you need to pay attention to the following features:
- The handle should fit comfortably in the hand and there should be no nicks or burrs on its surface. The presence of such irregularities indicates low quality of the product.
- Products that are too long are inconvenient, as are products that are too narrow. They will be difficult to handle while working.
- The trapezoidal shape of the product is best suited for putty. Triangular or teardrop-shaped instruments are not as convenient and less reliable.
- A good tool should have a smooth blade with moderate but sufficient flexibility. If, when pressing on the blade, it bends too much, the mixture will fall from such a spatula while working and it will be difficult to even carry it to the wall. Products that are too hard tend to break during operation. When you press on the blade, it should spring back slightly.
- The blade of the finishing putty tool should be made of stainless steel, which will allow it to be easily cleaned after work and will ensure that there is no rust that could ruin the finish.
- A tool with a metal-plated iron blade is a low-quality product and requires especially careful care to prevent corrosion, which can ruin not only the tool, but also the treated surface.
- The blade of the putty tool should not be sharpened. Products with a sharpened blade are intended for other types of work, such as removing old wallpaper, paint and glue from walls.
How to putty walls correctly
In the previous article we looked at materials for puttying walls, and now we will learn how to putty walls correctly.
There is no point in describing how to hold the spatula, hold it as conveniently as possible. When pressure is applied to the spatula, its plane bends, the edges rise, and there is more pressure in the middle. This is why more putty is applied to the spatula in the middle.
Using a spatula, we perform two actions:
- We apply putty on the walls,
- Let's level it out.
The harder you press the spatula against the surface of the wall, the stronger the deflection and waves subsequently. Therefore, when leveling holes on the surface of walls or plaster slopes, keep the spatula blade perpendicular to the surface. Sometimes the technology of puttying walls allows you to press the corner of the spatula blade with your second hand when aligning the corners and edges. A large spatula can be held by the edges.
What spatulas to use
To putty the walls with our own hands, we will need spatulas measuring 600mm, 450mm, approximately 300mm and an overlay spatula measuring about 80-100mm.
Prepare a putty mixture if using dry putties. Or take the required amount of the finished product and mix thoroughly.
Remember: Fugen and Multifinish have a limited time of use (40-60 minutes), Shitrok longer. And unused Vetonit can be closed with a lid and continued work even the next day!
Apply putty to the spatula, along the blade, more in the middle.
We apply it to the wall, spreading a layer, pressing it to the plane with the blade of a spatula.
Re-spread the removed material with an overlay spatula over a bucket. And we repeat: apply, level, remove.
It is more correct if these movements are mutually perpendicular.
To avoid sagging putty, do not apply too much. Watch the angle of the putty to the surface, the putty has a larger angle (60-50 degrees), the putty decreases and the angle of inclination decreases towards the wall. There is no need to press hard.
How to avoid sagging when layers of putty overlap? We begin to move the spatula towards the already puttied area, that is, we retreat 60 cm (for example) and apply the putty (move the spatula) towards the already puttied area. Let's smooth out the transition. If the putty has dried out and is scratching, you can spray it with a spray bottle. Vetonit is especially responsive to such a procedure.
Painting spatula and similar
Despite the name, this tool is not intended for painting. For example, an option made of rubber and very different in shape is a solid plate no more than 80 millimeters wide, with a flexible, obliquely cut working edge. There is no handle, instead there is a slight thickening. What is this type of spatula used for? This tool is very convenient for finishing curved or, on the contrary, concave surfaces, in particular, covering them with putty or decorative plaster. There are no traces left after using the rubber sheet. There are separate varieties, for example, spatulas for grouting and jointing, made of white or black rubber. The purpose of the first is clear; it is used to straighten the seams between the tiles. The second is necessary for opening seams and covering surfaces with liquid solutions.
Curved polymer spatula for tongue, double-sided
A tongue spatula is double-sided, polymer, curved, single-use - designed for pushing back the tongue during examination, as well as for taking scrapings from the oral mucosa.
The tongue spatula is made of medical polystyrene, approved for use in medical practice. The medical sterile curved spatula has high rigidity and resistance to fracture, due to the “wave” bend it can significantly increase the area of examination of the patient’s oral cavity, because the medical worker’s finger pressing the spatula is located lower than during a similar procedure with a straight spatula, as a result it more flexible than wood and even more resistant to breakage. The color of the sterile curved polymer spatula is transparent or matte. Dimensions: 150 x 20 mm
Sterilization: Ethylene oxide Shelf life: 3 years Packaging: individual, paper
, Russia Price: 3.50 rub.
Reasons for use
First, the glue is applied to the tile or wall with a regular spatula, and then the excess is removed with a comb. This allows you to leave a certain amount of glue on the surface, which will be evenly distributed. After pressing the tile, the glue will be evenly distributed and fill the entire space. It is quite reliable enough to avoid getting holes when the pan falls, but the enamel will most likely get chipped.
This achieves:
- Quality of installation. Since the layer of glue will be the same, the tile will automatically lie flat (if you have a flat base).
- Speed of work. There will be no need to squeeze out or remove excess glue.
- Connection strength. If there is an excess, it gets worse.
- Economical. The amount of glue recommended by the manufacturer will be applied, and there will be no need to overpay for overuse.
This is interesting: Drywall adhesive - selection criteria
How to clean the tool
There are many videos and articles on this topic on the Internet. But these two options are considered to be the most common.
- make a couple of slits in a tin can, and in the end you will have an accessible and effective device for cleaning tools;
- arm yourself with a wet rag (to prevent dust from appearing) and an ordinary washcloth to clean scale from stainless utensils.
For effective cleaning, you just need to delicately treat the contaminated surface with iron filings.
It is rational to use a wet rag to brush away falling dust particles. After a few minutes of manipulation, the instrument will look like new.
In this way, even old, long-hardened putty can be easily cleaned. Some people recommend using sandpaper, but it can damage the delicate surface of the spatula. This method can only be used by professionals who know how to control the intensity of friction.
What to look for when choosing a construction spatula
- Blade material – high-quality professional spatulas are always made from stainless steel. This tool is characterized by increased reliability and durability.
- The handle material – bare plastic – is mostly applicable only to budget-type spatulas. A more advanced tool is equipped with a rubberized handle. The entire handle or some specific segments can be rubberized. But among professional spatulas there are many models with wood-based handles.
- Blade thickness - when finishing relatively flat walls, you should use spatulas with a blade of minimum and medium thickness. Such spatulas spring well and allow you to putty the walls “to strip them off.” If surfaces with obvious defects are being finished, then you should choose spatulas with a thick spatula.
Rules for applying glue
When working with a notched trowel, it is important to understand how the adhesive will behave after laying the tiles. To ensure that there are no voids left under the tiles, straight parallel grooves must be applied with a spatula. It is not recommended to twist them. The glue should be applied with a spatula at an angle of approximately 45 - 75 degrees to the base
Most often it is applied specifically to the base, but some do it separately for each tile, which reduces the speed and quality of work. After application, the tile is pressed tightly to the base. To adjust and distribute the glue over it, light blows are made with a rubber mallet.
The glue should be applied with a spatula at an angle of approximately 45 - 75 degrees to the base. Most often it is applied specifically to the base, but some do it separately for each tile, which reduces the speed and quality of work. After application, the tile is pressed tightly to the base. To adjust and distribute the glue over it, light blows are made with a rubber mallet.
In conclusion, here are some useful tips for purchasing and using a notched trowel:
- Don't skimp and buy a plastic comb. It will be inconvenient to work with it due to the high flexibility and low strength of the plastic.
- Try to immediately wash the instrument from glue. Glue build-up will eventually render the comb unusable.
- It is more convenient to work with a blift with a handle that has two serrated sides and the other two smooth. You don't have to constantly change between a regular spatula and a serrated one.
- Pick up a few extra spatulas in different sizes. This is useful when working in hard-to-reach places and during other repair operations.