Patination or how to age metal
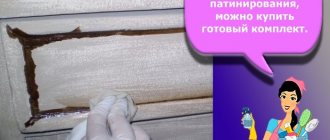
Patination is a technique for “aging” the surface of metal or wood, which is achieved by applying dyes based on various acids. As a result, the products acquire a special charm and the spirit of antiquity. Before carrying out manipulations, working surfaces are put in order, then treated with a special primer from a spray can, which allows the paint to better adhere to the surface. Patination of metal requires time and patience; we will look further at how to apply patina paint to the surface and what effect can be achieved.
General concept of patination
This term refers to the technique of aging a metal surface, which is achieved by applying paints based on various acids. As a result, the products acquire a unique appearance and are imbued with the spirit of antiquity.
Before carrying out work, it is recommended to tidy up the working surfaces and then treat them with a special primer. This increases the degree of adhesion of the dye and the surface. Patination of metal requires a lot of time and patience.
What you need for work
The very meaning of the word “patina” has nothing to do with the dyeing process. It is of Italian origin and refers to the film that forms on metal after prolonged interaction with oxygen.
Initially, you had to wait a long time for the metal to oxidize itself, and the result was completely unpredictable; now this technique can be reproduced at home with your own hands using the following materials:
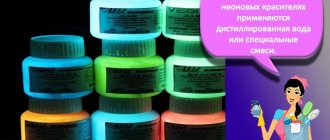
- patina of the color you like (in powder);
- liquid solvent;
- brush (size 2-3) or sponge;
- small plastic or glass trays (do not take metal ones, they can interact with the paint);
- metal product that you want to decorate.
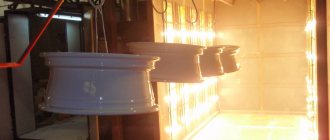
Pay attention to safety precautions! Means for patination involve working with chemical oxidizing agents, solvents and require special care.
It is recommended not to work in confined spaces without respiratory protection. It is better to work in the fresh air, in rooms with good ventilation (with open windows, an exhaust fan on, a draft). If acid gets on the surface of the skin, immediately rinse under running water and then apply a paste of baking soda. If rashes, burns or any skin changes occur, consult a doctor immediately!
Protect your hands! Always patina with gloves.
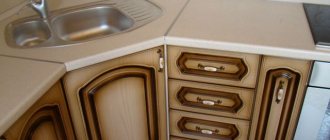
How to create a patina effect on bronze metal with your own hands
The patina effect on bronze metal can be achieved by painting the base with a special compound or translucent dark varnish. The patina is applied with a brush to cover the depressions with a thick layer, giving them a dark shade, and making the high points lighter.
High relief points of the product are coated with light bronze paint
Bronze handles are polished during use when they come into contact with your hands. They become lighter and shinier.
To create this effect artificially, use a semi-dry brush or foam sponge. The tool is dipped in a small amount of paint. Pass along all protruding areas of the pattern.
After coating, the product is dried and varnished to prevent rapid abrasion and accidental mechanical damage.
Patination colors
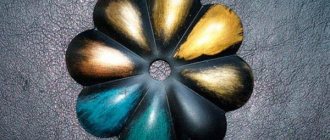
On different metal surfaces, completely different color schemes can be achieved by patination. The most common patina color is greenish, which is produced by the oxidation of copper. On other metal surfaces, the resulting shade may be completely different:
- Rich yellow or ocher color on steel surfaces.
- Chocolate brown on brass and bronze items.
- Dark gray on silver items.
The choice of dry patina for metal work is quite varied. Powder is sold in almost every hardware store. Most common colors:
- aged silver;
- natural or oxidized copper;
- red gold.
Brighter radical colors are also available, for example, blue, lilac, red, allowing you to achieve an original effect on the surface of various metals.
Color solutions
The most common type of patina is copper oxide. The surface painted with this paint has a greenish appearance. On other metals, oxidation processes occur differently, so patina gives different colors, for example:
- on steel - ocher or yellow;
- on bronze and brass - brown;
- on silver - darkish gray.
In construction supermarkets you can buy patina in a variety of colors:
- like silver;
- under natural copper;
- under gold;
- green copper oxide.
These are the most common colors, however, paints with more exotic shades are also available. Such paints do not imitate any metal, but are an independent color scheme. Their use is usually associated only with the desire to give the surface an antique look.
As an example, the following colors can be given:
- blue;
- violet;
- pink;
- red.
Surface preparation
Decorative application of patina requires careful preparation of the surface being treated; the metal must be perfectly smooth. There should be no signs of corrosion on it; it will not allow the surface to be well primed; the top layers will quickly bubble and peel off.
All burrs must be removed, chips and potholes must be filled and sanded with sandpaper (first coarse, then finer).
The prepared product is coated with a special primer (most conveniently, from a spray can), and then metal patina paint is applied to it.
Please note that the patina effect looks best on items painted with dark, especially black paint. The painted product must dry well, otherwise the patina will not adhere well and you will not achieve the desired effect.
How to make a patina on bronze
The interior of the house can be decorated in an antique style by painting bronze items.
To uniformly cover bronze with a patina, perform the following steps:
- Old surfaces are cleaned with sandpaper and degreased.
- To ensure that the paint applies easily and adheres well to the metal, the surface is treated with a special primer.
- All elements are painted with bronze paint, applying it in several passes. Each layer must be well dried.
- To obtain an antique bronze shade, the surface is covered with patina. It is applied to the recesses. To adjust the shade of the bronze coating, experts advise using a translucent patina.
- At this stage, glazing is performed. Use a brush lightly dipped in light paint to go over all protruding edges and corners. This action will give the effect of attrition.
After the last layer has completely dried, all treated areas are covered with transparent varnish.
Patina paint application technique
There are two ways to age metal: applying patina with a brush or sponge. By placing dissolved paint on the tip of a brush, you can achieve completely different textures, directional strokes and different depths of paint. Do not wet the brush before starting work; it must be dry; a wet brush will cause smudges and drops on the metal being processed.
Do not take a brush that is too large or small - the optimal bristle size is 2-3 cm. The sponge gives a “dusty” effect, but do not press it too hard, otherwise pores will be imprinted on the surface being treated.
Keep a napkin with solvent and some of the base paint with which the product is painted at the ready. Working with the patina should be virtually error-free. Repeatedly applying patina to metal in the same place gives an unsightly “flat” effect. When painting individual elements, be careful: if you accidentally “smeared” something nearby, simply paint over this area with background paint.
On video: applying patina to metal.
DIY instructions
The patination process is considered quite simple. Even a novice master can handle it.
Surface preparation
Before decorative application of patina, it is necessary to carefully prepare the surface. It is permissible to use such material only for perfectly smooth metal. There should be no signs of corrosion on it. This will lead to insufficient surface priming. As a result, the top layers will become covered with bubbles and peel off.
It is recommended to remove all burrs, cover chips and gouges with putty and sand with sandpaper. First you need to use a coarse and then a finer texture.
It is recommended to cover the prepared surface with a special primer. It is most convenient to use a spray can. After that, patina paint should be applied to the surface.
It is important to consider that the patina effect looks ideal on products that are painted with dark paint. The surface must dry well. Otherwise, the patina will not adhere well and you will not be able to achieve the desired effect.
Paint application technique
To carry out the patination procedure, it is permissible to use a brush or sponge. If you put the dissolved paint on the tip of the brush, you will be able to get completely different textures. Do not wet the brush before painting - it must be dry. A wet tool will cause streaks and drops to appear on the metal surface.
Experienced craftsmen do not advise using too large or small tools. The ideal bristle size is 2-3 centimeters. The sponge will give a dusting effect, but do not press it too hard. In this case, the pores of the tool will be imprinted on the surface.
See also
6 types of primers for linoleum floors and a rating of the best brands, how to apply
It is recommended to keep a cloth and solvent on hand while working. You will also need some base paint. You need to work with patina very carefully. When reapplying the substance to metal there is a risk of getting an unattractive flat effect. When painting individual parts, it is important to be careful. If a substance is accidentally applied to an adjacent area, it should be painted over with a background substance.
Patination of metal with oxidizing agents
Obtaining a patina on metal by immersing it in various chemical compounds is a labor-intensive method, which will result in the formation of a colored film (patina) on the surface of the metal. This type is much more durable, since the film does not wear off quickly under mechanical stress, like paint. If you want to feel creative and try to age metal using patination solutions, you will need special chemicals.
The surface to be treated should be prepared, as when working with paint, but not primed or painted, but degreased and bleached in an acid solution. You can carry out all the manipulations at home, create a masterpiece with your own hands or give new life to old objects.
How to do classic patination at home and get the colors you want? When patinaing brass, the most common colors sought are black or deep brown, olive, dark orange, or mouse gray. The brown color is achieved by immersing the metal in a solution of sodium thio-sulfite, popularly known as photofix.
An acid (sulfuric, hydrochloric, nitric) is first added to the prepared solution and the metal is lowered into it. Do not overexpose the product! The patina will appear very quickly. Work carefully! Use rubber gloves and take short breaks every 15-20 minutes.
Important! The coating is not very durable; it must be coated with varnish on top.
How to get other shades:
- To obtain an olive tint, brass products are immersed in a solution consisting of ammonia, water and chlorinated copper oxide (in a ratio of 4/5/2). Be very careful - the composition is toxic.
- A thick orange tint on brass will be given by a mixture of potassium sulfite, and a gray gray tint will be produced by liver of sulfur (a sintered mixture of sulfur 5 g in powder and potash).
- On copper, as on brass, the patina is very impressive. You can get a black tint on it (when immersed in sulfuric liver solution) and ancient blackness (if you mix 2-3 g of sulfuric liver, add the same amount of ordinary salt).
- Copper sulfate together with zinc chloride will give a blood-red patina.
- The luxurious blue color of steel will be given by a mixture of hyposulfite and acetic acid lead (150 g plus 50 g per 1 liter of water). The patina on steel appears both when immersed in a cold solution and when it boils (the shade will be more saturated).
- You can achieve a raven wing shade (“bluing”) by immersing the product in a chromium solution at the rate of 100 g per liter of water. The steel will acquire an amazing metallic glow with a deep, black-blue tint. After about 20 minutes, the steel will be covered with a film of an amazing blue-black hue.
- When bronze items are patinated, they acquire various shades of green and blue. To obtain a light green tint you will need 3 parts aluminum chloride, 1.5 5% vinegar and 5 copper salts. The exposure time of the desired shade on bronze is determined visually. The longer the exposure, the deeper and darker the resulting shade will be.
After completing work with acids, unused liquids must be disposed of. Do not store mixtures! The resulting products must be thoroughly dried and coated with matte or shiny varnish.
Patination of metal using oxidizing agents
To obtain the required coating, it is worth immersing the metal in different chemical compositions. This method is considered very labor-intensive. However, as a result, you will be able to get a beautiful color film effect on the surface. This method helps to achieve a more lasting effect, since the film will not rub off from the surface like dyes.
To artificially age metal, you need to use special chemicals. Before starting work, preparation is required. However, it is not worth priming and painting metal. It is recommended to degrease and bleach using an acid solution. All manipulations can be carried out at home.
To achieve the desired effect, you need to add an acid - nitric, sulfuric or hydrochloric - to the finished solution. Then it is recommended to immerse the metal product in the resulting liquid. It is important to observe the duration of the procedure. The patina will appear quite quickly.
During work, it is important to do everything as carefully as possible. You should use rubber gloves and take short breaks. It is important to consider that the coating is not particularly durable. Therefore, it needs to be varnished.
How to apply patina to metal?
I have a channel on YouTube where I post videos on DIY workshop topics and much more. If you are interested, go! https://www.youtube.com/channel/UCmRSX19tlEu89N8PrK1i1JQ
Learning to create a patina effect
Today I want to tell you how to properly apply patina. Although it would be more correct to say, apply a coating with a patina effect , because the term “patina” implies the creation of an oxide film due to the action of acids, and we will simply paint with paint...
Let's start, of course, with the selection of the paint itself. It comes down to taste and color... Gold, silver, copper, greens, etc. There are a lot of paint manufacturers; the paint itself from different manufacturers differs greatly in shade, smoothness of coating, and degree of transparency. Only practice and personal preferences will help you figure out what to choose for a specific task.
The acrylic base of the paints allows for application without special solvents, and the brushes are washed with water after use. The peculiarity of storing such paint is not to store it at subzero temperatures! This will lead to guaranteed damage to the paint. Paints with a patina effect are very expensive, but one must take into account their insignificant consumption per part, so one small jar will last for a very long time.
We decided on the paint. Now you need to prepare your brush and palette. I use a regular painting bristle brush with a width of 2 to 4 cm. In order for the bristle to allow the paint to be rubbed in firmly, it is better to cut it evenly, leaving a length of about 3 cm. The brush is ready. For the palette, you can use any piece of unnecessary plastic or MDF (hardboard). I do not recommend using highly absorbent materials, as the paint on the palette will dry out quickly.
We have prepared the paint, brush, and palette. Before we begin, I want to warn you: Giving a product a patina effect is a delicate process that requires accuracy and a sense of proportion, otherwise a work of art can easily be turned into popular popular goods. Many stores selling “forging” are littered with similar products. (This is how an arm-legged painter with a wide brush appears before your eyes, generously pouring patina to the right and left...) Develop taste and a sense of proportion!
To obtain a more subtle effect, you can (and sometimes need to) dilute the paint with a solvent (selected depending on the composition of the paint) so that the patina gets a certain glazing effect (becomes transparent) and gets rid of excessive hiding power. I often use patina in my work. So, it is simply impossible for it to work without dilution with a solvent, otherwise the patina will form thick, rough, dirty strokes. A terrible sight. Solvent 646 is well suited for dilution. The dilution process has its own characteristics. You need to take some small container. I use wide lids from 5 liter water bottles or baby food jars (I prefer them). You just need to pour a little solvent into our container, dip the tip of the brush into the jar with patina and rub the paint with the solvent. Thus, we will get a ready-made diluted patina, which we can already work with on the palette. The proportions of solvent to paint are a matter of taste and practice.
All work on applying patina should be done with an almost dry brush, otherwise the paint will paint over the areas completely, leaving dirty spots on the surface. We want to get a “light abrasion” effect. The concept of “more is better” does not apply here. We put a little paint on the tip of the brush and rub this paint on the palette. This is necessary so that our brush is almost dry. On the same palette you will see when the brush “starves” and gives a light glaze instead of bold strokes. Now you can start applying the patina. Using light tapping movements, as if trying to remove specks of dust from the surface, we apply paint to the product. As soon as the brush has stopped releasing paint, we take a little ground paint from the palette. If the paint on the palette has already dried, pick up some paint from the jar with a brush and repeat the rubbing procedure on the palette. The degree of abrasion of paint on the palette and the force applied to the brush when applying paint is developed with practice and no clear recommendations can be given here.
We apply paint at kinks, corners, edges, and irregularities. This will enhance the artistic effect. The paint may fade a little after drying. This must also be taken into account during the patination process. Start applying from places that will not be so visible, in order to first develop a certain skill, check how dry our brush is, and then move on to the facade and front surfaces. This way you can avoid damage to the product, because an incorrectly applied patina will spoil the appearance.
Applying decorative patina to metal
The name “patina”, in fact, like the idea itself, comes from Italy. Initially, patina was considered to be a natural coating that formed on copper and its alloys. This coating appeared due to oxidative processes and not in all cases the metal element looked beautiful. However, with the passage of time, a fashion appeared for metal products covered with patina. Since no one wanted to wait for the metal to be covered with an oxide-carbon film, patina began to be created artificially. To do this, various chemicals were applied to the metal, which usually included acids and oxidizing agents. Thanks to this, it was possible to patent the metal faster, and the final result looked much more beautiful.
Today, the fashion for decorating forged metal products and other elements made of this material has not subsided. Accordingly, no one forgot about the patina. The only difference is that now patina, as such, is a kind of decorative coating that creates the desired effect on the metal surface in a few seconds, without oxidizing it. Even a beginner without any experience can cover a product with patina at home. The main thing in this matter is accuracy and a sense of proportion!
Rules for applying decorative patina.
1. The most important thing is surface preparation! Since we are talking about metal and products made from it, it is definitely worth making sure that the surface is smooth, there are no burrs, bad unsightly welds, unwanted holes, and so on. At this stage, all defects should be removed with a file. Unforeseen depressions and holes are filled with a special metal putty. Afterwards the putty is rubbed off. This is necessary in order to remove its excess. During this process, it is best to use fine sandpaper. After all of the above, be sure to check the metal product for rust stains. If there are any, they need to be cleaned with a file or sandpaper and treated on top with an etching compound that removes corrosion and its traces. When everything is finished, the metal needs to be coated with a special primer for metal, which, firstly, will ensure good adhesion of paint and patina to the metal base, and secondly, will significantly extend the service life of the product by preventing the process of metal oxidation or, more simply put, its corrosion.
2. Before applying patina, the metal product is painted. The paint covers the primer layer and gives a beautiful appearance. Usually dark colors are chosen, in particular black. This is not surprising, since it is against a black background that both silver and gold patinas look most impressive. However, it must be taken into account that the patina will look darker against a dark background and therefore you should purchase this decorative coating with maximum color saturation. Naturally, before applying the patina, the previously applied layer of paint on the product must dry completely.
Methods of applying patina.
There are several methods and each of them is relevant in its own way in one case or another. It is important to understand that the choice of method almost directly depends on what effect you ultimately want to get. Patina can be applied either with a sponge or a brush. When applying patina with a sponge, the coating layer turns out to be very heterogeneous and light; this method is good if you only want to slightly emphasize a certain place. The main thing is not to overdo it, because otherwise a trace of the foam rubber texture will remain on the product that you cover with patina. To prevent this from happening, you need to touch the metal lightly with a sponge, and apply the patina exclusively with sweeping movements. Applying a decorative coating with a brush has its own characteristics. By the way, a brush is usually used with a width of 2.5 - 3 cm. It must be dry. The patina is poured in a small portion onto the palette and rubbed there. After this, using a brush, it is applied directly to the metal itself. Just as in the case of a sponge, this is done using swinging movements. It is better to apply denser layers of patina with a brush, since thanks to the bristles there are practically no streaks left on the surface. The patina hardens very quickly, so if something goes wrong, immediately wipe off the excess with a clean cloth prepared in advance and try again.
If you have to apply patina to a forged product of complex shape with various curls, etc. try not to touch unnecessary elements. For example, if a curl entwines a separately located rod, and you want to highlight this particular curl, do not paint over the rod as well - this will significantly worsen the appearance. Of course, it is not always possible to cover the desired part with patina without touching neighboring elements, so you should always keep a prepared small brush and paint that matches the background color, for example black, next to you.
Ideally, if you apply the patina properly, it will work the first time. All subsequent layers cover the texture, making a denser coating. In this case, the effect will not be the same.
And remember that before and during work, the patina in the jar must be stirred!
How can you patina metal?
Paint . Use a coloring compound to give the metal surface the desired color. It is advisable to use patina in powder form - it has good adhesion to surfaces and lasts quite a long time.
Carry out a chemical reaction . Metal can be patinated using different chemical compounds - for example, oxidizing agents, acids, solvents. Or using thermal influence. But such a technique requires strict adherence to safety rules and can give unpredictable results.
Application method
The methods for treating metal and wood with paint are different.
A powder (forging) agent is applied to metal objects, and an acrylic-based composition is applied to wooden objects.
Acrylic based paint
This dye is rarely used on metal products, as it has a low level of adhesion.
But acrylic paint perfectly paints objects made of wood, as it is deeply absorbed into the pores of the wood and beautifully highlights the structure of its fibers and structure. Wooden objects painted with such acrylic paint look noble; their appearance on the outside is decorated with color transitions.
You need to keep in mind that you cannot paint modern-style furniture. It will not look aesthetically pleasing.
Painting with patina will look good when decorating rooms in styles such as Provence, country, classic, and ethnic.
The method of applying an acrylic patina is called abrasion. Aging of products occurs by initially covering the product with a layer of dye used as a substrate.
Sequence of stages:
- Before painting, the surface of the product must be carefully cleaned with a metal brush or coarse sandpaper. During the process, the top layer of the surface is removed, and the structure of the wood is made more obvious. The wood must be sanded in such a way that the movements of the tool are directed along the structure and only in one direction. This processing option will show the texture of the wood without spoiling its integrity.
- The next stage is covering the object with a thick layer of acrylic-based patina. Then you should wait a while for the composition to be absorbed into the wood. We must keep in mind that the more time passes, the darker the color the object will turn out to be.
- Excess composition is wiped off with a sponge or soft rag.
- After the product has hardened, try painting the product with another layer of paint to add saturation to the shade. You can also coat the item with varnish.
How to paint metal for patina
Before patination of metal, you need to carefully prepare its surface. If you apply patina to unprepared metal, it will quickly lose the brightness of its color, will be applied unevenly and, as a result, will not give the desired effect. To prepare the metal, remove chips, fill and sand potholes, and coat it with a special primer. If you want to achieve a multi-faceted effect, cover the metal with a coat of paint in a base color. The patina will look best on items that are black or another dark shade.
You can age metal using a sponge or brush. To start patination, dilute the powder in a plastic container, put on rubber gloves and start painting.
If you are working with a brush , carefully dip the tip into the paint and apply the patina in small strokes. There is no need to wet the brush - the water will cause drops or streaks on the metal being processed. Use different strokes to achieve different textures and richness of color.
If you are working with a sponge , also do not wet it or press it hard against the surface. Otherwise, the patina will be imprinted along with the pores. Sponge treatment gives a noble dusting effect.
Keep the solvent nearby - if you make a mistake, you can quickly remove the patina layer and apply a new one. It is also advisable to keep the base color paint nearby - if the solvent removes it too, you can easily restore the shade. But keep in mind that the paint layer on the metal must be completely dry before patination.
Patination of metal with paint is the most accessible method at home. For example, in just a day you can get an excellent bronze aging effect using two shades.
Features and rules of metal patination
Patina is a film that forms on metal surfaces due to corrosion under the influence of natural conditions, heating or treatment with oxidizing agents.
Thanks to patination, it is possible to prevent the destruction of the material. This process is often used to decorate DIY items, to protect them from rust, and to add volume and attractiveness.
The following types of patina exist:
- Natural - plaque is formed due to the oxidation of metal under the influence of atmospheric phenomena. For example, copper, after being covered with a natural patina, acquires a green tint. In turn, this species can be noble and wild. A noble patina has a dense structure, while a wild one has a looser structure.
- Artificial is formed due to oxidative processes using chemical reagents. The coating is dense and porous, but reliably protects the metal from rust.
- A decorative patina can be achieved by applying stain or acrylic paint. It imitates the process of patination on metal with your own hands.
This imitation is used to turn things into antiques.
Rules for patination of metal with your own hands:
- It is important to comply with personal safety requirements. Because chemicals can cause poisoning.
- Chemical reagents should be stored in tightly closed glass jars, separate from products.
- Metal should be treated with chemicals in a well-ventilated area.
- It is imperative to work in safety glasses and rubber gloves.
- Acid must be added strictly to water or other solution in a slow stream, and not vice versa.
- Before applying paint or decorative film to the metal, it is necessary to clean it of dirt. To do this, degreasing and cleaning are performed.
- Pickling removes corrosion from metal. It is necessary to add 0.5 g of methenamine or dry alcohol per 1 liter of liquid to cleaning solutions.
- To degrease, metal parts are treated with special water or chemical agents. Water is poured into an enamel bowl, chemical reagents are dissolved, the liquid is brought to a certain temperature and the parts that need to be degreased are lowered into it.
- Patination of metal is carried out with chemical, acrylic, wax or bitumen patina.
- To make brass fittings an olive or black shade, they are dipped in a solution with chloride oxide and ammonia.
- To make brass a red-orange hue, it is dipped in a solution of potassium sulfite.
You can paint metal fittings at home with your own hands using acrylic paint or water-based patina.
Advice! If acid accidentally gets on the skin, the affected area should be washed with running water and wiped with a 5% solution of baking soda.
Methods for patination of metal at home
Paint for patination of metal is applied in two ways:
- brush;
- sponge.
The paint collected on the brush is applied in different stroke directions and depths. Before painting, the brush must be dry. A wet tool can cause smudges and drips on the metal being processed.
For work, it is recommended to use brushes with bristles of 2–3 cm.
When applying paint to metal with your own hands using a sponge, you need to work with light pressure so that pores do not imprint on the surface
Using a washcloth creates a “dusty” effect.
When patination of metal with your own hands, it is important to have napkins with a solvent and the base paint with which the surface is painted. All work must be performed strictly according to the algorithm. Reapplying patina to metal is not permitted. Otherwise, an unsightly relief will form.
If, when painting individual parts, the product gets in the wrong place, the stained area is tinted with background paint.
Metal can be patinated at home using oxidizing agents. Ultimately, a colored film (patina) will form on the surface of the material. The workpiece is prepared before the patination procedure. It is degreased and bleached with an acid solution. After the preparatory work, a special product is applied, which after some time is varnished.
What you need to patina metal
Patination is the creation of a film on metal elements, which occurs after prolonged exposure to oxygen.
To perform metal oxidation with your own hands at home, you need to prepare the following materials:
- patina powder of the desired color;
- solvent in liquid form;
- brushes or sponges;
- small containers made of plastic or glass;
- metal products that need decoration.
Important! You should take care of personal protective equipment. Since during patination you will have to work with chemicals, you must prepare safety glasses and gloves.
How to patina metal using chemical processes
Use acid, solvents, heat. Study the characteristics of the metal and the possible consequences of reactions to choose the optimal color. Be sure to wear gloves and a protective mask, preferably outdoors.
There are many ways to patina metal using chemical reactions. For example:
- To give brass a brown tint, it is kept in a photofix solution with the addition of nitric, sulfuric or hydrochloric acid
- To obtain antique black on copper, it is immersed in a solution of 2-3 grams of liver sulfur and 2-3 grams of table salt
- To “blue” steel—to achieve an amazing glowing effect—it is immersed in a chromium solution at the rate of 100 grams of the substance per liter of water.
- To obtain a bright black color, steel is heated and then sharply cooled in cold oil.
- To obtain a gray gray tint on brass, it is immersed in a mixture of liver sulfur
- To obtain a blood-red tint on most types of metals, they are treated with copper sulfate along with zinc chloride
After any type of patination of metal by chemical reactions, allow the product to dry completely and coat it with varnish. If this is not done, the patina may become unusable - the coating obtained by such methods is quite short-lived and unstable to external negative influences.
Attention ! When working with acids, solvents and other chemically active substances, be sure to follow safety precautions. We also recommend trying patination on a small, inconspicuous area of metal to see the effect it will give, and then proceed to aging the entire surface.
If you want to get a beautiful forged product with an antique effect, you don’t have to patina the metal yourself. You can order it from us - the Tekhinkov artistic forging plant will fulfill orders of any complexity. Call or write to us for details.
Bituminous varnish for aging interior items
Bituminous varnish is widely used for decorative aging, mainly of relief surfaces. This technique looks especially successful when working with carved elements found on furniture, picture frames, mirrors, and other interior items. Apply bitumen varnish over the paint layer. It is able to identify and emphasize depressions, cracks, darken the lowest located places, and give a beautiful brown tint to the elevations.
What to prepare
- Frame for a picture or mirror. Choose products with a textured surface. Not necessarily made of wood.
- Primer.
- Acrylic paint in gold or silver color.
- Bitumen varnish.
- Alcohol based shellac varnish.
- Synthetic brush for applying varnish.
- Brushes for paint, primer.
- A sponge or natural old rags.
- A little white spirit.
Metal paints with patina effect
Metal paints with patina effect
– these are special means for patination (artificial aging) of metal. In the natural environment, all metals except gold and platinum become coated with an oxide film over time due to interaction with moisture and air. This effect is most noticeable on products made of copper and bronze, which become covered with a greenish coating. Such a film can preserve the metal or, conversely, destroy it.
The fashion for vintage items has caused a rush of demand for artificial patination technologies. This process allows you to simulate oxide deposits on the surface, while maintaining all the properties of the metal. Together with zinc primers, patina enamels create an additional protective barrier against corrosion. Prevents oxidative processes on metal. And they create a patina effect - an imitation of aging of the entire product or its elements. You can choose a color for a specific type of metal (copper, silver, gold) or use shades of graphite, lapis lazuli and emerald green.
Ways to create a patina on metal
To patina metals, powder dyes, oxidizers, oil-based products, bluing (blackening) and paints with a patina effect are used.
- Powder patina.
Before the advent of this product, silver paint with coloring pigments was used. However, before applying a powder patina, the metal must first be primed and painted. The procedure is simple and does not require special skills. But in this case, the patina is only the final outer layer. - Acidic compounds.
For patination of metal, various mixtures with acids and oxidizing agents are produced. Essentially, they trigger the process of natural oxidation of the metal. This technology is acceptable for small interior products that are not affected by moisture. Oxidizing agents should not be used for external structures. - Oil and wax products.
Oil-based patina is a paste-like product that is applied to various surfaces. It can be bitumen or oil art paint. Its properties are similar to wax patina. The thick, non-flowing composition is suitable for vertical surfaces, but it dries very slowly. - Blueing.
This is a separate technology for blackening metal, mainly steel and cast iron. Burnishing can be done in different ways: alkaline, acid, thermal. The alkaline method is often used for iron. In thermal heating, steel is heated in the open air until it darkens. Other metals are rubbed with oil and heated to form a film. - Paints with patina effect.
These are ready-made decorative compositions that create an imitation of natural patina on the surface. Using ready-made paints is convenient and cost-effective. They can be applied at home. To protect against corrosion, it is recommended to use enamels together with zinc-rich primers.
Where are patina effect paints used?
- Manufacturing of forged and antique designer products.
- Decorative design of interior and exterior items.
- Restoration of antiques and museum relics.
- Painting of garden furniture, gazebos, canopies, stairs.
Heat-resistant modifications of enamels with a patina effect are also produced. This expands the scope of their application and allows the processing of products heated to high temperatures or in contact with fire. These compounds can be used to paint barbecues, stoves and fireplace grates, as well as to weld and cut painted metal structures.
The nuances of artificial patination
Before patination of metal, you need to carefully select the method and composition. If you make the wrong choice, the effect may be far from expected. It is better to apply the product to a small area or to the same metal to evaluate the result. If you lack the skills, it is most convenient to use paints with a patina effect - for example, Zinkor-Top Patina. This is decorative enamel, completely ready for use. Thanks to the variety of colors, it is easy to match it to a specific metal. After drying, the color fades a little.
It is also necessary to maintain a balance so that patination does not deteriorate the appearance of the product. This will also affect its artistic value, which is important for collectible or rare pieces. When processing wrought-iron stairs and railings, it is better to apply paint only to shaped details: curls, flowers, vines. This gives them a more naturally aged appearance. It is also important to follow the principle of contrast: dark metal is covered with a lighter patina, and light metal is covered with a dark patina or blackening (blueing).
Brief application instructions
Regardless of the chosen composition, the metal surface must be cleaned of old coatings, loose rust and dirt, then dust-free and degreased. If these are ready-made paints with a patina effect, then they can be immediately applied to the prepared surface. When using forged furniture or steel structures outdoors, it is better to pre-treat them with zinc-filled compounds. Such primers will create a protective anti-corrosion layer and an even coating for painting.
The use of paints and varnishes with acids and bluing technology require special care! Personal protective equipment must be used. Ready-made enamels with a patina effect are easier to apply. It is enough to protect your face and hands from paint and ensure good ventilation when working indoors. Do not paint near a fire source or at extremely low temperatures.
Do you need advice and help in choosing the right composition?
Call us at: +7, 8 (800) 555-34-18
You can leave a request in writing by e-mail:
[email protected]
We work for
Call right now, we guarantee the quality of our products and affordable prices!
I have a channel on YouTube where I post videos on DIY workshop topics and much more. If you are interested, go! https://www.youtube.com/channel/UCmRSX19tlEu89N8PrK1i1JQ
Learning to create a patina effect
Today I want to tell you how to properly apply patina. Although it would be more correct to say, apply a coating with a patina effect , because the term “patina” implies the creation of an oxide film due to the action of acids, and we will simply paint with paint...
Let's start, of course, with the selection of the paint itself. It comes down to taste and color... Gold, silver, copper, greens, etc. There are a lot of paint manufacturers; the paint itself from different manufacturers differs greatly in shade, smoothness of coating, and degree of transparency. Only practice and personal preferences will help you figure out what to choose for a specific task.
The acrylic base of the paints allows for application without special solvents, and the brushes are washed with water after use. The peculiarity of storing such paint is not to store it at subzero temperatures! This will lead to guaranteed damage to the paint. Paints with a patina effect are very expensive, but one must take into account their insignificant consumption per part, so one small jar will last for a very long time.
We decided on the paint. Now you need to prepare your brush and palette. I use a regular painting bristle brush with a width of 2 to 4 cm. In order for the bristle to allow the paint to be rubbed in firmly, it is better to cut it evenly, leaving a length of about 3 cm. The brush is ready. For the palette, you can use any piece of unnecessary plastic or MDF (hardboard). I do not recommend using highly absorbent materials, as the paint on the palette will dry out quickly.
We have prepared the paint, brush, and palette. Before we begin, I want to warn you: Giving a product a patina effect is a delicate process that requires accuracy and a sense of proportion, otherwise a work of art can easily be turned into popular popular goods. Many stores selling “forging” are littered with similar products. (This is how an arm-legged painter with a wide brush appears before your eyes, generously pouring patina to the right and left...) Develop taste and a sense of proportion!
To obtain a more subtle effect, you can (and sometimes need to) dilute the paint with a solvent (selected depending on the composition of the paint) so that the patina gets a certain glazing effect (becomes transparent) and gets rid of excessive hiding power. I often use patina in my work. So, it is simply impossible for it to work without dilution with a solvent, otherwise the patina will form thick, rough, dirty strokes. A terrible sight... Solvent 646 is well suited for dilution. The dilution process has its own characteristics. You need to take some small container. I use wide lids from 5 liter water bottles or baby food jars (I prefer them). You just need to pour a little solvent into our container, dip the tip of the brush into the jar with patina and rub the paint with the solvent. Thus, we will get a ready-made diluted patina, which we can already work with on the palette. The proportions of solvent to paint are a matter of taste and practice.
All work on applying patina should be done with an almost dry brush, otherwise the paint will paint over the areas completely, leaving dirty spots on the surface. We want to get a “light abrasion” effect. The concept of “more is better” does not apply here. We put a little paint on the tip of the brush and rub this paint on the palette. This is necessary so that our brush is almost dry. On the same palette you will see when the brush “starves” and gives a light glaze instead of bold strokes. Now you can start applying the patina. Using light tapping movements, as if trying to remove specks of dust from the surface, we apply paint to the product. As soon as the brush has stopped releasing paint, we take a little ground paint from the palette. If the paint on the palette has already dried, pick up some paint from the jar with a brush and repeat the rubbing procedure on the palette. The degree of abrasion of paint on the palette and the force applied to the brush when applying paint is developed with practice and no clear recommendations can be given here.
We apply paint at kinks, corners, edges, and irregularities. This will enhance the artistic effect. The paint may fade a little after drying. This must also be taken into account during the patination process. Start applying from places that will not be so visible, in order to first develop a certain skill, check how dry our brush is, and then move on to the facade and front surfaces. This way you can avoid damage to the product, because an incorrectly applied patina will spoil the appearance.
How to change the color of metal?
How to change the color of metal to make it look like antique? Since time immemorial, craftsmen have used the methods of oxidation, bluing and patination.
Various methods are used to carry out the work:
- Metal processing over an open fire . This method is one of the most popular and ancient among jewelers. For a more beautiful and even color, it is recommended to calcinate the wire over an open fire in advance, even before creating the decoration. This is due to the fact that the heating rate of the metal may differ in different areas, therefore, there is a danger of burning it out and making it brittle. In addition, if the original working metal is varnished, the fire will remove it and pre-prepare the wire for work.
- Treating metal with a sulfur liver creates a patination effect. Typically a proportion of 50 ml of water/1 drop of product is used. It is recommended to use water at 20-23 degrees, close to room temperature, since with hotter water the patination reaction occurs faster, and the resulting patina becomes less stable and will begin to wear off when it touches clothing, skin, or the surface of the box.
- Ammonia solution (in the first case, exclusively its vapors are used). To process, place the decoration in a jar with a lid, into which pour 1 ml of ammonia of 5% concentration. The color of the metal changes relatively quickly; it can be adjusted by observing the changes over time.
- Ammonia solution (in the second case it is used together with water). For processing, the product is sprayed with water or placed directly into the solution for 1 second, and then it is sent to a container where ammonia vapor is formed. Under the influence of water and ammonia in steam, the color of the patina becomes close to blue.
Do-it-yourself patination of metal to look like gold
To create a patina on gold-colored kitchen handles, follow these steps:
- Mix milk sugar (180 g) with copper sulfide (0.6 g) and alkali (180 g).
- The resulting solution is heated to 90 degrees.
- Place brass handles in a warm solution for 15 minutes.
Over time, the products will acquire a beautiful golden hue.
After the transformation is completed, the fittings are rinsed with water and attached to the kitchen furniture
What is patina?
Before learning how to change the color of metal, it will be helpful to know what patina is. Patina (from the Italian patina) is a coating that forms on copper products or products made from alloys using copper. Patina is always multi-layered, but on the surface there is only a green-blue or brown layer visible to the eye.
There is an artificial patina, which is created specifically by treating the metal with various chemical compounds; and natural, which forms on the product over time and is an oxidation reaction under the influence of storage and maintenance conditions.
Patina, formed naturally, can be seen on ancient copper coins, monuments, gates, castles, and temple domes. The metal is covered with a film of dark brown to bluish-green shades, which is a kind of protective layer of the base metal.
What does it mean to “patina” a product?
What does “patina” mean in terminology? This means coating metal products with a special coating that will give the item an antique appearance. Metal products can be patinated using chemical compounds, solutions, vapors, after contact with which the product changes color and becomes special.
The film that forms on the product after the patination process is protective and, when used, protects the metal from environmental influences and external aggressive conditions.
Various natural shades of patina on copper products are known. Green, olive, blue, brown, reddish, close to black. These colors appear on copper and copper-containing alloys - brass and bronze. The patina that forms naturally on metal looks beautiful and even has the epithet “noble”.
Aesthetic and practical effects prompted jewelers and decorators to invent ways to create artificial patina as a way of aging a product. There are two ways to patina metal: random and stable.
With a stable method, the result of patination can be accurately calculated. For example, if you use liver sulfur, the coating will turn out to be brown in color; the degree of its saturation can be adjusted by exposure time.
With a random method of applying patina, the result cannot be predicted, since it will depend on how the metal behaves in reaction to certain agents. But this method always produces an interesting and artistically valuable result.
There are a variety of agents and reagents available for plaque formation. Let's consider the most popular ones for patination of copper and brass.
Application technology
The principles of patination of metal and wood are different. Powder (forge) patina is used for metal, and acrylic patina is used for wood.
Acrylic patina
This paint is almost never used on metal surfaces. The reason is poor adhesive properties. However, acrylic is perfect for painting wooden products, as it penetrates deeply into the pores of wood and emphasizes the beauty of its fibers and structure. Wood painted with acrylic patina takes on a noble appearance, its appearance is enriched with color transitions.
Note! It is not recommended to apply patina to furniture made in a modern style. Furniture painted this way will not look aesthetically pleasing.
Patina painting is often used for items made in the following styles:
- classic;
- baroque;
- Provence;
- country;
- ethnic motives.
The acrylic patina coating technology is called abrasion. Aging consists of first applying a layer of paint, which will act as a so-called substrate.
Sequencing:
- Before painting, the surface is thoroughly but gently cleaned with a wire brush or coarse sandpaper. In this case, part of the surface is removed, and the structure of the tree becomes more obvious. You need to sand the wood in such a way that the movements are directed along the structure and only in one direction. This will show the texture without compromising the integrity of the wood.
- The next step is to apply a thick layer of acrylic patina. Next, you need to wait a few minutes until the material penetrates the wood. At the same time, you need to remember: the longer the pause, the darker the painted product will ultimately be.
- Excess paint is removed with a sponge or soft rag.
- After the paint has dried, you can make the color more saturated by applying an additional layer of paint material. You can also varnish the surface.
How to patina copper?
How to patina copper so that the product acquires an antique effect? One of the popular remedies is acetic acid or ammonia vapor. Copper wire or plate at a temperature of 20-25 degrees quickly comes into contact with chemical fumes and forms a coating. You can speed up the process and increase the intensity of patination by increasing the air temperature in the area of the procedure.
To create a patina, the product should be placed in an airtight container with ammonia or acetic acid poured into the bottom (follow safety precautions, work with gloves, you must also hold your breath or use a respirator). Follow the process; the decoration will begin to turn brown. Do not overexpose so as not to increase fragility and damage the metal).
Remove the product after reaching the desired color intensity and rinse with water. Using a velvet cloth with polishing paste (goyi paste), polish the jewelry, brush, rinse again and dry.
Shade options
One popular variety is copper oxide. The product painted with patina has a greenish color.
Other metals oxidize differently, and therefore the patina takes on other shades, for example:
- on steel objects - yellow or walnut tone;
- on bronze and brass – brown;
- on silver – a dark gray shade;
Construction supply stores sell patina in various colors:
- to match the color of silver;
- with imitation of natural copper;
- gilded tone;
- green copper oxide.
These are the most popular shades, but dyes of rarer colors are also produced. They do not visualize any layer of metal, but represent an independent tone. They are usually used for external aging of an object.
For example, purple, blue, red and pink paint are made.