Among the variety of materials for constructing finished floors in rooms for various purposes, solid wood boards and parquet made from hard wood occupy a special position, associated with natural warmth, unique beauty, solidity and respectability. Wooden floors, despite their high cost and the need for periodic maintenance, remain in demand among a wide range of developers. But a tree that gives warmth and comfort needs good protection in order to faithfully serve several generations of its owners. For good protection, appropriate materials are required, so the question of which floor varnish is better and more durable will definitely arise before every owner who decides to make wood floors in their home.
Preparation and application of coating
The real difficulties begin precisely at this stage - the entire area of the floor has to be processed before further actions. Before coating with varnish, careful sanding of the entire surface to be treated with sandpaper is necessary. If OSB-3 panels are used, then they immediately have well-polished front sides and additional processing will only be required at the joints of the parts.
All seams and joints should first be sealed with special sealants suitable for wood. It is advisable to use acrylic compounds. The sealed seams are sanded. Next, the required number of layers of varnish are applied with intermediate drying of each and final polishing. It will be better if you use oil- or acrylic-based varnish for a ceiling assembled from OSB - these compositions do not cause swelling of the material.
With coloring, everything is a little more complicated. You will need to pre-treat the entire surface with primer mixtures, and only after they have dried, apply the first layer of the finishing coat. Before priming, all joints or seams between adjacent structural elements are also treated with sealant and sanded.
When applying varnish or paint, special attention should be paid to the edges and adjacent areas of the panels. They need to be rounded, removing sharp edges and filling the resulting depressions with putty.
After puttying and sanding, it is necessary to prime the entire surface again and only after that begin painting.
If the plane is uneven, then you will need to not only putty the seams, but also treat the entire area of the future ceiling structure with putty. The technology for applying putty and sanding it is carried out using the same technology as when working with conventional bases. Applying a thick layer of putty mixture involves using a paint mesh to strengthen the coating.
Preparing the base
Before you start finishing the floor, you need to work with the screws and joints of the slabs. To do this, use acrylic putty for wood in white or pine color (more practical, since it matches the color of OSB) to seal the places of visible screws and joints of OSB boards.
It is important that if it turns out that you need to apply a large layer of putty, it is applied in two or three passes (the break between applications depends on the drying of the previous layer). This will prevent the putty from cracking.
We must not forget about the shrinkage of the material.
After complete drying, you need to treat the sealing areas with fine sandpaper (I recommend No. 120-150). When the work of sealing the heads of the screws and the joints of the plates is completed, the working surface is thoroughly swept from dust and a primer is applied.
As a primer, you can use a colorless wood primer or acrylic stain.
The primer is required for the adhesion of subsequent materials to the surface of OSB boards and is a mandatory stage of work.
Laying OSB on a wooden floor
How to finish an OSB slab on the outside
Wooden floors have unevenness, crookedness, and generally become unattractive over time. If you are a wood lover, there is no point in restoring such a floor, as this is fraught with costs, both financial and physical, if you decide to finish it yourself.
Therefore, almost every person prefers to lay floor finishing using modern materials.
Preparing a wooden floor for laying OSB is a very important criterion.
What is OSB
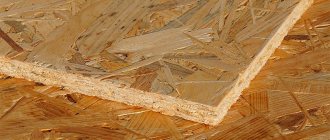
OSB is a particle board consisting of compounds of wood chips and an adhesive mixture, pressed into shape in the form of flat sheets of specified sizes and thickness.
A smart technology for gluing several layers of sheets consists of laying them transversely, which makes this product durable.
In order not to be mistaken with the choice of flooring, we will consider three types of OSB
OSB 1 is the lowest density material, and it is not difficult to cause wet damage. This type of board is mostly used in the furniture industry.
The components of the OSB 2 list are sheets of pressed chips intended for use in dry rooms. When OSB 3, on the contrary, is resistant to moisture and is suitable for finishing floors in the bathroom and kitchen.
OSB 4, whose thickness is 25 millimeters for less suitable flooring, is applicable in the construction of load-bearing structures.
Leveling a wooden floor
Leveling wooden boards of an old floor is done using various materials and you can choose any of them.
When compared with chipboard and fibreboard, OSB is quite durable boards, as thick as possible in width, based on the product category.
So, correcting the curvature of a wooden floor with your own hands will not be a difficult task. They are very convenient and easy to install and do not require any equipment.
Otherwise, fungi and mold will continue damaging processes under the new floor covering. Do you need it?
Before such a procedure, it is necessary to dismantle the old coating, leaving only the logs and laying thicker OSB.
After preparing the floor, begin laying OSB. You should start from the flattest corner of the room. To achieve a clear fit of the material, it is better to trim the slab on one or several sides at once.
OSB is fastened using nails and self-tapping screws, taking into account a distance of 35–60 cm between them. To achieve a better quality coating, then fix the material not along the perimeter, but also diagonally of the product.
Features of paint selection
The scope of OSB is wide - from use as a structural material to interior decoration and room decoration. The conditions in which OSB boards are used must be taken into account when choosing paint.
Indoors
The requirements for material used inside heated premises are less stringent, and the use of OSB-2 and higher grade boards is allowed. It is not very difficult to answer the question of how to paint an OSB board inside a house. All types of paint coatings considered are suitable for this.
Acceptable options for finishing OSB flooring would be:
- Oil or alkyd paints.
- Transparent or translucent water-based varnishes.
- Polyurethane epoxy resin.
The originality of the solution for treating OSB sheets laid on the floor with varnish lies in preserving the natural pattern of their structure.
The use of self-leveling epoxy composition with various shades or inclusions such as reflective, iridescent particles, textile fibers makes it possible to create modern decorative floors from OSB boards.
Decorative OSB flooring
It is preferable to paint the walls of children's rooms and bedrooms with environmentally friendly acrylic paints. Many of them are water resistant and allow for regular wet cleaning.
For external structures
Frame house construction from OSB boards is characterized not only by the speed of construction, but also by the affordable prices of materials. Coloring makes this technology even cheaper, without sacrificing quality, and serves important purposes:
- protection of OSB from aggressive environmental influences;
- maintaining the working properties of the material.
- decoration.
The planned design determines the choice of composition for painting OSB:
Preserve the natural texture of facade slabs:
- Alkyd transparent wood paint for exterior use with an ultraviolet filter - creates an original light-and-shadow play of reflections in the sun.
- Colorless varnishes, impregnations and azures give the walls of the house a stylish shade and gloss.
Before painting the OSB board on the facade of the house with transparent compounds, it can be tinted, emphasizing the chip texture. For this, stains and patinas are used. A variety of shades is achieved by diluting these decorative compositions with water or acetone.
To paint the OSB of external building structures in a certain color and completely hide the texture of the chips, covering enamels and water-based paints are used:
- Alkyd facade paint - forms a polymer film, creating protection from moisture and sunlight, resistant to fading and temperature changes.
- Latex facade paints are undemanding in terms of coating quality, which is important for OSB, have good covering ability and can withstand a large number of freeze-thaw cycles.
- Acrylic paints are resistant to moisture and temperature changes, vapor-tight, and inexpensive, which is essential for large volumes of facade work.
- Silicone paints - meet all the requirements for compositions for painting facades and adhere well to previously painted surfaces. The main disadvantage is the relatively high price, which makes them less popular for painting exterior structures.
When deciding how to paint an OSB board on a façade while preserving its original attractive appearance for a long time, you should be careful when choosing oil compositions. These paints are inexpensive, economical in consumption, have good adhesion, but are not resistant to precipitation, humidity and solar ultraviolet radiation.
Fire protection of OSB boards
The wooden base of OSB makes them a fire hazard, and the presence of resins and polymers in the structure of the material during combustion makes the smoke deadly due to the release of toxic substances, including hydrocyanic acid.
Therefore, fire protection of slabs comes to the fore, regardless of where they are used and in what capacity - rough or finishing material.
According to manufacturers, many paints and varnishes contain fire retardant inclusions. But to increase the fire resistance of the slabs, it is recommended to first carry out a fire retardant treatment before comprehensively covering them with paints and varnishes.
Fire retardant treatment
Following these tips will help you wisely choose the option of coating a popular construction material - OSB - in order to give it beauty and durability.
But it must be remembered that before painting the OSB board outside the house or inside the premises, preparatory work must be carried out with high quality, the main ones being sanding, sealing seams, and priming. This will save money and labor invested in painting.
How to paint the panels outside
Finishing stone for walls inside an apartment: maximum effective use
Painting slabs outside
For external finishing work - finishing the facade, installing partitions and floors - oriented strand boards are coated with impregnations, varnishes and paints:
- alkyd
- oil
- water-based
- acrylic
- latex
When choosing a material for painting, it is better to choose compositions that contain special additives that protect the slabs from exposure to UV radiation.
The coating must also be vapor permeable, otherwise mold will form on the slabs. An impermeable coating can cause warping of sheet building materials.
Alkyd paint
Alkyd paint
Alkyd paint
It contains plant resins, film formers (glyphthalic or pentaphthalic), pigments, purified kerosene, fillers and antiseptics. After coating and drying, a film remains on the surface of the material, which provides additional strength to the OSB.
Dries quickly, is non-toxic, creates a waterproof layer, protects against temperature changes. However, it has a pungent odor and is prone to fire.
If such a composition is applied to the slab before it dries completely, bubbles and peeling will form on the surface. This coating significantly reduces finishing costs, because the alkyd composition eliminates finishing impregnation with varnish.
Water-based mixture
Water-based paint
Water-based mixture
The two-phase mixture includes water and acrylic, fillers, film formers, pigments and a number of functional additives. After drying, the water evaporates, and the polymer layer gives the slab improved performance characteristics.
In addition to such advantages of paint as quick drying, non-toxicity and lack of a strong odor, the advantages include:
- low price
- variety of colors
- high resistance to fire and moisture
- ease of application
- service life up to 10 years and above
External work is carried out at a temperature not lower than +5. In the cold the composition becomes unusable.
For finishing, water-dispersion relief paint with the addition of marble dust or fine chips is also used. Its cost is higher than that of traditional water-based paint, but due to the relief it produces a beautiful decorative look.
Latex composition
Latex composition
Latex composition
A type of water-based paint, but instead of acrylic, the binder is a latex additive (based on vinyl, polyvinyl, silicone). The composition is elastic, viscous and durable, giving the surface characteristics of resistance to moisture, aggressive chemicals, UV radiation and temperature changes.
The paint is non-toxic and has no unpleasant odor. Using latex, you can get both a smooth and textured coating.
Acrylic based coating
Acrylic copolymer paints
Acrylic based coating
Such raw materials cover the unevenness of the structure well and give a uniform tone. It consists of polymers, water and dye, and after drying it leaves a durable film on the surface of the material. It can be matte or glossy; there are many colors in the assortment that do not require additional tinting.
The acrylic composition does not spread, does not fade, dries quickly, has the ability to allow steam to pass through, but is resistant to moisture. It is often used for interior work because it is non-toxic and does not emit harmful substances into the atmosphere when heated.
Oil paint
Oil paints
Oil paint
Raw materials using drying oil are rarely used due to their high toxicity and long drying time.
The oil composition leaves a lot of streaks and unevenness, while the coating does not last long, quickly crumbling and peeling off from the surface.
Doors for wardrobes: step-by-step instructions for calculation, assembly and installation with your own hands (Photo & Video)
What is floor varnish?
Floor varnish is a special mixture of various film-forming substances based on organic solvents or aqueous dispersion.
Floor varnish is a special mixture of various film-forming substances based on organic solvents or aqueous dispersion, with the addition of various additives that affect the characteristics of the product after its final drying. A varnish of different composition can have completely different characteristics, best suited to protect the wood of different species from which wooden floor elements can be made. Oil, alkyd, acrylic, polyurethane, epoxy and some other varnishes allow you to choose exactly the composition that best copes with protecting wood from any influences and can change its appearance, which is sometimes necessary to solve complex design problems.
Any varnish consists of a certain type of resin, dissolved in a special solvent to a plastically fluid state, convenient for application to the surface of the wood it is intended to protect. After application, a durable film is formed on the varnished surface, protecting the wood from fungus, mold, moisture and mechanical damage.
To ensure long-lasting protection, the floor varnish must have the following properties:
- high strength and wear resistance of the film formed;
- the presence of a large amount of dry residue;
- maximum adhesion to wooden surfaces;
- low emission of harmful substances;
- resistance to chemicals contained in cleaning products;
- resistance to resin secretions of pine and larch;
- the ability to hide mechanical and aesthetic defects of a wooden floor;
Coloring and its advantages
How to paint plaster on a ceiling with what
Painting OSB has the following advantages:
- paint protects the material from moisture;
- hides the OSB texture;
- prevents cracking and deformation of products;
- It is simple and inexpensive.
The layer of applied paint does not allow moisture to penetrate into the thickness of the finished material. Without moisture, the slab does not warp. The chips used to make the slab are quite large. You can hide them with dyes. This is much cheaper and easier to do than using decorative panels. But the painting method can only be used indoors. After painting the OSB surfaces, they are varnished. The varnish protects the paint from fading.
For quality work, you need to choose good paints and varnishes. The best of them consist of organosoluble pigments. Such compositions are able to penetrate inside the panel. Oil paint is considered the best option. It creates a reliable protective layer on the surface. But you can use oil compositions only when there is no need to rush, since it takes quite a long time to dry. An alternative option is alkyd enamel. It penetrates deeply into the slab and creates a strong and durable coating. This coating does not need to be varnished.
You can treat the slabs with Valtti Color Satin impregnations produced by Tikkurila, if there is no need to hide the texture. These products can create a matte or semi-gloss film on the surface.
There are fire-retardant paints Polistil, Ognelat and some others. They cannot be used to protect OSB panels, since they are intended for metal. The best protection against fire are antipyretics Vuprotek, SPAS and others intended for wood.
The quality of painting work largely depends on the preparation of surfaces for finishing. For preparation and painting itself, it is necessary to use special tools and materials:
- brushes;
- rollers;
- putty knife;
- spray gun;
- compositions for painting;
- putty;
- sealant;
- sandpaper.
If possible, painting is done before installing the slabs. Their surface needs to be sanded, especially OSB-3. All irregularities and places where screws are screwed in are smoothed out using putty based on oil and glue. The seams between the plates are hidden with the same putty or sealant. But experienced craftsmen advise hiding them with decorative strips. Then the slab is primed with Aqua-Filler varnish. Other varnishes can be used. After this, all surfaces can be painted.
The paint is applied with a brush along the perimeter of the surface. Then take the roller in your hands and apply a full layer of dye. After 8 hours you can apply the next coat of paint. The strokes of this layer are applied across the previously applied ones.
Using the described scheme, you can give OSB products an original appearance. Various wallpapers and other means are suitable for finishing.
Advice from the experts
Panels are used to decorate living rooms; they are used in the manufacture of furniture and for floor coverings. Painting with OSB varnish makes the natural material beautiful and interesting.
If cheap varnish is used in the work, then the slab is coated on one side. With the second, no processing is needed. Otherwise, the shelf life of the slab becomes shorter and its appearance deteriorates. Re-varnishing will be inevitable after a short time.
Purchasing materials
The coating will be pleasing if, even at the stage of purchasing materials, all their features that affect the quality of work are taken into account. Prepare in advance for the work process: OSB, sandpaper, varnish, painting tools.
Quality panels
For varnishing, home craftsmen purchase panels sanded on the construction market. If the tile material is not treated, it will have unevenness from excess glue and resin. It is very difficult to sand it at home; it is almost impossible to make it smooth. The varnish coating on such a surface does not last long.
High-quality panels have steam and sound insulation properties and have a groove-lock. The floor covered with such slabs and painted with varnish looks perfectly smooth, sealed, and original in appearance. Soundproofing qualities guarantee silence and comfort in the house.
Purchase of paints and varnishes
The surface is ready for use in 1.5 weeks. The furniture is not installed until the time for complete drying has passed. High-quality paints and varnishes are odorless. A three-liter container of good varnish covers 20 m2 of surface, it protects OSB boards. The absence of odor guarantees the absence of harmful solvents. They are the ones that harm your health.
Recommendations for laying OSB
Two types of installation are used: on logs and using point support. The steps are not complicated, you can do it yourself. Logs are wooden beams laid from one wall of the room to another, in one direction. Point fastening is the installation of small blocks, in the form of a grid across the entire floor, with a cell size of up to 35 centimeters. With a sheet thickness of 20 millimeters and above, you can increase the distance of the slabs to 40 centimeters. The frequency of the supports will provide resistance to dynamic stresses on the surface.
Installation of OSB to joists
Holes are made in the floor sheets in the corners of the room to allow air to pass under the floor and prevent mold from occurring. All joints with walls and between panels, as well as air duct openings, must be sealed with gauze and PVC glue so that insects living under the floor do not pass upward.
Varnishing
What varnish to paint OSB is an important question when processing tile material on the floor. It is taken into account that a varnish composition that is resistant to abrasion and mechanical stress is needed. Furniture is placed on the varnish coating and people walk on it.
Acrylic varnish is recommended for parquet. Its technical characteristics match the requirements of OSB floor covering material. The coating looks beautiful. You can choose gloss or matte finish.
Working with LM is easy. The slab is prepared before applying the varnish layer:
- putty treatment;
- The primer is used to smooth out uneven surfaces and the joints of the plates.
The varnish coating is applied to a dry surface. Dust is removed especially carefully after puttying and sanding.
The covering layer is multi-layered. A minimum of 3 coats is recommended. Then the service life of the surface increases. Places damaged over time are restored.
The varnish composition is applied using a roller or brush. The first layer is dried and sanded. Sandpaper is used for this. The dust is removed and the next layer is applied. The final coating is sanded especially carefully. To polish it, you need a soft rag or a soft attachment on a sander.
OSB processing for finishing
When you have received an answer on how to level an OSB floor, you can think about finishing. Processing must take place in strict accordance with technology. The simplest option is to coat the existing sheets with varnish, place skirting boards along the perimeter of the walls and enjoy the natural appearance of the material. But still, in most cases, when they think about how to level a concrete floor with their own hands, they subsequently lay the floor covering. The specific treatment depends on the type of coating, as well as the desired result.
Ceramic tiles on the floor. The base structure should not move or move. This applies to a greater extent to the floor on the joists. The surface should be sanded with a wire brush or sandpaper. The work uses only special glue that can connect wood and ceramics. Only in this case will you get excellent leveling followed by tiling. Clean finish. As mentioned earlier, the surface is not covered with anything. But at the same time, you should think about carefully protecting the slabs from external influences. To do this, several layers of varnish or other special products are applied to the top. They will create a barrier against wear and destruction. Special components in the covering elements prevent the appearance of various insects and especially the bark beetle. Laminate is a durable and tough material. It can also be used to cover the OSB leveling layer. In addition, the laminate has special fastenings that allow you to forget about many other requirements for the subfloor. The result should be a flat surface. The interior will not only be beautiful, but also durable. Linoleum. There is an alternative to this floor covering - carpet
For their flooring there is a very important requirement - the base of the floor must be perfectly level. Otherwise, over time you may encounter serious defects.
In addition to performance characteristics, height differences will negate the appearance and attractiveness. Stepping on such a surface, you will be able to feel every defect (cracks, crevices, gaps, bulges, screws, etc.). One level will allow you to get the scraping process, which will need to be done before laying the floor covering.
Using OSB boards to level the base of the floor in any room allows you to obtain a flat surface on which you can subsequently lay almost any type of floor covering. Compliance with technology will lead to a positive result. The main thing is to wisely choose the specific type of stove to work with and follow the instructions.
Video:
https://youtube.com/watch?v=YulWPO9abjE
Video description
All the nuances of installing ceramic tiles on wooden bases are described in great detail in this video:
Experts, when asked whether it is possible to lay tiles on OSB on the floor or to line walls with it, answer in the affirmative. It is possible, but with certain requirements being met: installing a rigid, non-sagging base, waterproofing the slabs, and increasing their adhesion to the glue. To ensure that the coating is reliable and does not lag behind the surface, elastic adhesives and small format tiles are chosen. The cladding process itself differs little from laying ceramics on concrete bases.
Laying on a concrete base
If it is necessary to level the floor with an OSB slab, you should carefully prepare the base for work. Fill all possible cracks and potholes, get rid of defects as much as possible. There should be no garbage. After all, the mounting adhesive must have excellent adhesion to the base. It would be a good idea to cover the concrete floor with a primer to create a dense film on the surface. During operation, this will relieve the screed from dust.
The next steps are to lay out the sheets over the entire surface of the room. Along walls and other structures, slabs should be cut to size. The reverse side of the slabs is covered with parquet glue, which is based on rubber. To ensure that the glue is applied evenly across the entire width of the material, a notched trowel is used. After this, the sheets are glued to the concrete floor.
To ensure the reliability of the entire structure, the OSB board is fixed with driven dowels. To ensure that everything here is strong, the fasteners are located at a distance of 20-30 cm from each other. The exception here is a flat floor and a dry room, when dowels only in the corners of each of the slabs will be sufficient.
There should be an expansion joint between the plates, about 3 mm wide. There is also a seam between the wall, but slightly larger - 12 mm. These gaps will help compensate for the expansion of the slabs under the influence of temperature changes and changes in humidity. No swelling of the entire structure will occur during use.
The final stage is to clean the surface from dust and debris. Any seams along the walls in the room are sealed with polyurethane foam. The entire “cake” will dry in about 3-4 hours. More accurate data is shown in the instructions from the manufacturer. If there is excess foam, it should be cut off with a sharp knife. In the future, you can carry out finishing and flooring work.
Method of application of compositions
The slabs consist of pressed and glued wood chips. Both surfaces do not have the required smoothness for applying paints and varnishes - they are rough. This feature gives it a special texture, but painting or wallpapering will require surface treatment of the building material.
Manufacturers produce several models of panels. 1;2 for front finishing and 3;4 for frame construction. The second option is cheaper, has the appropriate characteristics, but its use requires thorough processing.
Covering enamels
Before painting an OSB board on the street or in the house, you need to determine the types of enamels and paints that hide the protrusions of the chips.
Floor slabs covered with enamelSource pinimg.com
Among them, the following options are offered:
Latex. High level of moisture resistance, an excellent option for buildings located near water. Good covering ability. Not demanding on the surface condition. Facade paints can withstand many freezing cycles.
Latex paintSource gidkaminov.ru
Water soluble. It is considered the best option: inexpensive, withstands temperature changes, the influence of moisture and sun, and allows air to pass through. Can be used in winter. Do not use at temperatures of 20 degrees below zero. Such paints are also called acrylic.
Acrylic paintSource static.tildacdn.com
Pentaphthalic. They have a high level of viscosity and adhesion, forming a smooth and dense surface. They practically do not absorb moisture. Small expense. It takes a long time to dry, not for outdoor use. Instability to the influence of sun and moisture.
Pentaphthalic paint optionsSource farbagroup.com.ua
Alkyd. They have all the characteristics for facades. Forms a moisture-resistant film. The color does not change under the influence of ultraviolet radiation. They can withstand large temperature changes for any region of the country.
Alkyd paintSource gidpokraske.ru
Silicone. Dear ones, they fully meet the requirements for facades. Resistant to mechanical action, moisture and cracking. Used for slabs that have previously been whitewashed or painted.
Silicone paintSource caparol161.ru
So, it’s up to you to choose how to cover the OSB board indoors. Consider the performance and aesthetics you want. It is not recommended to use water-dispersed formulations. They contain a lot of water, which can deform the slabs.
Tinting
Stain makes it possible to emphasize the texture of wood. The required shade is obtained by adding acetone, solvent or water. The diluted stain dries within 5-10 minutes. The stain preserves the natural grain of the wood and protects it from the sun and moisture. Apply with a spray gun/brush. A layer of polyurethane primer is applied on top.
To achieve an aging effect, patina of any color will be used. When the patina has dried, sanding with a soft sponge is carried out to remove any remaining material. After this, the panel must be coated with transparent varnish.
Artificial agingSource pinimg.com
Transparent coatings
How to paint an OSB board to preserve the texture: for this purpose, special transparent compounds with a UV filter, water repellents and stabilizers based on alkyd resins are used. Can be used outside, providing protection from the negative influence of the environment.
Plates with transparent coatingSource teremforum.ru
You can preserve the natural appearance of the slabs using the following compositions:
- impregnation – provide good protection of the material;
- glazes are the most effective, they preserve the design and add shine;
- varnishes – provide gloss, protect from moisture, and give a special shade.
In some cases, slabs can be varnished in several layers. The process is long because the material takes a long time to dry. But this allows you to get a fairly strong, durable and reliable coating that will thoroughly protect the wood.
Fire protection
When OSB burns, harmful substances are released, the smoke becomes very dangerous even with a small fire. At the same time, you can increase the fire protection and paint the surface with Soppka paint. It is designed for such slabs, has high adhesion, lasts more than 15 years and can withstand various negative influences.
Fire protection for OSB boardsSource diymall.co
OSB can be painted with various specially developed paints. They allow you to give an aesthetic appearance, extend the service life of the panel and increase fire resistance properties. Enamels have a high covering ability, do not change color over time, and protect against rot.
Assembly of the structure
The greatest number of difficulties arise when the subfloor made of OSB boards is assembled on joists. Here it is necessary to take into account all the above nuances. In addition to this, there are other recommendations:
- The components of the coating are fixed in such a way that cross-shaped joints and joints do not form. To do this, it is necessary to mount adjacent rows of sheets with an offset of about forty centimeters. You can make an offset by half the length of the sheet.
- A gap of 5–10 millimeters is needed between the wall and the edge of the sheet to compensate for temperature deformations of the coating.
- The elements themselves are not mounted closely, but with a minimum gap of three millimeters - this is necessary to avoid surface deformations.
- The upper side of the logs on which everything will be mounted is always leveled in one horizontal plane.
- The sheets must be fastened to the joists using self-tapping screws or nails with the heads recessed into the surface.
- If a particularly durable surface is needed, the sheets can be laid in two layers, perpendicular to each other.
The rest is not so difficult
It is only important to correctly maintain the level of the upper side of the bars and the distance between them. In this case, you can take sheets of smaller thickness - 8 or 10 millimeters
But it is important that the total thickness of the structure is not less than the thickness of a standard OSB sheet. Otherwise, there is no point in all the work - it is easier to assemble the subfloor on logs from OSB boards of standard thickness in one layer.
Alternative - oil coating
Another option for processing sheets is to coat them with an oil-wax mixture, which is 100 natural. This finish is made from a combination of natural oils such as linseed oil and beeswax. This impregnation is suitable for wooden floors inside the house; it creates a beautiful honey-tinted surface.
In addition, you have the opportunity to combine an oil-wax mixture with tinted paint for natural oils. You can easily dilute the mixture with orange oil and thus get a natural aroma in the room.
As with other paints, you can use a roller or brush to coat the surface with the oil-wax mixture.
10 minutes after application, at room temperature - 20° C, the surface can already be polished. Partial drying of the material occurs after 10 hours, and after about 24 hours the surface can be re-treated. The oil/wax mixture requires approximately 4 weeks to completely dry and cure. At this time, the surface must be protected from moisture and treated carefully.
Note: The oil-wax mixture is not suitable for external surfaces.
Tip: Before applying the stain, apply a test coat, especially when mixing a mixture with a shade of color.
Before applying the protective coating, it is necessary to thoroughly clean the surface, sand it and thoroughly remove dust again. Once all preparatory work is completed and the surface is dry, apply the oil-wax mixture evenly with a thin brush or roller. At the same time, make sure that the mixture completely penetrates into the base. The first coat must dry for 24 hours before re-impregnation.
Before applying the second layer of impregnation, the surface is lightly sanded, as only this ensures good penetration and a smooth surface.
Tip: Use 180 grit when sanding floors and 240 grit when sanding furniture.
What are wood boards
Wood boards are composite materials made from wood with various binders and additives. Synthetic, mineral and natural resins can be used as binders, and the choice of additives is determined by the required operational and technological characteristics.
Sawdust, fibers of various fractions and wood flour are held together with binders and compressed at high pressure and temperature. Formaldehyde resins and glue are most often used as a binder in such composites. Due to the tightening of European legislation regarding the release of volatile substances, manufacturers had to look for an alternative to traditional phenol-formaldehyde resins and reduce the phenol content.
Pressing waste from the woodworking industry turned out to be such a successful technology that the development of wood chip production is intensively moving towards optimizing the shape and size of wood particles, searching for fillers and environmentally friendly adhesive compositions. Thus, lignin, one of the components of wood, is increasingly used, that is, the formaldehyde content in such materials is zero.
All types of wood-based panels differ from each other in their production method and in their operational and consumer characteristics.
OSB panel painting
After completing the preparatory work, cover the surface of the slab with any suitable paint. It is more convenient to apply the finishing composition with a roller. But the resulting result is suitable only for non-residential premises.
Next, I’ll tell you about the decorative method of painting OSB panels:
1 step.
Apply pigment primer to the entire surface of the material. White polyurethane primer can be used for this role. Consumption will be 90-100 g/m2, drying – 4 hours.
Step 2
. Sand the surface with sandpaper or a P320 grit sandpaper and then remove any accumulated dust.
Step 3.
Using a spray gun, apply the special composition “Effective Mother of Pearl”. Consumption will be 100-120 g/m2, drying – 1 hour.
Step 4
Spray platinum paint, this will give the effect of noble antiquity. Consumption will be 60-80 g/m2.
Step 5
After 7 minutes of spraying, use sandpaper (P320) to remove excess paint. Remove any accumulated dust. And you can stop there by moving on to step 7.
Step 6
For a more decorative solution, spray tinted acrylic pre-mixed with stain. Consumption will be 80-100 g/m2, drying – 1.5 hours.
Step 7
In conclusion, all that remains is to cover the surface with a matte paint and varnish material and wait for final drying.
Another way to decoratively paint OSB panels at home is shown in the video:
Benefits of OSB
All the strengths of OSB can be divided into two parts:
- advantages over plywood and chipboard;
- before other materials.
Let's start with the first ones:
price. Of course, wood is cheaper than other finishing materials. Compared to its counterparts, chipboard is cheaper. But, alas, the quality in this case corresponds to the price; strength. Thanks to their multilayer structure, the slabs boast high strength characteristics. True, plywood has approximately the same indicators. But chipboard cannot boast of strength; resistance to moisture. OSB performs well in conditions of high humidity. The same can be said about plywood. But chipboard is destroyed under its influence; environmental friendliness. The material contains synthetic resins, but in small quantities
An important point: the products are labeled indicating the level of environmental friendliness; You need to pay attention to this when purchasing. By the way, according to this indicator, OSB is considered safer than chipboard and plywood
Based on the above, we can conclude that oriented strand boards are better than their closest analogues. Now let's move on to the second group of advantages:
- light weight. The slabs weigh from 15 to 40 kilograms, which makes them easier to install on walls;
- ease of processing. OSB lends itself very well to sanding, cutting, painting and other actions;
- no need to buy special tools for installation;
- large selection of sizes. So, you can choose fairly large slabs to reduce the number of joints to a minimum.
OSB (OSB, OSB) - what it is, properties and application
OSB is a sheet finishing and building material. The given name consists of the first letters of the full name: oriented strand board. This is exactly how it is deciphered. But the name OSB and the Latin OSB are also found (sometimes they also say USB, but this is a completely different story - this is a type of port in computer technology). The Latin name is the first letters of the English name Oriented Strand Board. The translation is the same as the Russian name. And the OSB option is simply a transliteration (replacing Latin letters with Russian ones) from the English abbreviation. Both options are valid, but more correct, after all, is OSP.
General procedure for leveling floors with OSB boards
Composition and properties
OSB is made from long chips (6-9 cm) of coniferous trees, which are mixed with resins and synthetic wax. The percentage of binders is low - 5-10% of the total mass. Small chips and wood dust must be removed from raw materials for OSB. This increases the strength and flexibility of the material, but increases its cost. Therefore, more expensive material of the same brand may be more practical.
What is OSB (OSB) - a material made from wood chips with resinsIt is the binders - wax and resin - that give increased moisture resistance to the material. In the basic version, this sheet material already comes with increased moisture resistance (it tolerates moisture better than, say, moisture-resistant plywood). Waterproof OSB has virtually zero water absorption. On the one hand, this is good. This material serves as protection against moisture penetration. On the other hand, not very much. There is no way to remove moisture from the room if the humidity has become high.
Main operational characteristics of OSB
To increase strength and elasticity, the material is made multilayer. This can be seen on the cut and ends of the slab. In the outer layers, the chips are placed along the long side of the slab, in the inner layers - across. This makes it much stronger. In addition to increased strength and water resistance, the properties of OSB are as follows:
- Doesn't rot.
- Almost does not swell in water, after drying it retains its shape.
- Not affected by fungi and mold.
- It doesn't burn well.
- High degree of elasticity.
- Good sound insulation characteristics.
- Easy to cut.
- You can paint with any paint, use varnish.
- Sheets can be glued together.
All these properties, coupled with low cost, make this material popular. What may limit demand is the release of formaldehyde. This substance is contained both in the wood itself (natural content) and in the binder. For indoor use, choose materials whose formaldehyde emission class is not higher than E1. This is an absolutely safe material that can be used even for children's and medical institutions.
Classes, sizes, markings
OSB was invented in Canada and gradually appeared on the market in other countries. With low weight, the material has high strength, which makes it popular in frame construction. There are two classifications of OSB boards. According to the European EN 300 there is a division into four classes, which differ in the degree of water resistance:
- OSB 1 - for use in dry rooms. It is usually used in the production of furniture. It is not used in structures, construction and finishing (short chips, low strength).
- OSB 2 is a construction material for interior finishing in dry rooms.
- OSB 3 - can be used in construction both indoors and outdoors.
- OSB 4. Material with increased strength and moisture resistance. Suitable for outdoor use.
The third class is most often used in our country. It has a sufficient level of strength and moisture resistance for both indoor and outdoor use. If you want to make a floor from OSB, look at slabs of this class. If you prefer to have a margin of safety, use the fourth class. But it's not easy to find. Due to its high cost, it is produced infrequently.
OSB plywood - classes and their main characteristics
Sometimes you can find American oriented strand board on our market. They have a different classification. It can roughly be correlated with the European one as follows:
- Interior roughly corresponds to OSB2. Can be used for interior work in dry rooms.
- Exposure 1 - similar in characteristics to OSB3. They withstand wet conditions for a short time, so can be used in damp rooms or for exterior decoration, subject to the subsequent installation of a moisture-resistant finish.
- Exterior - an analogue of OSB4 for cladding the frame on the outside.
Everything is clear with American and Canadian OSB (OSB). If you want to make a floor from OSB, take Exposure 1. By the way, it is usually of better quality than domestic ones.
Which varnish for OSB board to choose
If you are thinking about the question of how to cover an OSB board on the floor, then you should remember that it is better to avoid oil-based varnishes. Their disadvantage is the long varnishing process and the complexity of the work. You should also not purchase turpentine varnishes, since they will last only a few months on the floor. But alcohol-based paints and varnishes are suitable for OSB. They do not give off a strong odor, which will completely disappear as the alcohol evaporates.
If you still haven’t decided for yourself which varnish to coat the OSB board on the floor, then you should pay special attention to alkyd compounds, which are excellent for this purpose. They are made on the basis of pentaphthalic or glyphthalic resins, which are soluble in organic substances
The coating will take a very long time to dry, and the second layer can only be applied 36 hours after applying the first.
Urethane varnishes are also suitable for OSB; they allow you to create a wear-resistant and durable coating on the surface. If you prefer a pure urethane varnish, then it will have average wear resistance, which the manufacturer sacrifices for the sake of increasing the elasticity of the film. Therefore, the canvases acquire the ability to withstand sudden and frequent changes in humidity and temperature.
Acrylic varnishes can also help in the process of improving OSB. However, the load on the surface must be small, and the requirements for the microclimate are very high. Therefore, installation of OSB boards on the floor, which you subsequently want to cover with acrylic varnish, should be carried out in bedrooms or other rooms where the base will not be used so intensively.
Laying technology
There is practically no difference between laying tiles on an OSB board on a wall or on the floor. First, preparatory work is carried out, then a layout scheme is selected.
On the floor
To ensure that the floor tiles look symmetrical, installation begins in the center of the room. It is located at the intersection of diagonals drawn from the corners of the room. Then the tiles for fitting are laid on a dry surface. If you end up with a lot of scraps near the walls, the center point can be moved.
The glue is applied to the prepared base with a spatula and leveled to form a thin layer. After laying the tiles, tap them with your hand or with a rubber mallet to level them horizontally, which is controlled with a bubble level.
Laying the first tilesSource izplitki.com
The next tiles are laid in the same way. To ensure that the gap between them is the same, plastic crosses are used, which are removed a day after completion of work. It should be remembered that multi-component adhesives set quite quickly, so the tiles need to be leveled within a few minutes.
On the wall
Now let's figure out whether it is possible to lay tiles on an OSB board on the wall and how to do it.
The floor covering experiences loads directed at its plane, while they do not threaten wall coverings - they almost never crack due to deflection of the base. However, under its own weight, the tile can “slide” down, especially if you do not take measures to prepare the surface to be glued.
The following measures will help avoid this:
attaching fiberglass mesh to the walls to create a reinforcing layer;
After the glue has dried, the profile is dismantledSource mebeus.com
laying no more than 5-6 rows at a time with a break in work necessary for the adhesive to set.
If the best option for laying tiles on an OSB board on the floor involves laying them out from the center of the room, then they are glued to the walls in horizontal rows from bottom to top.
The final stage is grouting the joints. It is also better to use not cement grout, but moisture-resistant, elastic grout.
Classification of particle boards (chipboards)
There are several types of particle boards, namely:
- 1st grade - characterized by a dense, uniform structure and aesthetic appearance without defects. There should be no protrusions, depressions, stains of resin or paraffin on the surface. It is also not allowed for the edges to be chipped or the corners to be chipped;
- 2nd grade - has lower quality characteristics. On the surface, edge chips are allowed within the limits of deviations in the width or length of the slab; in addition, there may be grinding defects, but not more than 10% of the entire area. Also, in comparison with the 1st grade, a large fraction of chips and bark may be present on the surface in a larger volume;
- Chipboard without grade is of the lowest quality.
Sheets come with different numbers of layers:
- Single layer;
- Double layer;
- Multilayer.
Sheets are distinguished by type of surface treatment:
- Polished;
- Unpolished;
- Laminated;
- Laminated.
To create a laminated surface, a sheet of chipboard is lined with a paper-resin film based on thermosetting polymers. First, the paper is impregnated with melamine resin, and then it is connected to the chipboard using a press. The advantages of such a coating include: a large selection of colors and a variety of textures, good resistance to heat and mechanical damage.
Sheets are divided into classes, depending on the formaldehyde content per 100 g of sawdust:
- Class E1 – less than 10 mg of formaldehyde;
- Class E2 – within 10 – 30 mg of formaldehyde.
Based on strength, hardness and water resistance, sheets are divided into grades:
- P-A - has high quality, as well as good tensile and bending strength, has a low percentage of swelling, roughness and warping;
- P-B - has lower characteristics than grade A.
For the production of sheets, different types of pressing are used:
- Flat;
- Extrusion.
There are 3 types of chipboards available with different densities:
- Small - up to 550 kg/m3;
- Average - within 550-570 kg/m3;
- High - from 750 kg/m3.
According to the type of structure, the slabs are divided into:
- Coarse-grained;
- Fine-grained.
According to the degree of water resistance, wood chip sheets are:
- Normal durability (they are mostly used);
- Increased durability (in the marking it is designated by the letter “B”) - used to create kitchen countertops, bathroom furniture or special construction tasks.
To make the chipboard waterproof, melted paraffin or paraffin emulsion is added to the chip mass before pressing. Water resistance is determined by the degree of thickness swelling of the sheets over 24 hours. For example, water resistance indicators are:
- for P-A grade chipboard - 22%;
- for P-B grade chipboard - 33%;
- for waterproof chipboard - up to 15%.
Preparing OSB for painting
First thing
Clean the surface of the slabs with a hand sander. If you plan to mount the material on the walls or ceiling in the future, it is best to prepare everything before installation.
To maintain the texture of the chipboard, use sandpaper with P120 grain. Before continuous painting, the surface is treated twice: first with coarse grain P80, and then with fine grain P200. This step helps remove the varnish from the OSB so that the paint is firmly absorbed into the base.
This simple sanding is only suitable for OSB-1 and OSB-2 panels. Higher grades will need to be treated several times as they have a thicker layer of varnish.
Now you can screw the panels to the floor in your country house or apartment. OSB boards are perfect for furnishing an apartment or country house.
Second step
involves masking the screw heads and seams between individual slabs. To do this, you can use parquet putty, sealant or elastic tape. To preserve the texture of the material, use putty after mixing it with sawdust. Try to fill only the seam without going beyond its boundaries. After the putty has dried, sand the surface with sandpaper.
Third step
, which completes the preparation of the OSB surface for painting, is a primer. Acrylic or alkyd varnish is suitable, which is mixed in a ratio of 1:10. It is better to dilute alkyd varnish with White Spirit.
You can also use Aqua Filler adhesive primer. This composition will perfectly protect the wood from paintwork.
Criterias of choice
The retail chain offers standard pox boards for renovation of premises, as well as laminated ones, which have different performance characteristics and have different effects on people’s health. When making a purchase, adhere to the following recommendations:
Pay attention to the presence of a certificate from the manufacturer, guaranteeing the environmental safety of the purchased products.
Modern technologies can ensure the production of any slabs, but there are certain sizes
- Use floor boards of the third design (OSB-3), which are most common in specialized stores and are used to form a reliable floor surface due to their high degree of protection from moisture and increased density.
- Use slabs with a thickness of 1 cm when eliminating minor defects in the concrete floor.
- Install material 1-1.5 cm thick to ensure flatness on surfaces that have significant unevenness.
- Mount products 1.5–2.5 cm thick on the joists, depending on the interval between the support bars.
- Calculate the required amount of material to complete the repair, focusing on the most common product dimensions of 1.22 x 1.44 m. Consider the size of the room and the dimensions of the base, focusing on the minimum amount of possible waste.
- Choose a texture and color scheme by purchasing laminated boards, which will allow you to fit harmoniously into the interior.
Procurement planning
Your work on the varnish coating begins mentally when you purchase all the materials. In the first place is the choice of the desired OSB board, in second place is the varnish. In general, you need the following materials:
- OSB boards
- Sandpaper
- Optional colored stain or paint
- High quality brushes or rollers
- Varnish
Buying slabs
It is important that you buy already sanded OSB boards on the construction market. Panels marked as untreated are not suitable for home varnishing. This material has slight unevenness caused by excess glue and resin. Sanding such slabs is extremely difficult and tedious. After all, you run the risk of the surface not being smooth. In addition, the varnish on such slabs does not adhere very well.
Good OSB boards have steam and sound insulation on the inside, and are equipped with a groove and a lock. With such a slab, after varnishing, you will get a sealed, perfectly flat floor, which is not only visually impressive, but also optimizes the microclimate in living spaces.
An example of a good varnish
In your endeavors you should expect the following amount of work. Varnishing takes at least one hour, then drying must take place - it will take from 12 hours. The next step is to lightly sand the surface and apply another thin coat of varnish, which can be applied with a brush or roller.
The surface will become completely suitable for loads after 10 days. Until then, you should wait and under no circumstances install heavy items or furniture. A good varnish does not contain fragrances or other unpleasant odors. A 3 liter can of varnish is enough to cover an area of 20 m2 and should provide long-term good protection for OSB panels.
If the varnish does not contain any strong odors, this means that it does not contain harmful solvents, which are generally considered to be a risk to health and the environment.
Briefly about the material
Oriented strand board (OSB) consists of 90% natural wood in the form of large chips.
Crushed wood chips are joined together by gluing with different types of resins, polymers and adhesives. The result is a dense and hard material. But, as you know, natural wood is afraid of moisture and can swell under its influence. To protect the boards, they are impregnated with various chemical impregnations. The marking of the slabs depends on the type of impregnation used. Surely you noticed that the abbreviation OSB also has a number in the name. What does it mean?
- OSB-1 – has a minimum level of moisture-proof impregnations in its composition, therefore it is suitable for use only in dry, heated rooms.
- OSB-1 can withstand only short-term and minor exposure to moisture;
- OSB-2 – intended for finishing indoors with an average level of humidity;
- OSB-3 – able to withstand high levels of humidity, and even short-term wetness;
- OSB-4 is the most moisture-resistant category of material. Recommended for outdoor use.