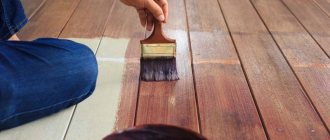
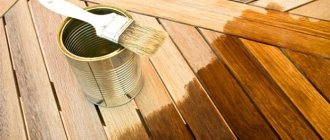
Painting wooden surfaces is one of the most popular wood treatments. Using paint, you can create a unique interior design without spending a lot of money and effort. You can even paint a wooden surface yourself, which is what owners who are planning to renovate their home most often do. In order for the wood not only to look good after processing, but also to be in excellent condition for a long time, you need to know how to paint wood correctly and what kind of paint is needed for this.
What types of wood paints are there?
To treat indoor surfaces, you can use one of 4 types of paints: acrylic, alkyd, water-dispersion and polyurethane. Any of the paints must contain a pigment, a base that binds all the components and forms a surface film, various fillers for the shine of the surface and its strength, as well as additives with which the paint dries faster and makes the surface resistant to fire.
- Acrylic paint is distinguished by its low price, which at the same time does not greatly affect the quality of the composition. It is also quite practical, which is confirmed in conditions of sudden temperature changes and frequent exposure to sunlight. In addition, the paint prevents the wood from rotting and crumbling. Thanks to the dense consistency of the paint, which is evenly distributed over the surface, it creates a coating that is resistant to mechanical stress. Acrylic-based paints dry fairly quickly, which is also a significant advantage.
- Alkyd paint is equally successfully used for both interior and exterior work. It consists of alkyd varnish, solvent, coloring additives and fillers. For more than 4 years, alkyd paint has protected the surface from the effects of various negative factors. It can withstand both very low and very high temperatures. Alkyd enamel also has good water resistance and high resistance to mechanical damage. It takes a long time to dry – 2-3 days. It's inexpensive.
- Water-based paint with water as a thinner is an environmentally friendly option for the home. This paint is sold in the form of a paste with a liquid consistency, which must be diluted with a certain amount of water immediately before use. When drying, the water from the paint evaporates, as a result of which the paint hardens and becomes resistant to influencing factors. This paint dries quickly - it only takes a few hours, and it has no smell, which is a huge plus for rooms. It has good water resistance and resistance to mechanical stress. Can last as long as 15 years. Easy to use and relatively inexpensive.
- Polyurethane paint has a good consistency, which allows it to adhere well to a wooden surface and form a surface with high protective properties. This paint is highly resistant to various external factors. Non-toxic, non-flammable. It has a huge variety of colors and shades.
Which paint to choose
Knowing what paints exist for treating wooden surfaces makes it easier to choose. Based on the distinctive characteristics, you can determine which one is more suitable in your case. But if you have not yet figured out which paint is suitable in your case, then the following tips will help you.
- If you are faced with the task of adding color to interior doors, floors, and baseboards, then it is best to use water-dispersion paint.
- To hide unevenness, for example, when finishing a house made of timber, it is best to use acrylic paint.
- When treating walls, floors, doors and other wooden elements in a children's room, it is best to give preference to acrylic paints with the ability to easily wash them off, as well as with a note about the environmental friendliness of the composition.
- Polyurethane paint can be used to paint floors and stairs.
- For rooms with high humidity, it is worth using compounds with an antifungal effect, for example, acrylic paint.
- Alkyd paint has a strong odor, so it is rarely used for interior work. But it perfectly levels surfaces.
Acrylic paint stain | gradient coloring
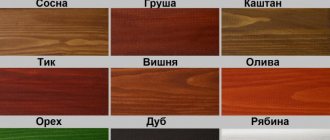
Classic store-bought stains most often match the colors of valuable tree species.
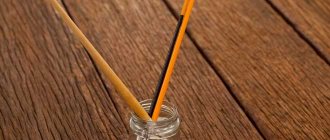
But sometimes you want to tint the wood in some non-standard color, and at the same time preserve its texture. In this case, you can make the stain yourself using acrylic paints. I'll do a gradient again just to show off a few colors at once. I take white, Turkish green and manganese blue. I dilute them with water until liquid.
If the paint is thick, like mine, then rub it well so that there are no lumps left. As in the case of ordinary stain, I first wet the board with clean water, and after drying, I sand the raised fibers. Then I wet the surface again with water and apply colors one by one, making smooth transitions between them. Can be applied in one or several layers.
Finally, after drying, I lightly sand the board, exposing the natural color of the wood in places, this also gives an interesting effect. You can create a stain of any color!
Rating of wood paints for interior work
Tikkurila is a Finnish company that produces impeccable quality compounds for treating interior and exterior coatings.
Tikkurila Empire base is a paint that is suitable for painting wooden and metal surfaces, as well as for finishing furniture. Alkyd based. Packaged in cans of 0.255 l, 0.9 l, 2.7 l and 9 l. The paint has many advantages and is ideal for interior work. It has a semi-matte effect and a slight shine. The price for a 0.9 liter jar is 700-800 rubles.
- easy to use;
- does not flow;
- does not splash;
- the smell is weak, barely noticeable;
- little consumption;
- can purchase any color from the catalog;
- hides flaws;
- dries in 3 hours.
– another high-quality paint for wooden surfaces. The price for a 0.9 liter jar is about 700 rubles.
- fits easily;
- no leaks;
- dries in 3-4 hours;
- large range of colors;
- dense, one layer is enough.
- has a moderate odor.
About the features of the material - in the video:
is a Finnish company that cares not only about the quality of its products, but also about their environmental friendliness. The company's advanced technologies allow it to succeed in this matter.
TEX products
TEX materials are suitable for all types of wood. We suggest purchasing the following formulations.
Enamel for wood and metal “Profi” . Great for interior and exterior painting, painting furniture, houses and so on. Dust drying time is approximately 6–8 hours. The coating will be durable (up to 8 years). The composition itself has virtually no odor during operation.
Heavy-duty parquet ECO-VARNISH BIOTEKS. The material is water-borne and wear-resistant. It has an acrylic base. The furniture product can be fully used 12 hours after painting. If you follow the manufacturer's recommendations, consumption will be economical.
The choice of coating for pine and its application should be treated very carefully, since this furniture is sensitive to mechanical stress and other environmental factors. However, with high-quality processing, furniture made from this wood can last for many years. If you have questions on this topic, you can contact our specialist. He will help you choose the best option and also explain the nuances of the work.
How to paint a wooden surface while maintaining texture
Buildings and structures made of wood need additional protection. They can be negatively affected by the environment and harmful organisms. The clear finish highlights the natural grain of the wood, which was not as prominent. Painting wood while maintaining the texture creates a layer that acts as a protective barrier against bugs, mold and mildew.
In addition, certain types of paints and the presence of ordinary tools can create a unique texture for every taste. This process does not require large expenses and will help give a second life to an old item without the services of professionals.
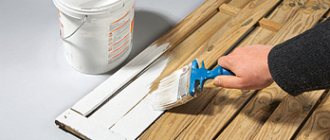
Preparing the basis
Before you paint the lining white, you will have to prepare it. If you miss an important step in this process, the result will be below average, the paint may lie unevenly, the boards may soon begin to rot, etc. A step-by-step examination of the process will help you understand the nuances of this work and find out all the technical aspects of finishing with clapboard.
Cleaning the panels
First of all, you need to start by cleaning the surface of the panels from various types of contaminants. You can use sandpaper in this process. You should walk in a circular motion over the entire surface, from all sides. All irregularities and minor deformations will be removed in this way.
Panel surface treatment
Today, the painting process is not difficult, because there are special bleaching substances that will help you quickly and easily paint the lining with your own hands.
If there is already a layer of paint on the surface, then you should check how well it adheres. If there are any deformations or the paint has simply begun to peel, it is better to completely remove its layer from the panels.
Tip: If the paint sticks well enough, simply wash the surface with a soda solution (2%).
Apply protection to the surface
- If the process of processing the lining is completed, we proceed to applying protective compounds to it. First you need to putty the surface, the instructions will help you with this;
Important! For wooden lining, it is better to use a plastic spatula so that the surface remains undamaged during processing.
- After puttying, we treat the panels with drying oil. It will protect the material from negative chemical influences. To maximize the result, you can also add red lead to it;
- After the material has completely dried, we move on to the primer. This process will fix the putty and protect the material from changes in temperature in the room. The correct application of the primer layer can be seen in the video.
Advice! When choosing a primer, check the possibility of using a composition for painting.
Priming the lining
The antiseptic composition is applied to the surface only after the primer layer has completely dried. Antiseptic substances help protect the lining from mold, moisture, as well as the appearance of fungus on their surface over time.
Two in one: beautiful appearance and protective barrier
To give wooden surfaces a brighter appearance and increase their service life, the following types of treatments are used:
- Glazing is the application of a colorless coating.
- Varnishing.
- Waxing.
- Polishing.
- Stain treatment.
Transparent paints are usually used to preserve texture on wooden surfaces. Their composition includes various oils, synthetics, natural ingredients and wax. Insects and pests can damage wood. To protect it, preparations are added to the composition of the treated product, which perform both a preventive role and rid the wood of existing pests.
With the development of the painting industry, new types of multifunctional paints have appeared, which include:
- antiseptics;
- light stabilizers that save the tree from direct sunlight;
- oils and other trace elements.
All additives are created for biological protection, water resistance and preservation of natural shade. Thixotropy is one of the properties of modern paints, which allows you to carry out work without smudges and with the necessary accuracy.
Multi-layer painting with a rubber spatula
I take the next primed board.
I paint it in a color that will show through from under the others. I have this purple-red one from the Acrylic-Art line. Pay attention when applied in one layer - it has such a delicate pink undertone, and when you apply subsequent layers it darkens to a noble brown! I love using this color in painting!
Then I put the following colors on a rubber spatula, maybe two at a time. I take light cold cobalt green, dark cobalt and manganese blue. It is better to wet the surface first, then the colors will float into each other more smoothly.
As a final chord I add a bright note of lemon color. Since the work is done in the raw, the colors float into each other quite interestingly.
How to choose the right paint?
Before buying paint, you need to know that you need antiseptic impregnation of wood into the soil. This is done to ensure even application of the coating and many years of service without peeling.
The required amount of material must be calculated based on the area of the treated area. The instructions indicate paint consumption per square meter. We multiply the resulting area by the consumption - the required amount of material. At the end, you need to take into account the number of layers and multiply the previously obtained value by it.
Recommendation: it is better to purchase paint in excess. This will be useful for future repairs (full or partial). Every year new types of products are released, the shades of which often do not match. After some time, the paint used may go out of production altogether.
Paints are generally classified into three types:
- Oily. At the moment, only domestic companies produce it. The fundamental components are toxic drying oils that have a pungent odor and form smudges. The cost is much higher than modern competitors due to the raw materials used. Drying time is one day. It is recommended to work in a cool, dry climate. A significant disadvantage is that during future repairs, you will have to use only oil paint or remove it to the base. There are no second layers on this type of paint.
- Alkyd. In construction it appeared before acrylic. High demand is ensured due to affordable prices. At the end of painting, a thin film with hydrophobic properties is formed. It is not used for so long, since due to rapid drying (8-12 hours) it does not penetrate into the deep layers of wood. It is best used for wooden elements that need protection from moisture. In addition, the material is famous for its good resistance to frost. Recommendation: painting with alkyd paints should only be done on a dry surface, otherwise the chance of bubbles and flaking increases.
- Acrylic. The most favorite paint in European countries. The percentage of erected buildings painted with this type is actively moving towards the figure of 100. The material is environmentally friendly. The main component is water, and the bonds are supported by acrylates. Acrylic paint has no unpleasant odor. It has a good effect on wood, which at the same time “breathes” and is protected from moisture. There is a large selection of shades. Working with the material is not particularly difficult, and it dries quickly. The service life is from 5 to 10 years.
Recommendation: Storing acrylic paint at subzero temperatures negatively affects its protective properties.
Care will help you avoid many mistakes.
Very often on the Internet you can find negative reviews about the painting compounds used. Some complain about significantly exceeded drying time, and manufacturers respond by assuring that this cannot happen. It's all in the instructions! It needs to be carefully studied and information extracted that will save you from unreasonable spending.
An example is special waxes that need to be diluted in water and used in dry rooms. Mainly for processing doors, ceilings and panels. The second layer is applied every other day. Rubbing the surface to add shine is allowed only after a week. By purchasing a different brand of material, you can save time twice as much.
Wood paints can be of three types
If the surface being treated is a valuable type of wood, then dryness is strictly contraindicated. Therefore, you need to buy the appropriate paint or wax. Sometimes it’s a matter of inattentive reading of the instructions, and sometimes it’s a simple lack of knowledge of the materials.
Advantages of painting wood while maintaining texture:
- Destruction of pests that negatively affect the product.
- Prevention of the development of mold, fungi and rot.
- Painting prevents the development of cracks in the wood.
- Protection from moisture.
- Safety for people living in the house.
- Nice appearance.
The downside is that the coatings are not very resistant to aggressive liquids and fire. In most cases the material is flammable. But there are brands that do not have these disadvantages. The question is the price, which is always high for higher quality materials.
How to paint wood bleached: advice from a paint shop technologist
Natural wood is again becoming in demand; it is increasingly found not only in private homes, but also in the interior of city apartments. Wood is used to make durable, strong lumber, which perfectly helps maintain heat and optimal humidity levels in the room.
But wood requires special care, which consists of processing the material and coating with paint and varnish products. In addition, painting will get rid of boring color and allow you to quickly change the design of the room. One of the trendy solutions is painting with the effect of “bleached oak” or “frost”. A specialist from our company, technologist Alexey, talks about how to paint wood bleached.
If bleached wood will be used in a Scandinavian or rustic style, then it is advisable during the staining process to create not a dense layer covering the wood, but to favorably emphasize the structure of the wood. The composition is applied twice, but in a very thin layer!
Photo 1. Bleached planken
For example, you can use Rammers Wohnraum lasur oil with wax or very good wood oils from GNature. With these products you will get a translucent finish, even if you apply two coats to achieve the whitest shade possible. You can coat it with oil-wax once, in which case the wood texture will be visible even more clearly.
Photo 2. Wohnraum-lasur
A very interesting fact about oil: absorbing well into soft layers of wood and poorly into hard ones, the oil creates a contrast of wood texture, which looks simply incredibly beautiful and natural.
Photo 3. White lining
If the task is how to paint bleached wood in a dense layer, then we recommend giving preference to water-based paint, for example, Remmers Deckfarbe. It will create a film on the material through which the structure of the wood will not be visible.
Photo 4. Deckfarbe Remmers
There is a “but” here, and we, as professionals in our field, are simply obliged to warn you about it. This “BUT” is that only knotless wood is suitable for painting in perfectly white COVERING tones, otherwise the knots will appear in a short time as ugly yellow spots.
Photo 5. Remmers insulating primer
Remember: NOT ONE INSULATING PRIMER protects against the appearance of yellow spots in the area of knots on white opaque paint.
Photo 6. Lining painted white
Is there a way out? Yes. Firstly, these are whitish glaze paints (which do not cover the texture), and secondly, these are various shades (ivory, etc.) in covering, light colors.
One-step craquelure
I paint the primed wood gold. One-step crackle p
is an imitation of cracks in paint that appear over time due to changes in temperature and humidity. The first color is the one that will remain visible through the cracks; you can come up with many interesting options, make it darker or lighter than the main one, use metallics or mother-of-pearl. After the paint has dried, a thick layer of craquelure varnish is applied to the surface.
I leave it to dry until it is slightly sticky to the touch. I take the red color, because I really love the noble combination of red and gold, and with a wide flat brush I begin to paint the entire board.
Very important!
You can apply paint over craquelure varnish only once, so it is important that the paint immediately has sufficient coverage and a well-spreadable consistency. If you try to apply a second layer of paint, it will simply start to roll off unsightly. Let's paint joint to joint! As you can see, cracks appear immediately. After the paint has dried, the craquelure must be covered with shellac varnish.
What paint do we use?
Traditionally, whitewashing was used as a cheap and easy way to protect wood (lime has antibacterial properties) and give it a neat appearance. Nowadays, when we recreate a whitewash, it is usually done with any water- or acrylic-based white paint for interior or exterior work (which is what we will do in the methods described here).
Water-based or acrylic paints without odor!! and can be used indoors
Basic requirements for interior paints
People spend most of their time in living rooms and offices. Therefore, special requirements are imposed on compositions for finishing work in premises. Whether the wood paint for interior work matches them directly determines how comfortable and safe it will be for a person to be in a given space and how easy and convenient it is to care for painted surfaces.
When choosing interior paint, you should pay attention to the following technical characteristics:
Wood and necessary materials:
Different painting methods will show how much of a difference the appearance of wood can make, whether it's a smooth pine board or an unsanded pallet . All three methods are very easy, fast and with wonderful results!
- White water-based paint for interior and exterior use
- Paint mixing container
- Rag
- Brush
- Scraper or piece of hard plastic for method #2
- Candle for method No. 3
Brushed firing and gray wood
Firing with brushing requires a gas burner, metal brushes and compliance with fire safety regulations.
Don't be afraid to burn the wood thoroughly if you're doing it for the first time. Usually, beginners do a very weak firing, achieving a barely brown color. When firing, we burn soft wood fibers so that we can then easily comb them out and reveal the relief texture. To do this, after firing, we moisten the board with water so that dust does not fly in all directions, take metal brushes and comb our wood with pressure. This technique is often called “Barn Board” - this is the attempt to age a board to the state of a board left over from a dismantled old barn. Any means will work here: you can use a nail puller or a hammer to leave deep dents, or use a chisel to mark and widen cracks. An awl or nail is suitable for creating round holes. Using a drill and a drill bit, you can create paths for bark beetles. Use a saw to mark some old cuts.
You can hammer in a couple of nails and oxidize their heads with acid, but I didn’t. A new board will first of all be distinguished by a smooth cut, so for authenticity it’s worth adding some unevenness to it, you can even cut out some pieces..
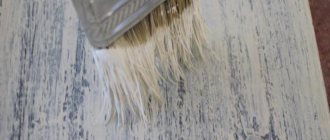
After all these terrible abuses of the board, I take a torch and once again burn through the newly formed cracks and potholes. I comb out the burnt wood again with a wire brush. Next, I sweep away the remaining dust with a brush and take white paint. Over time, the tree loses its color, fades in the sun, and becomes clogged with dust. To imitate such gray wood, you need to patina it. I apply thinly diluted white paint and then immediately wipe it off with a wet cloth. I dry it. The paint melts right away. I apply the next layer.
It is important
not to overdo it with white!
Wash the paint thoroughly after application. The wood should appear slightly dusty. The final step is to lightly sand the wood with sandpaper.
#1: Painting with a rag
Many types of wood sold in hardware stores are already sanded and have a smooth surface (such as boards or sheets of plywood), but there are also unfinished boards.
This whitewashing method is suitable for both smooth and unsanded wood. It creates a neat and refreshing look, great for modern, farmhouse or Scandinavian style.
White paint makes the wood more refined, while leaving the opportunity to see the structure of the boards and their natural pattern.
How to do:
- First, dilute the white paint with a special solvent.
- After this, dip a rag into the resulting paint mixture and wipe it over the wooden surface, making an even layer.
Apply 1-2 more coats of paint if you want the color to look deeper white. Let the paint dry after each new coat.
Of course, you can use a brush, but it leaves strokes, while a rag makes the surface perfectly smooth.
Stain | gradient toning
Stain is the easiest way to tint wood while still keeping the wood grain showing through.
The first stage in staining
- wetting the wood with clean water. After drying, the wood fibers rise and must be sanded off with fine-grained sandpaper.
Second phase
- then the stain is applied either in one layer or in several, depending on how dark the tone you need. I decided to show gradient coloring with three stains, it turns out to be a smooth transition. You need to work quickly with the brush and not let the stain dry out so that a sharp border does not form at the transition point. I decided to deepen the color and applied another layer.
No. 2 Paint filling method
This method works best on unsanded wood with a slightly rough surface (such as a wooden fence). With its help, wood can be given a rustic look and an antique effect.
- Clean the wood with soapy water and a brush and leave to dry.
- If your paint is too rich, thin it with thinner.
- After this, pour some paint onto the wood surface, and then take a scraper and spread the paint over the wood.
On an unsanded, that is, not completely flat, wooden surface, the paint layer will not be the same everywhere. A little more paint will flow along the depressions and less on the bulges, that is, in some places the white color will be more saturated, and in others more transparent, which will create the effect of antiquity.
You can see the result of painting a wall using this method above.
Brushed firing and metallic patina (dry brush)
I have another board with firing and brushing. By combining firing, brushing and dry brushing, you can achieve different visual effects, lightening the texture of the wood or, conversely, darkening it. And I want to show the metallic patina in this example. I paint the board deep black, using velvet black from the Acrylic De Luxe line.
Metallic paints look best and shimmer on dark surfaces. Next, I take Decolor metallic paints and work using the dry brush technique: I put paint on a brush (it is better to use flat, coarse bristles), wipe off the excess on a napkin and begin painting in the direction of the wood grain.
It is important not to overdo it and stop in time. The result is an elegant metallized coating that emphasizes the wood grain.
No. 3 Painting method using a candle
Worn white paint, through which in some places you can see the wood itself in its natural color, is wonderful when restoring antique furniture or creating new ones, but in the same style.
In the photo below you can see an example of such painting of wood with wonderful designer pens laid out on it.
Instructions:
- Take a clean wooden board (no matter sanded or not) and a candle. Rub the candles onto the surface of the wood in several places. You need to press quite hard on the candle so that a clear trace of wax or paraffin remains on the wood.
- After this, paint the wood with white paint and let it dry completely.
- Wipe the dry painted surface with a rag, applying some pressure. In those places where there was a trace of a candle, the paint will come off the surface.
Below is an example of a white wood floor painted using this method. It is worth noting that when using this, it is better to apply a layer of protective varnish on top of the paint for more durable use.
Toning with varnishes
Another way to give wood a noble shade is to use varnishes.
It is important to sand the wood thoroughly before applying. Shellac varnishes are used in woodworking; they give the wood pleasant golden shades. TAIR has two types in its assortment: shellac alcohol and clarified alcohol. The alcohol varnish in the jar looks very dark, almost like bitumen, but in use it is slightly more golden than the lightened varnish. I show them on one board. I really like the result.
But since I started talking about bitumen, I’ll show that too. The use of bitumen varnish is already in the area of aging. I apply varnish along the edges and the wood immediately looks as if it has been burned. I apply bitumen varnish using a sponge. Bitumen varnish can be removed with white spirit, so if you accidentally drop more bitumen than necessary, it can be easily removed from a varnished or painted surface.
You can apply bitumen varnish directly to wood, but it is very actively absorbed into the wood and cannot be wiped off. Also note that bitumen varnish is very glossy and sticky, it is recommended to cover it with shellac varnish on top. Brushes after bitumen and shellac varnish should be washed in solvents.