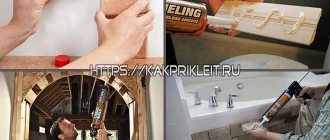
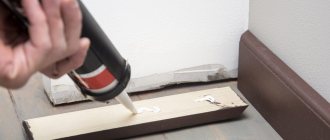
Good afternoon to everyone who wants to quickly and easily put their kitchen walls in order - and most importantly, inexpensively. One of the most convenient ways to avoid excess dust and dirt is to glue the apron to liquid nails.
Liquid nails are a versatile construction adhesive that can withstand heavy loads. They can be used to glue almost anything, with one condition: a dry and grease-free surface. Moreover, the plane does not matter - wall, floor or ceiling.
Naturally, craftsmen have been using liquid nails quite successfully for a long time to install various finishing materials on kitchen aprons.
What to glue a kitchen apron on - choice of glue
Tile. Until relatively recently, tiles were the only option when choosing a material for finishing a kitchen apron. And today, ceramic tiles are very popular.
As for choosing an adhesive for installing tiles, everything is quite simple - any universal tile adhesive will do.
The following dry mixtures enjoy a good reputation among finishers:
All of the listed brands of glue are a dry mixture based on cement with special additives; they are suitable for installing ceramic tiles to various substrates.
To prepare the working solution, simply add the amount of water specified by the manufacturer to the dry powder and mix thoroughly. Mixtures such as IVSIL Mosaik or Bergauf Mosaik are suitable for laying mosaic and transparent tiles. They are white in color, so they are suitable even for difficult materials.
Plastic and MDF. A wall panel made of plastic or MDF will cost much less than tiles, and there will be much less dirty work if you choose this material.
Installation of a plastic apron is possible in two ways: adhesive and using special fasteners. The adhesive (frameless) method is attractive because it hides traces of installation - the panel remains intact and monolithic.
However, glue a plastic apron to a perfectly flat wall.
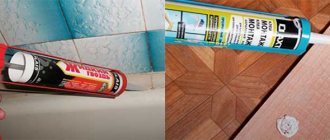
What glue should I use to glue an apron made of plastic panels or MDF? Liquid nails will be a universal adhesive for installing plastic to any substrate (concrete, plasterboard, wood, etc.).
They are based on two types: neoprene (neoprene is a synthetic rubber) and acrylic (water-based). The former have a pungent odor and are quite toxic; acrylic ones are safe from an environmental point of view, but are more sensitive to water and temperature changes.
For finishing the kitchen apron with plastic wall panels, as well as MDF panels, according to reviews from professional finishers, glue brands such as:
Types of decorative coating for MDF panels
MDF is made by pressing wood chips with an adhesive composition. The resulting slab is subjected to further decorative finishing using various technologies. The result is: laminated, painted, laminated, veneered MDF boards.
Laminated coating is made by treating panels with PVC film or melamine paper. Laminated MDF panels can withstand various adverse influences without damage. They are used in furniture production, including for making kitchen facades.
MDF panels are also painted. And then they make furniture for bathrooms or kitchens. However, painted panels have a significant drawback: such a coating does not withstand temperature and mechanical factors.
Gluing plastic to a panel is called laminating. Such a panel becomes more moisture-resistant, wear-resistant and temperature-resistant. Due to their practicality, such panels are often used to make kitchen splashbacks and other kitchen elements.
By veneering MDF panels, they acquire the appearance of natural wood.
There is another way to decorate MDF panels. This is the application of various drawings and photographs to the surface using photo printing. Such panels are called skinali. Initially they were made of glass. Skinals are very popular and are used to decorate kitchen aprons.
How to glue a plastic kitchen apron with your own hands
The installation process itself is not difficult, but requires care.
The most difficult thing about working with a solid plastic panel is adjusting it to the size of the kitchen.
At the marking stage, you should take several horizontal measurements, since walls are not always perfectly level.
How to properly glue an apron?
The process consists of several successive stages:
VIDEO INSTRUCTION
We glue an MDF apron in the kitchen
This procedure differs little from working with a plastic panel; it also consists of three stages:
VIDEO INSTRUCTION
Useful tips
Do not try to glue a plastic panel or MDF apron the first time, as this is not always possible. Place the panel against the wall, then lightly tap it and remove it.
After pausing for a few minutes, you can begin the final gluing. In most cases, it is enough to firmly press the surfaces at the joints once to achieve rapid setting of the adhesive.
Visible parts of the edge of the apron should be additionally refined with MDF corners of a suitable color.
Source
How to fix a plastic apron in the kitchen yourself: overview of installation options
Before installing a plastic apron in the kitchen, you should understand the process and types of installation, and choose the method of joining to the wall. This is important to do so that during operation the structure does not change shape, move away or lose its presentable appearance.
The apron protects the surface around the stove and first you need to understand how to attach a plastic apron in the kitchen.
Features of a plastic kitchen apron
During the cooking process, splashes of water, fat, and pieces of food fly from the stove and sink. This spoils the overall appearance of the walls. To avoid such troubles, install a special apron along the working surface.
It can be made of tiles, glass or plastic. The latter option allows you to quickly and easily change the look of your kitchen and freshen it up.
Advantages
A plastic apron has a number of advantages, which makes it attractive compared to other materials.
Advantages and disadvantages of plastic panels
Typically, plastic products in this context are compared to tiles. And if you do not take PVC aprons into account, ceramics lose due to the presence of the following advantages in the opponent:
- The price implies not only the purchase of the panel, but also installation costs;
- Resistance to the formation of fungus, fire, tangible physical shock, and the negative effects of chemicals;
- Low weight of the product and integrity of the canvas, facilitating easier alignment and fastening during the installation process;
- An environmentally friendly attribute that does not cause harm to humans and does not harm the environment.
In other words, in terms of price-quality ratio, plastic panels are more profitable. But, in fairness, there are also disadvantages: firstly, the material is not durable, therefore, with stable exposure to heat (a working gas or electric stove) or excessively frequent washing, the properties of the apron are reduced, they begin to scratch and fade; secondly, the appearance of a crack from a serious impact provokes the replacement of the entire canvas, unlike ceramic tiles, where only a fragment is changed.
Therefore, the choice depends on the frequency and scale of culinary events, as well as the size of the wallet and the desire to take careful care of the decoration.
Main types
There are only 3 main types of plastic aprons. They differ in performance characteristics.
From ABS
These are flexible panels that are made 600 mm wide, 1.5 or 2 mm thick, 2 or 3 m long. The sheets are made of polymer material, the abbreviation stands for: A - acrylonitrile, B - butadiene, C - styrene.
Most often, the design is applied to the panels using photo printing. Firms either provide their own design options or adapt to customers. At the individual request of the client, a drawing can be made and the size of the panel selected.
Advantages of ABS sheets:
Acrylic glass
This material looks just like glass. Such panels come in glossy and matte. The sheets are flexible and smooth. Most often, such aprons are sold ready-made.
Images are applied using photo printing on the inside. The dimensions are standard: width is 600 mm, thickness – 3 or 4 mm, length – 2 or 3 m.
Advantages of an acrylic glass apron:
PVC
These are sheets of their polyvinyl chloride. This option is the most economical. The products are produced in 2 formats: slatted and sheet. Panels are most often sold in sizes 950*480*3 mm. Rack material can be 3000*100*10 mm, 3000*195*12 mm, etc. PVC apron can be glossy or matte. The design is applied by photo printing and varnished on top.
Disadvantages of a PVC apron:
ABS work wall
There are already more advantages here. This coating costs the same as a tile, but is still cheaper than heat-resistant glass. Here are the pros and cons of ABS aprons:
| Advantages of ABS aprons | Disadvantages of ABS aprons |
| Weighs lighter than glass | The plastic has a yellowish tint |
| Abrasion resistant | Will not withstand an iron brush, only light abrasives |
| Resistant to chemicals | If PVC panels cannot withstand even ammonia, then these aprons are only afraid of acetone and solvents, which is also not a plus |
| Eco-friendly | Fades quickly in light |
| Wide variety of textures | There are not many ready-made drawings; more often you have to make an individual order, which also adds to the cost |
Basic fastening methods
The main advantage of plastic aprons is quick, easy installation with your own hands.
On the guides
The first method of fastening is using guides. It will be appropriate if the panels are planned to be replaced after some time. Guides are special metal slats. They are attached to the wall horizontally using self-tapping screws. The sheets are simply inserted into the guides, creating a “rails” effect. The panels can be easily moved.
For self-tapping screws
This method implies that the panel is attached to the wall for a long time. Plastic is a thin and flexible material, so it is easy to drill through. Then the screws can be hidden with special plugs. But it is important to take into account that the wall must be flat. In addition, there will be a distance between it and the panel, i.e. the connection will not be tight. This can be used to hide wiring.
Fastening the kitchen apron with self-tapping screws.
On the sheathing
Sometimes, to save time, sheets are attached to the rough wall without leveling the surface. In this case, lathing will help. It is a system of metal or wooden bars that are attached in a vertical and horizontal plane. Thanks to this, the structure is rigid and stable.
The bars are attached to the wall with self-tapping screws. First you need to line up the slats along the contour, observing the dimensions of the sheet, then install horizontal and vertical slats. After this, the panels are again attached using self-tapping screws to the sheathing. This method also does not require frequent replacement of the apron.
Lathing for attaching a kitchen apron.
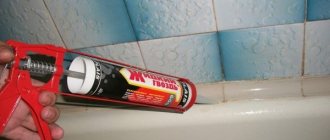
On glue
This method is the fastest, simplest, and most understandable. Use special glue or liquid nails. The composition is applied in thin strips to the wall, then the apron is pressed tightly. The caveat is that the surface must be flat. No bumps, dents or traces of old finishing are allowed. In addition, it is important to use high-quality glue so that the sheets do not fall off.
Attaching a kitchen apron with glue.
Installation of panels: using skirting boards and more
There are two ways to independently attach a wall panel in the kitchen.
In this case, the MDF kitchen apron will not wrap its edges behind the upper cabinets and countertop. Do this:
- Move the set close to the wall and mark the places for attaching the baseboards. The walls must be prepared - cleaned, puttied and primed.
- Measure the resulting distance from the bottom of the cabinet to the countertop and place it on MDF kitchen panels. Cut off the resulting piece.
- A manual gun for liquid nails is charged with a tube of the composition and applied around the perimeter of the wall and the cut piece. It is advisable to spread the glue with a spatula if the MDF board is thin.
- Immediately strengthen the baseboards. Liquid nails for wood or plastic are applied to them, depending on the texture, and pressed against the edges of the installed apron.
The good thing about this method is that the installation is carried out without removing the furniture from the kitchen. The work takes several hours. Install sockets and other components, perhaps a day after the MDF apron was attached to the kitchen.
A glass apron looks perfect in a kitchen with furniture
For self-tapping screws
The panel is mounted on a frame made of metal profiles or wooden slats. In this case, the set is removed from the kitchen - it will interfere. The wall is prepared in a similar way as described above. Then, checking the level, install the frame box. The thickness of the profile is no more than 0.5 cm (the panel parameter is also taken into account), otherwise it will not be possible to install an MDF apron in the kitchen under the cabinets and countertops.
The formed frame of wooden planks is subject to mandatory antiseptic treatment - a humid environment can reach the natural material and develop favorable conditions for the growth of mold. Therefore, the choice of a metal profile is dictated by necessity.
How to attach correctly:
A measured MDF board is drilled for inserting self-tapping screws. If you screw them in right away, there is a risk of getting chips around the fastening - this is noticeable on a dark panel. Then they begin to symmetrically attach the laminate to the wall, gradually tightening the screws. The work takes a long time, however, the durability of the kitchen apron is beyond doubt.
Step-by-step DIY installation instructions
Installation on your own will not take much time, and you will need the simplest tools.
List of required materials and tools
A general list of what may be required in the work:
Preparation
At the initial stage, you need to perform preparatory work:
Installation of the structure
First you need to calculate the dimensions of the sheet that will be used. They directly depend on the design of the kitchen, the location of the hood, etc. It is necessary to measure all distances: from the edges, between sockets, to devices.
The apron should extend beyond the tabletop by 2-3 cm. You also need to cut holes for the sockets, this is done with a stationery knife. Further actions depend on the chosen mounting method.
When gluing the apron, the algorithm is as follows:
Installation algorithm using self-tapping screws:
Recommendations for selection
It is recommended to select and purchase materials for the apron after the renovation and installation of the kitchen unit has been completed. This will help to avoid a stylistic contradiction between the furniture and such an important functional and decorative element as the apron.
The variety of textures and colors opens up a lot of scope for choosing various PVC options for the kitchen. Panels and sheets with the texture of wood or stone are in demand. You can find PVC in any shade that matches the color of the kitchen set.
You also need to keep in mind the geometric features of PVC. During installation, the apron must completely isolate the actual wall of the room from moisture and possible contamination. The PVC apron should go under the wall cabinets and reach the level of the countertop. Therefore, you need to immediately decide which panel configuration to choose, so that they are easier to install and cost less money to purchase.
The edges of the PVC panels are protected with a special border. This gives the structure completeness and does not allow moisture and other “consequences” of cooking to penetrate inside. You also need to worry about purchasing it right away.
Detailed instructions with video and photos on the topic: how to glue a kitchen apron?
After purchasing a panel based on MDF, HDF, plastic or polycarbonate, a reasonable question arises: how to properly attach a kitchen apron?
There are two most common fastening methods: using liquid nails or self-tapping screws.
Installation of adhesive-based apron
Fasteners based on liquid nails seem simpler and less troublesome, since there is no need to prepare walls and drill holes. Therefore, most buyers choose this method. But there are a few caveats here:
The most important thing is to choose the right adhesive composition. You cannot use glue if it contains organic solvents: methyl acetate, acetone, ethyl acetate and other aggressive components, as well as glue with a low dry residue. When using such glue, the organic component will “eat” the inner and outer surface of the apron, it will become covered with terrible stains and will become completely unusable.
We recommend using Titan Wild universal
, which is also in our catalog. It reliably glues surfaces without causing damage to the panels. Do not allow glue to get on the outer surface of the apron!
All construction, electrical and finishing work must be completed in the premises. Installing the apron is the final stage of finishing the kitchen. First of all, take care of the permanent installation of sockets, switches and household appliances. Holes for sockets on the surface of rusticated panels should be cut in advance before attaching them.
For more reliable installation and protection of the ends of the apron, it is recommended to use finishing profiles
. If the design includes panels along the entire perimeter of the kitchen, then a universal aluminum corner is attached to the corners of the walls with screws or glue. It has grooves at right angles into which the apron panels are inserted. The ends of the apron are protected using U-profiles. After installing the corner, H and F-profiles, the inside of the apron and the walls are lubricated with an adhesive composition, which is left for 5-10 minutes for better penetration into the materials. Then the surfaces are connected and pressed tightly against each other until the glue dries completely according to the instructions.
Video instructions for installing an adhesive-based apron
Installation of an apron with self-tapping screws
This method is considered more reliable. It is suitable for installing splashbacks made from MDF, HDF, glass or polycarbonate as it can withstand heavy structures.
All materials for proper fastening and the aprons
You can order and buy in our Lazarti online store.
Video instructions for installing an MDF apron with self-tapping screws
Source
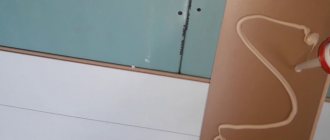
Preparatory work
The wall is being dismantled. They operate with a hammer drill, spatulas, nail pullers - depending on the interfering elements
It is important to leave it absolutely clean, otherwise you will not be able to attach the wall panel for the kitchen. After dismantling, the wall is washed and impregnated with a primer for future plaster.
If the surface requires significant repairs - a large number of chips, whole pieces falling off, then sealing alone will not do - you will have to completely level the walls, that is, do the entire cycle of plastering work, including laying reinforcing mesh and placing beacons.
A beautiful apron made of flowers looks fabulous with light furniture
When the wall is ready - dry, soaked in antiseptic - a starting profile is attached to it. This is an ordinary wooden lath or aluminum profile for drywall. The guide is placed according to the level, otherwise the entire apron will become skewed. Subsequently, if it interferes with the tight connection of the headset to the wall, it is removed. Further:
Fastener selection
The following types are used for work: liquid nails for plastic, wood or self-tapping screws. Advantages of the first option:
- Ease of operation. Even a child can use a liquid nail gun.
- Speed. There is no need to drill holes for self-tapping screws or maintain the required level - after fixing, it is possible to immediately level the slab with the liquid composition. Liquid nails dry from 20 to 40 minutes, the total setting time is 24 hours.
- Ease of use. A liquid nail gun is the same device that installers use when sealing cracks with polymer foam. All that remains is to press on the handle and close the hole as unnecessary.
The use of self-tapping screws is not without its own advantages. In particular, the home master is confident in their strength and the fastening of the wall panel in the kitchen is reliable. However, the appearance of MDF will be spoiled by microchips. Deciding whether liquid nails are better or self-tapping screws can only be done experimentally.
Beautiful furniture goes well with an apron made from nature
How to properly glue a kitchen apron using liquid nails?
Good afternoon to everyone who wants to quickly and easily put their kitchen walls in order - and most importantly, inexpensively. One of the most convenient ways to avoid excess dust and dirt is to glue the apron to liquid nails.
Liquid nails are a versatile construction adhesive that can withstand heavy loads. They can be used to glue almost anything, with one condition: a dry and grease-free surface. Moreover, the plane does not matter - wall, floor or ceiling.
Naturally, craftsmen have been using liquid nails quite successfully for a long time to install various finishing materials on kitchen aprons.
Advantages and disadvantages
The advantages of this method include:
- there is no need to strip the wallpaper down to the plaster, clean the putty (the tiles don’t stick to it), or prime;
- With high-quality liquid nails, the apron holds very tightly;
- as mentioned above, the method is quite convenient, fast and clean.
Flaws:
- difficulties when dismantling such an apron. The glue penetrates deeply into the structure of the surface, and is often removed directly from the putty, plaster, or pieces of chipboard;
- high price of high-quality liquid nails (150-250 rubles for 1 bottle). Tile adhesive, for example, is cheaper;
- The glue is not applied to the entire surface, and voids remain in the apron. Therefore, it is better not to glue tiles in this way on surfaces that come into contact with water (in the bathroom, swimming pool, shower). Even if you cover all the seams with silicone grout, moisture will accumulate in the voids due to condensation, which can lead to mold. Due to the voids, this method is also not recommended when laying tiles on the floor (they may burst).
What can be glued with liquid nails?
The special composition provides excellent adhesion to the surface of such materials as:
Surfaces can also be very different:
In the instructions for the glue you will not find all types of bases from this list - however, you can rest assured that home craftsmen have already tried everything. And below we will describe some apron options that you can make with your own hands.
Supporters of liquid nails claim that only classic nails can be better than them. The viscous composition is capable of forming the strongest possible adhesion of materials, allowing even heavy and large structures to be firmly secured.
However, this gluing method also has malicious critics. Some people complain about the discrepancy between price and quality, others about too much material consumption.
As a rule, these people simply do not know how to use liquid nails correctly. We have prepared a small cheat sheet for you. But first, let's look at what requirements apply to the surface being glued.
What glue to use for heavy wallpaper?
Heavy vinyl wallpaper is best glued with regular glue that includes starch. The presence of antifungal additives allows you to protect the surface of the walls from the appearance of fungus and mold. Special glue for vinyl canvases can be easily diluted in water without forming lumps.
Interesting materials:
How to remove bitterness from fried milk mushrooms? How to remove shortcuts from the desktop on Lenovo? How to remove language on the keyboard? How to remove calcium deposits? How to remove pellets without a machine? How to remove pills from a wool coat? How to remove pills from a wool coat? How to remove moment glue from gel polish? How to remove monolith glue from your hands? How to remove applique glue from clothes?
Wall requirements
It is better to remove wallpaper and other old finishes, smooth out uneven areas with strong putty, then dry.
In order to assess the evenness of the wall, if possible, apply finishing material to it and see if there are any bends or dips.
If they are not there, you can start gluing the apron. Otherwise, you will have to level the surface, or at least add leveling pads - plastic, cardboard, hardboard, etc. - to problem areas. - and only then glue the trim.
Installation of the apron is the final stage of finishing the kitchen, so by this time all construction, electrical and finishing work must be completed. Take care of installing electrical wiring, sockets, switches, and connecting household electrical appliances.
Options for work wall
Plain
MDF aprons are incredibly varied in their color scheme. Single-color options are produced in a wide range and are suitable for both light and black interiors, bright and pastel, matte and glossy. You can choose a panel that exactly matches the kitchen unit, opt for a contrasting solution, or purchase an apron that is just 1-2 shades lighter/darker than the existing furniture. Read our tips on how to choose an apron for a white kitchen at this link.
Colored
A one-color solution is not for you? Pay attention to the colored aprons. Panels with imitation wood, cork, stone, parquet boards, ceramic tiles... The range is limitless
At the same time, there is no point in choosing a panel according to the principle “dark colors show less dirt,” because the MDF surface of any shade can be easily washed with water.
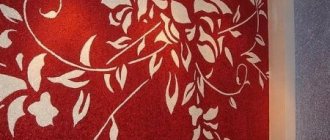
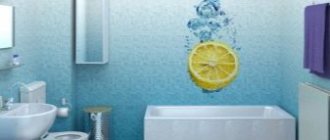
Photo printing or artistic drawing
This option is suitable for connoisseurs of non-standard solutions. A real painting will appear in the kitchen area, a canvas that will become a bright accent. You can choose panels with floral patterns, panoramas of metropolises, still life, picturesque landscapes of mountainous areas, or one of hundreds of thousands of other options. Read how to choose an apron for a white kitchen with a black countertop in this material.
For an interior decorated in red and black shades, a Japanese-style panel, options with imitation animal skins, black and white panels, white panels with large photographs of red berries, etc. would be acceptable.
For a kitchen in soft colors and with floral wallpaper, panels depicting fruits, a spring meadow, and bright butterflies would be appropriate.
Bonding technology
Below we will talk about the nuances of gluing an apron made of various materials.
The general operating procedure is as follows:
Before starting work, it is necessary to tidy up the surfaces that are to be fastened with liquid nails:
It is also important to remember the temperature of the materials. In order for the composition to take well, their temperature must be in a certain range.
Air temperature also matters:
Some representatives of polymer adhesives cope with their task even in cold weather.
When all factors are taken into account, you can move on to the second stage:
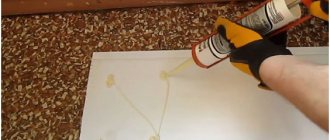
Let's get down to the main thing - applying liquid nails to one of the surfaces.
There are several application methods:
Immediately after applying the glue, the object must be pressed as closely as possible to the surface, fixing it in a constant position for 10–15 minutes.
You can fix it using:
To prevent the glue from going beyond the joint, the borders can be covered with a toothpick placed on top.
If excess has already appeared, it can be washed off using:
If glue accidentally gets on a porous surface, it must be allowed to dry and then carefully cut off.
Apron material
Let us note once again that if you want to glue the apron, and not build a sheathing for it, then you will have to make sure that the walls are even and clean. They should not have chips, cracks, potholes, unevenness, dirt, dust, old glue, etc. Otherwise, no matter how much glue you use, the finish on such a base will not last long.
Let's look at the features of fastening different materials using liquid nails.
Ceramic tile
Tiles are a classic option for tiling the work area in the kitchen. This apron is durable, easy to clean, and is not afraid of water, fire, acids or alkalis.
There are many options for laying tiles, including liquid nails.
Gluing tiles to wallpaper using liquid nails
For this, a surface in the form of wallpaper (as in the photo above), sheets of gypsum fiber board and gypsum board, or a plastered, painted wall (as in the example below) is suitable.
When gluing tiles to liquid nails, the walls must be perfectly smooth.
We must strive to ensure that the gaps between the tiles and the wall are minimal:
Step-by-step instruction:
To grout the tiles you will need:
Work plan:
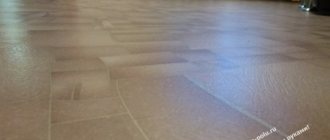
Time-tested: a kitchen with an apron glued to liquid nails after 5 years
Plastic
Plastic panels are a practical and budget option for protecting the work area in the kitchen. Plastic is easy to wash and replace without serious financial losses, it is not afraid of harsh kitchen conditions, and a huge range of colors and textures will allow you to realize any fantasies during renovation.
Installation in this case is not a difficult job if you do it carefully and remove excess glue from the surfaces in a timely manner.
Advantages of this method:
The most important thing is to choose the right glue. You cannot use liquid nails that contain:
Using a low-quality adhesive composition can lead to the plastic becoming covered with yellow spots or even being “corroded”.
Stages of work: