The finishing of almost any room should be completed with the installation of baseboards or moldings (decorative trim strips). They are considered an integral part of renovations made in a highly artistic, residential style. It is possible to secure these elements in various ways, but the most common and effective of them is attaching the overlays with glue. Even a person without experience in finishing can do such work, because installation with glue does not require the use of any special tools. The main point is to select a high-quality adhesive composition for this operation.
Moldings and baseboards - features and differences
If we talk about skirting boards, then they are more or less familiar to everyone. With their help, the free space between the walls and the flooring is insulated. Thus, the skirting boards are in contact only with the floor covering.
Moldings are special decorative elements that are structurally picture frames, imitation stucco or patterned ceiling linings.
For both elements, the main purpose is to mask empty joints, gaps and minor finishing imperfections. This makes it convenient to decorate mirror frames, door frames or decorate ceiling joints.
At the same time, the elements in question may also have an applied purpose, namely: with their help it is possible to zone living/working areas or protect individual finishing parts from mechanical influences. All this will help visually change the spatial shape of the room. The material from which moldings/plinths are made is extremely diverse and can be matched to any type of finishing work, especially since it can differ qualitatively in the type of relief.
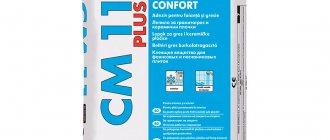
Existing types of adhesive for moldings and baseboards
The need to use a certain type of glue will directly depend on the material from which the part is made, as well as on the material from which the base on which this part will be attached is made. Thus, the decision to use the appropriate adhesive substance will most often be quite individual. However, there are several common types of glue that are suitable for most cases:
- Polymer glue - it is quite universal and can be used on almost all materials - it can be foam, plastic, and even polyurethane. The initial thickness of this substance is very viscous, which means that adhesion occurs in a very short period, so you do not need to manually hold the attached part at the base for a long time. However, these mixtures may have an unpleasant, pungent odor, or they may not harden very quickly. Nevertheless, there are already samples on the modern market that are devoid of these shortcomings (but their price is very high).
- “Liquid nails” - this type of glue got its name due to the increased adhesion properties when connecting objects - “the same as nailing it on nails.” In fact, the composition is a very viscous glue that can be applied in a thick layer and even on uneven surfaces. From here it is clear that if the master does not have time for preparatory work to clean the fastening surface, then “liquid nails” will be the ideal solution. However, some types of “liquid nails” interact very poorly with various synthetic materials, for example, with polystyrene foam or expanded polystyrene - they can simply corrode such baseboards or moldings. Therefore, before use, you should read the instructions from, which will definitely mention the compatibility of the composition with similar materials.
- Polyvinyl acetate glue - roughly speaking, we are talking about PVA glue and its various variations. Its undoubted advantages include the absence of pungent odors, but a major disadvantage is the high quantitative consumption. In addition, it has a rather liquid consistency, which is why it dries longer than other adhesive substances.
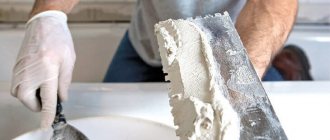
- Putty is a classic, universal and profitable option for gluing moldings and baseboards. Particularly good for fixing ceiling slats. The putty itself is characterized by thickness, which ensures reliable adhesion to the surface. It is especially important to use the putty method when installing planks even before closing the outer layer of the wall. In addition, cracks can also be sealed with putty.
How to glue correctly
Having learned how to glue foam rubber, you need to familiarize yourself with the features of working with this material. There are many nuances when gluing foam plates to different surfaces.
To get the most durable connection, consider some subtleties:
- Don't forget to prepare your materials before starting work. They need to be cleaned of dirt and degreased. For degreasing, it is recommended to use white spirit.
- Carry out gluing at room temperature. The higher the temperature, the faster the adhesive will harden.
- Carry out the procedure strictly according to the instructions, do not increase the flow rate unnecessarily.
Foam rubber to foam rubber
After reading about how to glue foam rubber together, you should better understand the gluing technology. It consists of several stages that follow each other.
These include:
- Using a sharp utility knife, cut pieces of the foam plates to the desired size. The edges should be smooth.
- Degrease work surfaces.
- It is advisable to buy an aerosol adhesive composition. Spray it over the material to be glued.
- Press the cut pieces together. After 2-3 minutes, release the pressure.
The glue packaging indicates the exact amount to be applied, i.e. how many layers are required and how long to wait for hardening.
How to glue foam rubber to wood
Several types of furniture adhesive for foam rubber were described above. Such products indicate the ability to work with certain surfaces
Please note that they are sometimes only for these purposes, i.e. not universal. There are a number of features of working with such a composition
There are a number of features of working with such a composition.
Let's list some here:
- Before starting work, the surfaces must be cleaned of dirt and dust.
- Use a special gun to apply the adhesive mass.
- After applying the glue to the foam and wood, as indicated on the packaging, use a press to create a secure connection.
It is important to do everything as described in the instructions to ensure that the seam is strong and durable.
Foam rubber to metal
Not everyone knows the interesting point of how to glue foam rubber to metal. The difference between these two materials can raise many questions about their connection.
Step-by-step instruction:
- Apply the adhesive mass to the metal surface using a roller, brush or special gun.
- We must not forget about preparing the metal before starting work. To do this, it is cleaned of rust and dirt deposits. Degreased with gasoline, acetone or alcohol.
- Wait about 5-7 minutes.
- Combine materials.
The last stage of the work is the use of a press (weight).
To plastic
When choosing how to glue foam rubber to plastic, you need to remember that both materials have low resistance to aggressive chemicals. This can cause adhesive components to damage work surfaces.
The gluing process is the same as when gluing porous plates to wood. It is not advisable to use a weight in this process to obtain a stronger connection. Also, it is not recommended to use acetone when degreasing plastic.
Foam rubber to fabric
Gluing foam rubber to fabric is not as difficult as it might seem at first glance. General instructions:
- To obtain a reliable connection, the materials must be pre-moistened with water.
- Apply a thin layer of glue to both parts.
- Wait about 5 minutes. When a thin film appears on the work surfaces, it needs to be dried in the open air.
- Apply a second layer of adhesive.
- Wait 3 minutes and combine the materials.
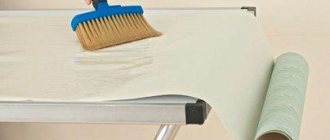
The last step is heating the finished joint using an iron, as indicated at the beginning of the article.
Features of the use of certain types of glue and control of quantitative costs
As mentioned above, there is practically no universal type of glue for skirting boards and the use of each specific brand will depend on many factors. For example, polymer-based adhesives should be used only in well-ventilated areas, and the same “Moment”, due to its special viscosity, once it gets on the surface, is very difficult to remove. In addition, if the substance is transparent, then unauthorized contamination is unlikely to be noticed the first time. In any case, for synthetic adhesives with similar qualities it is better to use a gun.
If we touch on the topic of “liquid nails”, then among them there is a special variety - neoprene “liquid nails”. They will be an ideal solution for installing skirting boards in low temperatures or when the environment is extremely saturated with moisture. However, this type of “nails” is very toxic and it is possible to work with them only under conditions of constant ventilation of the room where the work is carried out.
But acrylic-based glue is completely safe for the human respiratory system. However, it is not able to maintain its functional fastening properties at low temperatures. From this we can conclude that it is better to use it for finishing interior living spaces, because, as a rule, low temperatures are not established in them.
Regarding consumption calculations. Based on the fact that strips, moldings and baseboards rarely exceed fairly narrow width dimensions, the approximate consumption can be determined based on the number of strips that need to be glued. Thus, half a liter of adhesive will be enough for ten square meters of area. From here we can trace the following pattern - glue for baseboards and moldings is never sold in bulk containers.
Required technical properties of the adhesive
To achieve the best result in the process of gluing moldings and baseboards, the selected adhesive must have the following properties:
- Operational strength;
- Ease of application;
- Reasonable drying time;
- No pungent odor (or its complete disappearance after drying);
- The product is directly focused on working with the selected material.
Guided by these simple points, choosing an adhesive substance for a specific task will not be difficult. Nevertheless, professionals call the main criterion on which the choice should be based is the material from which the planks and the mounting base are made. Traditionally, ceiling plinths contain synthetic elements and are made of PVC, polystyrene foam or polyurethane. It is important here that the adhesive base does not conflict with these materials. Things are simpler with traditional bases - clay, gypsum and wood - it is much easier to choose a mixture for them. It is important to remember that correctly selected technical qualities of the glue will make the result of the work more durable.
Product trimming
Proper trimming of the material used affects the final result. Therefore, when the problem arises of how to attach a larger plinth, you need to use simple tips:
What to cut with? For this process, a metal saw with a blade having small teeth is used. As an alternative, you can use an electric jigsaw, to which special files are selected. When the parts have already been fastened, but there is a need for minor adjustments, use a sharp construction knife
This device must be used very carefully so as not to damage the front side. It is advisable to cut the plinth only after careful measurements. To trim at the desired angle, use a miter box.
Trimming the plinth: outer and inner corners, arrangement of parts in the miter box
Such simple tips greatly facilitate the process and allow you to install the elements with the highest quality.
“Pros” and “cons” of attaching moldings/plinths to adhesive mixtures
Among the undoubted advantages of the method under consideration are the following:
- Strong adhesion to the mounting base;
- The finishing process is relatively short in time;
- A wide range of fastening mixtures on the current Russian market;
- Possibility of fixing skirting boards/moldings even on unprepared substrates;
- The ability of some types of compounds to successfully withstand temperature changes and increase/decrease in humidity (and this allows the compositions to be used in rooms where there is no thermoregulation for a certain period of time, for example, a country house in winter).
Among the shortcomings it is possible to note:
- 100% need to level the base surface to fix planks made of hard materials (wood, plaster, clay, rigid polyurethane, MDF);
- The likelihood of a long period of adhesion for some types of adhesive substances and materials - it is necessary to maintain the connection for some time through muscular efforts until hardening occurs.
Types of fillets
Fillet is the second name for a plinth, received for the presence of a groove on the outside of the part. Among the most common materials used in the production of fillets are:
- foam products;
- polyurethane products;
- wooden baseboards;
- PVC profiles.
Polyurethane
Polyurethane skirting boards differ from others due to:
- The density of the material, thanks to which polyurethane products are strong and durable.
- Beauty. Decorative elements on polyurethane are more clearly visible than on other materials.
- A large selection of colors and styles, significantly expanding the model range.
- Possibility of installing hidden suspension.
Foam
A material that, despite its low cost, has a decent set of positive characteristics:
- low weight of products;
- ease of installation.
Flaws:
- fragile;
- afraid of high temperatures;
- does not interact well with some types of glue.
PVC profile
Affordable and high-quality material, noted by both professional finishers and ordinary people. Pros:
- heat resistance;
- does not collapse under the influence of ultraviolet radiation;
- easy to process and install;
- not afraid of exposure to water.
Minuses:
- not suitable for installation on curved walls;
- When exposed to high temperatures for a long time, it begins to deform.
Wooden
This material is gradually falling out of use, being replaced by cheaper and more practical counterparts. Despite this, wood skirting boards have many advantages:
- service life is not inferior to most alternative materials;
- wood products are the most environmentally friendly;
- beauty;
- can be painted.
Flaws:
- difficult to install;
- are expensive;
- Wooden skirting boards require special care.
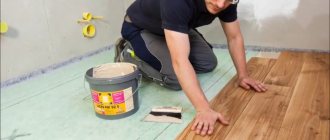
General gluing rules
Any plank, be it molding or baseboard, can be quickly and easily glued using the following procedure:
- The selected segment should be turned with its back, and the adhesive composition should be applied to it in small drops at a distance of 3-5 centimeters from each other (for narrow parts);
- If the width of the part exceeds 6 centimeters, it is preferable to apply the mixture on the back side in the form of a wavy line;
- The lubricated element is unfolded and attached to the desired location of the base - the ceiling, baseboard, wall and pressed tightly (should be held for 10-15 seconds on average);
- The sutures themselves should provide a tight hold within 15-20 minutes;
- It is worth remembering that fillets must be glued from the beginning of the corner;
- If the molding is glued to a stretch ceiling, then the fixation occurs exclusively on the surface of the wall, but not on the unstable surface of the stretch ceiling;
- The ends of the planks should also be coated with a thin layer, then they are attached in the desired corner, and the remaining adhesive is quickly removed with a thin spatula.
Features of gluing some types of skirting boards
Wooden
It is preferable to apply the composition along them in a thin line along the entire back part. However, if their width is small, then the spot application method can be used. However, the edges of the strip must be properly lubricated to prevent gaps from forming at the seams. The main thing is not to fix the part right away, but to wait a few seconds and only then press the bar to the surface - this is how the adhesion will occur as efficiently as possible.
Plastic
Basically, they are used to neatly disguise wires and cables in residential premises. The adhesive substance must be applied to the stiffener and immediately pressed onto the desired surface for several minutes. It is worth remembering that the coupling process most reliably occurs with bases made of carpet, linoleum, wood and tile.
However, there are several significant points specifically for plastic strips:
- It is always worth considering the level of rigidity of the molding edge;
- Skirting boards made of foamed PVC, due to their lightness, quickly break;
- If a type of PVC is required with semi-rigid qualities, then it is mounted in the form of a long strip;
- Plastic baguettes are the most durable;
- Before gluing, these skirting boards need to be laid out around the perimeter and the joints trimmed in the right places;
- If decorative plugs are expected at corners and joints, then they are installed simultaneously with the main body of the plank;
- It is better to apply the composition in small drops within 8-10 centimeters of each other;
- On short sections, this distance can be 4 centimeters, and on complex transitions - every 2 centimeters;
- It is preferable to cover wide planks with a wavy line of adhesive mixture;
- Any plastic corners/joints are covered additionally.
Self-adhesive options
They will be an ideal solution for uneven walls and are able to create such a type of finish between the walls and the floor that the unevenness of the joints will simply be invisible. They go well with linoleum and laminate and look great in large rooms. According to their structure, self-adhesive skirting boards can be made from aluminum or polyvinyl chloride. They can also have their own coloring, for example, wood or stone. External and internal corners in such models are easily formed due to the fact that the base itself bends very easily. In some cases, masking tape will help improve the artistic appearance. The only negative is that you need to fix the self-adhesive plinth as accurately as possible, because then it will be very difficult to separate it from the wall.
How to install correctly?
The good thing about polyurethane ceiling decor is that attaching it to the work surface is quite simple and quick. It is best to glue long parts to the ceiling together; this procedure does not require construction qualifications and can be done with your own hands.
Before starting work, repair or replace electrical wiring. All old communications are dismantled and replaced with new ones, since after installing the decorative ceiling plinth it will be more difficult to do this. If the electrical wiring is planned to be laid in a niche of a polyurethane plinth, that is, in a special cable channel, then the wires for this procedure are also prepared in advance and secured so that they do not interfere with the installation work.
Before gluing polyurethane moldings, you need to complete the preparatory work
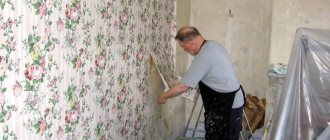
Since gluing the baseboard is a finishing touch, before it begins, it is important that all other work related to the preparatory plastering of the walls in the room has already been completed. Painting the walls or wallpapering is done after the moldings are glued into place
If you want the plinth not to be white, but to have a certain shade, installation and painting are not combined; the moldings are painted after they are glued to the ceiling.
Before you start cutting the ceiling fillets, you need to mark the ceiling in the way they will be attached. First of all, determine the length of the sections for installation. To do this, the ceiling plinth is laid on the floor, bringing it as close as possible to the wall. Next, use a tape measure to measure the desired length of the decor and put a mark on it in the place where trimming needs to be done.
After the length is determined, the decorative plinth is brought to the ceiling and a line is drawn along the outer edge. The same is done with the second connecting element. When two straight lines intersect, the desired junction angle between two ceiling fillets is formed. On the plinth, mark the place where trimming is to be done to join the corner.
Trimming fillets is carried out according to preliminary markings using a sharp carpenter's knife or a hacksaw for metal. If joining two elements can be a difficult task, a special corner decorative element, which joins two decorative fillets cut at an angle of 90°, will help simplify it.
Adjustment of joints can be done at both external and internal corners.
The ceiling plinth for corner joining is cut as follows: the fillet in the position on the left is placed in the box of the miter box, pressing it with its nearest edge to the side of this device. The hacksaw is placed in the miter box on the left. Next, trim the bar. This will be the plank on the left side of the corner. The right strip is cut like this: the fillet is inserted into the miter box on the right and a cut is made on the right with a hacksaw.
When joining two fillets for an internal corner, proceed in the same way, but in a mirror order.
If gluing will be done using acrylic sealant, then first cut off the end of the tube cap and place it in a construction mounting gun. Using a mounting gun, a zigzag line of sealant is applied to the back surface of the fillet.
Next, the decor is brought close to the ceiling and, according to the markings, attached to the surface
When installing the plinth, the greatest attention should be paid to the corner joints, pressing them tightly with your fingers to the ceiling or wall (depending on the type of molding construction). If excess sealant appears from behind the edges of the ceiling plinth, it is immediately removed with a dry cloth, simultaneously rubbing the area of the junction seam
Then they take the next decorative strip and begin further installation, systematically moving along the perimeter of the room. For vertical joining of decorative fillets, the sealant is applied not only along the entire length of the molding, but also on its end parts.
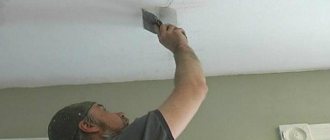
After the decorative ceiling moldings have been glued, the corner and vertical joints are treated with finishing putty using a small putty knife made of rubber material. During the day, the moldings are allowed to stick properly to the ceiling.
Features of working with polyurethane strips
Selection of adhesive composition
The most common and popular type of connecting substance for them will be the domestic brand “MomentMontazh”. In principle, you can use any other type of substance with increased adhesion force or “liquid nails”. In extreme cases, in the absence of better options, they can even be added to compounds intended for tiles. But still, from the point of view of professionalism, a specialized option should be used. Moreover, it is necessary to understand that if the work is to be carried out in a city apartment, then the adhesive composition must cause excellent adhesion to the concrete base of the walls.
At the same time, to coat the joints you can use a special type of glue, which, after being applied to the plank, causes the latter to melt. Thus, after the butt shrinkage of all elements, the risk of divergence of the structure will be eliminated.
Preparing the base
For this process, you can apply the following algorithm:
- The surface of the walls and ceiling must be thoroughly cleaned of dust and dirt;
- It is extremely important to remove any existing grease stains;
- To consolidate the cleaning effect, it is better to degrease the base again;
- Before gluing, you should wait until the base has completely dried;
- For better application, it is preferable to prime the walls and ceiling.
If the joints are cracked
No matter what polyurethane plinth is glued to, they very rarely fall off the wall. But the problem with corners is not uncommon. It usually occurs if the joints were glued with assembly adhesive or any other composition. Then hairline cracks form first, then they can increase to several millimeters. What to do with cracks in the corners of the baseboard? How to fix?
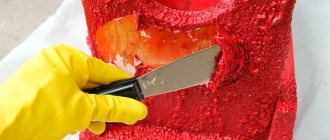
The first thing to do is clean the old glue from the joint. The easiest way to cut is with a knife. Then the joint can be filled:
- Acrylic sealant. After application, try to level it out, repeating the relief. After it dries, we sand it and then paint it. This is the most realistic method and the easiest to implement.
And at the corners the gaps may be larger - If the gap is small, you can apply joint adhesive. Just keep in mind that once it dries, it is difficult to work with. So after applying, remove the excess immediately, wipe off the remaining residue with a rag with acetone. If there are any irregularities left, we try to give the desired shape with sandpaper on a block.
- Seal the joint with polyurethane foam, trim, putty, paint. Foam is the easiest to work with, but you need to use it with a small expansion and make sure that as it increases in size it does not tear the baseboard away from the wall. So the option is still problematic. The truth is not in terms of processing.
All these methods will only give a temporary effect. If cracks appear at the joints, there are reasons for this. And until the causes are eliminated, cracks will appear again. If it is simply an unsuitable composition (not for joints, but for installation), then the normal appearance may last longer. If the joints were glued with the “correct” glue, then the reason is more serious. Possibly - shrinkage of the house, cracks, etc.
Instead of an epilogue
An analysis of the market for adhesives for skirting boards has revealed that for the most part in the Russian Federation there are universal options like “liquid nails”. The remaining samples are unpopular due to their low functional properties, lack of high-quality equipment (for example, a construction spout), as well as outdated chemical composition. At the same time, it is worth noting that, as such, highly specialized compounds will soon fall into oblivion and most adhesives will simply be combined under the simple name of “installation adhesive.” The cost of such goods in Russia is very affordable, and the product range provides the maximum breadth of choice. At the same time, in this segment, up to 80% of goods are presented by foreign manufacturers.