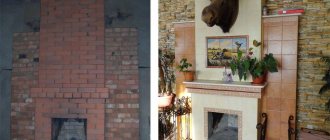
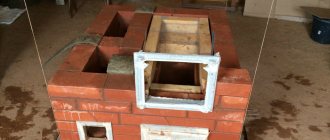
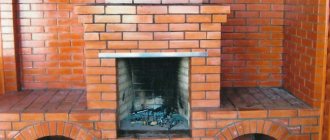
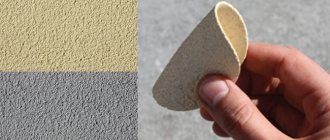
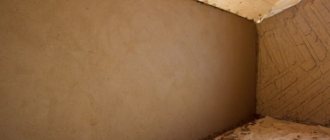
The use of decorative plaster in the decoration of fireplaces Decorative plaster in the decoration of fireplaces has been used not so long ago. It began to be used when they came up with the idea of making decorative fireplaces, and here it found many fans. Many people want to do this work with their own hands and simply reduce the cost of work. After all, the price of this service is not cheap. Our article will be devoted to this work. You can see photos and videos on this topic. Instructions for completing this work will be provided.
Why do you need to plaster a stove?
Any oven is based on a frame made of metal, bricks or clay. Fireplaces, unlike stoves, are also made of stone or concrete. All of these materials have different thermal conductivity and coefficient of thermal expansion, unequal service life, and differ in aesthetic properties. If the structure is not covered with a layer of finishing material on top, it can quickly lose its strength and attractiveness.
Without plastering or another type of finishing, over time the masonry joints will begin to crack. The same thing happens with the clay walls of the oven - a network of cracks appears on them, which will have to be covered regularly. The absence of a plaster layer leads to the penetration of smoke and soot through cracks and their settling on the walls of the house and furniture, which spoils the environment and pollutes the air.
Other purposes for which it is recommended to use stove plaster:
- increasing the strength of the entire structure and its resistance to destruction;
- optimization of heat transfer and improvement of thermal insulation;
- increasing the safety of using the stove;
- ensuring the tightness and durability of the masonry;
- giving the structure a neat, neat appearance or changing the design of the stove to suit the new interior.
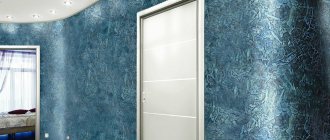
As for decorative fireplaces, their plastering is carried out primarily for aesthetic purposes. Typically, marble plaster for the fireplace, Venetian plaster or composition with the “travertine” effect are used. If the fireplace has an exhaust system and is actually used to heat the room, modern heat-resistant plasters are used for its cladding, which have many advantages:
- ease of application, low consumption;
- increased fire safety, non-flammability;
- high adhesion to any materials;
- increasing the heat capacity of the fireplace, long-term heat retention.
Fireplace finishing with marble plaster
Briefly about the main thing
The problem of how to plaster a stove to prevent it from cracking can be solved in different ways, using various compositions based on cement, clay, gypsum, asbestos or lime.
The main requirements for leveling materials: elasticity, heat resistance, safety, mechanical strength and low thermal expansion.
The plastering itself is carried out in two ways: a reinforcing mesh made of steel or fiberglass is attached to the walls, or environmentally friendly fibers are added to the solution.
The consistency of the prepared mass depends on the purpose: roughing and grouting - liquid, leveling - like cottage cheese, for installing profiles - thick. At the same time, at each stage of work it is important to comply with the permissible standards regarding the layer. Enlargement causes improper drying, flaking and cracking.
Ratings 0
Features of mixtures for plastering stoves and fireplaces
Not every building mixture is suitable as plaster for a stove. It must meet a number of requirements, otherwise it will quickly become unusable, since it is operated in extreme conditions. There is a large temperature difference inside the furnace and on its surface during combustion, and after cooling there is a sharp temperature drop. As a result, the plaster regularly expands and contracts, and in the absence of certain properties it begins to become covered with cracks.
Only special heat-resistant plaster with high elasticity will not deteriorate from such operating conditions. The material should easily withstand temperature changes, adhere securely to the base and not crumble. It is important that the heat-resistant plaster is environmentally friendly, without the admixture of toxic components, drying oil, or oil paints. When heated, harmful substances will decompose and have a negative effect on the body of residents.
Heat-resistant mixtures are used for finishing fireplaces and stoves
How to plaster a stove without cracks
In order for the plaster coating of the furnace to serve for a long time and not give shrinkage cracks, it must adequately respond to the process of expansion of the furnace when heated. Of all the compositions existing on the construction market, several types of clay-based products meet this requirement. In addition to clay of a certain fat content, gypsum is suitable for this purpose, but it is used much less frequently, since it also cracks without the introduction of certain additives. It is better to use gypsum as an additional binder in a ready-made clay mortar to speed up its setting and drying time.
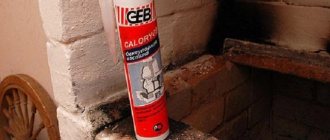
In addition to gypsum, asbestos fiber is used as additives to clay. It helps make the plaster more flexible and durable, resistant to moisture and fireproof. This component can be added to any oven finishing product, regardless of its other composition. Instead of asbestos fiber, cheaper straw chaff is sometimes used.
Fireproof compositions for plaster
Clay-sand mixture
The most inexpensive and popular mortar for plastering stoves is clay-sand. The main raw material - clay for plaster - can be collected independently and completely free of charge if there is a quarry nearby. The main thing is that it is clean, without debris, grass, roots and other impurities. Typically, 2 parts sand are added to 1 part clay; if desired, 1/10 part asbestos is added.
The finished plaster is quite plastic, easy to apply to surfaces, and can be easily repaired if damaged. The mass is considered practically waste-free, because it can be removed, soaked and reapplied. The plaster is non-flammable, 100% environmentally friendly, and vapor permeable.
The thermal conductivity of the mixture is low, so it retains the heat of the oven for a long time. The clay hardens quite slowly, which allows you to work with it without much haste (this is very important for beginners). The disadvantages of this type of mixture for plastering stoves include the need to apply a fairly thick layer. If it is less than 1 centimeter, it will gradually fall off.
Cement-clay-sand mixture
This fire-resistant plaster has a more complex composition, but the finished coating is even stronger and more reliable. First, cement is mixed with sand (1:4-1:8), mixed well and paste-like clay is added until the mass of the desired consistency is obtained. This type of plaster is less easy to install than regular clay plaster, but lasts longer. To further enhance its strength characteristics, 1 part of liquid glass is added to the composition. As a result, the plaster layer will not be susceptible to cracks at all.
Lime-clay-sand plaster
Adding lime to a clay-sand mortar provides increased adhesion, strength, ductility, as well as resistance to cracking and biodeterioration. Usually, to make plaster, slaked lime (1 part) is added to the finished clay-sand composition (2 parts). To improve properties, it is allowed to introduce 1/10 of asbestos fiber. The use of such plaster will be even more effective if, instead of ordinary clay, it is made on the basis of fireclay, which is obtained by firing kaolin at a temperature of about +1500 degrees with further grinding.
The influence of a plasterboard fireplace on the layout
At the same time, the decision to install a fireplace in your apartment should not be taken lightly. Wrong decisions will turn advantages into disadvantages, and an unnecessary pretentious shelf for trash and dust will be piled up in the corner. Therefore, we have prepared information on how to make a fireplace from plasterboard, in order to expand your design horizons.
First, you should carefully consider the changes in layout that the fireplace will cause and choose a suitable location. Based on your conclusions, think about the shape and appearance that you would like to see.
The simple design of plasterboard fireplaces reveals the limitless possibilities of this material. Don't get hung up on grave granite, the brick splendor of old England fences, or marble covered in bronze to look like gold. There are many other stylistic choices that can be fun to explore.
Simulated fire vs natural flame
The home comfort industry offers several options for simulating live fire with varying degrees of authenticity. From a full-fledged picture of a fire to an almost completely identical process of burning birch logs with smoke and flame. The dimensions and characteristics of the selected equipment will allow you to determine the dimensions of the plasterboard fireplace required for installation.
1 - electric fireplace; 2 — imitation of fire; 3 - portal decor
This is much better than the real soot, soot, firewood and drafts of a real fireplace. The question of choice is only the amount you are willing to pay for it and the goals you want to achieve. An electric fireplace, or combustion simulator, is that part of the structure that will have to be purchased ready-made. You won’t be able to make it yourself, and there’s no point in experimenting. But decorating an electric fireplace with your own hands will allow you to show creativity.
Start of installation work
The experience of using plasterboard in interior decoration can be expanded to interior elements. Making fireplaces of the desired appearance with your own hands is a completely feasible task. Make a drawing and put the main dimensions on it. Many people neglect this stage, making a big mistake at the very beginning of the matter. Three sets of work are conventionally distinguished:
- frame manufacturing
- covering the fireplace with plasterboard
- finishing
The frame can be assembled from a tin U- and L-shaped profile or from wood. It is difficult to say which is preferable; it all depends on the dominant skills of the performer. The advantage of tin can be considered that it allows you to easily reproduce a broken and even bent surface.
Popular ready-mixes
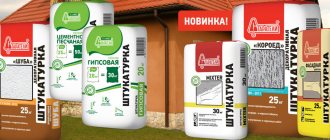
In construction stores you can find ready-made plasters, sold in the form of dry construction mixtures and ideal for finishing stoves:
- Plaster for stoves and fireplaces “Pechnik”. It is fire-resistant up to +600 degrees, made on the basis of clay, sand, cement, gypsum, mineral and polymer additives. Has low consumption - only 1 kg/1.4-1.5 sq. m.
- Plitonit "Superfireplace Fireproof". Suitable for plastering stoves and fireplaces made of brick, since it is close to this material in terms of thermal expansion coefficient. Made on the basis of clay, cement and heat-resistant fibers. Characterized by high moisture-holding capacity.
- The Terracotta mixture is heat-resistant. Mineral plaster based on kaolin clay with a smooth texture, applied in a layer of 2.5-8 mm. Terracotta plaster can withstand heating up to +400 degrees, so it is excellent for finishing and leveling stoves, fireplaces, barbecues, and barbecue areas.
- Modeling plaster TSP-4. Contains mineral granules 0.5-1 mm in size, designed specifically for plastering stoves with the last (finishing) layer. Ideal for thin layer finishing. Withstands heating up to +200 degrees. It is highly resistant to cracking due to the presence of liquid glass.
- Plaster for fireplace KODRU. It is not afraid of heating up to +1270 degrees, does not shrink and does not crack. Due to its high elasticity, it is suitable for any heated areas, including stoves, fireplaces, and pipes.
Fireproof mixtures for fireplaces KODRU
Do-it-yourself finishing
Plastering fireplace stoves is a responsible and complex process, although at first glance everything may look slightly different; before you begin facing work, it is important to make sure that you have prepared all the necessary components, materials, tools, and that you have studied the instructions and steps in detail performed actions.
To work, at the first stage you will need to purchase the following tools, which are guaranteed to make your work easier:
- A reservoir in which you will mix the solution and a trowel;
- Sandpaper and medium-sized brush;
- Bucket with clean running water;
- Tools for measuring evenness - building level and/or plumb line.
After all the tools and materials have been purchased and prepared, you need to once again read the work instructions and determine the steps that you plan to follow to the end.
For convenience, at the first stage you need to heat your fireplace stove for 2-5 hours, and then start cleaning its surface (remove old cladding, wipe off dust, degrease, put all seams and joints between bricks in order).
Now you need to begin the main work, which is carried out strictly in stages; you can familiarize yourself with the sequence below:
- In order to ensure that the brick surface of the fireplace does not absorb a large amount of cladding and at the same time the adhesion is maximum, at the first stage it is necessary to properly moisten and soak the bricks with running clean water;
- Now we begin to apply the so-called base or first layer of plaster; to do this, using a special device, apply it in a thin layer to the brick surface and level it evenly. The thickness of the feather base layer of plaster should not be more than 4-5 millimeters;
- Now we proceed to priming the surface of the brick stove-fireplace; for this we use a special heat-resistant primer, which is specifically designed for these purposes. The thickness of the second applied layer of primer should also be optimal and small, about 4-6 millimeters; the second layer must be applied especially efficiently, while distributing it over the entire brick surface, rubbing every seam, brick, and thereby eliminating all previous irregularities and flaws. The second layer must adhere tightly to the surface, and its consistency will be more liquid than the first main one. To prevent your grout from drying out immediately, the surface of the fireplace must be periodically moistened by applying water;
- The third layer is the very last one to be applied, and how well it is applied and distributed over the surface determines what appearance the final furnace lining will have. The consistency of the third and final layer will be even more liquid than the second; it will also be evenly distributed after application over the entire surface of your brick heating unit. In order for you to ultimately get a perfectly flat and sealed surface, make sure that at the last stage, your solution fills all the remaining cracks, voids, and irregularities.
Ultimately, if you follow all the tips, rules, regulations and recommendations, your layer of plaster, completed in three stages, will be about 1.3-1.6 centimeters in thickness, but not more than 1.7 centimeters. Since in this case cracks and chips may begin to form on the surface, for thick cladding a special fine-mesh reinforced mesh is often used and secured to the brick surface, which reliably fixes any material and does not allow it to crumble and crack in the future.
Homemade oven plaster mortar
If you wish, you can make plaster for the stove yourself. It is only important to properly prepare the clay in advance. The raw materials are soaked in water for 5 days, then washed again, removing any floating debris. Then do the following:
- the water is finally drained, but if there is small debris left in the clay, it is first filtered through a sieve;
- mix the clay until smooth, remove any lumps (they will cause cracks);
- River sand is prepared separately - sifted, washed, dried;
- fluff up asbestos, prepare milk from lime by mixing with water (if these additives are planned to be added to the plaster);
- connect the main components together, add water until you get plaster with the desired texture (like thick sour cream).
Experienced plasterers add table salt to the finished composition - 200 g per bucket of finished plaster. Salt prevents the solution from cracking, slightly slows down the hardening of the mass, and allows the coating to dry evenly. If the stove is heated with coal or peat briquettes, it is advisable to add a little fireclay clay to the plaster, which will give the mixture additional heat resistance.
Tools for applying plaster
In order to apply the plaster mixture efficiently, prepare all the necessary tools in advance, and during the work process use those that are more convenient to use. They also buy a primer that will enhance adhesion to the mortar and strengthen the masonry, metal corners, tile adhesive, beacons, and some gypsum plaster.
Here is a list of accessories that may be useful to the master:
- trowel, trowel - for applying and distributing the mortar over the surface of the oven;
- spatulas of different sizes - for applying, leveling, smoothing the composition, especially in corners and other hard-to-reach places;
- construction grater, trowel or trowel - for leveling and rubbing the surface;
- brushes and rollers - for painting dried plaster;
- chisel - for making notches on the surface before plastering, if it is too smooth and does not adhere well to the mortar, and reinforcement has not been carried out;
- hammer - for quickly beating off old mortar;
- metal scissors - for cutting reinforcing fabric;
- level and rule (plumb) - for proper leveling of the coating;
- a construction mixer and a suitable container for mixing plaster;
- hard metal brush - for removing old plaster and cleaning joints.
How to plaster a stove: instructions
Before starting work, carefully prepare the base, because the quality and service life of the plaster layer will depend on this. The walls of the stove or fireplace are freed from the old coating - knock it down with a chisel and hammer. The seams are well cleaned with a brush to remove pieces of plaster and sweep away dust. If the masonry is fresh, remove any adhering and escaped drops of mortar, which can lead to detachment of the new plaster.
The old paint is completely removed. Irregularities and cracks in the bricks are covered up, masonry joints, on the contrary, are deepened by 5-10 mm. If the base is too smooth, small notches are made on it. The walls of the stove or fireplace are primed 2-3 times. The seams are especially well coated with primer.
Reinforcement
If the oven walls are uneven, you will have to apply several layers of plaster. In this case, the frame must be reinforced, otherwise the solution may peel off and crack. Purchase a mesh made of metal or fiberglass with medium-sized cells (1.5-2 cm). The metal material is secured using nails with wide heads, driving them directly between the bricks.
Reinforcing mesh for oven
Fiberglass is attached to a mortar or heat-resistant tile adhesive. To ensure perfect alignment, steel or aluminum corners with perforations are glued to the corners of the stove. In case of sharp unevenness of the walls, plaster is carried out along beacons, which are placed on top of the reinforcing mesh on small piles of gypsum mixture. Beacons are installed according to the level, having previously determined the point of greatest deviation of the plane.
Spray
To properly level the walls, it is necessary that the plaster layer be at least 8-10 mm - this is the only way to get rid of significant distortions. After the mesh is fixed to the surface and the beacons are placed, the oven is heated to a warm state.
Then spray the walls of the oven with water using a wide brush and make a spray. This is the first layer of plaster, up to 4-5 mm thick, which is literally thrown onto the wall. The spray solution has the consistency of medium thick sour cream. After filling the entire area, the plaster is leveled without much effort, but paying attention to the high-quality filling of masonry joints. Allow the composition to dry thoroughly.
Leveling and covering
After the first layer has dried, further work begins. Apply the solution with a spatula or trowel between the beacons, starting from the bottom of each wall, and immediately level it using a small rule. After treating one area, proceed to the next until the entire surface is covered with the solution. Allow the leveling layer to dry, then proceed to covering.
The covering layer is only 1.5-2 mm thick, so the solution for it is made more liquid. It is needed to perfectly level the surface before painting. If you plan to glue tiles, covering is not necessary. As this stage of work is completed, the beacons are removed and the holes are sealed with plaster mixture. The corners are carefully treated with an angle spatula, rounded for your own safety.
Grout
While the surface has not yet completely dried, they begin grouting work. Grinding is carried out with a construction float or matting, not forgetting to regularly moisten the device with water. Move the tool in a circular motion, increasing the pressure in the depressions and decreasing it in the pits. To reduce the risk of cracking of the layer, experienced craftsmen, after finishing plastering work, cover the oven with damp burlap. As a result, it dries more evenly, which improves the quality of the result.
Applying the material
This is not a complicated job that can be done using several methods. They are all different in their method and depend on the plane you want to see. Let's look at each of them.
Spray material
This is perhaps the easiest way to do it. This requires no special knowledge and skills. You can get the job done pretty quickly. So:
- To begin, the first layer of material is applied. There is no need to do perfect alignment; it is enough to maintain the basic plane of location. We are waiting for the material to dry;
- Now we apply another layer, which determines the texture of the surface. Almost any tool can be used for work. Some even sometimes use a broom, which is used to do a regular spray;
- The technique is simple and fully corresponds to applying a fur coat to any surface. First, we lower the broom into the solution and then bring a stick to the surface and hit it with the broom. Splashes hit the surface. The grain size in this option depends on the viscosity of the solution. You'll have to experiment first.
Making a textured surface
First you need to apply a base coat. Its thickness depends on the depth of the pattern. This is an individual question. Here you do not need to do the work particularly accurately and draw the surface; it is enough to do the work on one plane.
Attention: Before applying the texture to the surface, you must first try it. To do this, you can use a simple piece of drywall. You can simply immediately determine whether such a pattern is right for you. As a result of the experiment, you can immediately determine the size of the layer.
Such mixtures do not harden quickly and you will have the opportunity to do everything as you want.
Decorative design of the stove
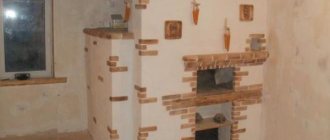
For the final lining of the stove, you can use a wide variety of materials - from inexpensive to luxury. When it comes to a fireplace in a country house, marble, granite in the form of slabs, stones, as well as coils or onyx are often used. The ideal material for fireplaces and stoves is marble, which is not afraid of sudden temperature fluctuations and has a long service life. More economical finishing options include whitewashing, painting, painting or gluing tiles.
Painting and whitewashing the stove
The simplest method of finishing a stove is whitewashing. To carry out whitewashing, prepare a solution of 100 liters of liquid lime and 100 g of non-iodized salt, you can also drop a little blue. A more modern option is to paint the stove with heat-resistant water-based paints. Oil-based paints and varnishes are not used for this purpose - they quickly darken, and can also release toxins when heated. Before whitewashing or painting, the surface of the plastered stove is primed.
Decorative plaster for stoves and fireplaces
Decorative plaster is another easy-to-work and beautiful material that can be used to decorate a stove or fireplace. It is important to pay attention to the quality of the mixture and its suitability for finishing stoves, since not all brands are suitable for this purpose. There are heat-resistant decorative compositions from different manufacturers on sale. Also, instead of specialized products, you can choose plaster for exterior work, which is not afraid of sudden temperature changes.
Mineral-based decorative plasters can withstand high temperatures when heated, with mixtures based on clay or lime being the most suitable. Silicone or silicate compounds are also suitable for the job. As it dries, a layer of paint, varnish or wax can be applied to the decorative plaster.
Tile
To finish the stove after plastering, terracotta or ceramic tiles are often used. It is glued to heat-resistant tile adhesive, which is designed to work with very hot substrates. The usual adhesive composition for tiles will not work - the material will quickly peel off from the stove. There are even special corner ceramic elements on sale that simplify work and make the stove beautiful and stylish.
Finishing the stove with terracotta tiles
Stone cladding
Stone finishing of the fireplace is made from both natural materials and artificial analogues. Moreover, the latter are produced in the form of tiles. Therefore, the technology for their installation is no different. Yes, and natural stone for work is pre-cut into thin plates.
True, some types of stone still retain significant weight. In addition, elements often come in different configurations. And this complicates the installation process. It is necessary to first assemble the mosaic on the floor, and then transfer it to the surface of the fireplace. But otherwise, the technology for installing stone is no different from gluing tiles.
Cladding a fireplace with stone Source dompechey.ru
Tips for plastering stoves
Professionals point out a number of important nuances that need to be taken into account when facing a stove or fireplace yourself:
- When the structure is heated strongly and regularly, it is important to select a special primer for the job that is heat-resistant. The use of ordinary primers may cause the mortar to detach from the oven.
- Plastering can only begin after some time has passed since the construction of the stove. It is better if it lasts at least 2-3 months, and the stove must be regularly heated throughout this period. This will reduce the risk of the coating shrinking in the future.
- After completing finishing activities, the stove can be warmed up after 3 days, when the coating stops being pressed through with a finger. For the first time, they do not heat at full power, then gradually increase the heating temperature. After heating, the vent is not closed to ensure natural evaporation of moisture from the plaster.
- Whitewashing, tiling or painting of the stove begins about a month after plastering.
Repair of stove plaster
If cracks do appear on the stove coating, this means a violation of the plastering technology or improper operation of the structure (overheating, loosening of doors, etc.). In difficult cases, you will have to reposition the stove, but most often, “cosmetic” repairs help. The work is carried out in the following sequence:
- Completely remove old plaster and whitewash from the surface of the damaged area, remove soot, otherwise the latter will appear from under the layer of mortar in the form of rusty spots.
- Cracked bricks are restored with a special repair mixture or the cracks are filled with heat-resistant mastic. If repairs are impossible, the bricks are replaced with new ones, but plastering begins no earlier than after 7 days.
- Apply the primer with a brush and let it dry.
- Prepare the plaster composition and apply it to the area moistened with water by throwing it on. After leveling the solution, rub it with a construction trowel.
- Loose doors are reinforced with wire, and a clay composition is also applied around the fastening area. Let the stove dry.
If the plaster is made correctly, finishing the stove or repairing it can be done with your own hands. The costs of such work will be small, and the savings on wages for invited craftsmen will be significant.
Dimensions and stage of preparation for work
To create a false fireplace with your own hands, no special design or engineering skills are required.
First of all, you need to have a clear idea of what you want your future fireplace to look like in order to choose the right material, which will make the work easier and faster.
First of all, be sure to make a sketch and design. Don’t be surprised, a sketch will help you better imagine what the fireplace will look like externally, and the project will display the given dimensions, according to which you can calculate how much material is required. When choosing sizes, take into account all the nuances and only then do the project.
An artificial fireplace should have dimensions proportional to the room where it will be placed. A massive structure in a small room will look bulky and visually make the room much smaller. A fireplace of modest dimensions in a spacious room will become completely inconspicuous.
In addition, the fireplace should be in the right place so that your household and guests can mix around the room without obstacles.
