How to use a liquid nail gun: instructions
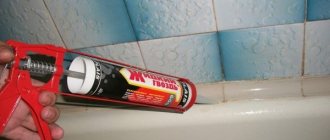
Liquid nails are a convenient, high-quality and reliable installation tool that provides durable and strong bonding of various surfaces. It is used by professional builders and people involved in renovations. Working with this composition is quite simple, for which it is advisable to use a special gun for liquid nails.
Ease of use of the tool
This adhesive can be applied to surfaces in different ways, but it is considered optimal to use a “liquid nails” glue gun. This method has many advantages.
If you do not use this tool, this can lead to applying the product to unnecessary surfaces, skin or furniture, and it will be quite difficult to remove the glue.
Benefits of liquid nails
The product is a special adhesive designed to perform a variety of installation work. It is made using rubber and various polymers. It is considered popular due to its high strength, other positive characteristics and ease of use.
Using this composition, it is possible to glue even the most complex elements, so it can be applied to surfaces made of wood, metal, plastic or ceramics. Its indisputable advantage is the high drying speed, so it does not take too long to connect different products with your own hands.
The resulting compound is resistant to low temperatures and does not ignite, and it can easily cope with a load of up to 50 kg. Rust does not form at the joints of metal products, which increases their service life.
To obtain an ideal gluing result, it is important to choose the product itself wisely, as well as buy a suitable gun for liquid nails. It is due to this that the correct distribution of the composition is ensured.
Pros and cons of using a pistol
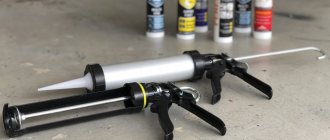
A liquid nail gun is a specialized tool designed to evenly distribute the composition. Its use has many positive aspects.
| Pros of the tool | Minuses |
| Uniform distribution of adhesive composition over any surface | Quite a high cost of the tool |
| The process of applying the product is simplified even in the most difficult to reach areas | The need to use a special cleaner after each use, which entails additional costs |
| Ease of use | You need to understand the specifics of using a pistol |
| Protecting skin and other surfaces from accidental contact with glue | If you choose a cordless tool, you will have to regularly purchase batteries. |
The liquid nail gun can be used to work with various brands of this product, therefore it is considered universal and practical.
Types of pistols
There are several types of such tools, each with its own operating principle:
- the mechanical device operates on the principle of squeezing out a product, for which a person must press the trigger;
- pneumatic assumes that the rod moves under the influence of air flow, and it occurs after the user releases the handle;
- The cordless one makes it possible to automate the process of applying glue, so a tool with batteries or standard batteries is used.
The first option is considered the most affordable and difficult to work with. To simplify the work process, you should choose a cordless tool.
Pistol design
Before using liquid nails with a glue gun, you should understand its structure, operating principle and other features.
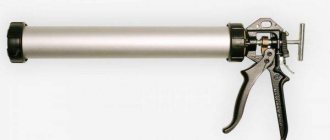
The tool consists of several components:
- body made of high quality plastic;
- a rod equipped with a special disk, and it is due to this that the load on the bottle of glue is distributed;
- a special tongue designed to fix the rod that exerts pressure on the cylinder;
- a trigger, due to which the use of the adhesive immediately begins;
- handle for ease of use of the tool.
There are many models of this pistol available, but they all have a similar design.
Operating principle
In order to use this gun correctly and quickly, you should have a good understanding of the principle on which it works. Actions are performed in a certain sequence:
- first you need to insert a bottle of liquid nails into the body of the tool;
- a disk connected to a rod approaches the base of the container and exerts a force on the product with the adhesive;
- with the help of a lever, also connected to the rod, the operation of the mechanism begins;
- this causes significant pressure to be applied to the bottle, causing glue to emerge from the tip.
To use the tool correctly, you need to understand how to insert liquid nails into the gun, since the seal of the bottle tip is not allowed to be broken during this process. This can lead to the solution drying out, so it will be difficult to use it further.
What do you need for work?
To use a gun specially designed for working with liquid nails, you need to prepare the necessary elements:
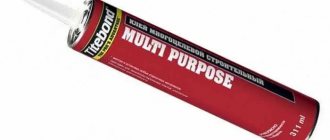
- directly the bottle with the adhesive composition;
- knife;
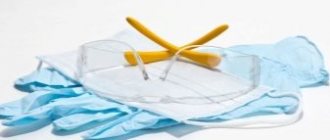
- safety glasses and gloves;
- a respirator if it is expected that an adhesive solution based on organic solvents will be used;
- clean rags;
- Often during work, glue gets on the skin or adjacent surfaces; in order to quickly remove it, it is recommended to immediately prepare a solvent.
This way, you won't need any unusual or unavailable items to use this tool.
How to insert a tube into the instrument
The liquid nail gun has a suitable shape so that any bottle of adhesive can be inserted into it.
The procedure itself is divided into stages:
- the disk and rod are retracted;
- a tube of glue must be placed on the freed area;
- the disk is pressed in for emphasis, for which the hook is held;
- the tip is cut off from the tube, and the work must be done at an angle of 45 degrees.
Once all the preparatory steps have been completed, you can begin working directly with the glue.
Surface bonding process
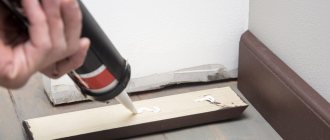
How to use a liquid nail gun? This procedure is considered simple and quick, and the product can be applied in separate dots or in full lines.
Often you have to work with large structures, and in this case you need to apply a large amount of product. The same applies to situations where the surfaces will be exposed to high humidity or significant loads in the future.
In most situations, it is enough to apply liquid nails pointwise, since they are distinguished by a truly high level of strength and reliability of bonding surfaces. This will reduce the consumption of adhesive.
The application process begins after cutting off the tip. If a mechanical tool is used, then you need to regularly press the hook, which will provide pressure on the bottle of liquid nails. The product is supplied in doses, so you cannot apply too much of the solution.
After applying the product to the entire surface, you need to wait about 6 minutes, and only then connect the elements to be glued.
How to remove the solution
Even when working with a gun, there is a possibility that glue will get on furniture, hands or other elements in the room. In this case, you will need to remove it immediately. To do this, it is advisable to use a solvent, but this option is only suitable for quickly removing fresh glue.
If the adhesive has already hardened, then only a special cleaner is used to remove it, and you can also use a scraper, but it can damage the coating.
A liquid nail gun, the instructions for use of which are indicated above, is considered an excellent choice if you need to use a high-quality adhesive to connect different specific surfaces. It greatly simplifies this procedure, and also ensures that the solution does not get on other objects in the room where the work is being carried out.
fb.ru
Description of the device operation process
First you need to figure out how to properly place the container with “liquid nails”. It is unacceptable that the seal of the package is broken if installed incorrectly, otherwise the glue will dry out and it will hardly be possible to use it.
Before using the gun, you need to prepare the following things:
- a bottle of “liquid nails”;
- sharpened knife;
- glasses and gloves for protection;
- a breathing mask if you plan to use an adhesive mixture prepared yourself;
- a dry rag to remove excess adhesive;
- a solvent, due to the fact that the glue may accidentally get on the skin or some surface.
The principle of operation of the tool is quite simple - after pressure is applied to the cylinder mechanically, the adhesive substance “comes out” of the cylinder. The pressure is provided by a rod, which is activated by acting on the trigger lever. In pneumatic mounting units, pressure is supplied by air. Difficulties arise when you need to choose the appropriate glue. As a rule, manufacturers use the same standards, that is, glue can be selected for any gun.
Next, pull the rod out of the device; to do this, mechanically act on the lever and remove the rod. Instead, install the tube and press the release lever 2-3 times with little force to strengthen the balloon.
Poke a hole in the container, glue will flow through it to the tip.
If you decide to use a tubular tool, it is charged differently. First you need to make a hole in a container with “liquid nails”. The container with the adhesive must be fixed so that the cut end of the container is directed towards the tip from where the glue will “come out”. Before installing the cartridge into the tool, you must remove the rod.
As a rule, the kit comes with several nozzles with tips; use one of them to tighten the cylinder. If there is no hole on the tip, then you need to cut off a very small part with a knife at an angle of 45 degrees. Then gently press the trigger lever and move the glue along the pre-applied markings. If you use a skeletal or semi-open instrument, then in order to fill the void in the cap, you must first press the trigger lever several times, and then perform the actions smoothly.
Before the gluing procedure, the surfaces must be cleaned and degreased. Then apply “liquid nails” in a thin layer or in dots. If the surfaces to be glued have a large area, for example, ceramic tiles, then it is necessary to apply the adhesive on them in the form of a snake or mesh. Afterwards, the surfaces to be glued need to be pressed against each other; if necessary, they should be fixed with special structures. Flat parts can be placed under the press. Some types of glue set within 1-2 minutes.
How to use a liquid nail gun?
In any large-scale repair, we resort to the help of assembly adhesive, however, not everyone knows how to use this composition correctly. It is likely that each of us will figure out how to open assembly adhesive , but not everyone knows how to insert it into a gun. Adhesive joints in repair work are simply irreplaceable when attaching laminate or parquet boards, wall and ceiling panels, baseboards, stucco moldings, and various decorations.
Modern adhesive compositions sold as “liquid nails” are cartridges with a volume of 400 to 310 g; there are also more economical options - 200 g, which are suitable for small jobs. Any product indicates how to use the composition correctly and what materials it is best suited for, but not all manufacturers indicate how to use a glue gun .
Correctly opening the mounting adhesive:
- So, first you need to strictly follow the instructions on the cartridge label: the nozzle should be cut at an angle of 45° to the mark.
- The membrane is opened with a knitting needle or other sharp object.
- Then we install the nozzle on the opened cartridge and insert it into the mounting gun - loosen the working rod of the tool, insert the tube into the niche and clamp the rod all the way, the main thing is not to create strong tension in the tube.
In general, nothing complicated, now you know how to insert mounting adhesive into a gun . The glue is applied in dotted drops, a process similar to driving in regular nails. For bonding strength, a continuous application of the adhesive composition to the surface is not required; to fasten heavy parts, the composition is applied in a thin strip.
To remove the liquid nail cartridge from the gun, you need to press the locking tab and, holding it, pull the rod towards you until it stops. Then we move the cylinder forward a little and pull it out of the gun.
Please note that after completing work with liquid nails, it is recommended to immediately clean your hands and tools of the adhesive, otherwise, after drying, this will be quite difficult to do. Organic-based construction adhesive is best washed off with acetone, white spirit and toluene; water-soluble compounds can be rinsed well with water.
If you have not been able to figure out how to use a liquid nail gun or you think that you can handle it on your own and do not plan to purchase this tool, we recommend that you study in detail the instructions for working with the composition. For a small amount of repair work this is quite possible.
How to use liquid nails without a gun?
If you open a new tube of mounting adhesive, you can easily squeeze out the contents by pressing your finger; otherwise, you will need a stick, for example, the handle of a hammer. The main thing is to be careful; you cannot turn over the cap that closes the container, otherwise all the adhesive will spread and the tube can be thrown away.
www.kinkraska.ru
Which mechanism to choose
Before purchasing a tool, you need to decide on the tasks that will be performed with its help. It is necessary to take into account not only the type of work, but also its volume, the type of surfaces being processed. Here are expert recommendations for choosing the right device:
- for large-scale processing, applying wide and long seams, it is worth buying a pneumatic gun;
- for single housework, a skeleton pistol or even a half-open tool is quite suitable;
- In order not to make a mistake during high-precision application of glue, you will have to purchase a battery-powered or electric gun - they are indispensable if great demands are placed on the quality of the seam.
A cordless mounting gun allows you to apply an even layer of glue.
Also, when purchasing, you need to pay attention to the handle of the product - if it has rubber inserts, the gun will not jump out of your hands. It is convenient when it is equipped with the ability to adjust the supply of liquid nails and the reverse stroke of the rod.
If the device is heavy, it will be impossible to work with it for a long time due to hand fatigue. Products made of plastic and aluminum are considered the lightest, and the latter are more reliable and less likely to break.
How to use a liquid nail gun - selection and operation
Contents: 1. Composition of the glue - how not to make a mistake with the choice 2. Preparation of the surfaces to be glued and tubes of liquid nails 3. What to do if you don’t have a special gun 4. Summing up
In the 90s, a new glue “liquid nails” appeared in domestic building materials stores as a replacement for PVA.
When used correctly, the connection is almost 10 times stronger than its polyvinyl acetate counterpart.
For household use, it is available in tubes from 250 to 900 ml. And for a novice master, a reasonable question arises: how to use a gun for liquid nails, how to squeeze them out of this cylinder.
Glue composition - how not to make a mistake with the choice
You can find liquid nails on sale under various brands from a variety of manufacturers. All of them are based on synthetic rubber with various adhesive polymers. And according to the second main component, they can be divided into two groups:
- with the addition of special plastic clay - the original classical production technology;
- with the addition of chalk - a cheaper option.
Before you start figuring out how to use liquid nail glue, you need to carefully and correctly choose it. Manufacturers and sellers claim that there is no particular difference between these two groups. However, experienced installers note that glue with chalk has less adhesion and slightly worse strength characteristics of the resulting joint.
Another nuance is the composition of the polymers. Polyurethane additives can corrode polyethylene and Teflon; acrylic and acrylate mixtures are more intended for use on porous surfaces. Organosoluble synthetics are characterized by increased strength, but have an unpleasant, pungent odor.
Advice! Acrylate, polyurethane and acrylic adhesive water-soluble mixtures are intended for indoor use only. When temperature changes, they begin to collapse. For external work, it is necessary to purchase glue only based on organosoluble synthetic rubber.
Using universal liquid nails you can glue almost anything:
- Fiberboard and chipboard;
- light metal parts;
- ceramic tiles;
- plastic finishing materials
- heavy bamboo wallpaper;
- glass and much more.
The only thing that is not recommended for gluing with this glue is poorly dried wet wood. Otherwise, droplets of moisture will begin to form under the adhesive layer, and the connection will turn out to be of poor quality.
Preparation of bonded surfaces and tubes of liquid nails
Before applying glue, any surface should be cleaned of dirt and dust, degreased and dried. There should not be even the slightest trace of corrosion or rust on the metal. Wooden parts must be treated with a degreasing compound to remove grease. And concrete, brick and plasterboard surfaces are coated with a primer.
To squeeze the glue out of the tube, a special gun is used - mechanical or electric. Both of them operate on the principle of a syringe (when pressed, they squeeze out the required volume of material from the internal container).
The latter is worth purchasing only for large volumes of work. In everyday life, hand tools are sufficient.
Before using the liquid nail gun for its intended purpose, you must cut off the tip of the glue bottle. If you need to glue small parts, you should cut off the very top so that the adhesive mass is squeezed out in a thin stream. And for tiles or platbands, it is better to cut the cone closer to the base.
Recommendation! It is best to cut the tip of the tube through which the glue will be squeezed out at an angle of 45 degrees. This way, the adhesive composition will come out onto the surface to be glued in a neat, uniform layer.
The tube is inserted into the gun after the rod on it is loosened. The container with liquid nails should easily fit into the tool in its place. Then the working rod is pressed all the way to the bottom of the tube.
You shouldn’t be too zealous at this moment and press unnecessarily - the glue will still not be squeezed out from the tip. Before starting work, you will still need to pierce the control membrane inside the cone. This can be done using a long nail or an awl.
Important! There is a removable cap at the tip of the balloon. You should not throw it away when cutting it. It is designed to cover the top of the tube when not in use. Otherwise, the glue in the tip will harden under the influence of air and you will have to throw away the half-used container.
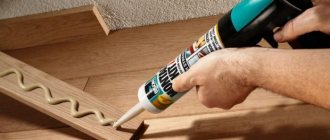
Liquid nail glue is applied in dots or in a thin stream to both surfaces to obtain a strong connection. If the area of parts to be glued to each other is large (for example, ceramic tiles and a concrete wall), then it is worth drawing a snake or mesh on them with an adhesive mixture.
After pressing, it will take about 12-24 hours to dry and bond securely, depending on the liquid nails you choose. You can find a more accurate time on the tube. You also need to take into account the temperature and humidity in the room. In order not to make a mistake, it is best to start using glued parts only after a day.
What to do if you don’t have a special pistol
You need to glue it right now, there is a bottle of glue, but the tool, which costs mere pennies, is not at hand at the most necessary moment. What to do, how to use liquid nails without a gun?
If the tube is full, then a little glue can be squeezed out by simply pressing your finger. Otherwise, you will have to press on the bottom with something long. For example, with a stick or the handle of a hammer.
The main thing here is not to turn the plug that covers the bottom of the cylinder inside it. Underneath there is only an adhesive mixture. If you press on one edge, it will easily turn inside. As a result, all the glue will be exposed to air and begin to harden quickly - the tube can be thrown away.
Summarizing
Liquid nails glue can be used for gluing a wide variety of parts and surfaces. The main thing is to choose the right composition for each material. If you have a special gun, squeezing out should not cause any difficulties, and if you don’t have one, you can use various available devices.
The main thing is to make sure that the bottom does not turn over inside. You can also see how to use liquid nails:
Also interesting: high-quality apartment renovation and house construction is not complete without equipment and tools. The 1000 Watt online store offers you a wide selection of tools at affordable prices. Good luck in your endeavors!
otopleniedomov.com
Sequence of gluing parts
To release the glue from the tube, you need to press the gun handle with frequent hand movements.
The threaded head of the tube is cut off with a sharp knife or the membrane is pierced with a sharp object. A conical tip is screwed onto the head and the cap is removed from it. The edge of the tip is cut at an angle of 45°, and the cap is put on again. The glue cartridge is ready for use.
Before inserting the cartridge into the gun, the operating rod must be relaxed. The tube is inserted into the device; by pressing the trigger, the rod is clamped until it stops. The cap is removed. By frequently pressing the handle, the glue is applied to the surface in an even strip or dotted fragments. To glue large surfaces, a mesh or snake is applied.
The surfaces to be glued are pressed and, if necessary, fixed with additional devices. Individual flat parts can be pressed down with a press. Some types of glue set within 1-2 minutes.
The total bonding time of the parts is usually 12-24 hours.
The area of surfaces prepared for gluing should be taken into account. Do not completely cover large surfaces to be glued with glue and do not apply excess glue. This will increase the setting time of the composition. To glue decorative parts, the cut is made with the smallest distance from the end of the cone.
Excess glue that appears is wiped off with a rag soaked in solvent. Glue stains remaining on wood parts can be washed off with a special cleaner. The glued structure can be used no earlier than after 24 hours.
How to use liquid nails + photos and videos
Liquid nails are a strong adhesive that is suitable for gluing various types of surfaces: metal, glass, concrete, wood and others. When using liquid nails, you need to follow several rules, and the result of your work will certainly be at a high level.
Read the instructions
When purchasing liquid nails, read the instructions to ensure that the product you choose is suitable for the type of surface you intend to work with. In addition, in the instructions on the package you will find information about the conditions under which this product can be used. Please note that for gluing surfaces outdoors or in a damp room, such as a bathroom, you need to use moisture-resistant liquid nails. They must contain a solvent. If you plan to work with nails inside a warm, dry room, choose acrylic nails - they are less toxic.
When working outdoors, it is important to consider the temperature: liquid nails can only be applied if the temperature has not dropped below 4 degrees. If you plan to work in the house, make sure that the room is well ventilated.
Liquid nail gun
Liquid nails are produced in tubes of 300 or 600 ml. In addition to the glue bottle itself, you will also need a special gun with which you will squeeze out liquid nails. In some cases, if you have a very large amount of work to do, you can purchase an electric gun. But, as a rule, this is not necessary: for minor repair work, an air gun is sufficient.
Preparatory work
Before you start working with liquid nails, you need to cut off the tip of the conical tip from the bottle in order to create a hole through which the glue will come out. Experts recommend cutting this tip at an angle of 45 degrees: this way you can apply the glue to the work surface more accurately and accurately. If you have to work with small parts, cut off the very top of the tip so that the hole for squeezing out the glue is small.
Installing the tube into the gun
Now proceed to install the tube into the gun. Loosen the gun rod, insert a bottle of liquid nails into the device, then tighten the rod tightly, securing the bottle in the gun. Don’t overdo it: we don’t need too much pressure at this stage. Using an awl or nail, pierce the metal membrane that prevents the glue from escaping and screw on the conical tip (which should already have the tip cut off at this point).
Preparation of bonded surfaces
Before applying liquid nails, it is important to carefully prepare the surfaces to be bonded. They must be clean from grease, dust and other possible contaminants, and dry. Before applying liquid nails, metal surfaces must be cleaned of rust and corrosion. It is advisable to treat the wood with a degreasing solution or a regular solvent. When starting to glue surfaces made of stone or brick, it is advisable to prime them with special means and wait until they dry completely.
Application of liquid nails
When starting gluing, apply liquid nails to both surfaces. The amount of glue depends on the desired strength, as well as the severity of the objects being glued. If you need to glue heavy objects, apply the glue generously in a mesh, snake or spiral pattern. In other cases, a few points may be sufficient.
Drying the surfaces to be bonded
After applying liquid nails, the surfaces to be glued must be firmly pressed together and wait until they dry completely. The time required for liquid nails to dry depends on the composition of the adhesive in question, as well as the temperature and humidity of the environment. As a rule, 12-15 hours is enough.
chastnyi-dom.com
Rules for working with adhesive
The durability and strength of the connection entirely depend on following the rules and following the instructions, which are detailed on the packaging.
To glue two materials together, proceed as follows:
- Thoroughly clean the parts from dust and dirt, scrape off any remaining paint, and treat with alcohol or acetone. It is recommended to make notches on smooth material to make the surface rough.
- The glue is applied using a special gun in dots, stripes and zigzags. Do not cover the entire area. Using the gun is very easy: a can of glue is inserted into a niche specially designed for this purpose, and by pressing the trigger, the adhesive is supplied in portions to the intended location.
- The surfaces to be glued are tightly attracted to each other and kept in this position for at least two minutes. Within a few minutes it will still be possible to correct the part, and the glue will finally harden no earlier than in a day.
Sometimes the manufacturer advises doing the following: apply glue, attach the surfaces to each other, then separate them and wait 10-15 minutes until the adhesive sets a little, and only then finally connect the parts.
Liquid nails “Moment installation superstrong MVP 70” – properties and features
Bonding surfaces is the main way to quickly and firmly connect materials when performing installation work. The variety of modern technologies for the production of adhesive compositions is so great that in order to fully master them, large companies are developing a separate production line under a specific brand. One of these brands is the Moment brand of the German company Henkel.
The content of the article
Variety of adhesives Moment
The composition of adhesive mixtures determines their properties and purpose. The basis of 90% of adhesives is synthetic polymers or prepolymers. The company produces and uses all modern polymers: acrylates, resins, polyurethanes, silicones, polyvinyl acetates, silane-modified polymers, synthetic rubbers. One adhesive may contain mixtures of two or more polymers, which improves the properties of the composition.
Moment single-base and double-base adhesives are available. The adhesive base hardens when exposed to atmospheric components, when the solvent evaporates, or when a hardener or catalyst is added. In this case, the glue kit includes two tubes.
Variety of products Moment
An important distinguishing feature of adhesive mixtures is the type of solvent. The safety features when using a particular brand of glue depend on it. The company pays great attention to the development of technologies for environmentally friendly and safe compositions based on polyacrylates, which are produced in the form of aqueous dispersions.
Among the other characteristics by which Moment brand products are classified are the physical state of the adhesive mass, curing speed, adhesiveness, and water resistance of the resulting compound.
Moment adhesives are packaged in containers of various sizes. This way you can purchase the required amount of material and fully use the contents before polymerization begins inside the tube.
The Henkel company produces household and construction universal adhesives. Moment Montazh adhesive mixtures are widely used in construction.
Moment Installation adhesives, or liquid nails, are produced on the basis of polyacrylate (MB marking), polyurethane prepolymers (MF), synthetic resins (MP marking), silane polymers (MS).
Universal mounting mixtures based on polyacrylates
All these mixtures have a common property - odorlessness and anti-allergic qualities. Compositions of this type are not intended for gluing Teflon and polyethylene. To obtain a strong connection, it is advisable to use compounds for gluing two surfaces, one of which is capable of absorbing glue. They have similar areas of application and shelf life (18 months). They differ in packaging volume and speed of initial setting.
The compositions are available in white or transparent. This depends on the type of polyacrylate isomers used in the mixture. Information about color is already contained in the names of this or that product in this series.
Installation Superstrong MVP-70 is a white pasty mass. Available in tubes for a plunger gun weighing 400 g. It has a high degree of initial setting (70 kg/m²). The time before intensive polymerization begins after application to the surface is up to 15 minutes.
Superstrong adhesive MVP-70 is used for gluing wood (wall panels), ceramics, foam plastic (curly ceiling cornices, baguettes). It can withstand heavy loads, so it can even be used to glue heavy solid wood panels. Moment Superstrong MVP-70 can be used both for interior work and outdoors. This glue does not decompose or depolymerize over time.
The Henkel company produces acrylic adhesive Superstrong Plus with increased primary strength, up to 100 kg/m². The manufacturer allows the possibility of using this composition for installing door blocks.
Moment Superstrong Plus MV-100
In a dispersed state, polyacrylates are a dangerous poison for fish, so the manufacturer, in the rules for disposing of unused glue, indicates that the glue should not be allowed to enter wastewater. Dispose of it as normal household waste.
Compositions Express MV-50, Express Decor MV-45 are specially designed for finishing work. With their help, you can quickly install friezes, baseboards, and other decor. The initial adhesion force of the compounds is lower (45 kg/m²), so they are used for gluing light objects. Available in 250 g tubes or 450 g cartridges.
Express Decor
Polyurethane compounds
All polyurethane universal mounting mixtures do not contain cyanide. Used both as an adhesive and as a sealant. Like all polyurethane prepolymers, they harden when exposed to water. After drying, they retain elasticity, which is important when installing moving structures or gluing materials that are subject to vibration during operation.
It is allowed to use these compounds in outdoor work, as they are not afraid of ultraviolet radiation. Used for gluing all types of materials, except polyethylene. They have restrictions in temperature conditions for storage and work (+5-+40 °C).
The Henkel company produces polyurethane universal liquid nails Moment Transparent Grip MF-80. Bonding strength – 80 kg/m². It is a transparent viscous mass with a characteristic odor in tubes weighing 300 g.
Liquid Nails Transparent Grip MF-80
Polyurethane liquid nails cannot be frozen before use.
Adhesives Moment Installation based on synthetic resins
These mixtures are produced by the company's factories located in the United States. Composition Extra-strong MP-55 contains phenol and aliphatic hydrocarbons, so be sure to follow safety precautions, as the composition is flammable and the vapors are hazardous to health. Suitable for quick and durable gluing of any materials and their combinations, however, due to the solvents contained in the composition, it is not used when working with polystyrene foam.
Due to the above characteristics, the main area of application of the glue is outdoor work. It is also used for installation of facing panels and tiles. The adhesive strength increases as the glue polymerizes. Primary – 55 kg/m², final – 70 kg/m². Available in tubes of 423 g.
Extra-strong MP-55
Liquid nails based on silane polymers
Henkel technologists are actively searching for new materials and technologies that increase the capabilities of produced adhesives. The use of silanes for curing polymers is an innovative method.
Silanes are a compound of silicon and hydrogen, having properties similar to hydrocarbons, but showing greater reactivity. They are the starting material for the production of many polymers, including silicones. When used in mixtures with polymers, they improve cross-linking of molecules when reacting with water and adhesion to the surface.
The composition of MS-Technology MSP-90 contains a proprietary composition of FlexTec silane-modified polymers. This is a white jelly-like mass. The initial setting of this material is 50 kg/m². Final up to 90 kg/m². It is durable and has high adhesion to any surface.
The adhesive connection is sealed. Does not contain toxic solvents. Unlike most other compositions, it practically does not shrink after hardening. They work with this glue at above-zero temperatures. Available in 280 g cartridges.
Extra-strong MP-55
The Moment brand has been known to our consumers since 1979, having gained popularity over the past time and become a household name. And today the company maintains its reputation by producing high-quality and inexpensive products.
gipsohouse.ru
Glue liquid nails Moment Installation Express white and Super strong transparent
Mounting adhesive Moment Installation - liquid nails produced by Henkel. The scope of their application is quite wide. Very often they are used for fastening wall and insulating panels, baseboards, and decorative elements. The adhesive seam retains elasticity after drying and full strength. This ensures the connection is reliable.
Are you looking for where to buy high quality liquid nails at a low price? The online store "Building Materials-Cheap" offers mounting adhesive Moment Montazhny Superstrong (transparent) and Express (white). Both products are versatile and provide instant grip. You can buy glue in 400g cartridges. We always have excellent prices, expert advice, and guarantees for the products offered.
Glue (liquid nails) Moment Installation Express white universal
Liquid nails - glue Moment Installation Express has an excellent price/quality ratio. This is a universal white composition for interior and exterior use. The product can be purchased for working with metal, wood, ceramics, PVC, chipboard, gypsum, polystyrene foam, styrofoam and other materials. Packing – 400g. Not suitable for polyethylene, teflon, polypropylene, etc.
Among the advantages of the glue (liquid nails) Moment Montazh (400g) Express is the reliability of the connection, the absence of solvents (and, as a consequence, unpleasant odor and toxicity). Has an instant grip with a gripping force of 50 kg/m2. The product allows you to do work quickly, but in a fairly comfortable mode: open time is about a quarter of an hour. During this period, you can align and move the parts being connected.
Application area:
- Adhesive Moment Installation Express can be used for fastening boxes for cable laying
- Tiling
- Installation of doors and window sills
- Fastening skirting boards, decor
- Work with panels and profiles of all types
Glue (liquid nails) Moment Installation Super strong Transparent universal 400g
This is a high-quality waterproof mounting adhesive for interior and exterior use. Moment Installation Superstrong is a transparent adhesive created for reliable connection of a wide variety of materials (PVC, styrofoam, plasterboard, wood, metal, ceramics, plaster, etc.). Actively used for fastening panels and mirrors. In the online store “Building Materials-Cheap” you can buy this universal glue at an attractive price in 400g cartridges.
Transparent liquid nails Moment Installation create a strong but flexible adhesive joint. Superstrong glue, similar to Moment Express, contains no solvents, so it is non-toxic and can even be used in children's rooms. The seam remains transparent after hardening, so the composition can be purchased for working with glass. Provides an instant grip with an initial grip force of 70 kg/m2.
Application area:
- Installation of window sills and window frames in any room
- Fastening stained glass windows and advertising modules
- Installation of door frames
- Fastening any decorative elements, wall shelves
- Filling cracks and seams
- Attaching protective corners and other parts in the bathroom
What is it used for?
Recommended uses include a variety of products including wood, silicate glass, ceramics, organic glass, aluminum alloys, natural cork, plasterboard, foam polymers, siding, wood fiber boards or shavings.
High-strength adhesives can be used to secure sinks and other plumbing fixtures, window and door frames, baseboards, countertops and mirrors. Sometimes craftsmen use liquid nails instead of sealants; they are used to insulate seams, fill microcavities, cracks in walls, ventilation ducts, and corner joints of design structures.
