Most often, a gypsum mixture is used for plastering premises. It has gained popularity due to its environmental friendliness and ease of preparation (diluted with water). All necessary information is indicated on the packaging. For example, the thickness of the layer of Rotband gypsum plaster is 10 mm.
Make sure that there are no drafts in the room while the gypsum plaster is drying. They can cause cracks to appear.
If you or a designer want to paint the walls, the plaster must be of high quality. In the case of wallpapering - improved. The putty can be applied to a surface that has undergone a simple finishing.
- The standard thickness of the coating of simple plaster (spray and soil) is 12 mm,
improved – 15 mm
As SNiP 3.04.01-87 BUILDING STANDARDS AND RULES states:
"3.16. Improved and high-quality plaster should be performed along beacons, the thickness of which should be equal to the thickness of the plaster coating without a covering layer.”
Plaster, beacons and rule
Do you want to transform the walls of your house or apartment yourself, but you don’t have a huge amount of plastering experience behind you? Then you can’t do without beacons. It is also indispensable because they can significantly reduce solution consumption. And all this without harm, but, on the contrary, for the benefit of the business: the evenness of the walls will be ideal.
The best explanation would be to demonstrate this process.
Important! The thickness of the plaster layer depends on the size of the beacons. Therefore, be careful when choosing these guides.
Reinforcement and plaster
Reinforcing mesh is another tool in the repair kit that will make plastering walls easier.
This technique ensures a stronger connection between the wall and the finishing coating and prevents the formation of cracks.
It is used for plastering the house outside and inside.
The thickness of the plaster layer on the first type of mesh should be about 30 mm, and on the second type mesh – more than 50 mm.
The mesh is laid on a primed wall in the same way as wallpaper, only the roll is unrolled from a horizontal position.
Plaster, beacons and rule
Do you want to transform the walls of your house or apartment yourself, but you don’t have a huge amount of plastering experience behind you? Then you can’t do without beacons. It is also indispensable because they can significantly reduce solution consumption. And all this without harm, but, on the contrary, for the benefit of the business: the evenness of the walls will be ideal.
The best explanation would be to demonstrate this process.
Important! The thickness of the plaster layer depends on the size of the beacons. Therefore, be careful when choosing these guides.
In some cases, the curvature of the walls is so great that more than 5 cm of mortar must be applied. For every additional 2 cm of layer, a reinforcing mesh must be used. Plaster is not the most expensive building material, but you need a lot of it, so in some cases it is better to abandon the use of mixtures in favor of plasterboard boards. In addition, such materials are quite heavy, so before starting work you need to make sure that the wall being treated is reliable.
How to improve the quality characteristics of concrete and give it color?
To improve the quality of concrete mortar, it is not necessary to buy expensive granite crushed stone or spend money on special cement. It is enough to use plasticizers. A huge number of them are sold on the building materials market at an affordable price.
If you make a solution with plasticizers yourself, you will be able to achieve the following:
- the process of laying concrete mortar into molds is significantly simplified;
- the process of separating the mixture into its constituent parts is prevented;
- the solution can be used at much higher or lower ambient temperatures;
- the concrete hardening time increases or decreases;
- formed products acquire better plasticity;
- the quality of adhesion of the solution to the embedded parts increases;
- concrete acquires hydrophobic properties;
- the finished product acquires increased lightness and porosity.
What plasticizer should I use?
In order not to waste money on purchasing plasticizers, you can replace them with some available means. The most popular of them are:
- washing powder for automatic machines;
- liquid soap;
- slaked lime;
- office glue.
When using such products, it is necessary to take into account that during the process of mixing with the solution they release a huge amount of foam. It is recommended to add a plasticizer after combining sand and cement. If you do this later, the filler will become enveloped, which will not allow you to achieve the desired effect. The amount of plasticizer should be 0.2-3% of the total volume of the solution.
How to give color to concrete?
A smooth concrete floor will be even more attractive if you give it a specific color. This can be achieved by adding a special dye to the solution. This option is preferable for creating structures with increased throughput load.
It is also possible to apply coloring solutions to the finished concrete coating. They dissolve in polymer impregnations that are used to treat surfaces. This ensures better adhesion of the pigment to the base.
How to control the layer of plaster mixture
Beacons are used for these purposes. They are metal guides 3-4 m long and 6 or 10 mm thick. Six-millimeter products are convenient because they allow you to apply a small layer of solution, while ten-millimeter products are more rigid and comfortable.
After all work has been carried out with a plumb line and the curvature of the coating has been determined, the beacons are installed. To do this, you need to retreat 30 cm from the corner, draw a straight line, apply small portions of the solution to it and glue the beacon. By pressing or pulling outwards you need to align it, and then install the second one at the opposite corner.
Experienced craftsmen can slightly change the thickness of the plaster layers based on their personal experience, but beginners are highly advised not to deviate from the above parameters and the manufacturer’s recommendations.
Reinforcement and plaster
Reinforcing mesh is another tool in the repair kit that will make plastering walls easier.
This technique ensures a stronger connection between the wall and the finishing coating and prevents the formation of cracks.
It is used for plastering the house outside and inside.
The thickness of the plaster layer on the first type of mesh should be about 30 mm, and on the second type mesh – more than 50 mm.
The mesh is laid on a primed wall in the same way as wallpaper, only the roll is unrolled from a horizontal position.
External plaster on concrete
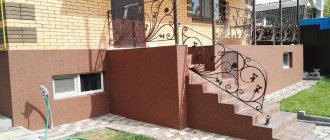
Facade plaster helps give your home an aesthetic appearance. Exterior concrete finishes decorate the walls of a building made from various materials and provide protection from weather conditions such as snow, rain, wind and solar ultraviolet radiation. Today we offer a wide range of mixtures with different application technologies for cladding all types of masonry materials.
What should be the thickness of wall plaster?
It turns out that the thickness of the plaster cannot be arbitrary; it has its own maximum and minimum, determined by the properties of the plaster materials and the type of base. This was found out in the practice of plastering and included in SNiP. It is understandable that property owners want to save on compounds and apply as thin a coating as possible. Why it is not recommended to apply plaster compositions thinner or thicker than specified in the rules, we will consider further.
Examples of manufacturers
Top popular mixtures:
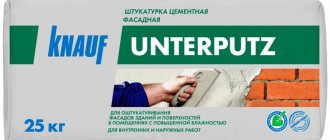
- German mixtures Caparol, Ceresit, Knauf are known for their high quality and medium price range. Produced in Eastern Europe and the CIS countries without loss of performance characteristics.
- Polish products Atlas, German mixtures Kreisel, Austrian materials Baumit, Ukrainian plastering compositions Polimin are distinguished by reliability and quality. Used for external and internal cladding of any surfaces.
- Russian Bolaris, Volma, Osnovit and Kazakh Synergy compounds are distinguished by mediocre performance. They occupy the lowest price segment.
Return to contents
Depending on location
Since the operating conditions of the plaster coating outdoors and indoors are radically different, this also affects the thickness of the plaster layer.
What characteristics of the coating are affected by the size of the laid layer:
- coating strength;
- base strength;
- leveling efficiency;
- financial and labor costs.
The maximum thickness of wall plaster, depending on the number of layers (according to the quality of finishing), can be represented as:
a) 1.2 cm – simple (total thickness of spray and soil);
b) 1.5 cm – improved (total spray, soil and covering layers);
c) 2.0 cm – high-quality (spray + 2 ground layers + covering layer).
The maximum value is set to reduce the likelihood of cracks forming, shrinkage of the plaster coating when drying, and slipping of the freshly laid mortar.
Read more about plaster defects and the reasons for its cracking in the materials on our website.
Plastering indoors
The thickness of the plaster on the interior walls may depend on the design features of the room. For example, if electrical wiring is laid along the surface of the walls, the thickness of the coating is increased to hide the location of the wire. In this case, it is necessary to ensure a minimum height above the wiring itself.
In interior spaces, increased demands are usually placed on the quality of plaster finishing. This concerns the geometry of surfaces. If the walls collapse or the angles between them are less than or more than 90 degrees, then leveling is performed, which may require a layer of more than 8 cm.
An increased layer may be necessary in the case of dense reinforced concrete walls for operational reasons. For example, to install fasteners on which paintings are hung, dense, strong concrete walls have to be drilled.
For walls made of cellular concrete, it is especially important to ensure vapor conductivity of the interior and exterior finishes. Moisture from such walls must be removed continuously. Therefore, in order not to resort to complex calculations, we are guided by the rule: the internal plaster coating should be twice as thick as the external one.
So, if the permissible minimum thickness of the street layer is 10 mm, then the internal plaster is made no thinner than 20 mm. This method will prevent condensation from entering the room to the base of the wall. In this case, the right choice would be to use a silicone or silicate mixture for facades.
Facade plaster
For facades, the strength of the coating is the primary condition, since this side of the building is exposed to hail, strong wind, temperature and rain loads, and the base is subject to strong mechanical stress. And the protective function is more important than the decorative one. The composition of the mixture that will be applied to the outside of the house depends on this. Therefore, cement compositions are more often used for facade work, which determines the minimum layer of simple plaster - from 10 mm.
The minimum standard is also due to the need to ensure the integrity of the plaster coating during operation. An excessively thin plaster layer has low strength. A small mechanical load is enough, and the finish will begin to crack and peel.
Why are they needed?
This coating can become a decoration for the walls of a building.
Plastering the outer side of the walls of buildings protects the surface from the accumulation of dust and makes it possible to remove dirt - thereby ensuring the proper sanitary condition of the building. The material creates a reliable barrier against the harmful effects of moisture and aggressive environmental factors, reduces heat energy consumption and absorbs sound. The decoration performs a decorative function - it decorates the facade of the house with a variety of textures and colors.
Plaster thickness depending on the type of mixture
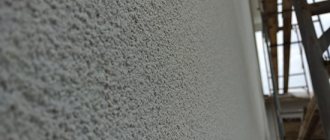
Let's consider what thickness of plaster should be applied when using different compositions. The most popular are gypsum and cement. Lime compounds are also used for premises, and clay finishing is often used. Each of the materials forms a coating, the strength of which depends on the size of the plaster layer. This property can critically manifest itself when the solution sets; if the thickness of the coating is less than permissible, it will tear when drying (the plaster will crack). The minimum is also determined by the size of the filler fractions.
The finishing of the premises can be done with gypsum or gypsum-sand mortar. According to the recommendations of the manufacturers, the dry gypsum mixtures they have developed can be applied up to 50 mm thick (Volma layer - up to 60). The minimum thickness indicated by companies is 5 mm, but craftsmen often apply a 3 mm layer of gypsum mixture. When applied by machine, the minimum is 8 mm. According to SNiP, the thickness of a single-layer gypsum coating is up to 1.5 cm.
When using a cement mixture, the normalized minimum is 1 cm, maximum 2 cm for one layer. When leveling plastering, the spray layer is up to 0.5 cm, a separate layer of soil is at least 5 mm. The total thickness of the coating is at least 10 mm.
Lime mixtures can be used for outdoor finishing (with the addition of cement), but are more often used in dry rooms. The thickness of the spray is up to 5 mm, the thickness of the soil is up to 7 mm. If a lime composition is used as an intermediate – buffer layer between cement and gypsum compositions, then the thickness of the “buffer” should be at least 4 mm.
Clay is an excellent plastic material. Most often it is used for wooden surfaces, onto which shingles are filled before plastering. The minimum layer of clay mixture on top of shingles is 10 mm. If the coating is thinner, the clay will simply peel off. Clay-sand cementless mortar is applied with a thickness in the range (mm) - 10-35, with the addition of cement - 15-35.
Criterias of choice
- Persistence. Acrylic plaster has the highest durability. This coating lasts up to 25 years. Silicate and silicone - 20 years, and external cement - 10 years. Silicone and acrylic plaster exhibit the highest resistance to weathering. Mineral and silicate mixtures require the inclusion of antifungal and antiseptic additives in their compositions.
- Texture. Smooth and even surfaces are more likely to crack due to high internal stresses. Rough walls are more durable and allow you to mask defects in the outer surface.
- Color. The durability of the color finish depends on the uniform distribution of paint or pigment in the outer layer, the antistatic properties of the plaster, the ability to repel dust, and resistance to UV rays. The most resistant in this regard is silicone plaster.
Table of operational parameters of external plaster for facade decoration
Return to contents
Thickness for different bases
When finishing, it is necessary to take into account the type of wall material. For example, the thickness of plaster for walls made of wood, OSB or concrete, provided the walls are the same evenness, will be different.
Brick
The relief of the brick surface affects the cross-sectional size of the plaster coating. Applying less than 5 mm means not ensuring good distribution and high-quality performance of the composition; such a layer turns out to be ribbed with a difference in thickness. Recommended sizes: optimal – 2.0-2.5 cm, largest – 5.0 cm.
Concrete base
Concrete walls in panel houses have a smooth surface with a small number of large pores. Plastering work is carried out not so much for leveling, but for sealing joints, for heat and sound insulation. Here, in the absence of differences, you can get by with a layer of 2 mm. In case of unevenness, rotation or collapse of the wall, the upper limit (with mesh reinforcement) is 70 mm.
Aerated concrete blocks
The material is not as strong as brick or concrete, so the heavy weight of the plaster coating can become an intolerable burden for the cellular base. With proper preparation for plastering using a plane, you can achieve a smooth wall. In this case, it is possible to plaster aerated concrete blocks with a minimum of 2 mm. If the walls are uneven, then you can correct the situation by achieving a layer 0.8-1.5 cm thick. Anything above these values will easily crack and fall off. Sometimes the surface of aerated concrete blocks is destroyed.
Wooden surfaces
Quite a complex material for plastering. Wood tends to dry out and get wet from excessive humidity - “play”. In such conditions, it is not possible to achieve reliable adhesion with all plaster compositions. To ensure a strong connection with the base, before plastering the wood, mesh or shingles are attached to the wall. The first layer of plaster is applied so as to cover the slats/mesh, the second - 15-20 mm.
Drywall
The surface of plasterboard sheets is initially flat. The joints and dents from installing self-tapping screws are plastered. Drywall plaster is used in cases of unevenness not exceeding 1.5 cm. Therefore, we can consider this 1.5 cm to be the greatest thickness of the plaster layer for plasterboard bases, and the minimum thickness of plaster is 1.5 mm.
Insulation materials
Penoplex, as well as other insulation materials installed on the walls of a house, require enhanced mechanical protection, since they, especially polystyrene foam, do not resist mechanical influences well, such as impacts or abrasion. Such loads are especially high in the area of the base. Therefore, the plaster finish of the insulation must be reinforced for strengthening. The first layer (1.5 cm) is applied to solidify the reinforcing mesh, the second (1.0-2.0 cm) is applied for leveling and protection.
Thickness of decorative plaster
Decorative compositions intended for decorating interiors and facades also have their maximums and minimums.
Existing types of finishing decorative mixtures are divided into:
The Venetian can boast the most minimal layer of plaster. This is due to the fraction of the components included in the composition (the filler is stone flour). The finish with the effect of crinkled silk and Moroccan is also distinguished by its thin layers.
Structural compositions produce a layer no less than the size of filler granules. For example, the popular finishing of bark beetles, performed with roller compounds. By the way, for the bark beetle, the grain size dictates the maximum thickness. Indoors, compositions with filler of a smaller fraction are used than on facades. The same can be said about travertine plaster.
How to control the layer of plaster mixture
Of course, when applying a solution, it is difficult to determine the size of the formation thickness by eye, and without sufficient experience it is impossible. If you need to apply the solution in a thin layer on a flat wall, then use a 50-centimeter spatula and then level it using the rule. When performing decorative work, the size of the mortar thickness is checked by eye. In the case of applying the maximum layer of plaster, the thickness and evenness of the coating is ensured by the use of beacons.
Beacons are guide profiles made of metal, mortar, plastic or wood. Standard metal profiles have a height of 6–10 mm, a length of 3–6 m. Mortar profiles can be made to any desired height. Before starting the installation of beacons, the walls are examined, irregularities are identified, and the minimum height of the future covering is determined. Using the chosen method, they create an auxiliary vertical plane along which the beacons are placed (read about installing beacons here).
In addition to beacons, corner profiles are used to apply the proper layer, installing them on slopes. To make arched doorways, templates are made from plywood.
Craftsmen with extensive practice and accumulated experience can change the thickness of the plaster coating within small limits. However, this is not recommended for beginners. It is correct to follow the instructions and standards so as not to end up with a “broken trough” - cracking and falling off plaster mass.
At first, plastering looks not only dirty, troublesome, but also complicated. There are many nuances in plastering that affect the result. Thus, the factor on which the quality and reliability of the finish in operation directly depends is the thickness of the plaster on the wall. There are many numbers given here that make your eyes widen. In fact, you will need those that are easy to remember. With the beginning of practice, the plastering process will no longer seem difficult. And over time, such work will become habitual.
Groups of plaster compositions
The goal of the process is to create a smooth, perfect surface.
There are three main groups of plasters:
- Classic plaster mixtures, which are intended for leveling surfaces for further finishing (painting, puttying, varnishing). They are endowed with high and specific protective properties, for example, when facing block wall materials such as aerated concrete, brick, cinder block. The most common is cement plaster.
- Decorative plaster products used as wall finishing. With their help, the masonry takes on a finished look. Plaster is used to decorate facades to create relief or colored surfaces. They differ in more complex application technology.
- Specific plasters designed to create a heat-insulating or shielding layer on walls. With their help, additional protection is provided from low temperatures, high humidity, noise, etc. The compositions are recommended to be applied under decorative plaster.
Return to contents
Wall plaster: maximum layer thickness
You can level the walls before finishing the room using plaster. This method of pre-finishing walls has a number of undeniable advantages: low cost of the material and the ability to do all the work yourself. Even a person who is far from construction can master the technology of plastering walls in literally a matter of minutes. The main thing is to know the maximum thickness of the applied material when finishing walls. The material of the surface on which the work will be carried out is also taken into account.
Alignment of walls
You can make walls smooth in different ways. The result is better when plastering the walls along the beacons is used. This topic will be discussed in our article.
The plaster composition can be applied mechanically or manually. From an economic point of view, machine plastering of walls is justified for large volumes.
Modest scales can be leveled in the old “old-fashioned” way, that is, by hand.
All that remains is to decide: do the work yourself or entrust it to a specialist. At first glance, plastering walls using beacons with your own hands seems complicated and time-consuming. However, practice shows that, in general, there are no difficulties - the same plaster, you just need to figure out the installation of beacons.
Types of plaster
Several types of mixtures are used for finishing premises. They differ in their composition and intended use. Plaster compositions can be classified as follows:
- Simple. Used in cases where special finishing is not required. Apply to the wall in two layers.
- Improved. Goes well with wallpaper. This plaster is applied to the wall in three layers - spraying, priming and covering.
- High quality. Used to prepare walls for painting. Apply in several layers. During the work process, it is recommended to use special beacons.
According to its structure, plaster can be wet or dry.
In the first case, it is a cement-containing mixture that reliably adheres to the surface. It is undemanding to the level of humidity in the room. Among the disadvantages, one can note the long drying time of the material.
Dry plaster is more convenient to work with. It contains gypsum or lime mixtures. Disadvantages include the material’s demands on indoor air humidity.
How to plaster concrete walls
There are a large number of mixtures to create a coating over concrete. They are divided into 2 types of mixtures for plastering concrete walls.
- Cement-sand.
- Decorative plaster (gypsum, acrylic, latex, silicone).
A cheap and affordable product is cement plaster for external work. Decorative mixtures are more difficult to apply, but they are much more beautiful in appearance and do not require facial plastering.
The base is also important. Thus, the plastering solution of expanded clay concrete blocks does not have any distinctive features from the plastering of concrete, monolithic, or poured concrete. For this purpose, mixtures based on both cement and gypsum can be used.
The composition for cellular concrete has features combined with the parameters of the solution:
- hygroscopicity – plaster for cellular concrete is endowed with good absorption of liquid. Due to this, in order to avoid depletion of the plaster composition, the walls are coated with acrylic primer 2 times, with each layer completely drying;
- the smoothness of the concrete does not allow the finishing material to reliably adhere to the surface of the slab. In this regard, concrete must be plastered only using reinforcing mesh;
- plastering of sawdust concrete surfaces is carried out according to the standard. The only difference in the material is the presence of sawdust in it. The reason is the coefficient of thermal conductivity and vapor permeability. When passing layers with a lower density, liquid vapors fall into dew on the inside of the elastic cement-sand composition. A similar process does not occur if layers of the same kind are in contact - a sawdust concrete sheet with sawdust concrete plaster.
Silicone
This solution has the highest performance characteristics and high elasticity. Due to this, the material is easy to use. The plaster composition is able to maintain integrity during large shrinkage of the building, which makes it possible to create a high-quality external coating during plastering of panels made of foam block and gas silicate, which shrink strongly in the first year of use and require protection from snow and rain.
The advantage of the finishing material is:
- repelling dust;
- instant laundering;
- long-term color retention;
- can be used to plaster the basement floors of houses near the sea coast due to its increased water resistance and resistance to the influence of salt from the sea.
Among the disadvantages of the composition are:
- price - it is determined by the components, including natural silicone resins. This pleasure is not cheap, which is why the cost of the product is high, relative to conventional materials based on acrylic or minerals;
- the difficulty of removing the old finish - silicone material is durable, but there is always the possibility of its necessary removal. Due to its high resistance to mechanical damage, the finish is difficult to clean;
- Due to the high cost, there is a possibility of purchasing a counterfeit product.
Silicate
These solutions are made using liquid potassium glass, based on a binder component. Stone chips, pigments, water, and modifying additives are used as fillers.
Advantages of silicate compounds.
- They have increased protection from moisture and wind.
- Durable.
- Decorative finishing at a high level.
- Excellent adhesion to aerated concrete, concrete, silicate.
- The material is fire-resistant, vapor-permeable.
- Plaster is available in a variety of shades.
- It can be finished with silicate paints.
The disadvantage of the product is its high cost.
Acrylic
Acrylic-based compositions require application only to a smooth surface. Due to increased elasticity, a small thickness of the facing layer is enough. The final finish is wear-resistant. Can be used for vapor-permeable concrete panels insulated with polystyrene foam and polyurethane foam.
The disadvantage of solutions is:
- high price;
- flammability;
- low permeability;
- instant settling of dust and dirt, which leads to the loss of the aesthetic appearance of the building.
Mineral
Walls are often leveled using mineral mixtures. They are offered in the form of dry formulations. The solution is prepared directly on the construction site. It is diluted with the required amount of liquid, based on the attached instructions.
Walls made of various materials are plastered with mineral mixtures. Plaster can also be applied to a wooden surface, having done the preparatory work in advance.
To prepare the mixture yourself, you need a high grade of Portland cement and filler, selected in relation to the final requirements. A popular solution is lime mortar for plaster: cement-based with sand or lime filler.
Advantages of mineral plasters.
- Low cost.
- Strength, adhesion, vapor permeability, frost resistance at a high level.
- Low water absorption.
The disadvantages include:
- no variety in colors;
- low elasticity, which over time leads to cracking during shrinkage of load-bearing walls.
Thickness for different bases
It’s worth noting right away that the layer of mortar on the wall should be minimal. Excessive thickness will cause the plaster to crack under its own weight. Let's look at what the maximum thickness of plaster should be using specific examples.
Brick
Brick walls are characterized by a certain relief, so the minimum amount of mortar should be 5 millimeters. It makes no sense to apply less, as there will be problems with leveling the material. The maximum value can reach up to 5 centimeters. For this thickness it is necessary to use reinforced mesh. The maximum permissible layer of plaster without a mesh should not exceed 2-2.5 centimeters.
Concrete base
Thanks to its structure, concrete adheres well to any finishing materials and has a fairly smooth surface. The thickness of plaster for concrete walls starts from 2 millimeters. The maximum amount of mortar you can apply without using a mesh is up to 20 mm. With reinforced mesh, the thickness can reach 7 centimeters.
Aerated concrete blocks
In their structure, these products resemble concrete, so the minimum amount of mixture is the same as in the previous case. The maximum permissible value can vary from 8 to 15 millimeters. It all depends on the curvature of the walls.
Wooden surfaces
Bonding the mixture to the wood is not so easy. Therefore, before starting work, a metal or plastic mesh is installed on a wooden wall. The optimal cell size is no more than 40 millimeters. The metal mesh is attached to the surface using self-tapping screws, while the plastic mesh is attached with glue. The solution is applied in two layers. The thickness of the first does not play a big role. It is applied to hide the mesh. The thickness of the second layer ranges from 1.5 to 2 centimeters.
Drywall
Drywall itself is a good finishing material, so it rarely needs additional leveling. If there is a need to apply plaster, the minimum layer is 1.5 mm, the maximum is 10. If the maximum amount of plaster is applied to the drywall, it is necessary to first install a plastic mesh.
Insulation materials
As in the case of wooden surfaces, the insulation is plastered in two stages: the first covers the reinforcing mesh - 1.5 centimeters, the second leveling layer - 1-2 cm. These data apply to all types of insulation, including mineral wool and foam plastic.
How to make a “warm” solution
This material has been very popular recently due to the desire of home owners to reduce heat losses. To reduce thermal conductivity, not ordinary sand, but perlite filler should be added to the solution.
For one part of cement you can give 5 parts of filler; if you need to make the mass more durable, then increase the amount of cement. Water, as always, is added as needed.
Important. When working with dry perlite, you must use protective masks. Many builders ignore this requirement, but in vain.
Step 1. Measure out the required amount of perlite. This is quite an expensive material, do not overspend. It is recommended to first find out the entire volume needed for one batch and prepare one large container for it. Next, make a small hole in the plastic bag and carefully fill it. Avoid excessive dusting and keep the bag as low as possible above the container.
Step 2: Turn on the concrete mixer and add water.
Pouring water into a concrete mixer
It is advisable to first measure its quantity. The fact is that this filler absorbs much more water than sand. If you need to prepare a large amount of solution, then you need to remember all the proportions of the ingredients for one batch and not experiment every time.
Step 3. Add a special soaping resin to the water; if it is not available, then liquid soap will do at the rate of approximately 100–150 ml per concrete mixer with a volume of 0.25 m3. Dilute the soap a little with water, you need to foam it. Approximately 2.5 buckets of water are needed. Do not pour any more, otherwise the perlite will rise to the top and not get wet.
Use liquid soap or soap resin
Practical advice. Never pour completely dry perlite into a concrete mixer; first wet it in the container. To do this, pour water into it, add perlite and stir with a shovel until it becomes mushy. The mass is considered ready after the perlite stops producing dust when stirred.
Step 4. Throw wet perlite into a concrete mixer; if it sticks to the walls, then add water.
The master collects wet perlite with a bucket
Throwing perlite into a concrete mixer
Only a little, otherwise problems will arise later - adding perlite will not remove the excess. The fact is that dry perlite will float on top and will not be able to absorb moisture. You will have to mix it by hand again and only then add it to the mixer.
Step 5. Once the perlite has become homogeneous, begin adding cement. Sprinkle it in small portions, do not allow the formation of balls. It is very difficult to get rid of them later. If the solution is planned to be used for plastering some wall surfaces, then increase the amount of cement. Constantly monitor the consistency and add water as needed.
Practice shows that, despite all efforts, it is not possible to completely avoid the sticking of perlite and cement on the walls of the concrete mixer. You need to stop the concrete mixer, carefully clean the walls of the adhering material with a trowel and mix it a little with the finished material inside the barrel.
Step 6. At the last stage of preparing the mixture, add sand. As the concrete mixer fills, increase its tilt angle. Keep in mind that the greater the angle of inclination, the worse the mixing process.
If the mixture sticks to the walls again, you need to periodically stop the mixer and clean its walls. There are situations when the mass in the middle of the mixer volume is normal, but on the sides it is liquid. Stop the mechanism, select two or three buckets of mass from the middle, tilt the mixer and turn it on again. In this position, the mass mixes better. Everything is fine - add the removed mass again, tilt the mixer and turn on the engine.
It is more difficult to prepare such a solution than an ordinary cement-sand solution; you need to understand this and not be afraid of the first difficulties. Some professionals advise adding slaked lime to the solution; we consider this an optional condition. The fact is that perlite itself inhibits the development of microflora and no additional ingredients are required. But the final decision is yours. If you have the desire and opportunity, add lime.
Prices for popular models of concrete mixers
The working process
Plastering walls involves applying several layers. Each is applied for a specific purpose.
Splash
A pre-coat that is applied to a bare wall. The purpose of the spray is to bind the wall surface with the plaster mixture. For spraying, you must use a liquid mixture. The plaster is simply thrown onto the surface of the wall, leaving as many irregularities as possible. For brick, concrete and aerated concrete blocks, the thickness of the spray is 5 millimeters, for wooden surfaces – 9 mm (including the reinforcing mesh).
Priming
This is the main layer of plaster. The primer is applied after the spray has set a little. The preliminary layer should not be allowed to dry completely; this will make it difficult for the materials to adhere. For soil, a mixture of a thicker consistency is used. It is applied as follows: a small amount of plaster is thrown onto the wall and immediately leveled. The procedure is repeated until the entire wall is plastered. To optimize the process, you can install special beacons on the wall before spraying. These are metal or plastic guides that are leveled to the required thickness of the plaster layer. The distance between the beacons is 1-1.2 meters. The soil is poured between the beacons and smoothed out.
If gypsum or lime mortar is used for the soil, the recommended thickness is about 7 millimeters. For cement mixtures, the optimal soil thickness is 5 mm.
Covering
This is a finishing coating designed to eliminate minor defects and errors. For covering, mixtures are used whose fraction does not exceed 2 millimeters. The finishing layer is applied with a wide spatula, but is not thrown onto the surface, as in previous cases, but is pressed tightly and smoothed in a circular motion. The thickness should be minimal for all types of surfaces. After covering, the plastered walls are grouted.
There are cases when the solution is applied in one layer. The thickness of cement-based plaster should not exceed 2 cm, lime and gypsum mixtures - 1.5.
Modification of concrete screed using liquid glass
An aqueous alkaline solution of sodium or potassium silicates can improve the resistance of the coating to moisture, elevated temperatures, mold and other external influences.
Liquid glass additives are used in two ways - by introducing them into a solution or by treating an already finished surface.
To prepare an anti-dust impregnation and improve waterproofing, 1 kg M400 Portland cement is mixed with water and mixed with 1 kg of liquid glass.
One of the most inexpensive and effective supplements
Silicates are not used in their pure form, as they are quickly washed out with water.
Dilute silicates with clean tap water with a minimum content of impurities and salts. One glass of silicate glue is poured into 10 liters of water and stirred until a homogeneous solution is obtained. Next, add the dry ingredients in parts with continuous stirring.
The resulting solution is consumed immediately, after which the instruments and containers are cleaned.
Permissible deviations
The thickness of the plaster on the wall is prescribed in the building codes and regulations (SNiP), act 3. 04. 01-87. All standards for insulating and finishing coatings are listed here.
- For simple plaster, the maximum permissible deviation in the vertical plane is no more than 3 millimeters. For high-quality mixtures, this figure should not exceed one millimeter.
- Along the entire wall (in the vertical plane), no more than 15 millimeters are allowed for plastering with simple mixtures and 5 mm for high-quality materials.
- It is worth noting that even the number of errors is strictly regulated. For a plot of 4 square meters, no more than three defects are allowed. And this is when working with a simple mixture. For high-quality, the requirements are even stricter, no more than two.
- The depth of the unevenness should not exceed 5 and 2 millimeters. For simple and high quality materials respectively.
- To perform work in a horizontal plane, the requirements are the same. Therefore, there is no point in repeating them.
- Remember that there are certain requirements for the moisture content of the rough wall. This figure should be within 8%. To determine the level of humidity, there is a special device - a moisture meter. If there is no device, you can simply inspect the wall. It should be dry visually and to the touch.
Where is it better to make the mixture, in a concrete mixer or a mortar mixer?
First, we need to tell you how a mortar mixer differs from a concrete mixer.
Concrete mixer
The main element is a rotating drum, to the walls of which blades are welded.
Advantages : versatility. You can prepare concrete and sand mortars in a concrete mixer.
Disadvantage : the quality of mixing does not always meet the required parameters. To improve, the process has to be significantly lengthened. Another disadvantage of the concrete mixer. During the preparation of the solution, as the container is filled, it must be constantly raised (reduce the angle of inclination), and the operating principle of the unit is such that the greater the angle of inclination, the better the solution is mixed. Accordingly, if you need to prepare a lot of mortar in one batch, then the concrete mixer must be periodically partially emptied, the angle increased and the remaining mortar mixed. This takes energy and time. Mortar mixers do not have this disadvantage.
Mortar mixer
The body has the shape of a circle and stands motionless. The blades rotate inside the body. The advantage is excellent mixing quality, lumps of cement and sand are completely broken up. Disadvantage: You cannot prepare concrete in a mortar mixer. The fact is that large fractions of crushed stone fall into the gap between the rotating blades and the stationary bottom. The mechanism jams, which causes the electric motor to burn out.
Mortar mixer from a barrel
Some tips for use
Water is first poured into all mechanisms, and only then dry materials are added.
Cement should only be poured into water or a very liquid solution. If you don’t do this, the balls will roll into the concrete mixer, and it’s almost impossible to completely break them. This does not apply to the mortar mixer; it does not create such problems.
After finishing work, be sure to thoroughly wash the units. It is strictly forbidden to beat off the hardened solution with a sledgehammer or crowbar. During such procedures, irregularities appear on the body, and an increased amount of mass will then accumulate in them. Negative processes are developing increasingly.
Video - How to quickly wash a concrete mixer
When connecting the equipment, be sure to comply with the requirements of the PUE; you are working in constant contact with water, which greatly increases the risk of electric shock.
Never attempt to clean the agitator surfaces while they are rotating; doing so can cause serious injury.
It is important to wash the concrete mixer on time, following safety rules
We have told only two recipes for preparing mixtures for outdoor use. If you master them, then any changes in the recipe and technology will not pose any difficulties.
Conclusion
Plastering walls is not such a complicated procedure as it seems at first glance. The main thing is to properly prepare the base and monitor the thickness of the laid coating. Remember a few practical tips.
- If the solution is applied in several layers, the total thickness of which exceeds 3 centimeters, be sure to use reinforcement.
- Prepare the base carefully. An influx on the wall with a thickness of only 1.5 millimeters will increase the amount of material used by at least 3-4 bags.
- Use beacons to make your work as easy as possible.
vote
Article rating