Plastering work is used for rough finishing of walls or ceilings. When applying the plaster layer, the walls or ceilings are leveled and a base is created for applying the finishing putty layer and decorative coating. For interior work, plaster mixtures based on gypsum or cement are used. Gypsum plaster is preferable for use in dry areas.
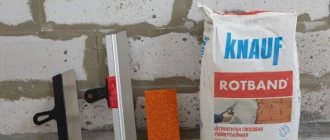
Choosing Rotgips plaster
Gypsum-based plaster mixtures are produced by various manufacturers. One of the Russian ones. The line of products for plastering "GIPSOPOLIMER" produces plaster mixtures Rotgips Standard, Rotgips, as well as mixtures for machine plastering. Let's take a closer look at what one of GYPSOPOLIMER's products is - Rotgips gypsum plaster.
Mixtures for manual and machine use
Gypsum plasters are also distinguished by the method of their application. According to this criterion, two types of compositions are classified: for manual and machine application.
Mixtures of the first type are distinguished by a large number of chemical additives, since their main task is to provide optimal time for manual production of the batch. Adding chemicals to the composition allows you to increase the time for the solution to start setting to 40-60 minutes. Thus, in just 4-5 hours a full cycle of work on the external or internal finishing of buildings and premises can be completed.
Gypsum facade plaster - an environmentally friendly coating for a residential building
Gypsum plasters intended for machine application have different tasks. These compositions should have a longer setting period (from 1.5 to 2 hours), since the master needs to process a significant amount of surfaces during this time. The work is carried out in two stages: applying a plaster mixture to the wall with a special gun and leveling this layer. The long period of setting of the composition ensures that the master will have time to complete the full cycle of tasks required by the technology.
Plastering walls by machine
Mechanical plaster
The gypsum composition is fed into the gun through hoses connected to a specialized machine for preparing wet plaster from a dry mixture. For better mixing and to ensure unimpeded passage of the solution through the hose system, fractionated sand (crushed to particles of a certain cross-section) is added to the mixture.
Application technology
Plaster for interior work has a certain application technology. And this process consists of two stages.
The first stage is preparation . To do this, the wall or ceiling is cleaned of dirt and dust. And then treated with a deep penetration primer. Better in two layers. The purpose of this construction operation is to increase the strength of the outer layer of wall material, plus to increase the adhesive properties of the wall or ceiling surface.
If the plaster layer is thick, then a plaster mesh must be laid on the leveled surface, which is attached to the wall with self-tapping screws and washers with wide heads.
The second stage is applying the mixture . But before that, it must be prepared in strict accordance with the manufacturer’s instructions, which are printed on the packaging.
- The dry mixture is poured into a container that has previously been filled with water. Do not pour water into the plaster mortar.
- Mixing is carried out using a drill with a special attachment or a construction mixer.
- The kneading is carried out for 2-3 minutes, then the material should stand for 5 minutes, and then another mixing.
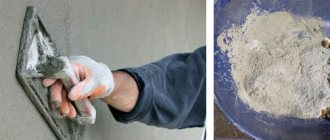
The application process itself is carried out with spatulas, and leveling is carried out using the rule.
Leveling of the applied mixture is carried out using the rule Source yandex.net
Clearing the form
After the completed procedures, when the tiles are completely ready, you should clean the work area yourself and clean the mold. To do this, you can use a dry cloth or sponge. Carefully wipe all corners and place the mold in a dry, dark place. It is not allowed for the uniform to be in sub-zero temperatures or in the sun.
If there are white traces left in the form after the tiles, then you can pour concrete into it and leave it to harden. When the concrete pebble is removed, all the white residue is left behind.
The process of removing finished gypsum tiles from the mold. Following the sequence, you can make individual gypsum tiles, which will subsequently decorate the interior of the house and create the desired atmosphere. Creating tiles is a simple process. Making a mold yourself sometimes saves money, because silicone with additives for the mold costs significantly less than the mold itself. Installing gypsum tiles on the wall will be quick and simple. The final work will delight not only the owners of the house, but also the guests. But, if there is a desire to produce a certain decorative stone, then the form is purchased on the market.
TOP 3 best gypsum plaster for interior work, small packaging 5-10 kg
KNAUF Rotband, 10 kg
Universal plaster for interior finishing work, which is created on a gypsum basis and with additives that provide increased adhesion.
Thanks to this, the base does not necessarily need to be primed; the solution will lie tightly and be easily distributed over the surface. A layer thickness of 5 to 50 mm is allowed; with a layer of 10 mm per square meter it takes up to 8.5 kg.
The solution is diluted according to the recipe, 600 ml of water is used per kg of the mixture, after which the plaster must be completely used within 25 minutes, since it cannot be diluted with water again.
Even with a thick layer, the plaster does not crack and gives a smooth surface at the finish, which is ideal for painting or wallpapering.
Due to its high water-holding capacity, it is suitable for installation in the bathroom or kitchen, allows you to regulate the microclimate in the room, and allows air to pass through well.
Main characteristics:
- The base of the mixture is gypsum.
- The surface texture is smooth.
- Layer thickness, mm - 5-50.
- Mixture consumption according to the manufacturer is 8.5 kg per square meter. m. with a layer of 10 mm.
- Water consumption per 1 kg of mixture is 600 ml.
- The viability of the solution is 25 minutes.
pros
- affordability;
- uniform gray tint;
- easy leveling;
- does not crumble or crack.
Minuses
- fakes are common;
- only for dry rooms.
Unis Teplon, 5 kg
This gypsum plaster for interior decoration is considered one of the best representatives of its kind, as it has a pure snow-white color.
Designed for finishing walls and ceilings in rooms with normal humidity, best for painting or wallpaper. Without using a plaster mesh, the mixture can be applied in a layer up to 5 cm thick.
It is also possible to use this mixture in the bathroom or kitchen if tiles will be laid on top.
The plaster received high marks from experts due to its unique formulation, which ensures quick drying, as well as plasticity, moisture resistance and reduced costs for giving the walls a white tint.
The surface is smooth, but porous substrates must be primed, since adhesion indicators are insufficient, they can affect the further consolidation of the mixture.
Main characteristics:
- The base of the mixture is gypsum.
- The surface texture is smooth.
- Layer thickness, mm - 5-50 kg.
- Mixture consumption according to the manufacturer is 4 - 4.5 kg per square meter. m. with a layer of 5 mm.
- Water consumption per 1 kg of mixture is 500 ml.
- The viability of the solution is 50 minutes.
pros
- can be used under tiles in damp areas;
- suitable for machine application;
- the solution does not thicken for a long time, allowing you to work slowly;
- good ductility and tenacity.
Minuses
- Primer of a porous base is required.
Bergauf Bau Putz Gips, 5 kg
Gypsum plaster with high crack resistance . Easy to work, flexible,
stretches well and is evenly distributed over the surface, without the appearance of bubbles or pits.
Not suitable for application in a thick layer, the maximum allowed is 30 mm. The line includes three colors for the buyer to choose from: grey, white and beige.
Can be applied over concrete, brick, plaster, aerated concrete, suitable for sealing joints. Dries quickly and colors evenly.
To dilute the solution, you do not need a lot of water; 420 ml of water is used per kg of mixture. The solution is suitable for use for about an hour, then it should be replaced (repeated dilution has a negative effect on density and durability).
Main characteristics:
- The base of the mixture is gypsum.
- The surface texture is smooth.
- Layer thickness, mm - 5-30.
- Mixture consumption according to the manufacturer is 11 - 13 kg per square meter. m. with a layer of 10 mm.
- Water consumption per 1 kg of mixture is 420 ml.
- The viability of the solution is 60 minutes.
pros
- three colors: gray, beige and white;
- fine grain, good leveling and durability;
- no cracks form;
- smooth finish.
Minuses
- takes a long time to dry.
Rotgypsum standard gypsum plaster
Gypsum plaster dry mixture Rotgips-Standard is used for high-quality manual leveling of ceilings and walls of various surfaces - plastered bases, concrete, gas and foam concrete, brick. It can also be used to prepare the surface for subsequent finishing with materials such as putty compounds, wallpapering, laying ceramic tiles, and paneling. It is used for rooms with normal humidity during interior decoration, including bathrooms and kitchens of residential buildings.
The plaster mixture is plastic and has high adhesion. The thickness of the applied layer can vary from 8 to 30 mm. The prepared solution can be used within 40 minutes. No additional puttying is required. The main purpose of the mixture is to roughly level the walls for tiles and wallpaper. According to environmental protection and safety requirements, the plaster mixture does not release harmful chemical substances into the environment. Based on the effective specific activity of radionuclides, it belongs to the first class.
Properties of the Rotgips-Standard plaster mixture
Preparing the surface for plastering with Rotgips-Standard mixture
The surface must be dry and durable, free from remnants of masonry mortar, paint, and dust. Steel parts must be treated with anti-corrosion materials. If necessary, it is possible to install beacon profiles. For highly absorbent surfaces, pre-treatment with a primer is required.
Preparatory work
Before applying plaster to the base, it is necessary to prepare the surface and prepare a plaster solution.
The surface must be cleaned of dust, paint, and remnants of old masonry mortar. Dry and prime.
The temperature should be above 5 degrees.
“Rotgypsum” is a plaster that is diluted with water in a ratio of 1:0.7, that is, approximately 21 liters of water are needed for a bag weighing 30 kg. The required amount of water is poured into the container, and plaster is poured into it. Next, mix everything well (by hand or with a mixer) until a homogeneous consistency is obtained.
Subsequent addition of water or dry mixture to an already prepared solution is prohibited.
The solution is suitable for use. It must be used within 20 minutes.
Features of gypsum plaster
Modern plaster mixtures come in two types: cement-based and gypsum-based. The former are traditionally used for external and internal decoration of non-residential and residential premises. But with the advent of gypsum mixtures, priority was given to them. The reason is the numerous advantages of these materials.
The only reason for using cement-sand compositions is a high level of air humidity. The fact is that gypsum material is hygroscopic, and under the influence of moisture it gradually collapses. Special additives are added to mixtures intended for facade work to increase the moisture resistance of gypsum. But the use of such plaster has its own nuances.
If you plan to decorate the facade with artificial stone or porcelain stoneware, you cannot use gypsum composition as a binder. To lay this finishing material, only cement-based solutions are used.
Comparison of two materials
So, let's analyze the characteristics of two leveling solutions.
- Cement ones are much stronger than gypsum ones. They are highly waterproof. Therefore, these materials are used for finishing the facades of houses, as well as for leveling surfaces in wet rooms.
- Gypsum compositions are cheaper than cement ones.
- They dry faster, which means the speed of repair increases if you use the gypsum variety.
- The viability of cement plaster is two times greater than that of gypsum plaster. Therefore, the latter is diluted in small batches and everything is done to ensure that it is used for its intended purpose within 1-1.5 hours.
- The plasticity of cement compositions is lower than gypsum.
Craftsmen do not have a dilemma about which plaster is better. They clearly know all the subtleties of the differences. Therefore, experienced craftsmen use cement plaster to level defective walls with serious flaws, and then cover it with a finishing gypsum layer. Of course, priming is required between them. And at the same time, the cement layer must dry well before priming.
Technical parameters of Rotgypsum plaster
Rotgips plaster has a certificate of compliance with Russian standards, and is produced in accordance with TU 5745-003-48420415-2015. The technical characteristics of Rotgips plaster allow it to be used for work in dry and damp rooms, when using special primers. Dry mixture Rotgips is intended for manual plastering of ceilings and walls made of various materials.
It has good adhesion to materials such as concrete, aerated concrete, brick, as well as previously plastered surfaces that have sufficient strength. The material is economical - the consumption of Rotgypsum plaster is approximately 8 kg per square meter with a thickness of 10 mm. Consumption per 1 m² depends on the size of the unevenness being sealed. Plastering walls with Rotgypsum over beacons in several layers allows you to eliminate fairly large irregularities.
The beginning of setting from the moment of mixing is about an hour. This time is enough for a professional plasterer to produce a whole bag of the mixture - the dry mixture is packaged in 30 kg bags.
Technology for leveling walls with plaster
To begin with, plasterers will have to learn how to effectively mix the plaster mixture. It is considered relevant to prepare the solution manually. To do this, as previously mentioned, you can use a construction drill and a specialized attachment.
In addition to the tools described, you will have to:
- choose dishes (basin or bucket);
- prepare a spatula with a half-meter blade;
- prepare a trowel;
- take beacons;
- find a trowel and sanding board.
If the solution is used to finish concrete or brick walls, then the formation of cracks should first be prevented by using sealing masking tape 2.5 cm wide or more, which is glued to the surface vertically and every half meter. A cement-gypsum mortar is applied in several layers. In this way, the quality and practicality of the plaster is maintained. If the material is applied to the facade, then the consistency is selected to be rigid. The wall surface must be pre-moistened so that the material is applied evenly. In any case, a plasterer, even if he is not experienced, does not have to worry about the quality of application of the material, since the application proceeds evenly and does not require special skills.
Tools and materials for the production of gypsum tiles
To produce gypsum tiles with your own hands, you will need a room in which there will be an optimal air temperature (+15, +20 degrees), as well as minimal humidity (dry room). To produce tiles at home you need:
- Form. It can be silicone or polyurethane.
- Ingredients for gypsum mixture.
- Perfectly flat table. This should be done using a building level.
- Plastic container for mixing ingredients.
- Special paint of the desired tile color.
- Acrylic based varnish, matt.
- Brush. It can be a small construction one for painting the entire surface of the tile. Art brush size 3 or 4 for fine sketching.
- An ordinary spatula.
Materials you should purchase are G10 gypsum and slaked lime or citric acid.
TOP 15 rating of the best gypsum plaster for interior work in 2022
| Place | Name | Price |
| TOP 3 best gypsum plaster for interior work by price/quality for 2022 | ||
| 1 | KNAUF Rotband | Find out the price |
| 2 | Volma Layer | Find out the price |
| 3 | Weber Vetonit Profi Gypses | Find out the price |
| TOP 3 best gypsum plaster for interior work for machine application | ||
| 1 | Volma Gips-Active | Find out the price |
| 2 | KNAUF MP-75 | Find out the price |
| 3 | Prospectors Optimum | Find out the price |
| TOP 3 best thermal insulating gypsum plaster for interior work | ||
| 1 | Rusean Termoplast | Find out the price |
| 2 | Unis Teplon Reinforced | Find out the price |
| 3 | Perfecta Gipstar | Find out the price |
| TOP 3 best leveling gypsum plaster for interior work | ||
| 1 | Volma Canvas | Find out the price |
| 2 | Prospectors Gypsum | Find out the price |
| 3 | Rusean Plaster | Find out the price |
| TOP 3 best gypsum plaster for interior work, small packaging 5-10 kg | ||
| 1 | KNAUF Rotband, 10 kg | Find out the price |
| 2 | Unis Teplon, 5 kg | Find out the price |
| 3 | Bergauf Bau Putz Gips, 5 kg | Find out the price |
The benefits of making tiles yourself
Gypsum tiles can be used to finish:
- Slopes. After installing the windows, during repair work, the slopes on plasterboard windows are decorated with gypsum tiles.
- Fireplace. A plasterboard fireplace is covered with gypsum tiles to give naturalness and originality.
- A flight of plasterboard stairs is lined with gypsum tiles to create the interior of the house.
- Doorways are decorated with gypsum tiles.
- Walls in a room, in a living room, in a hall. Laying gypsum tiles under the brick, highlighting significant places, for example, the wall on which the TV is installed.
- Columns and niches made of plasterboard. Finishing occurs to accent the background of the overall interior.
Benefits of making tiles yourself:
- to make tiles you will not need a lot of space, as well as drywall tools;
- it is possible to produce tiles without using a vibrating table;
- The manufacturing technique is easy. It will be understood by a person making tiles for the first time;
- painting the tiles is done independently;
- All materials for tiles do not have a high cost, which makes the manufacturing process enjoyable.
How to choose gypsum plaster for interior work in terms of price/quality ratio?
When purchasing this material for finishing work, it is recommended to pay attention to the main selection parameters:
- Shelf life of the solution . If you take plaster for specialists - 20-30 minutes. But a beginner needs more time to work, so when working with the material independently, it is better to take a sample with a longer time interval.
- Check the packaging for information on what base the solution can be applied to and what can be used as a further coating.
- If the walls are very uneven, choose samples with the ability to apply a thick layer.
- For a bathroom or kitchen you need to choose moisture-retaining plaster; regular plaster will simply fall off due to the negative impact.
- Method of application . There are samples only for manual application, there are ones for machine application and universal ones.
Rotgypsum plastering technology
The technology for carrying out plastering work using a solution prepared from the dry Rotgypsum plaster mixture does not differ from the work performed with other gypsum-based materials. To create favorable conditions for work, it is necessary to provide a solid foundation. To do this, before applying the plaster, the surface to be treated must be cleaned, removing all spilled areas. After this, treat with a primer to remove dust and improve adhesion.
There are some practical techniques for plastering with Rotgypsum that allow you to achieve excellent results:
- Application of a plaster layer of increased thickness. The minimum thickness of the plaster layer created by Rotgypsum is 6 mm. Maximum thickness – up to 50 mm. If it is necessary to apply thicker layers, the material is applied in several stages. To apply the next layer, it is necessary to make notches on the previous layer to create better adhesion. This can be done using a comb - a notched spatula. Before applying the second layer, the surface should also be coated with a primer.
- Possibility of using plaster for gluing wallpaper without additional putty. Most often, the surface leveled with plaster is puttied with a thin layer of putty before applying decorative coatings. But when plastered with Rotgypsum, you can prepare the walls for wallpapering and painting without additional puttying. This allows you to significantly save on the purchase of materials - you do not need to purchase finishing putty, as well as on payment for work.
To do this, 20 minutes after trimming the irregularities remaining from the rule, moisten the surface generously with water and rub it in with a sponge grater. After this, finally smooth the resulting plaster milk using a metal trowel. The resulting surface is sufficiently even for gluing wallpaper without applying finishing putty.
- Painting over the plaster layer. If painting is chosen as a decorative coating, then the smoothed surface obtained in the manner described above is once again moistened with a large amount of water, and again smoothed with a metal spatula - trowel. This method allows you to obtain a perfectly smooth, glossy surface suitable for high-quality painting.
- Using plaster as a decorative coating. In addition to creating a basis for the subsequent application of decorative coatings, Rotgips plaster itself can also be successfully used as a decorative coating - creating a textured textured surface. To do this, before the surface hardens, it must be processed using special tools that create texture.
Is it worth choosing Rotgyps?
The choice of material for plastering work depends on the preferences of the master. You should not rely on reviews from other users, because they are both positive and negative. Some craftsmen complain that it is necessary to eliminate cracks using Rotgypsum. After plastering with Rotgypsum, surface microcracks may actually occur. But they are not “living” - they do not penetrate into the depth of the layer and do not affect the strength of the plaster layer. For gluing tiles and wallpaper, the presence of microcracks does not affect the quality of finishing work.
"Rotgypsum" (plaster). Description, types, application
Leveling a plaster wall with your own hands: how to carry out the work correctly
When applying two or more layers, do not forget to moisten the previous layers with water after they have dried. The first two layers, if three-layer plastering is intended, are usually not leveled, leaving them rough. And the third layer is brought to perfection.
Is it possible to level plastered walls with plaster?
Yes, if the walls are uneven. It is better to level a plaster wall using gypsum-based plaster.
What to do
If the unevenness is more than 3 cm, then you can cut off the bumps with an angle grinder. It is recommended to cover the depressions with putty.
Composition and types of gypsum plaster
Mixtures of this type are based on an environmentally friendly binder – gypsum. In addition to it, the composition includes various fillers and modifying additives that provide the plaster with plasticity and high adhesion (adhesion) to any surface, smooth or rough.
Water-soluble polymers necessary to improve the performance characteristics of the coating come to the Russian market from Europe. Water-soluble pigments included in mixtures for facade work, most often produced domestically. Ground sand and polymers are used as filler.
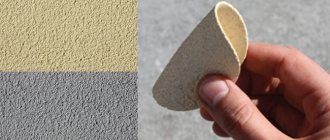
Depending on the cross-section of the granules of these ingredients, three types of gypsum-based plaster mixtures are classified:
- fine-grained;
- medium grain;
- coarse-grained.
Types of gypsum plaster
Fine-grained mixtures contain crushed sand, so this plaster is more fragile. This determines the rule for its application: the layer thickness should not exceed 8 mm. Otherwise, after drying, cracks may appear on the wall.
For interior work, medium-grain gypsum plaster is most in demand. It can be applied in a layer whose thickness does not exceed 5 cm. Coarse-grained and medium-grained mixtures are used for finishing facades. Compositions with coarse filler can be applied in a layer up to 8 cm thick.
General rules for the use of cement and gypsum mixtures
- Plaster is necessary to level surfaces and eliminate defects such as chips, potholes and cracks.
- The optimal layer thickness when applied is from 5 to 50 mm.
- Regardless of the composition, you will need to perform a series of works sequentially: prepare the solution, install beacons, reinforce the layer (if necessary), leveling and finishing.
According to the joint venture, the finishing layer should have less strength than the base on which it is applied. When using cement-sand mortars, this rule is often violated, since such plaster is much stronger than gas or foam concrete or dilapidated wooden surfaces. This leads to the formation of cracks and shedding of the finishing layer. The use of “breathable” gypsum plaster eliminates the occurrence of such unpleasant consequences as micro- and macrocracks.
Selection rules
The cost of production of domestic enterprises is significantly lower than that of foreign ones. But this does not mean that gypsum plaster mixtures from Russian manufacturers are of low quality. Most often, there is not much difference in the technical and operational characteristics of products from different companies. There is a slight difference in the compositions and percentages of ingredients.
How to choose high-quality gypsum plaster
The quality of gypsum plaster is determined by the amount of additives it contains. If this figure exceeds 30% of the total volume of the mixture, manual application will be difficult. The reason is that a significant amount of additives reduces the adhesion of the plaster, so during the application process it will slide off the wall. Such mixtures are best used for work using special machines. In this case, the plaster will be “driven” into the surface of the wall, thanks to the pressure of the jet from the gun.
Conclusion
Based on the above, it is determined that gypsum mortar is a real godsend for a beginning plasterer. Applying the solution to the outside of the house is convenient and easy. Due to this, the learning process is significantly easier. Mechanical application does not require special skills, especially if a device from trusted manufacturers is used. No skills are required for plastering a facade either, because in this case the main thing is to be able to work with a spatula and a trowel. Of course, you should also know the coefficient of the solution being created, which is indicated on the product packaging.
Features of using gypsum plaster for facade work
Gypsum has a high coefficient of water absorption, so compositions based on it will inevitably be hygroscopic. Thanks to polymer additives and mineral plasticizers, it was possible to increase the level of moisture resistance and frost resistance of plaster mixtures. However, this is not enough for a complete finishing of facades using gypsum compounds. To use these materials, additional protection of the walls from moisture is required.
Gypsum plaster can be used for exterior work only as an intermediate layer, provided that the facing layer has good vapor permeability. For this reason, despite all the advantages of gypsum compositions, they are rarely used for finishing facades.
Bolars - facade plaster
Mixtures for external use, in addition to the main binder, must include additives such as gypsum polymer or GPCV (gypsum-cement-pozzolanic binder). In this case, the gypsum plaster will acquire properties that ensure proper resistance to adverse environmental influences. But all manufacturers of gypsum-based compositions warn that their products are intended only for interior decoration. This is another reason for uncertainty about the suitability of gypsum plaster for facade work. However, for regions with a dry climate, facade mixtures can be used without fear.
Founds gypswell
Dry plaster
Now let's talk about dry plaster - what it is, how it differs from the so-called “wet” plaster, which was discussed above.
This category includes two almost identical materials: drywall and gypsum fiber boards. The first is a gypsum layer covered on both sides with cardboard. The second is simply a gypsum board, in the manufacture of which not only gypsum was used, but also various additives that increase the characteristics of the material.
Both materials received their name, namely dry plaster for interior work, only because they can be used to level both walls and ceilings without using water or other liquids. At the same time, the quality of the final result is always excellent.
While gypsum sheets may seem expensive, it will actually be cheaper than leveling with mixtures. Especially if walls and ceilings with large defects are being repaired, where it is necessary to use a large volume of plaster solutions. And this is even though profiles and fasteners are needed to install the sheets.
Attention! Today, manufacturers offer moisture-resistant drywall that can be used both in wet rooms and outdoors. In the latter case, the main task is to install the material under a canopy.
Leveling walls with plasterboard Source wp.com
We work with rotgypsum blogs poremontu.ru
Hello, dear repairmen!
Today I want to share my experience of leveling ceilings and walls with dry gypsum mixture. There are many of them on the market, they are represented by different brands. These are Knauf, Ekogips, Rotband, Rotgips and many similar brands.
I specifically used Rotgips; in my opinion, this brand has already become popular.
When I did the plaster, its price was 270 rubles. per bag, the price of the finished solution was about 5 rubles. Now the price has risen to 290, but I still consider it optimal for primary processing.
I noticed that if the walls are being finished with wallpaper, then with the right approach, finishing putty is not required. Just 15-20 minutes after application, smooth it with a hard façade spatula, preferably made of stainless steel, soaked in water. The surface is very good.
But you still can’t do without sanding. Sanding by hand is difficult; I use a vibration-type surface sander with a dust collector. Very comfortably.
If the wall is to be painted, then as a finishing putty I use oil putty with the addition of acrylic. If the rotgypsum is applied correctly, there is practically no need to sand after applying the finishing sanding, if only to slightly knock down the wave somewhere.
You can plaster directly onto the brick with rotgypsum, this is what I did on the loggia, I decided to make it into the “living part” of the apartment. I installed electricity and installed a plastic stained glass window. The result was, although not large, a very neat room. In summer it is very pleasant to work with a laptop, because the view from the window is simply inspiring.
Rotgypsum is very convenient for leveling ceilings, I mean the depressions between the slabs. Lightweight, durable, with good adhesion. A hundred points will be given to sand mixtures. When I was leveling the slabs in my apartment, I first tried the sand mixture, but then gave up. Throwing ceilings is not an easy task, but here you don’t need to throw anything, you carefully apply it with a spatula in several layers. There is practically no loss of material.
When working with gypsum plaster, you need to prepare the correct amount of solution, because after about twenty minutes, it begins to “plasticize.” It is highly undesirable to add water, since the chemical reaction has already taken place.
If I have such an opportunity, there is always some reserve for this case. For example, an unwalled strobe under an electrical wire. And so, when plastering surfaces, I “automatically” seal up grooves, or any holes under pipes, etc.
I find this material very convenient; I only use it to repair walls.
10 life hacks for working with gypsum plaster: the experience of virtuosos
Affiliate Material
Something went wrong... with the gypsum plaster? Is its surface cracked or partially collapsed? After plastering with gypsum mixture, did red spots appear on the wall? At the same time, according to manufacturers, plaster compositions based on natural gypsum are durable and have a long service life, their surface is smooth, it does not crumble and the finishing finish (for example, wallpaper) does not peel off from it. So what's the catch? Why so many contradictions?
It turns out that it’s all about the right choice of gypsum plaster, as well as the technology for applying it to various surfaces. If everything is done correctly, then the plaster will turn out flawless, if on the contrary, the result will be unpredictable. We bring to your attention 10 technological points regarding the correct work with gypsum plaster, including a short essay on its non-standard use:
1. What does it mean to observe the temperature regime when plastering walls with gypsum mixtures?
The first nuance, which can nullify all efforts, is non-compliance with the temperature regime. At the time of applying gypsum plaster, the room temperature should not be lower than + 5°C and not higher than + 25°C. Low temperatures lead to the formation of irregularly shaped gypsum crystals, which leads to a decrease in the strength of the plaster layer. At high temperatures, moisture will evaporate from the solution too quickly. This will lead to a weakening of its crystal lattice and the appearance of a web of cracks.
The necessary conditions in the room should be created even before plastering work begins. Moreover, it is advisable to do this before you start choosing a suitable primer. Additionally, the room must be protected from drafts, and the plastered surfaces must be protected from direct sunlight. All this will reduce the likelihood of cracks to a minimum.
2. Is a primer necessary and how to choose it correctly?
Despite the abundance of primer compositions intended for treating various surfaces, there are still “masters” who, instead of priming, simply wet the walls with water and advise others to do this. In their opinion, this technique is quite enough to remove dust and saturate the walls with moisture. Well what can we say here? This recommendation is at least not relevant, but that’s not all.
If the wall is porous, then water will only increase its “thirst”: the material will begin to draw moisture from the plaster (we all know that a wet sponge absorbs water faster than a dry one). The primer, if chosen correctly, will make the surface moderately hygroscopic, and its adhesion to the plaster mixture will be maximum.
The primer has three main purposes: increasing adhesion, removing dust from the surface, leveling and reducing absorbency. Using a primer, you can level out the absorbency of the surface to be plastered if it is made of different materials (for example, ceramic brick, foam concrete, etc.). For highly absorbent substrates, it is advisable to use film-type primers. Highly absorbent substrates include masonry made of brick, foam concrete and aerated concrete. Low-absorbent/smooth substrates are concrete, cement plaster or polystyrene foam.
3. How to properly apply primer to a wall?
To apply the primer, you can use a brush, roller or spray gun.
It is more convenient to treat concrete, old plasters, masonry made of foam and gas blocks with a primer using a roller, and brickwork with a brush using uniform cross-shaped movements. The spray gun can be used for all primer compositions, except those intended for concrete surfaces. They contain quartz filler, which will quickly clog the nozzle. In order to distribute the primer evenly over the entire surface to be plastered, first of all it is necessary to treat the grooves and other recesses with it. The primer must be completely dry before applying the plaster. Drying time is usually regulated by the manufacturer of the primer and adjusted by the master depending on environmental conditions (temperature, humidity).
4. Choosing the right gypsum mixture
The choice of gypsum plaster is an important step in the renovation. When choosing plaster, you should pay attention to whether it is intended for leveling only walls or also ceilings. If the scope of work is not yet fully known, then it is more advisable to purchase universal plaster for ceilings and walls.
An example of a universal composition is KNAUF-Rotband plaster. It allows you to apply a layer of plaster up to 50 mm on the walls in one stroke, does not contain harmful impurities, regulates the humidity in the room, helping to create an optimal microclimate. In addition, KNAUF-Rotband plaster:
The universal gypsum plaster KNAUF-Rotband is the choice of virtuosos, but its versatility confuses some. Is it worth choosing a composition based on the individual characteristics of the surface to be plastered, or can you safely choose plaster for any occasion? Let's turn to the opinion of an expert: