Today we’ll look at when and how to transition over the varnish.
Sometimes, when painting a small segment, it is not advisable to varnish the entire part. It is quite possible to create an imperceptible transition across the varnish, but it is usually not recommended, because the blurred border may appear over time under the influence of ultraviolet sunlight and the transition will become noticeable. For good wear resistance, the paint coating must have a certain film thickness. During the formation of a smooth transition using a blender, the thickness of the film at the transition site tends to zero. This lack of thickness reduces wear resistance at the transition and leads to undesirable defects such as fading/fogging, visible transition lines, and peeling. For this reason, some car manufacturers do not recommend the use of this procedure and recommend that when partially painting a body panel, varnish the entire part. This gives a guaranteed result that will not change with further use.
In what cases is a transition solvent used?
Unforeseen situations on the road leave their mark on the paintwork of cars. To restore it, sometimes you have to repaint some elements of the body, which, accordingly, reduces the market value of the car. How can you tell if a repair has been made? There are certain signs by which you can determine which part has been repainted:
- Different tone of paint on different parts. If you look closely, the part that has been repaired has a different paint shade from the whole one. This is especially noticeable on cars painted with enamel without a metallic effect.
- The texture of the varnish is different. The skill of a car painter is to obtain the same surface structure on enamel or varnish as on a factory part. To achieve this requires a great deal of experience.
- Traces of polishing. This is clearly visible in the sun. If polishing artifacts are noticed, then you should inspect more carefully; it is possible that previous defects will be revealed.
To minimize these imperfections, the car is painted using a transition solvent. This will help make the intervention visually invisible. In addition, it will reduce labor and material costs. It is not advisable to completely repaint large body elements such as the roof or hood due to a small chip or dent.
Measuring viscosity
Any painter should be able to control such a vital indicator as viscosity. For what? So that it corresponds to the recommended value. Again, why? To evenly apply the material to the surface and obtain a coating of the required thickness with the planned properties - beautiful and durable.
For what?
For more details, use the example of filler soil. The surface that we cover with it has various kinds of micro-irregularities left after preparation (grinding marks, pores, etc.). In other words, protrusions and recesses. From the deepest to the highest point - approximately 50 microns.
So, if we apply too liquid a filler to this surface, its thin film will not be able to cover these irregularities, and even with a margin for grinding (by analogy: if you put pebbles on the bottom of a jar and pour water without covering the stones with head"). As a result, the surface will remain uneven and the material will, by and large, be wasted. You have to do extra work - reapply the filler, spending twice as much time on repairs.
Let's take the opposite situation with applying too thick filler. It would seem that there certainly shouldn’t be any problems here. No matter how it is. A filler that is too thick and non-flowing, again, will not be able to properly fill all the micro-irregularities - its penetrating ability is too low and it is simply not able to flow into these small depressions (just as a soccer ball cannot fall into a golf hole).
The coating turns out to be loose, poorly adhered to the surface, and subsequently the filler begins to peel off. Not a very rosy prospect, but the troubles don’t end there. A filler that is too thick will not be able to spread over the surface in a smooth layer; increased shagreen is formed, which leads to torment and excessive consumption of materials during sanding.
And this is just a filler primer! What can we say about paints and varnishes? Gloss, shade, texture and adhesion again... All this directly depends on viscosity.
Someone will ask: “What if you dilute it thinner so that it flows everywhere, adheres well and spreads smoothly, and apply it thicker so that there is a reserve for leveling by sanding? The thicker, the better the protection!”
We don't recommend it. A thick layer of liquid material contains a large amount of solvent - the coating will harden for a very long time (not hours or days - months until it dries completely), and enamel applied on top of an undried primer can lead to wrinkling of the coating and poor adhesion between the paint and the primer. In addition, the likelihood of such unpleasant defects as “boiling” and many others increases.
So, it is necessary to be able to control viscosity. The question arises: how?
In everyday life, measuring viscosity most often looks like this: a painter takes a long object (say, a screwdriver), dips it into a jar of prepared paint and, based on one sign known to him, determines whether the viscosity is optimal or needs to be diluted more. Roughly speaking, if you like the way the mixture flows from a screwdriver, great, let's go paint it. If you don’t like it, make it thinner by adding a solvent, or thicker by adding the main product and hardener (if added).
We must say that if this method is good, it is only for professionals with very extensive practical experience. They, as they say, feel the paint and varnish material with their skin. What should novice painters, those who don’t have much experience, do?
We remember from school physics that viscosity is usually measured in pascal seconds (dynamic viscosity) or in square meters per second (kinematic viscosity). It is also known that methods for determining the true viscosity properties of liquids are quite complex, and therefore unsuitable for use in repair shops. Therefore, such a concept as “conditional viscosity” was introduced into circulation.
Determining conditional viscosity comes down to measuring the time (in seconds) when a certain volume of liquid (100 ml) flows from a funnel through a hole of a certain diameter (usually 4 mm).
So don’t be surprised when you see the inscription on a can of enamel: “working viscosity 22-24 s.” This just means that the material should be diluted to a conditional viscosity of 22-24 s, which is determined using a special device - a viscometer, which is a cylindrical measuring container with a volume of 100 cm³ with a conical lower part and a hole in it.
The most common viscometer for measuring the viscosity of paints and varnishes is the DIN4 standard - with a calibrated hole diameter of 4 mm. In our standard it is called VZ-4. The VZ-246 funnel can also be used, only it has replaceable nozzles - with diameters of 2, 4 and 6 mm.
Types of transition thinners
Modern cars are painted with both uniform enamel and nitro paint, followed by varnish. To transition to nitro enamels or varnish, different techniques with transition solvents are used.
To make the difference in paint shades on one part invisible, a binder is used. It removes paint dust in the transition area and smoothes the boundary between the old and new enamel.
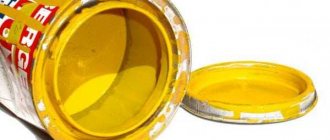
To make the difference invisible when applying a new layer of varnish over the old one, a thinner is used to transfer the varnish. Its effect is that it partially dissolves the factory paintwork, and the new layer of varnish penetrates the old one, mixing with it. This effect is not available to a conventional solvent or thinner used with a paint system. One of the inexpensive and frequently used products is the Novol transition solvent.
Tips and tricks for proper paint dilution
There are a huge number of paints and varnishes, but only some of their representatives are used to paint a car:
All of them differ from each other in performance characteristics, but at the same time they are effectively used by car owners. For a 100% high-quality result, these products are diluted with solvents. What solvent should you use to dilute car paint?
Acrylic paints
This is a two-component liquid, which contains a thinner and a hardener. The desired color is achieved by applying a certain number of layers of material.
- does not fade in the sun, ages slowly;
- easy to apply and does not require varnishing;
- dries quickly;
- can be used at high temperatures;
- easy to polish.
For acrylic paints, a specialized automotive solvent is used, which is more expensive than conventional organic solvents (646, 647), but it is worth it. If such a product could not be found, then you can use its analogue - solvent 651 or P 12.
Alkyd paints
Such products are rarely used for painting car bodies, only because they require a more careful approach. The resulting surface should be varnished and polished, but the finished products are distinguished by high performance characteristics and good appearance. The coating prevents the formation of corrosion and performs well in adverse conditions.
For dissolution, white spirit, gasoline, solvent, turpentine and its mixtures are used. There is a universal solvent P 4, but it is better to choose according to the product labeling.
Nitro enamels
They have a mirror effect, for which they have received wide appreciation from car enthusiasts. The body, painted with nitro enamel, differs from other cars in its gloss and metallic sheen. The only significant drawback is toxic fumes during painting work, which are harmful to human health.
Before application, the body surface must be perfectly cleaned and prepared for painting. Nitroenamel dries quickly and lasts quite a long time. It is diluted with organic products, for example, transparent 646.
Advice
This solvent is highly flammable and belongs to the category of aggressive solvents, so it must be handled with extreme caution. To play it safe, you can use the universal product P 4
Water-based paints
This type of paint is considered the most suitable for painting a car, although it requires expensive equipment to achieve maximum effect. Such products are environmentally friendly and have a number of advantages:
- the surface does not need to be thoroughly prepared;
- there is no swelling effect;
- high adhesion of the material;
- perfect result.
The only negative is the long drying time. Water-based paints are dissolved with plain water or alcohol.
Why is it difficult to paint perfectly?
Despite the fact that there is a computer selection of paint, it is rarely possible to get the color perfectly. Many factors influence the final result:
- colorist qualifications;
- air pressure in the spray gun;
- temperature and humidity in the painting booth;
- the distance from which the enamel is applied;
- number of layers applied;
- the angle at which the part is painted.
To understand how the shade of the base enamel changes, the painter must have extensive experience.
So, let's move on to action.
First you need to decide what tools and materials you will need to complete the work. To do everything right, you can’t do without:
You should start with preparatory work.
First of all, you need to clean the body element that was damaged. This could be the hood and bumper, for example. But let's assume that the fender is slightly scratched and will have to be painted with the transition to the front doors:
How to make the transition on base enamel invisible
Transition painting helps to minimize the difference between repair and factory enamel. It is performed as follows:
- The first layer is a tint primer. This is done so that there is no need to paint with enamel in several layers. Some types of paint do not cover the repair primer well and require more than 3 coats, which significantly darkens the color. While this is not critical for dark tones, it is unacceptable for light-colored cars.
- The first base coat is applied. It should cover the primer. Then dry for 5-10 minutes.
- The second layer should overlap the first by 15-25%. If you paint only the primer area, there will be a significant difference in shades.
- The third layer is the final one. It overlaps the second one by 10-15% and should completely equalize the transition in color from the repair enamel to the factory one.
- The last layer is applied with binder. Its task is to smooth out the dust from staining and eliminate the “sticky” metal grain of the enamel, which does not lie exactly on the border.
Additionally, it should be noted that between each layer it is necessary to wipe the surface of the part with a sticky gauze cloth. It removes enamel that has settled as dust from the surface.
How to use thinner for transitions on varnish
Sometimes you only need to paint part of a part. And accordingly, there is no need to cover the entire part with varnish. In this case, in an inconspicuous place, a transition is made on the varnish from new to old. The method of using solvent for transitions over varnish is different.
In order to make the transition, the surface in this place must be sanded with 2500-grit sandpaper or red Scotch-Brite with matting paste.
The border will remain in any case, but the point is to minimize it. Subsequently, using polishing, you can reduce it to zero. To make a transition on varnish, you need:
- Wait for the base to dry.
- Wipe the part with a sticky cloth.
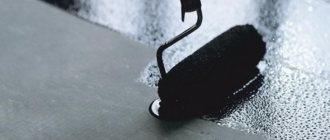
- After mixing the varnish with thinner in a ratio of 1:5, apply the first coat of varnish. This layer should not be abundant. It is needed only to ensure adhesion of the surface to the second layer, which will be the main one.
- After exposure for 10-20 minutes, depending on the temperature and properties of the varnish, a second layer is applied. Here you need to find a middle ground between ensuring that the varnish creates shine and at the same time does not flow on a vertical surface.
- The last step is to apply the transition solvent. It is also applied with a spray gun to a small area between the fresh varnish and the rest of the surface.
It should be noted that in the absence of a transition solvent, you can simply mix the varnish remaining in the spray gun with the usual solvent or thinner included in the kit to a 1:1 consistency. This mixture will be more fluid and can smooth out the transition.
Size matters
Also, when choosing hardeners and thinners, you need to be guided by the size of the part to be painted.
This also significantly affects bottling. So, when painting a small part and making spot repairs, there is no point in taking “slow” materials - in this case, “fast” or standard ones will do. If we are painting the entire car or a large hood, and even at a temperature of 30 degrees, we cannot do without a slow one. The location of the part (horizontal or vertical) is also important. For example, using a thinner that is too slow on a vertical plane can cause the material to move and cause drips or uneven ripples.
In this case, it is better to take a standard or “fast” one.
When choosing hardeners and thinners, take into account the size of the part and its location
A few words about painting with complex “spectacular” colors, such as gold and silver metallics, mother-of-pearl. When painting with such enamels, you need to be especially careful and try to use slower thinners so that the pigment and grain have time to take the correct position in the paint layer and streaks and “apple-coloring” do not occur.
Of course, all hardeners and thinners used must be original production. And do not forget to read the manufacturer’s recommendations before use, as different materials may have their own nuances. I wish you success!
Subtleties of transition to alkyd and acrylic enamel
Alkyd enamels are used for painting bodies on automobile conveyors. These enamels are rarely used for repairs. Acrylic paint is most often used. In order to make the transition from acrylic enamel to alkyd, a transition solvent is not suitable because it has a different base. In this case, a different remedy is used. The transition solvent allows for the diffusion of one material into another.
Therefore, in order to achieve the desired effect, you need to make a transition with nitro enamel and then cover the entire part with a layer of varnish.
In order to achieve a transition, it is important to sand the entire element to be painted with sandpaper. There should be no gloss visible anywhere on the surface.
If you decide to make a transition with acrylic enamel followed by varnishing, in this case the paint should be applied using the dry spray method. To do this, the spray gun is adjusted to a minimum supply of material with a high air flow. Then the paint will lay down in a dry layer without gloss. The layer will dry quickly and can be varnished. If the enamel was applied using the “wet” method, then it can be varnished after final drying followed by sanding.
Basic mistakes
In order to be pleased with the result, you need to avoid mistakes, which are especially common among beginners. The main problem is applying too much solvent, which causes streaks and reduced color intensity.
Important! Beginner car painters often treat the entire part with solvent. You can’t work like that: the composition is intended only for the transition area.
When contacting the paint during boiling, bubbles may appear, which are then removed by polishing. If this is not done, the border will still remain noticeable.
If the recommended measures are followed, the transition solvent will be an excellent tool for carrying out local repairs and correction of small areas of the body. It will make it possible to reduce the cost of money and time for performing manipulations, although it will require careful use.
Polishing transitions
Car polishing is used not only to add shine to old paint and remove scratches from the surface of the car. It is used by car painters to visually reduce defects that arise after painting.
As mentioned above, it is impossible to completely remove the boundary between old and fresh varnish. Although a solvent is used for transitions, the technique for completely removing marks involves polishing. It is done as follows:
- After the varnish has completely dried, the transition area and partially the old surface are sanded with 2000-grit sandpaper. This is done by first moistening the area with water. You need to sand until the dust from the varnish disappears and the surface becomes uniform both to the touch and in appearance.
- Using a polishing machine, you need to add shine to the sanded areas. First, polishing paste No. 1 is applied. After rough processing, the process is repeated with paste No. 2.
If the car is dark in color, then traces of polishing remain on it, and to remove them, finishing paste and special towels are used.
In some cases, the transition to the varnish is done under the moldings, at the boundaries between the planes. This visually masks the transition. Therefore, neither polishing nor a solvent for transitions is required in this case.
Bonuses
Coloring transition within the element
Video of spot repair (spot repair) of the corner of the front wing. The transition here is carried out only along the base, and the entire part is covered with varnish.
Reoflex transition base is applied to the matted transition area in 1 layer to create a damp substrate so that when applying the base enamel, the aluminum grain is correctly oriented relative to the surface and does not cause discoloration at the transition site. The material does not require dilution. Input pressure 2 atm. Dry the surface for 15 minutes at +20°C. The finished Reoflex base enamel of the desired color is applied to the repair area in 2-3 layers. The base enamel is applied diagonally; it is not recommended to spray the transition in one vertical line, because in this case the transition will be noticeable. During application, it is necessary to gradually expand the overlap area, i.e. Each subsequent layer of enamel must overlap the previous one. Interlayer drying for 10 minutes at +20°C. Dry the enamel before applying varnish for 15 minutes until matte at a temperature of +20°C. Before applying each layer, it is recommended to wipe the surface with a napkin with a sticky layer. Apply Reoflex varnish in 2 layers to the painted surface, gradually expanding the overlap area, similar to applying base enamel. The application and drying of the varnish is carried out in strict accordance with the technical documentation (TDS). After the varnish has dried, Reoflex transition thinner is applied to the transition zone in 1 layer. The product is ready for use, but if necessary, the transition thinner can be mixed with the ready-made acrylic varnish mixture in a ratio of 5 to 1 by volume. Input pressure from 0.5 to 1 atm. Drying is carried out in strict accordance with the technical documentation for acrylic varnishes (TDS).
Note: After the coating has completely dried, if necessary, the transition area can be polished - either manually, using a cloth and polishing paste, or using a polishing machine (at low speed, without overheating the surface). It is not recommended to use sanding paper in the transition zone, as it can “pull” the border and the repair site will appear; polishing of under-dried varnish can also be a common manifestation of the repair site. It is recommended to polish the transition area only with abrasive pastes.
What materials to use for DIY painting
You can eliminate paint defects with your own hands. But not all, but only some of them. You should also understand that there will be no professional result, no matter how the manufacturers of paints and transition solvents in spray cans claim.
Parts that you can touch up yourself should be in places hidden from view. For example, car sills, lower parts of wings and bumpers.
These places often suffer from stones flying from under the wheels, and it is not at all necessary to paint them at a car service center. It’s entirely possible to do this yourself.
To do this you need to acquire the necessary materials:
- Degreaser or gasoline.
- Aerosol primer.
- Spray paint. It is purchased in accordance with the number indicated on a special plate on the body.
- Sandpaper. To work on the ground you need number 240, 320. For sanding under the base - 600. For varnishing - 800, 1200.
In addition, you will need adhesive tape, a couple of bottles with solvent No. 746, a solvent for varnish transitions in a can, aerosol varnish, and a covering film.
Local dyeing technology
Despite the apparent simplicity of local painting, in fact it is a rather complex job in terms of technology. Although even an inexperienced car enthusiast can easily learn all its tricks.
Today, local car painting technology uses sets of no less than eighty chemicals and pigments that make it possible to create the same color and properties of the paint that is already on the body - almost any that is used in the automotive industry. The most important thing is to accurately select the color, for which there are even special computer programs like DuPont. And such a complex paint itself can contain up to nine constituent substances. Moreover, for local painting you will need to mix only a few grams of it.
Interestingly, in many auto repair shops, if the paint was selected for a long time and with difficulty, its remains are necessarily stored in a special container. If their client comes back with a scratch on the body, the first and most difficult stage of the work - selecting a tone - can be bypassed.
And this approach can be called reasonable: the point here is not only to attract customers, the remaining paint after local home repairs can also be stored “just in case” in any tightly sealed tin can. Thus, with the help of special components in modern auto repair shops, paints of almost 60 thousand shades are produced, even “metallic” and “pearl”.
DIY painting process
Before painting the defective area, it is necessary to prepare it. To do this, wash the part with water and dry it. Then, using gasoline, remove traces of tar, particles of engine oil, and degrease the work area.
Before priming, the defect must be sanded with sandpaper with a grit of 240, then with a grit of 320. After that, degrease again.
After that, the entire area that is supposed to be painted should be sanded with 800-grit sandpaper.
To prevent the sprayed primer from getting onto other parts of the body, use tape and covering material to isolate the working area.
Now you can prime. This must be done in several passes, between which there should be a time interval. If you put a thick layer of soil at one time, it may leak, which will cause difficulties with its subsequent processing.
After the primer has dried, it is sanded with 600-grit sandpaper. The entire area where the base enamel is to be applied is sanded. The area that will be painted with varnish should significantly cover this area and is sanded with No. 800 sandpaper.
Well, the final stage of preparation is sanding the areas where the aerosol solvent for transitions will be applied. For this, sandpaper No. 1200 is used.
After the part has been pasted over again and degreased, you can begin painting. If you have no experience using spray paint, then first you need to practice on a wall or fence. The enamel should be sprayed evenly. To do this, the hand must be moved at the same speed, without jerking, and the valve of the can must be open by one amount. You should start applying the base before your hand reaches the area to be painted, so that there is no visible stain. You need to paint in several layers until the primer layer stops showing through when the base has dried.
After the enamel has dried, varnish is applied. The spraying technique is the same as for enamel. Aerosol varnish hardens much faster than professional repair varnish, so drying time between coats is shorter. Depending on the ambient temperature - 5-10 minutes. However, this varnish has a high fluidity, so you don’t need to apply a lot of it at once.
After applying the last coat of varnish, you need to wait until it partially hardens, then spray the transition spray over it. It will even out the texture of the varnish and make the transition uniform.
How to prepare a car body for spot painting?
Before you paint any parts of your car with a transition, you should prepare the body. To do this, you will need to matt the spot around the damage area of about 10-15 centimeters using sandpaper with the finest grain. Sometimes you have to process large surfaces
It is important to stick masking tape around the treated spot and protect the rest of the body from paint. Next, it is important to perform the following processes:
wash the area of paint that will be painted during the procedure;
treat the part to prevent corrosion (this can simply be a primer);
carry out perfect leveling of the surface with putty and other materials;
degrease the area to avoid unpleasant paint effects in the future;
apply the paint correctly, which will make the procedure effective.
Applying metallic paint to the car body is the penultimate stage of all work. It is this that is given the most attention in most instructions. But in reality, doing the preparation matters more. You can perform these tasks with your own hands even without extensive experience, so you can get the necessary results even without using the services of specialists.
Remember that any mistakes during preparation will have their effect. For example, leveling and washing only the damaged area without its surroundings will make the repair area smoother than the surrounding parts of the body.
Safety precautions when working
All paints and varnishes, including transition solvents in cans, contain highly toxic compounds that cause respiratory damage if poisoned by their vapors. Solvents also easily penetrate the skin and are absorbed into the blood, causing weakness, dizziness, and nausea. If the degree of poisoning is severe, convulsions and coma may occur.
Therefore, when working it is necessary to use personal protective equipment:
- Gloves. They must be resistant to chemical solvents.
- Respirator for respiratory protection. Gas masks with an open mask and a carbon filter are best suited. 3M respirators have also performed well. They go by numbers, depending on the size of the face. The filter elements that are installed on them must be designed to protect against organic solvents.
In addition, it is advisable to carry out work in well-ventilated areas. After finishing work, containers with paints and solvents must be tightly closed.
What does 646 dissolve?
Solvent 646 is suitable for diluting nitro enamels, nitro varnishes and nitro putties. Reduces paint drying time and increases the shine of surfaces.
Interesting materials:
What is the difference between lean mayonnaise and regular mayonnaise? What is the difference between a current account for an individual entrepreneur and an individual? What is the difference between Sberbank and Sberbank? What is the difference between a bruise and a russula? What is the difference between a smart TV and a non-smart TV? How does the sporophyte stage differ between mosses and ferns? What is the difference between STO and TU? What is the difference between technical glycerin and food glycerin? What is the difference between a webinar and a lecture? What is the difference between festal and mezim?