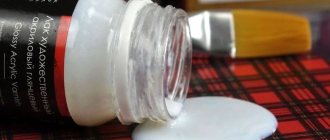
Manufacturers offer a wide selection of hardeners. These are important components added to the composition before application to the surface. They lead to the emergence of the polymerization process - the ordering of chaotically scattered molecules. The paint hardens and becomes hard. Used where a two-component composition is applicable, which itself remains soft.
Hardeners for paints and varnishes - what are they?
Paints can consist of one or two components. They should not only have the appropriate colors, but also not crack for a long time and, preferably, quickly set and evaporate moisture. However, the last factor does not always take place and needs to be helped to come true. To do this, various substances are used to polymerize the components.
In order for the paint to set quickly and evaporate moisture, various substances are used to polymerize the components.
Purpose and features
Paint hardener is a chemical compound added to paint materials that converts the paint into an insoluble and infusible product. Fusing into the structure of the material, it gives it stable properties.
There are several varieties of this material. Their number exceeds the number of solvents. With the right choice of additive, you can change the elasticity and strength of the paint and varnish material and even slightly change the color.
The properties of the added component directly depend on its chemical composition. In most cases, the substance is used to add to resins, resulting in epoxy adhesive. Features of the hardener under its storage conditions. It is not recommended to pour the substance into another container, since within a short time the hardener for enamel and not only loses its properties and becomes unusable.
After adding the additive to the paint, it should be used within a few hours, after which it will become unusable.
After adding the additive to the paint, it should be used within several hours.
Description of properties
As a rule, many paints and varnishes harden after the liquids of which they are composed have evaporated. True, there are some, including those based on epoxy resin, that do not harden without “outside help.”
In this case, special polymer products will help.
Thus, they serve as a kind of “catalysts” for hardening, thanks to which a person can actually create decor, or use it in the process of restoration work.
This way the coating will stay on the surface much stronger and longer.
“Polymerizing agents are popularly called hardeners, and they are often used by builders and for restoration work.”
In this case, the hardener does not act as an accelerator of chemical processes, it only “participates” in them.
So, it combines with the paint and varnish composition into one whole, and “gives” it the correct structure.
Advantages of using a hardener
Adding this component has many advantages, although it has its own characteristics, although there are still more positive aspects. Advantageous characteristics of coatings with additives:
- Becomes resistant to sunlight (does not fade);
- The wear resistance of the coating increases. For example, the service life of acrylic paint increases to two decades;
- Using the component gives a 100% guarantee that the coating will dry as quickly as possible;
- The hardener gives some types of paintwork materials a glossy shine, as a result of which there is no need to additionally coat the surface with varnish.
Such compounds have increased resistance to mechanical stress. The elasticity coefficient increases, and the paint does not crack even in corners and joints of parts.
The service life of acrylic paint increases to two decades.
Storage
If the packaging has not been opened, has a production seal and the temperature regime is observed (10–30 degrees), then the shelf life is 1–2 years.
Storing polyurethane glue near heating elements and direct exposure to ultraviolet radiation is not allowed.
If the package with glue is opened, then the mass should be used up within six months. Storage should be carried out in tightly closed containers, without access to air or moisture. To prevent internal hardening at the exit from the tube, it is turned over onto the lid and stored in a vertical position.
We recommend watching the video:
Types of hardeners
Depending on the chemical composition, subsequent features of paints are distinguished. Different types have different curing times and service life. Each type of paint or resin requires its own hardener. Experts conditionally divide the product into two groups.
Each type of paint or resin requires its own hardener.
Driers
Drying agents contain salts of various metals. Depending on the content of these metals, driers are divided into primary, secondary and auxiliary. They are present only in one-component formulations. Essentially, these are additives that speed up the hardening process of the coating. Dryers must be included in oil-based paints.
In order for them to dissolve, it is necessary to maintain the temperature regime. Easily soluble substances are dissolved at 150 degrees, sparingly soluble substances are dissolved at 250 degrees, and only liquid substances are dissolved at only 20 degrees.
These are additives that speed up the hardening process of the coating.
Hardeners
Hardeners are added to two-component paints and varnishes, accelerating their physical and chemical processes. For example, a hardener for acrylic paint, which is widely used for painting cars. In addition to acrylic, this type of hardener is intended for polyurethane and epoxy paintwork materials. It is important to strictly observe the proportions, which are expressed in weight and volume of substances.
It is important to strictly observe the proportions, which are expressed in weight and volume of substances.
Two-component acrylic paints
Hardeners with acrylic-based paints and varnishes are a typical representative of two-component materials. They are a “set” of component A - the base, component B - the hardener. They are available in two different containers. This is due to the fact that these substances cannot be stored together. If they are placed in the same container, an irreversible reaction will immediately begin. The base is a high molecular weight compound. It is a product of the polymerization of acids such as methacrylic and acrylic. Along with them, component A contains esters, for example, butyl acrylate, methyl methacrylate and others. Thus, a copolymer containing units with hydroxyl OH groups is obtained. There are two types of two-component acrylic materials. Most are adjusted to the desired viscosity after mixing with the hardener using a thinner. There are exceptions. They concern super-filled VHS or UHS compositions. They can also be used without thinner. Everything depends solely on what degree of viscosity is acceptable for carrying out certain work.
Which paints and varnishes require a hardener?
Not every paint with a hardener is sold in finished form. In addition, not all materials require such an additive. It is needed for two-component epoxy paints intended for painting concrete structures.
Metal frames and other objects made of this material are coated with varnishes and enamels containing a hardener. The metal is then resistant to corrosion and has increased wear resistance. It is actively used in enamel intended for the restoration of bathtubs and washbasins. It is also necessary for some varieties of acrylate paints.
Metal frames and other objects made of this material are coated with varnishes and enamels containing a hardener.
Step-by-step instructions for use at work
Of course, the manufacturer takes care of its customers and provides instructions for use with its paint and varnish products.
With its help you can understand the order and cases of using the hardener.
“It is imperative to take into account the type of paint, since acrylic requires certain proportions, and other compositions require different ones.”
In fact, everything is not as complicated as it seems at first glance - you just need to add a certain amount of hardening agent to the paint itself before painting, and then stir the mixture thoroughly.
A drill with a special attachment will help you with this.
After preparing the composition, it must be applied within five hours, otherwise its properties will “sink into oblivion.”
How to use this tool in practice
When adding hardener, it is important to maintain proportions. In addition, this or that product is applicable only for a certain type of product. The manufacturer always indicates the required component on paint cans. For example, some hardeners are designed only for acrylic paints, others for oil-based paints. In this case, not only the choice of hardener differs, but also the proportions.
The manufacturer always indicates the required component on paint cans.
How to properly introduce hardener
First, you should prepare suitable mixing containers. The paint is poured first, then the additive, and finally, if necessary, a solvent is added, which acts as a viscosity stabilizer. How to add it correctly is indicated directly by the manufacturer on the paint packaging.
The paint is poured first, then the additive and finally, if necessary, the solvent is added.
In what proportions
Compliance with proportions is an important condition for subsequent use. As a rule, the manufacturer indicates them in parts, for example, 2 to 1. In this case, you must first pour two parts of the paint base and add one part of the hardener to it.
The excess of hardener should not be more than 10 percent. However, depending on the structure of the base, the percentage of additive content in it can vary from 5 to 25 percent. Exceeding the permissible limits in matte varnishes and primers leads to rapid cracking, but in glossy varnishes and enamels a slight excess of the dose is allowed. The components are mixed immediately before painting.
The components are mixed immediately before painting.
Deadlines
Almost regardless of whether a "cold" or "hot" process is used to cure polyester resin, the basic steps look something like this:
Gelatinization. Occurs 40-120 minutes after final mixing of all components of the polyester material.
Rubber-like stage. May occur within a period of time after mixing all components from 2 to 12 hours.
Solid stage-1. The material has frozen; when exposed to hard objects, no traces are left or they are barely noticeable. But volatile fractions are present in the material and slowly diffuse out of the monolith.
Solid stage-2. It takes 15 to 25 days after mixing the primary components. All free radicals of the polymer chains of the hardener were fixed in a new final and unchanged position.
The final process of Solid Stage-2 can be shortened if the material is exposed to high temperatures in a heat chamber or special heating devices in the room, allowing for a temperature regime of about 80-100 ° C degrees for one and a half to two hours.
If you are dealing with fiberglass impregnated with polyester resins, then you need to keep the product at 100°C for 6 hours. In these cases, Solid Stage-2 can be achieved in 6-7 days.
An “indicator” of the onset of one or another stage of the curing process is usually a change in the color of the polyester compound. Which color changes to which, the instructions placed on the packaging of the polyester material will always tell you about this. But in order not to make a mistake and not spoil a large volume of resin diluted with all the components, make batches of a small amount of material, no more than a liter. This way you will have time to accomplish everything you have planned and save yourself from unnecessary financial expenses in case of damage to the material.
A good sign of the correctness of the processes that began after mixing all the components in the resin will also be a significant increase in the temperature of the working solution.
How can I replace the hardener?
What a hardener is needed for is more or less clear. But is it possible to replace it in the absence of such a thing and if it is urgently needed? Some types of hardener cannot be prepared at home, but at home you can make an analogue of a drier for oily bases.
You will need a metal canister in which you need to put 50 grams of rosin. Melt it at a temperature of 250 degrees. During the melting process, the rosin is constantly stirred. Next, add a small amount of slaked lime (to the completely melted rosin) and heat for a few more minutes until a clear product with a homogeneous structure is obtained.
At home, you can make an analogue of a drier for oily bases.
The hardener seems to be an insignificant, but sometimes very necessary thing. The main thing is to comply with the selection conditions and proportions specified by the manufacturer. Otherwise, after some time, the painted surface will lose its presentable appearance and become covered with cracks.
Application and safety rules
Before applying the adhesive layer, it is necessary to remove all types of contamination from the surface; if any, remove cement, plaster and other old materials. Fat is removed. If a two-component type is chosen, then the main part is combined with a hardener, then applied to the surface.
Application rules include the following principles:
- Make a thin layer so as not to get an overly widened seam;
- Complex surfaces need to be coated with glue on both sides; for ordinary surfaces, application to only one side is sufficient;
- Material with pores must be processed in two layers, when the first one has set, the next one is applied;
- Adhesives in the form of a spray are sprayed in strips, making them at an equal distance of 10 cm;
- After application, wait 5-10 minutes, then press the objects against each other with force;
- Pressure is created on the surface;
- When the drying process is complete, the excess is cleaned off with a chisel;
- The item can be used after 24 hours.
Before applying the adhesive layer, it is necessary to remove all types of contamination from the surface; if any, remove cement, plaster and other old materials.
How long does polyurethane glue dry?
How long it takes for the adhesive joint to dry depends on the type of product and the components used in production. Typically, initial setting requires 20-60 minutes, then pressure is applied to the surface to ensure better fixation.
Full fixation lasts 24 hours, sometimes 48. The process can be accelerated by exposure to hot steam, then 4 hours will be enough.
Typically, initial setting requires 20-60 minutes, then pressure is applied to the surface to ensure better fixation.
Manufacturing process
If high-quality hardeners are used, then cold polymerization can be carried out.
But they still recommend heating the epoxy resin a little. Then it will not be so viscous, but you need to make sure that it does not boil. This will ruin it and you cannot use such resin.
In addition, during the heating process, it is better to stir the epoxy resin and monitor the temperature level.
It is important to correctly calculate the amount of solvent that needs to be added. If there is not enough of it, then the resin will either remain viscous or harden, but will be sticky.
Before mixing, you must carefully study the instructions; they always indicate the required quantity and proportions. The amount of solvent depends on the composition of the epoxy resin, so its amount can vary from 10 to 50 percent.
If the hardening agent is not specified in the manufacturer's recommendations, then its use is prohibited.
The resin and solution are drawn into different syringes. Some manufacturers already produce the material in such bottles with measuring marks, which is very convenient.
For the hardener, the needle is removed from the syringe; it is not needed. And the resin is poured even through a piston, especially if it is thick, it will not pass through a narrow passage.
How to get a small volume of mixture
To obtain a small amount of resin for home use, use the cold method.
In the container, carefully stir the components in the required quantity. A small amount is mixed with a stick; no tools are used. During the process the temperature should not exceed 25 degrees. No air bubbles should appear in the diluted product, the color should be transparent, without various inclusions.
Such material will be homogeneous if the entire dilution process was done correctly.
Obtaining resin in large quantities
Since when mixing epoxy resin and hardener, the first one generates heat, so the cold method can only be used to obtain a small amount of product.
To obtain a sufficiently large amount of the product, the epoxy resin must be brought to +50 degrees.
Then a hardening agent is quickly added. Under no circumstances should water get into the mixture, otherwise everything will have to be redone.
After the epoxy mixture has heated up, you need to quickly work with it further, so prepare the container and hardener in the required quantity in advance.
Next, mix the combined products thoroughly.
Drying time
How long does it take for the resin to dry completely after mixing the material? This indicator will be different for each composition. But this period of time is always indicated in the recommendations.
Until the epoxy dries completely, it will be sticky, viscous, and can be poured into any shape.
If the mixing ratio was 1:10, then polymerization will occur in an hour. If the amount of hardener is less, then the drying time increases to approximately 3 hours.
If we talk about epoxy glue, it will take a day to dry. If the product has not dried during this time, then this can be explained by several reasons:
- Low temperature in the building;
- The amount of hardener and resin is not met;
- Water has entered the product;
- Poor quality or the hardener has expired.
