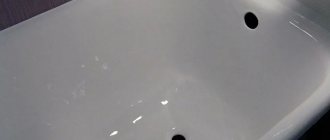
Covering an old bathtub with acrylic or enamel is a great way to restore the appearance of your plumbing fixtures. Typically, old bathtubs were made of cast iron and covered with enamel. Enamel can last for many years, but over time it still requires updating.
Then the question arises, which coating to choose. Restoration is easy to do with your own hands, you just need to choose the right material. The most commonly used are enamel and acrylic. They differ in cost, durability and method of application. Therefore, before starting work, you need to study all the positive and negative aspects of the materials.
Pros and cons of enamel
Some manufacturers coat their bathtubs with enamel, since this method is considered the most reliable and durable. Pros of enamel:
- efficiency;
- wear resistance;
- quick application;
- resistance to chemical cleaning agents.
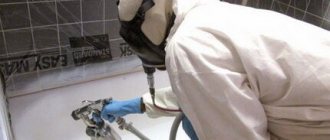
The main disadvantage of this method is the pungent odor. Workers use special respiratory protection when enameling. The enamel takes a long time to dry, so you won’t be able to use the bathroom for about a week. Another disadvantage is high thermal conductivity, so the water in such a bath cools quickly.
Acrylic fronts - a new material in the modern kitchen
In the modern furniture industry, various materials, both natural and artificial (synthetic), are used to make kitchen facades. Each of them has its own advantages and the ability to be used in various stylistic design directions. The most widespread in modern kitchens is acrylic (or acrylic plastic), which, despite its recent appearance, has firmly strengthened its position among one of the most popular materials for cladding facades.
Prerequisites for the appearance of acrylic
The appearance of acrylic in our kitchens was facilitated by the rapid development of alternative modern stylistic trends in the field of kitchen furniture design. Instead of the usual classics, such movements as techno, art house, and avant-garde began to appear. The main characteristics that were inherent in them were a combination of bright, initially incompatible color and shade solutions, the ability to express individuality in the interior, the use of modern technological materials and the bright, dazzling shine of glossy surfaces.
Pros and cons of acrylic
Painting a bathtub with acrylic is the easiest way. Its advantages:
- Easy to apply - no brush or roller required.
- Low thermal conductivity - water cools slowly in the bath.
- Smooth surface.
- Durability.
- Acrylic is less susceptible to delamination than enamel.
- Large selection of colors.
Due to these properties, acrylic is often chosen for restoration. It is easy to work with and does not require much time or special knowledge.
But acrylic coating has its disadvantages:
- High cost - the price is higher than for enamel.
- Absorbs hair dye.
- Easily scratched.
- The white finish may fade over time.
This coating is easy to scratch, and then microbes accumulate in the cracks. I don't want to take such a bath anymore. But with careful handling, the acrylic coating does not wear out.
Acrylic is often used to create an unusual colored bathtub in a designer interior. If you spend a little more money on this than on enamel, you can get a designer bath that will be different from all the others.
Acrylic paints have different characteristics. You can choose a paint that dries quickly so that you can use the bathroom the very next day after painting. Or you can give preference to a type that takes longer to dry, but forms a thicker and more reliable layer.
Is it profitable to restore
The production of a self-leveling coating does not require dismantling the bathtub, wall and floor cladding, disposal of old plumbing fixtures, or loading and unloading operations. There is also no need to repair the bathroom finishing or disconnect/connect communications. Therefore, updating the interior with acrylic coating of plumbing fixtures can save a significant amount. Even rusty and chipped plumbing fixtures can be restored. The service life of the surface is about 20 years. Reviews and prices confirm that restoring a bathtub with liquid acrylic is more profitable than buying new plumbing fixtures.
Bathtub restoration with acrylic
Coating a bathtub with acrylic paint is a simple process that you can do yourself. But do not forget that all painting work should be carried out in well-ventilated areas with open windows. It is best to leave the apartment unoccupied for a while so that they do not breathe harmful fumes.
Be sure to wear a respirator. An ordinary medical mask will not work; more serious protection is needed. Feel free to wear a military gas mask if you have one.
To avoid getting dirty, you need to wear rubber gloves and a rubberized apron. Have spare gloves on hand so you can change them.
Before carrying out work, it is better to remove everything from the bathroom except the bathtub, sink and toilet, as they are firmly fixed. And household appliances, and especially towels, need to be removed from the room. If it is not possible to take out the washing machine, you can cover it with polyethylene.
Stages of work:
- First you need to remove the old coating with sandpaper. You can speed up the process and use an angle grinder or purchase a special drill attachment that performs the same function. It is best to clean with a respirator or mask.
- Remove all dust that has formed.
- Clean out old chips and cracks.
- Degrease the surface.
- Fill the bathtub with hot water. Acrylic adheres better to a warm surface. Drain the water and wipe dry.
- While heating, you can prepare an acrylic mixture.
- Cover the drain holes with polyethylene.
- Unscrew the siphon and place a container under the hole into which the paint will flow.
- Pour acrylic in a thin stream onto the sides. The width of the strip should be approximately 5 cm. Then the paint will flow down and cover half of the bath.
- After the paint has drained, pour another strip around the perimeter, starting from the middle of the bath.
- Wait until completely dry.
If drips appear during the process, you don’t have to eliminate them - they will blur on their own. It is better not to interrupt the painting process and carry out all the work at once.
Before drying, it is necessary to protect the bath from splashes and dust, as this can ruin the entire work. It is best to turn off the water so that it does not leave random droplets. If you notice bubbles that do not disappear within two minutes, you need to break them with a brush.
The coating dries in about 3-4 days, and the unpleasant odor disappears quickly - within a few hours.
This method is also called "fill bath". As a result, a thicker layer is formed than that of enamel. Accordingly, it also lasts longer.
Read kitchen reviews
Buyers of plastic, acrylic and enamel kitchens left their reviews. Interested in knowing their opinion about the purchase? Then read on.
On a note
We have had a kitchen with glossy enamel fronts (dark gray top, bright orange bottom) for 4 years. Beautiful. Of course, the bottom gets dirty all the time, but it depends on how you treat it. There are two small children in the house, so, of course, they don’t carefully open the drawers by the handles. But everything washes off easily. And then, on a lighter facade, the spots are not particularly visible, especially if bright light does not fall on them. We are glad.
On a note
I immediately decided that my kitchen facades would be made of plastic. Caring for furniture is generally beautiful, you just need to periodically wipe it with a cloth, it’s simple. In terms of cost, again, a kitchen is much more budget-friendly than one made from other materials, but at the same time it is in no way inferior in its characteristics.
On a note
I can say the following about my kitchen - acrylic facades look incredibly beautiful, but to my great regret they are very difficult to maintain. Our kitchen is located on the sunny side, so it turns out that every speck of dust is visible on it, so we have to constantly clean it.
Bathtub restoration with enamel
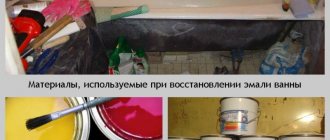
To start work you need to prepare the necessary materials:
- protective glasses;
- respirator;
- roller;
- brushes 8 cm wide;
- beaker;
- acetone;
- primer for metal;
- vinegar;
- hardener.
It is necessary to take the choice of brush seriously, as this affects the appearance of the bath. It is better not to touch the bristles with your hands; there will be a trace of grease on it, which can ruin the coating. The brush must be new so that the enamel adheres well. You can also use tweezers to remove loose hairs.
It’s not difficult to do the work yourself, but experience in plumbing repairs will only be a plus. There is an opinion that restoring bathtubs is similar to restoring boats, so if you have experience in this type of work, it will help you.
The most important thing is not to forget about eye and respiratory protection. You can wear special work clothes that you don’t mind getting dirty.
Bathtub enameling steps:
- Remove the old coating with sandpaper or a sander.
- Clean the surface from dust.
- Degrease the surface. Fill the bathtub with hot water for 10 minutes and drain the water. Wipe with a clean, lint-free cloth.
- Remove the siphon and place a container underneath. Cover with polyethylene all places that do not need to be enameled.
- Apply primer from top to bottom. Do not allow bubbles to form.
- Mix the hardener and enamel according to the manufacturer's instructions.
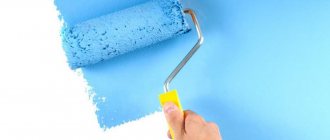
- Apply the first coat with a roller or brush.
- Let the enamel dry.
- Apply second and third layers.
The enamel takes a long time to dry - about a week.
In the factory, after enameling, the bath is installed in a special oven, where the surface is hardened and the paint firmly adheres to it. Therefore, do-it-yourself enamel coating may not be as reliable as coating from the manufacturer.
This is one of the easiest and inexpensive ways to restore a bathtub. In addition, a bathtub can be enameled many times.
Review of popular manufacturers
Today, various companies are engaged in the production of this type of material. Among the mass of brands, the following institutions can be singled out separately:
- materials with good properties from the VGT manufacturer;
- good quality from the TIKKURILA brand;
- Kudo materials are of good quality;
- Ceresit materials are in excellent demand;
- Buyers also praise Vixen materials.
When choosing the best option for substances, you should rely not only on the composition of the product, but also take into account customer reviews.
Important. When choosing a suitable material for the reconstruction of bathtubs, you need to pay due attention to the reviews of specialists and sellers.
Restoration of bathtubs with enamel or acrylic, video
Acrylic liner
This is literally a liner that is made to order to the individual dimensions of your bathtub. You can order any shape and color.
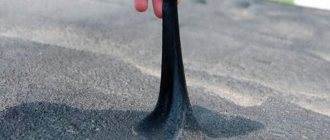
The manufacturing technology is simple: a sheet of solid acrylic is heated and blown into the desired shape.
Liner installation steps:
- The bath is polished, cleaned of dust and dried.
- Holes are drilled in the liner for drainage and overflow.
- Polyurethane foam or special glue is applied to the bathtub and liner.
- The liner is placed in the bath and filled with water so that the glue sets.
All work lasts approximately 2-3 hours, and such a liner lasts up to 20 years. Therefore, its advantages over paints are obvious. There are a few more advantages:
- does not darken or fade;
- does not absorb rust and dirt;
- resistant to cracks and shocks;
- more wear-resistant than acrylic paint;
- provides antibacterial protection;
- has low thermal conductivity;
- easy to install.
The relative disadvantage of the liner is its high price compared to acrylic and enamel. But the result is a durable and high-quality coating that lasts several times longer.
This liner can only be cleaned with special products for acrylic. Under no circumstances should powdered products be used.
There are reviews that you cannot put heavy things in such a bathtub. This is not true. The acrylic liner perfectly withstands loads of 100-130 kg.
This liner must be installed correctly. If you glue it not tightly, then water will get into the space between the bathtub and the liner. Therefore, it is necessary to choose a good installation specialist.
Comparison of coating service life
If you compare two such bath coatings, it is also necessary to identify differences in service life, however, this parameter is influenced by several points, namely:
- How often are bath tanks used?
- Procedure for using self-leveling baths.
- The quality of the work performed.
- Compliance with technology during application.
- What kind of reconstructive material was applied?
- Temperature conditions and present humidity.
All these points have a direct impact on the duration of use of the corresponding coatings. If we take average values, then the enamel coating can withstand several years of active use (up to 5). As for liquid acrylic, this period can be increased to 10 years.
Important. Under various operating conditions, the service life of the restoration coating can be reduced to 2-3 years, or, conversely, increased to decades.
In order to decide on a coating for restoration, it is not enough just to read the comparison; you should understand that you have to work with each material differently. That is why you should not only compare substances, but also know their basic properties.
Recommendations for selection
In order not to make any fatal mistake when choosing a bathroom, you need to approach the product selection process wisely. A high-quality product must meet the required standards in terms of performance characteristics, external parameters, and also have specific criteria, for example, an individual approach to installation. Professionals in their field recommend that when inspecting an acrylic bathhouse, pay attention to the following details:
- You should independently verify by external signs that the walls of the bathroom have the required thickness, i.e. There should be no gaps during inspection.
- To rule out the possibility of purchasing cheap plastic, nothing should be strange; you need to examine the side section. It must have not only an acrylic coating, but also a resin coating.
- It is necessary to find out from the seller what kind of reinforcing raw materials were used in production. A high-quality product is usually made from a layer of fiberglass.
- A reliable and durable design will not be characterized by numerous bends or various fancy shapes.
- It is necessary to carefully review the thickness of the walls of the bathroom product. Acrylic products are particularly durable with parameters from 4 to 6 mm.
- It is possible that when purchasing you will be offered a cheaper type of bathtub, however, you should not give in to temptation, as this means that the product does not have all the qualities that are necessary for operation.
- Before coming to a specialized store, it is best to take measurements at home. Then, with this data, you can select the desired configuration for your shower room. Otherwise, the purchased bathroom may not fit the parameters of the room.
- You can distinguish low-quality products due to the porous surface. Also, try running your hand over the tub, if it's a little rough, it's probably not of the right quality. Consequently, during operation in the near future, cracks, chips and other signs of poor quality may appear.
- Acrylic bathtubs should form a sandwich-like material when cut. As a result, three layers in the form of acrylic, reinforcement and plastic are clearly visible to the naked eye. If any layer is missing, then the service life of such an instance will be significantly lower than stated, on average up to 3 years.
- Taking into account all the above points, you can choose a fairly reliable acrylic bath that will withstand all negative influences, be it high humidity, microorganisms, dirt and others.
Rules of care
When using acrylic bathtubs, the following rules should be observed:
- It is forbidden to use chlorine-containing chemicals intended for the care of ceramics to clean them; acrylic is also resistant to acetone, ammonia, and gasoline.
- For cleaning, acrylic care chemicals are used in the form of pastes and gels, some of them: Sarma, Star-Acrylat, Cif, Acryl-Net, Luxus, Akrilan, New Key, Meteor.
- Do not use the bowl to drain boiling water from the washing machine after washing colored laundry to avoid staining its surface.
- It is not recommended to wash pets in an acrylic bath, whose claws can leave marks on the surface; in extreme cases, you can lay a mat.
- Do not place metal objects with hard and sharp ends (iron buckets, cans) into the bowl, especially when heated. If deep scratches occur, the acrylic surface can be restored by grinding with fine-grained materials and further polishing.
Acrylic care products
Application technology
When choosing a product for restoring a bowl, people often wonder: painting the bathtub with acrylic or enamel, which is better and easier for use at home. Each material has different application rules and tools. Let's look at the features of application technologies.
Working with acrylic
You can restore the bowl with polymer material yourself. During work, be sure to use a respirator and mask, and open the windows in your home for ventilation. To avoid poisoning from toxic fumes, professionals recommend leaving the premises without residents or pets for a day.
All things are taken out of the bathroom, leaving the bathtub and toilet. It is better to cover furniture and household appliances with polyethylene, and tiles with masking tape. Old enamel in the bowl is removed with sandpaper or a grinding machine. The roughness of the walls will ensure good adhesion and prevent delamination of the material. The debris is removed with a vacuum cleaner, washed with warm water and, after drying, degreased with acetone. The siphons are unscrewed and reservoirs are placed under the holes.
Correctly applied coating will last at least 15 years. It is more convenient to work with liquid acrylic at a room temperature of 21-26 C. Before the procedure, add hot water to the bathtub, drain it after 30 minutes and thoroughly wipe the walls.
Liquid acrylic is prepared before use. The hardener is added to the container with the substance according to the instructions and stirred carefully. If the connection is poor, areas will appear on the surface that do not harden. The stains will begin to peel off, so restoration will have to be done again.
Liquid acrylic is applied to the surface by pouring at home. For convenience, the composition is poured into a small container. The resulting solution is poured in a thin stream along the side of the bathtub, gradually moving along the perimeter of the plumbing. The width of the strip should be 5 cm. The thickness of the product is such that the mass slowly flows off the surface, leaving no streaks or bubbles.
The first layer of liquid acrylic should fill 50% of the bowl (wall), then proceed to processing the bottom. To ensure an even coating, you need to apply 2-3 layers. If the technology is followed, smudges will not be visible. If necessary, areas not filled with polymer mass can be leveled with a soft rubber spatula.
Liquid acrylic will harden within 24 hours. It will take 4 days for the polymer to dry completely. Professionals do not recommend using quick-drying compounds that have a short service life. A week must pass before the first use, otherwise the material will begin to delaminate. During polymerization, you cannot check the degree of hardening and you must protect the plumbing fixtures from dust, otherwise volumetric defects will remain.
Installation of acrylic liner
The polymer structure is installed using special technology. Before restoration, the surface of the bowl is cleaned with a powdered detergent. To ensure that the acrylic liner adheres perfectly to the walls, the old layer is removed with sandpaper or a sanding machine.
Areas with rust are cleaned and coated with a converter. After the manipulations, wash the bathtub with soapy water and rinse thoroughly. After drying, the surface is degreased with acetone and dried. Before installation, pour hot water into the bowl, drain and unscrew the siphons.
Before installation, the acrylic liner is inserted into the bathtub, checking the fit. Holes for drains are cut, protruding edges are trimmed. The structure is removed, and a special compound is applied to the inner surface of the plumbing fixtures. Polyurethane foam or silicone glue is used as fastening raw material; sealant is used in the siphon area.
After treating the walls with adhesive, an acrylic liner is installed in the bath. For more reliable fixation, tighten the structure with clamps. Siphons are installed in the holes, connected and pressed with force. Any foam (glue) protruding from the edges is removed with a dry cloth.
To ensure that the acrylic liner is evenly pressed against the bowl, the plumbing fixtures are filled with water, the temperature of which is +40 C. A correctly and carefully installed structure is glued to the walls as firmly as possible, so the seams between the old and new coating are not visible. Hardening lasts a day, after which the liquid is drained, the protective film is removed and the bath is ready for use.