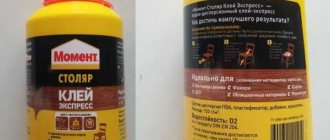
Everyone knows the abilities of superglue, which can cope with urgent work at home. Using it, you can glue various materials, but still, the difference from special compounds is significant. You can strengthen the bonding of the necessary parts by adding baking soda to the glue. The combination of moment glue and soda leads to heating and speeds up the gluing process. The method is popular and will be covered in this article.
Combo set
Features of superglue
The main component contained in superglue is cyanoacrylate. Thanks to it, the parts are fastened several times faster - one might say instantly. It also contains plasticizers, stabilizers and other auxiliary components. It should be noted that superglue does not contain solvents, which is an advantage when fastening metal products.
Among the features of the quick-drying mixture, the following should be highlighted:
- After contact with air, the glue hardens very quickly. Therefore, when working with it, you do not need to leave the tube open.
- For fixation, the parts to be glued are treated with a thin layer of adhesive and pressed against each other with force. It is enough to hold in this position for no more than 1 minute.
- Bonded surfaces treated with super glue, provided the products are sufficiently strong, can withstand heavy loads - up to 150=250 kg/cm2.
- Cured glue has no color.
The miracle composition can be used to glue cracks or small gaps. First you need to fill the space with plaster mixture or concrete dust. Then treat with super glue, which will adhere well to the filler.
Precautionary measures
Since the polymerization reaction occurs within 2-3 seconds, simple precautions must be taken to avoid gluing your fingers to each other and to the material being processed:
- When working with a mixture of baking soda and superglue, have acetone on hand, which can soften the cyanoacrylate for a strong bond. It is important not to try to instantly unclench your fingers, but to apply a cloth generously moistened with acetone and hold for the required amount of time, not allowing the acetone to evaporate. The “unsticking” procedure can take up to 30 minutes.
- Maintain the viscosity of the adhesive, which directly affects the gluing process. Superglue must be fluid, which requires storing it in the refrigerator.
- It is advisable to pour baking soda from a specially made funnel or from a tube, which will ensure uniform distribution over the surfaces to be glued. NaHCO3 should be finely ground, not damp and homogeneous in composition.
Types of miracle glue
A piece of glass has broken off a shelf, a stone countertop has cracked, or a wooden piece has burst - all these problems can be eliminated by using superglue. There will be no problems with the purchase, but in order to choose the right composition, you need to roughly navigate the typology of glue. Each of them has its own disadvantages and advantages.
All glue is classified according to the number of components it contains into two types:
- One-component. Received the greatest distribution. The composition contains ethyl cyanoacrylate, due to which setting occurs after a few seconds. But for the process to be completely completed, it takes a day. Mainly used for fastening small parts.
- Two-component. When purchasing at a hardware store, what immediately catches your eye is the set of two tubes with different contents. When both components are combined, they react, so they require separate containers. The components are mixed immediately before use. No more than 2 minutes are allowed to complete the work. The glue is then covered with a film and hardens.
Two-component
Application in monitor repair
Monitors are attached to a plastic stand, which breaks quite often.
This happens because the monitor is used carelessly or the weight of the monitor does not match the size of the stand.
Sometimes epoxy resin can be used for repairs, but it is not suitable for plastic, so you can safely use superglue with soda. The instructions are:
- All chips must be cleaned;
- The area is cleaned with sandpaper;
- Remove fat with alcohol;
- Sodium bicarbonate is applied to the edges of the chip;
- A large amount of superglue is poured onto the soda;
- After complete drying, blow off excess powder;
- The surface is polished;
- New holes need to be made for the screws;
- Reassemble the stand;
- If necessary, paint it black.
What can baking soda with superglue do?
Having analyzed the abilities of soda in combination with zinc acrylate, we will consider several standard situations where this composition can be used.
We repair the bumper
Car owners are familiar with many ways to repair a bumper when it is not possible to contact a service center. One such recipe is considered to be a combination of baking soda and superglue.
Action process:
- We remove the bumper from the car body and remove the fastening elements.
- To prevent further divergence of the crack, we drill a hole at its end.
- We clean the damaged area.
- Prepare a package of baking soda and a tube of superglue.
- We connect the edges of the cracked part and sprinkle with a generous amount of powder.
Bumper
- Apply glue to the prepared area so that the tip of the tube does not touch the surface of the bumper.
- Leave for half an hour for the damaged area to set.
- Repeat sanding the coating with further sanding.
Filling the cavity
In this case, a cavity refers to dents, deep scratches and depressions that appear as a result of wear of the part or careless use.
Filling the dent with the composition is of a different nature, but the technological process remains the same. Plastic is one of those materials that does not require sanding of parts. It is enough to degrease the coating using alcohol solutions or white spirit.
Cavity
Fill the cavity with baking soda powder and pour superglue on top. Thus, the powder part of the composition should be saturated with glue as best as possible. After 30 minutes of waiting, proceed to cleaning the part to be glued. To do this, take sandpaper and sand the bumper. To ensure that there are no scratches left on the surface, you need to sand it with a special felt wheel placed on a sanding machine or grinder.
Restoring the figured part of the part
Restoring the relief part of a part is also possible with a combination of glue and soda. By mixing these components, it is possible to securely fasten a broken element of a plastic product to the base, ensuring the proper level of wear resistance.
Plastic products are often fragile and prone to frequent breakdowns. Sometimes the damage is so severe that it is necessary to restore the damaged area, literally piece by piece. Conventional adhesives cannot cope with this task, and in this case, it is quite possible to use a composition of superglue and soda.
Recreating a badly damaged part requires a lot of strength and patience, as well as the makings of a sculptor, because the process involves the logical construction of an object according to the image in the head. To make the task easier, you need to break the whole process into several stages.
Curly details
The painstaking work of restoration, sometimes takes a lot of time, and therefore patience is an important condition for those who are about to take on the task. Each broken element is installed in place with preliminary application of glue and soda, and subsequent cleaning of the area. This way all the fragments are glued together.
Important! In case of deformation of the form when gluing small elements or an influx of adhesive mass, use abrasive materials. Restoration work is carried out no earlier than an hour after applying the glue.
Gluing plastic
Let's look at the general principle of gluing plastic:
- Sanding the coating. Clean the surface from excessive roughness. Excessive relief leads to a decrease in the quality of bonding. To correct the defect, use fine-grained abrasive material.
- Degreasing. It is carried out in order to improve the adhesive qualities of parts. Small particles and greasy deposits prevent the uniform distribution of the adhesive mass, which means that the bonding of structural elements will be somewhat worse. An alcohol-containing product is useful for processing.
- Gluing parts. The treated surfaces are covered with an even layer of glue and sprinkled with baking soda. There is no need to skimp on the powder, everything that is necessary for high-quality gluing will be absorbed, and blow away the rest.
- Polishing. After 30 minutes of drying the surface, sanding is carried out with sandpaper. To improve the appearance of the coating, use a felt attachment on a grinder or sander.
Sealing the pool
It’s an unpleasant situation when, while swimming, you suddenly discover that the pool has leaked - a hole has formed somewhere in the side. In this case, it is necessary to urgently take measures to eliminate the problem so as not to aggravate the situation by further discrepancy of the defective area.
In this situation, there is no way to do without a patch, which slightly complicates the process of using the combined composition and requires more skill.
Let's take a closer look:
- If a leak is detected, it is necessary to immediately drain the water to a level below the damage line. Ideally, it is better to remove the water completely.
- Dry the area. Do not use special products to dry the surface. This may cause the hole to diverge.
- Degrease. We treat the surface around the hole with available alcohol-based products.
- Apply glue. The adhesive composition is evenly distributed over the damaged area and patch.
- Sprinkle soda. Immediately after the glue has been applied, pour soda on it and blow off the excess.
- Glue it together. Place the patch over the hole in the pool and press firmly on both surfaces. Maintain in this position for about 1 minute.
- Sanding. Remove excess glue with sandpaper.
Important! All work to eliminate leaks in the pool is carried out very quickly, since the combined composition is applied to both surfaces, which complicates the gluing process.
For bumper repair
Bumpers in cars are made of special plastics, so superglue and soda can be used to repair them.
If chips or minor defects appear, then it is not necessary to go to a car service; you can do all this yourself using the mixture.
First, the bumper is removed from the car. It must be cleaned of dirt and dust, cleaned with sandpaper, and then degreased with a solvent.
Afterwards, an adhesive is poured onto the defect, and soda is immediately poured onto it. This action needs to be done several times.
In order for the adhesive to set perfectly, the bumper must be left for 30 minutes and not touched at all.
After complete drying, excess superglue is removed, and the area itself is sanded and polished. In addition to the bumper, this is also how they repair other parts in the car, for example, headlights and so on.
Precautions
Complete drying of this adhesive composition occurs almost immediately, a couple of seconds is enough, so you need to work quickly and carefully.
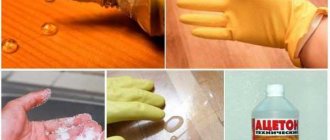
You should always use gloves, otherwise your fingers may stick together. And this is quite painful. If the glue does end up where it is not needed, it is quickly removed using acetone. This also needs to be done if the skin has managed to stick to your hands.
Then take a cotton wool disc and moisten it with acetone. Apply it to the glued area and wait half an hour.
Then the dissolved composition is carefully removed. To avoid pouring a lot of soda, pour it out using a funnel or take a pinch at a time.
Since cyanoacrylate emits toxic fumes, when working with such an adhesive composition it is necessary to have excellent ventilation.
Hyundai Solaris › Logbook › The strongest plastic compound is soda + superglue
The connection is SO STRONG that most likely, the second time, the thing will break in another place, but superglue will endure, and when applied to plastics and any porous materials, the strongest connection is obtained with the formation of molecular bonds!
(How many things were thrown away in vain!) This recipe was tested by me on many things and works flawlessly:
- fastenings for broken headlights - radiator fitting - fastening mirrors (yes, when the ears break off, baking soda with superglue reattaches them securely) - bumper - 1/8 buggy arms - fastening a table lamp - kettle body - lens mount - radiator grille - chair leg on wheels ! (a year has passed, and it can withstand my weight of 87 kg, the second leg is already cracked, and the one repaired with soda does not even think about it) - the case of the uninterruptible power supply unit - the bracket of the fallen monitor, etc. There are so many repaired things that would most likely have to be thrown away that the list would be too long...
If something that cannot be glued is broken, then baking soda and superglue will come to the rescue. The combination of these two cheap substances gives the strongest connection!
For working with cyanoacrylate in thick layers, an amateur method is known by sequentially filling the seam with baking soda, moistened with superglue and in this case playing the role of not only a filler, but also an alkaline polymerizing agent. The mixture hardens almost instantly, forming an acrylic-like filled plastic, and in some cases can successfully replace epoxy compositions, including those reinforced with fiberglass mesh. You can also use finely ground plaster or concrete as a filler, for example, dust obtained when drilling holes in such materials.
The reaction of cyanoacrylate with soda occurs with the release of temperature, as a result of which, when applied to plastics and porous materials, a very strong connection is obtained with the formation of molecular bonds. I'll tell you what I've been fixing over the past 2 days and how it's done.
Source
