A lot of internet searches are "What can I use as a polyurethane sealant remover?" This is due to the widespread use of such sealant in everyday life and in production. He has a set of unique qualities for which he is deservedly appreciated. But, along with this, the sealant has one significant drawback - it is very difficult to remove the old polymerized layer. The reason is the sealant’s unusually high ability to adhere to any material and resistance to aggressive liquids. This leads a large circle of users to the question “What should we do to remove highly resistant material that has become unnecessary?” Only a special polyurethane sealant remover can handle this task.
Self-vulcanizing polyurethane sealant is a composition based on rubbers from the class of polysulfide polymers (thiokols), used in the form of a paste or viscous mixture for the purpose of sealing seams, sealing cavities, and filling various kinds of cracks and cracks. It was invented by German scientists in the first half of the 20th century, and since then has conquered the world with its effectiveness. When used correctly, after complete crystallization, the composition becomes especially resistant to mechanical stress (punctures, scratches), to the action of solvents and other chemical liquids.
Polyurethane sealant can serve for a very long time - up to 50 years, but sooner or later, there comes a time when it is necessary to dismantle the old layer due to repairs or for another reason. It is then that the understanding comes that for ideal sealing properties, for stickiness, plasticity and strength, which have no analogues, it is necessary to pay with unsuccessful attempts to remove unnecessary mass, which has actually turned into a kind of stone. And, most often, it is not possible to do this without damaging the part or the surface being cleaned.
Communities › All about Paint and Painting › Blog › How to dilute joint compound under a brush?
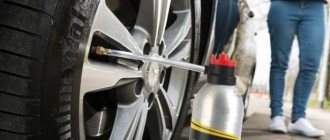
Hello everyone) in fact, from the title of the topic it’s clear what I want to ask) I decided to blow out the bottom of the car (it was sandblasted, primed with epoxy primer, the seams were sealed with app sealant) all that remained was to seal everything with a gun or a movil, but I couldn’t find a purchased and ready-made liquid sealant; in Voronezh, we have only one option left to seal the seam under the brush ((SO THIS IS WHAT TO DILUTE IT SO THAT IT DOESN’T LOSE ITS PROPERTIES? WHO HAS DONE THIS SAME, PLEASE RESPOND)
Comments 91
Hello. Correction:) The simplest and most effective one is anti-silicone. Preferably of more or less decent quality. It is diluted in a jar using a screwdriver with a whisk. Dries better. History has shown. What is the best anticorrosive agent for outdoor work? Even if you compare it with dinitrol, rastop, and tectyl :) I have been using Kuza for almost 6 years. Everything is worth it. But everything else needs to be updated. It is very important to prepare it with anti-corrosion primers...
I also liked this option, the main thing is that it’s clean and dry and the excess doesn’t stick (sand and dirt) and you don’t get dirty during repairs. It’s been 3 years since everything’s fine.
Polyurethane sealants are easily diluted with xylene
I don’t know, guys, what kind of solvents you use, but I personally used APP brush sealant which I diluted with solvent and P12 (Belarus) (nozzle 2.5) and everything was dry and strong and elastic!
which app? for the brush there are 10 and 12
in what proportion should I add p12?
I agree, the video from Alexander USSR is the best, I’m 300 percent sorry I didn’t see it from my phone... everything is so small)))
if the compressor has an engine of 4.5 kW or more, or slowly with any compressor, but in the heat, keep in mind that in about 15 minutes polyurethane sealants can curl up, and they can no longer be revived, you can blow them out with a spray gun with a nozzle larger than 2 mm, but this is personal IMHO, I’ve seen it as well as a construction one used, but losses from ricochet are approximately 50 percent of the material and the tank needs to be modified or a second person holds it on a flexible hose... you won’t put the car at 75-90 degrees, but you will spray from a hole or on an overpass... therefore, I recommend using a brush!
My car is at 75 degrees. I’ll go try it now
By the way, there are also rubber masses auto-emali.ru/price-uni.p...+%E3%E5%F0%EC%E5%F2%E8%EA, not as rubbery to the touch as terason, terastat, but quite a viable mass if there are more than three layers, IMHO from personal experience))) if the mastic is very thick in your opinion, it was diluted with an acrylic thinner, solvent, neither gasoline, nor kerosene, nor any other trouble, I did not experiment, there were deadlines and quality. those who are not looking for easy ways can always save on their car and wallet
The coolest sealant in my practice was Terason suture sealant, it was the most elastic and most resistant but the most expensive! There are two options - or apply by spraying with a special gun and don’t forget to warm up the cartridge! or squeeze the sealant into a jar and dilute it with degreaser, acrylic solvent and apply it with a brush in several layers. A more budget-friendly solution - take the sealant for gluing windows - in a sausage, dilute it and apply it with a brush, stir it with a screwdriver and a whisk from a mixer - in the form of 8, it turned out thinner - added sealant, add solvent thickly))) it dried for a day at +25, if the part was painted, then after an hour and a half I painted it (the visible part of the thresholds)
Thanks for your feedback)
if you want to do it right - using factory technology - you need a special gun that sprays sealant in tubes. It doesn’t cost much, but I got it on Avito for 7k.
People! Why are you powdering a man’s head? I gave him a video camera, everything is clear to the fool, what and how...
Brush sealant based on rubber, not acrylic, kg can be diluted with gasoline or anti-silicone, thoroughly mixed, but it will take a very long time to dry
I didn’t make it a rule, but I tried diluting APP joint sealant with white spirit. I didn’t dilute it directly into liquid, I also did it under a brush. It dried out as usual and didn’t become stiff.
Hello. Dilute with 92 gasoline to the desired viscosity. A screwdriver with a whisk in a container. The best thing for them is to get a divorce. I tried anti-silicone and so on. Take suture in tubes. Novol, for example, is much more elastic than a can. It can also be applied with a spray gun with a nozzle of 2-2.5. Great. This covering cannot be compared with a cordon. It is even better than tectyl a and dinitrol a. The main thing is not to regret. And place it on a properly prepared surface. Observe the interlayer space. Then another layer. And so on as long as you need. They are usually painted the second day after the gasoline evaporates in the color of the body. For protection against ultraviolet radiation. It's also on the bottom. Glass works well using the same method. But don't try to dilute it with a solvent. It will never dry out. Dries well with gasoline. You can also dip the brush in anti-silicone. Easier to smooth out. With gasoline, this option has been tested in more than one car.
Doesn't dry very quickly. When the thick layer is longer. I just painted it yesterday. I still have it after 12 hours. There was a thick layer. I painted it like this. Everything is fine. It will still dry out. Simply put, for thick layers you need less gasoline. I was never able to dilute it with a degreaser.
Hello. Dilute with 92 gasoline to the desired viscosity. A screwdriver with a whisk in a container. The best thing for them is to get a divorce. I tried anti-silicone and so on. Take suture in tubes. Novol, for example, is much more elastic than a can. It can also be applied with a spray gun with a nozzle of 2-2.5. Great. This covering cannot be compared with a cordon. It is even better than tectyl a and dinitrol a. The main thing is not to regret. And place it on a properly prepared surface. Observe the interlayer space. Then another layer. And so on as long as you need. They are usually painted the second day after the gasoline evaporates in the color of the body. For protection against ultraviolet radiation. It's also on the bottom. Glass works well using the same method. But don't try to dilute it with a solvent. It will never dry out. Dries well with gasoline. You can also dip the brush in anti-silicone. Easier to smooth out. With gasoline, this option has been tested in more than one car.
Kerosene, white spirit and mixture 646 - how productive are they?
If the house does not have special solvents for sealant, you can find an alternative. Very often they use gasoline or kerosene. We are sure that everyone has a small canister of such petroleum products in their garage. Cleansing goes like this. Apply kerosene (gasoline) to a clean cloth, cotton wool or napkin, apply it to the area with sealant and leave for a couple of minutes. Next, take a sharp knife or scraper and carefully scrape off the remains.
ACETONE+
How to wash off silicone if only a couple of drops get in? Use white spirit. Before using this product, test it on an inconspicuous area to analyze the effect of the substance on the surface. It is not recommended to use white spirit to clean large areas. It may disturb the paint and varnish layer; apply it only locally.
Mixture 646 is considered an inexpensive and also neutral solvent that does not harm the paintwork. When interacting with silicone sealant, it rolls it into small pellets that are easily removed with a dry cloth.
But, as practice says, if the silicone has hardened, then such solvents will be practically ineffective. In this case, you need to purchase a highly professional silicone remover, choosing the appropriate chemistry specifically for your surface or choosing a multi-purpose option. Such household solvents are sold in building materials stores.
How to dissolve frozen and hardened sealant?
How to dissolve frozen and hardened sealant?
Post by Klopster » Wed Aug 15, 2007 9:38 am
Post by aversun » Wed Aug 15, 2007 10:32 am
Post by Serty » Wed Aug 15, 2007 10:42 am
Re: How to dissolve frozen and hardened sealant?
Post by avor » Wed Aug 15, 2007 1:49 pm
—How can you dissolve rubber or sealant (any kind, including silicone)? It's a funny question to ask. What will dissolve any sealant will dissolve any plastic.
In order for the solvent to act selectively, it is necessary to take advantage of the difference in the properties of the sealant and plastic.
If the plastic is PVC, ABS, Polyolefin, and the sealant is silicone, then hydrochloric acid may help. If the plastic is polycarbonate, plexiglass, polyester, polyurethane, then acid can partially destroy them.
If you take rubber-based sealants such as 88 and rubber adhesives, then they can be softened with mixtures of xylenes and toluene, but any polystyrene-based plastic will leak, PVC will leak, and to a lesser extent (almost imperceptibly) plexiglass, polycarbonate, polyester, and may become cloudy.
At the same time, you need to keep in mind that sealants are polymers, and even cross-linked, as a rule. So their dissolution is not an instantaneous process and they cannot be dissolved like sugar in water. At least by soft selective means.
Polyurethane sealants may be easily destroyed by alkaline solutions.
Post by Klopster » Wed Aug 15, 2007 3:12 pm
Post by Marxist » Wed Aug 15, 2007 3:14 pm
Post by Klopster » Wed Aug 15, 2007 3:23 pm
Post by Marxist » Wed Aug 15, 2007 3:42 pm
Post by Klopster » Wed Aug 15, 2007 3:58 pm
Post by StYV » Wed Aug 15, 2007 4:04 pm
Post by amik » Wed Aug 15, 2007 4:46 pm
Post by Klopster » Wed Aug 15, 2007 5:08 pm
Post by VOVAN CIR » Wed Aug 15, 2007 5:18 pm
Post by amik » Wed Aug 15, 2007 5:24 pm
Post by avor » Wed Aug 15, 2007 8:43 pm
—The front part of it (the lampshade) is made of transparent plastic. Yes! More like polycarbonate than plexiglass. —The back plastic cover is made of black plastic. ABS - with a probability of 80%
Well, they already told you where to get the alkali. The acid must be taken from the battery electrolyte.
Warning: both acid and alkali will destroy transparent plastic, but black plastic practically doesn’t care; if this transparent plastic is plexiglass, then battery acid can make it cloudy.
You need to work with gloves and after opening, rinse everything thoroughly and generously with water.
Post by Alexey [ins] T. » Wed Aug 15, 2007 9:03 pm
The same case happened - we keep the exhibits in the museum in glass containers, we fix the lids (also glass) with sealant, only ours is not black (transparent).
I tried it with acid - the result was not the same. Lye is a more progressive method, but it took 3-4 days to completely remove it, finally using a knife.
Posted by AF » Thu Aug 16, 2007 11:54 am
The sealant is most likely polyurethane. Typical application for sealing headlights. The material is sewn. It can only dissolve through destruction under fairly harsh conditions. So. “Abandon hope, everyone who enters here.” You won't be able to do anything other than mechanical removal.
PS although, if “A temperature of 250-300 degrees does not affect it at all.” - then silicone, but in this case - only mechanical removal.
Post by Klopster » Thu Aug 16, 2007 12:53 pm
AF wrote: The sealant is most likely polyurethane. Typical application for sealing headlights. The material is sewn. It can only dissolve through destruction under fairly harsh conditions. So. “Abandon hope, everyone who enters here.” You won't be able to do anything other than mechanical removal.
PS although, if “A temperature of 250-300 degrees does not affect it at all.” - then silicone, but in this case - only mechanical removal.
Doesn't take alkali
Post by Klopster » Tue Aug 21, 2007 2:27 pm
Re: How to dissolve frozen and hardened sealant?
Post by kontrast86 » Mon Jan 24, 2011 12:38 am
Good day to all!
I registered solely thanks to this forum topic, although I might read the others. Interesting. I always loved chemistry, in my school years I was even the winner of city Olympiads in it. But this is a digression. Unfortunately, I did not become a chemist, so I ask for your advice. My task is simpler, I think, than that of the author of the topic.
Silicone removal process
Almost all solvents are similar in the process of interaction with the sealant. Since the composition has an aggressive effect on the surface and humans, they take care of their safety. Provide good ventilation, wear gloves and a respirator. Before use, try the effect on a sample. When the check is completed, proceed to the following steps:
The solvent acts faster if the dissolution procedure is performed in a dry room. Remove the remaining aggressive composition with a damp sponge. This procedure is mandatory, otherwise solvent residues will continue to corrode the coating or get on the skin. After cleaning, the work area is ventilated.
Before looking for a means to dissolve silicone sealant, ask yourself the question of feasibility. There is no point in removing frozen sealant on a plasterboard sheet, since this will soften the material itself that is being puttied. If the drop is large, then it is cut off at the root and then hidden under a layer of plaster.
A VAZ car is not a finished product, but only a blank for its independent production (c) All ideas are posted for personal use. These are like “newspaper clippings”. Links to primary sources are provided.
Pages
Seam sealant instead of gravitex
I heard that they dilute hand sealant and blow it with a bullet for gravetex, what do you think? and mastic on top, I think it will work out well, the sealant does not let in moisture
Why do you need mastic on top? And it works out so well
which sealant is better? what to breed? the layer is thick, will it hide the patches?
Yes, any polyurethane. You can dilute with xylene, but I prefer the solvent from polyurethane enamel. Nitro solvents do not roll, the sealant will not harden. The layer depends on financial viability, you can apply 5mm
Anti-gravel and sealant are two different things. When mixed with a solvent, the polyurethane takes in air and the next day polymerizes in a closed can throughout its entire volume, forming a closed-cell foam structure. Anti-gravel has open pores, it just “dries”.
How many bottles do you need for the bottom? I saw hand sealant in a liter jar in a store, I didn’t look at polyurethane or what
You need a lot of tubes, but the money is no more expensive than high-quality anti-gravel, about 400-500 rubles per liter. The sealant for brushes in liter jars is slightly different and of worse quality. The price tag depends on the cost of the starting materials, usually 2 tubes of 330 ml per liter + xylene-based solvent, approximately 500-600 rubles. Epoxy primer is definitely better for bare metal.
Spelling and punctuation preserved Source: car painters forum
And more information confirming the above:
I see this for myself: 1) Acid pickling primer (1-2 thin layers on degreased metal, there is aerosol Seakens Washprimer 1K CF) 2) Sprayed sealant 3M (2 layers, the first thin with drying, the second thicker) 3) Bitumen mastic or anti-gravel (also from the 3M line) What’s confusing is that there is nothing between points 1 and 2. or is nothing needed? They suggested treating everything with epoxy varnish after the acid treatment.
on the first point - refuse the aerosol, well, the acid agent as an “underlayer”, in my opinion, only makes sense in some places that are not directly exposed to fur - well, there are “pockets”, “cavities”, etc. - the problem is that its mechanical strength is weak (and its properties to “stop corrosion” - let’s say, are very much exaggerated). those. the arches should definitely just be cleaned better and painted with a normal epoxy primer - I misunderstood - you can buy it in Moscow without any problems - why bother with some “BODY varnishes”? I agree - there probably won’t be any spare parts in the nearest store, so you’ll have to go straight to the paint.
on the second point - apparently I’m a little behind the times and the sealant manufacturers heard my dreams and released a polyurethane sealant with a viscosity that allows it to be sprayed right away? if this is not the case, dilute PU sealant with xylene or, like a painter, hydrodesmo (this is a construction PU composition for sealing all kinds of roofs, caissons, etc.)
Well, and thirdly, anti-gravel on the arch-bottom makes no sense at all, but bitumen - in principle, if you never bother with such global work again - you can probably smear it (just don’t put any primer or polyurethane on it at all - you’ll have to remove it carefully , or don’t fool around and lubricate them)
Types of solvents
When choosing one or another means for diluting hardened sealant , it is important to take into account certain features of its composition.
Silicone-based consistencies are divided into three main groups.
- Acid based. Acetic acid is used in the production of this type of silicone solution. This material has a low price and a not very pleasant smell. The composition is incompatible with some metals and marble.
- Alkali based. This type of consistency is made on the basis of amines and usually has a specific purpose.
- Neutral. They are considered universal compositions that are suitable for virtually all materials.
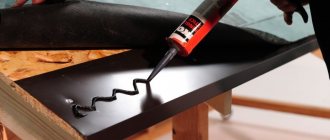
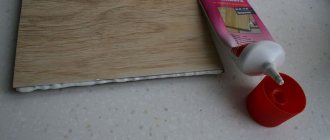
We spread the seam sealant.
On the modern building materials market you can find special impregnations for diluting the sealant . However, folk remedies are no less effective and will help in a situation where there is no special-purpose composition at hand.
How to make anti-gravel from joint sealant for a car
Seam sealant is a convenient material used in car body repairs. The product has an impressive range of consumer properties, the main one of which is high resistance to negative environmental influences. In simple terms, seam sealant reliably protects the metal parts of the car from moisture.
One of the key features is the elastic polymer base. Sealants are made from rubber and synthetic resins, due to which they retain elasticity even after curing, which eliminates the appearance of cracks and minor defects. The film formed over the seams lasts a long time, providing high-quality protection for the metal.
Car Seam Sealant
These properties have made joint sealant a universal material used to solve many other problems. For example, it can be used to produce a high-quality mixture that provides effective protection of the bottom from moisture and rough influences.
Sealing technology
To carry out high-quality sealing of window seams, it is necessary to strictly follow the sequence of operations during installation work.
Sealing gaps between slopes
Sealing cracks in window frames
Why not use a ready-made tool?
Indeed, in specialized stores you can find compounds designed to protect the bottom, but in addition to a whole set of advantages, they also have disadvantages, including:
- high cost;
- high degree of moisture absorption;
- too viscous/liquid composition;
- difficulties with manual application (for example, they are intended for application exclusively with a paint sprayer with a correctly selected nozzle).
Anti-gravel HB BODY 950
Anti-gravel made from suture material, made by hand, does not have such disadvantages. It is easier and more practical to apply, and costs much less.
Characteristics and rules for choosing polyurethane glue
Among the types of adhesive masses, polyurethane glue occupies the top level in the ranking. It differs from other compositions in its properties, scope of application, and characteristics. But, before starting use, you need to familiarize yourself with the best TMs and application rules.
Properties and characteristics
The composition of polyurethane adhesive, in addition to its main component, polyurethane, includes fillers that affect the drying speed, consistency of the mass, and increase adhesion to various planes.
The main difference is the ability to increase the volume of the layer when drying. This ability allows you to penetrate into all the gaps and cracks without shifting the clutch elements.
The seam is resistant to sudden temperature changes within 40 degrees. It is resistant to oil liquids and gasoline. Resists water, vibration. There are no strong odors and no solvents in the composition. Therefore, you can use the product without harm to health and the environment.
The glue also contains antiseptics that resist the formation and proliferation of fungus and mold. The operating temperature range is from -60 to 120 degrees.
The applied layer of glue has high viscosity and fast setting. Due to the presence of isocyanates in the composition, when interacting with air moisture, a chemical interaction occurs in which molecular bonds appear. They ensure the strength of the connection.
As for consumption, it directly depends on the type of material being glued, ranging from 150 grams per square meter to 500.
Polyurethane-based adhesive is produced in several shades, from beige to dark brown.
Scope of application
Having excellent characteristics, polyurethane adhesive is used in areas that are subject to deformation and impact. The scope of application therefore extends to:
- In the synthetic covering of playgrounds.
- Mechanical engineering, construction.
- Insulation work of drainage pipes.
- Gluing stones and slabs to various planes.
- Finishing floor work in industrial buildings, home conditions. , furniture, etc.
Main consumer properties
It is necessary to understand that in this case we are talking about a symbiosis of two compositions, each of which has a certain set of advantages. Together, these components form a product with excellent consumer qualities.
Properly prepared anti-gravel (with clearly defined proportions and optimal composition) provides:
- high-quality protection from moisture;
- resistance of metal components to chemicals/reagents used to treat road surfaces in the cold season;
- good protection from shock, friction, rough physical impact;
- tightness of seams, reducing the likelihood of a corrosion process;
- good and simple application, ensuring operation under normal conditions (no special equipment required);
- quick drying and curing;
- the elastic structure of the film, due to which it is preserved for a long time without losing its protective properties;
- high adhesion to metal and steel surfaces.
Another important advantage is the lack of high hygroscopicity. Anti-gravel is applied either with a spray gun or with a brush. The product adheres to the surface very tightly, which ensures low hygroscopicity. As a result, the resulting film does not have a porous structure, which makes it durable, dense, and elastic. Ready-made compositions sprayed using gas cans do not have this feature (their hygroscopicity is much higher and their service life is lower).
Remove from various surfaces
When cleaning with one product on different surfaces, the result will be different, since not all surfaces are able to withstand the effects of individual components. Therefore, when removing silicone from different coatings at home, the type of surface is taken into account.
Plastic
The surface of the package must contain information about the intended use of the product for plastics.
It is also possible to use hydrochloric acid.
Glass
The glass plane is hard and reacts well to solvents. The sealant itself is not very absorbent, so white spirit, purified gasoline, and kerosene will help remove the silicone layer. Depending on the product, the time allocated for cleaning varies.
Tile
The tile has a glossy coating on the surface that reacts to solvents. To clean this coating, products with abrasive components are not used. Also, white spirit is not used for low-quality ceramics. It is better to buy special solutions for the work or use kerosene.
The better to dilute
The choice of components for preparing anti-gravel at home must be approached very carefully. Composition compatibility is a key selection criterion.
To prepare you will need 2 main components:
- polymer (body) sealant;
- antisilicone.
When mixing one with the other, you need to monitor the consistency. Add anti-silicone until the mixture reaches the consistency of paint. In this case, it will be easier to apply (especially when using a paint sprayer).
If there is no anti-silicone, you can use xylene. It is cheaper and also evaporates slower. The last property is important because the antisilicone evaporates quite quickly, so the mixture flies out in small flakes when applied with a paint sprayer. This does not create any particular difficulties, since the elastic liquid structure quickly mixes and sticks together, forming a homogeneous mass. The only problem is the high consumption of the composition.
Using xylene can reduce consumption. By choosing the right consistency and proportions, you can achieve optimal performance characteristics of manual anti-gravel.
Does the color of the composition affect the level of protection and durability
Not really. In practice, motorists note that both white and black joint sealants have the same performance and consumer properties.
Recommendations
When working with sealant, use the following recommendations.
Carefully study the composition on the packaging of the material. When wondering how long it takes for the sealant to harden, take into account all of the above factors, as well as the information provided in the instructions.
Thus, it is impossible to unambiguously answer the question of how long the sealant takes to dry. It all depends on the selected type of material, technical characteristics, working and operating conditions.
To learn how to seal the seam between the bathtub and the wall using sealant, see the following video.
Preparing the car
The procedure boils down to the following procedure:
- The surface of the bottom and parts should be completely cleaned of all kinds of contaminants. If necessary, it is recommended to remove the suspension components, which will eliminate dirt at the joints and subsequently ensure uniform application of the anti-gravel composition.
- Treat the surface of the parts using Scotch Brite. Similar formulations with similar properties can be used. This procedure is necessary to increase adhesion.
- Prime metal surfaces. This increases adhesion and reduces the likelihood of rejection of the composition. With high-quality pre-treatment with two-component primers, a homogeneous film is formed, providing a high level of protection and preserving the structure even under aggressive environmental influences.
Scotch Bright for preparing the bottom for anti-gravel treatment
If desired, the surface can be degreased at the final stage. Despite the fact that the anti-gravel coating contains anti-silicone, additional degreasing will only improve the quality of the protective layer.
Useful tips
Immediately before treatment, it is recommended to cover the car body with plastic film, leaving only the underbody and suspension parts. If desired, you can clearly glue the joints with masking or ordinary tape, which will ensure that the border is marked. This preliminary preparation will help avoid subsequent cleaning of the fenders and doors.
The car should be installed at an angle of 45 degrees using a special stand. Firstly, this will allow you to work in more comfortable conditions, and, secondly, it will not create difficulties when using the spray gun (when tilting the gun, problems with application may arise).
At this point, the process of treating the body with an anti-gravel compound can be considered complete. This method of protection is strongly recommended for owners of domestic cars, as it will help avoid the appearance of rust on the body and increase the service life of the suspension.
Application methods
It was noted above that this composition can be applied without the use of special tools, and this is true. However, to save time and effort, it is recommended to use an air gun. The nozzle diameter varies from 1.5 to 2.5 mm. This will ensure even application over the entire surface.
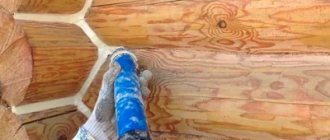
What is the most suitable width of the sealant seam when sealing a log house?
Since wood is not static, that is, it is constantly subject to imperceptible deformations, the joint must be wide enough to withstand these movements. Experts recommend a layer of sealant of at least 2.5 cm - this is for a log house with natural humidity. If the logs are poorly dried or the climate is humid, then it is better to make the seam even larger.
Experts have a rule: the width of the seam should be in the range of 6–12 mm, and the depth in the range of 6–9 mm. Professionals do not recommend sealing seams thicker than 15 mm, and if you do this, use thick caulking cord.
The sealant is applied in a wide and thick layer, because after drying it will still shrink. “Insurance” is made with this in mind.
The sealant is applied to a depth of 6 mm with a joint depth of 10 mm
Theoretical data
When starting to clean silicone, they also think about the surface from which it is to be removed. Solvents are aggressive materials that damage the surface beyond repair. Therefore, consider the following:
- The sealant is removed from a plastic surface (PVC or polyolefin) with an acid such as hydrochloric acid;
- Acids cannot be used if silicone is applied to plastic based on polyester, polyurethane, polycarbonate, or plexiglass. The finishing material will be damaged;
- Polyurethane sealants are better removed with alkali. In this case, the product does not have any effect on plastic;
- Solvents reduce the shine of tiles and change the tone of the painted surface;
- The selected product is tested in an inconspicuous place or on a sample.
The density of chemical bonds of the sealant is also taken into account. Therefore, it is impossible to remove silicone instantly. You should wait a little until the selected solvent penetrates deeply into the material.
Sealing seams in rooms with high moisture