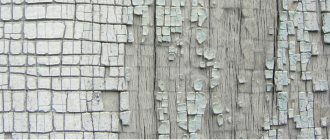
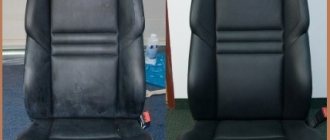
Plastic is a common material used in cars, furniture and household appliances, window openings, etc. Almost everyone has products made from it in their home. During repairs, paint may get on plastic elements and leave a mark. Sometimes you need to get rid of the old coating. Therefore, many people wonder how to remove paint from plastic and what is important to consider.
Features of removing paint from plastic
Plastic is a lightweight material, quite durable and wear-resistant. But if you choose the wrong method for removing paint, you can damage the product. Therefore, it is important to consider some important points related to getting rid of coloring pigments.
When figuring out how to remove old paint from plastic, you need to consider the following features:
- The material is sensitive to strong mechanical stress. Brushes with hard bristles and compositions with abrasive particles provoke the formation of scratches on the surface;
- Some aggressive compounds cause plastic to melt. This negatively affects the appearance of the product and its performance properties;
- Polymers are prohibited from heating to 80 degrees or more. They immediately lose their strength characteristics, change shape and can no longer be used.
Some aggressive compounds cause plastic to melt.
Prompt cleaning
It happens that you have to immediately remove the water emulsion from delicate surfaces, for example, from wallpaper. To prevent the paint from being absorbed and ruining the appearance, mix water and gasoline in the same ratio. Dip the sponge into the mixture, then use the rough side to remove the stain. Work in a circle: from the outside to the inside, making sure that only the stain is removed and not the layer of wallpaper. Next, gently blot the area with a paper kitchen towel. Wait for it to dry and evaluate the result.
On a note! If the stain still remains, then nothing can be done about it. You need to cut out the defect and replace it with a similar piece of wallpaper.
Methods for determining the type of plastic
To choose the right method for removing paint, you need to know what type of plastic it is. Some of them do not tolerate exposure to solvents, others can only be cleaned with ethyl alcohol. There are several methods for determining the type of plastic.
If you plan to remove paint with a special remover, you need to clarify what type of plastic it is suitable for. Information can be found on the product label.
To choose the right method for removing paint, you need to know what type of plastic it is.
By labeling
Numbers can be found on the bottom of the product. They indicate the classification of the material. Number 1 means PET, if number 2 is indicated, it means it is a high density product. To indicate low density, the designation is 4. For PVC, 3 is used, for polypropylene it is 5, and for polystyrene it is 6.
Numbers can be found on the bottom of the product.
According to the nature of combustion
Depending on the type of material, its combustion will be different. For example, when PET is burned, it produces acrid black smoke. When polyethylene burns, you can observe a blue flame; no soot is formed. You can smell the paraffin. The combustion of polypropylene is accompanied by a blue flame and no haze is formed. After melting, the mass looks like long threads. When burned, polystyrene produces a bright flame with soot, and soot particles can be seen in the air. PVC goes out quickly when burned, and polycarbonate emits a sweet smell.
Depending on the type of material, its combustion will be different.
Types of materials and the nature of their combustion
Some types of material and the characteristics of their combustion have been described above. But these are not all types of plastic. There are many of them and it is worth focusing on other types. The nature of combustion allows us to understand what kind of material it is. You can set it on fire and see exactly how the process proceeds.
Other types include:
- When polyamide burns, a blue flame appears. The material begins to swell and crack. A distinct smell of burnt hair appears;
- When burned, polyurethane emits an unpleasant, pungent odor. The flame turns blue, droplets appear, and when cooled, become greasy to the touch and sticky;
- Heated ABC develops a pungent odor, produces a lot of soot and smokes heavily;
- When ignited, fluoroplastic does not begin to burn, it can only become charred. This creates a strong, pungent odor.
When polyamide burns, a blue flame appears.
When immersed in water
A safer method to recognize the type of material. Simply immerse it in a container filled with water. If it quickly sank to the bottom, it is fluoroplastic. Slow immersion indicates that the material is PET and PVC. Species with low density do not go under water. And polyamide and polystyrene can not sink for a long time.
A safer method to recognize the type of material is immersion in water.
Secrets of cleaning plastic panels in the bathroom and kitchen
The plastic used for bathroom finishing is classified as a cleanable coating. But regular exposure to high humidity conditions contributes to the appearance of specific contaminants:
- yellowish from rust;
- dust, splashes of dirt;
- limescale from hard water;
- mold, fungus.
It is difficult to clean fungal lesions. They appear on the walls and ceiling in the form of black dots ingrained into the structure of the material. Accumulations of fungus are found in different places, but more often near pipes where condensation forms. If there is a rusty streak near the mold, check the pipes. The problem arose due to poor quality plumbing.
To tidy up the surface of the panels, gel or cream products are used. Cleaning is carried out with soft sponges and rags. Suitable for work:
- acrylic, foam rubber, melamine sponge;
- cotton fabric.
Abrasive detergents, brushes, steel wool, and hard brushes are prohibited for use. The devices scratch the plastic, leaving places for dust and new contaminants to accumulate.
Having decided to wash the plastic panels located in the bathroom, use:
- soft liquids, gels;
- creams, cleaning liquids;
- paste-like compositions against difficult stains;
- remedies for fungal plaque.
Chlorine-containing products are used against mold. You can use bleach diluted with water.
To remove marks from felt-tip pens, ballpoint pens, and pencils, the sulfur head of a match is briefly placed in water. The resulting paste is applied to the stain and left until the pattern is completely dissolved. Wash off any remaining residue with soapy water.
Bleaching agents will help wash off brilliant green and other caustic substances. Before use, test in an inconspicuous area so that the outer layer is not damaged.
The kitchen, like the bathroom, is a specific place. PVC here is exposed to many factors, including grease from food, cigarette smoke, and splashes from detergents. To prevent stubborn stubborn marks from causing problems, you need to regularly clean using the following products:
- ammonia solution: take 1 tbsp for 1 liter of water. alcohol;
- baking soda paste: baking soda is mixed with water to form a thick paste and applied to difficult stains. Rub effortlessly to avoid scratching the panel.
The following diagram will help you wash the plastic panels on the ceiling in the kitchen:
- Vacuum the surface to remove large dust particles.
- Prepare a cleaning solution from available products and apply to the ceiling.
- Wait until the dirt softens.
- Wash with a soft sponge or cloth.
- Dry and rinse with clean water.
- Wipe dry.
If dirt gets into the connecting seams, it is difficult to clean it. It will not be enough to wash the plastic ceiling in the kitchen; you will need to dismantle the finishing, clean it and reassemble it.
What devices are best to use to avoid damaging the panels?
Before you start cleaning, you should prepare tools that can be used to effectively and safely clean plastic panels:
- soft cotton fabrics;
- soft sponges with a fine-pored structure;
- melamine sponge;
- acrylic sponges;
- Before washing the plastic panels on the ceiling, you should purchase a special mop with a sponge and a telescopic handle.
Methods for removing old coating
To choose the right way to remove paint from plastic, you need to consider the type of dye. Each of them has certain characteristics. This will influence the choice of a more suitable paint remover.
To choose the right way to remove paint from plastic, you need to consider the type of dye.
How to remove oil-based paint from plastic
Fresh traces of oil coloring matter are removed with a solution of soap and water. To avoid the formation of streaks, it is recommended to wipe the desired area with vegetable oil. For old marks, you need to use a gel cleaner. Apply to the desired area for 15 minutes, then wash off with water.
Fresh traces of oil coloring matter are removed with a solution of soap and water.
How to remove latex-based paint from plastic
When figuring out how to clean plastic from paint if it has a latex base, it is worth highlighting solvent and white alcohol among the suitable products. Methanol will also work. It is recommended to carefully remove it from the surface to avoid the formation of yellow marks.
When using these products, it is necessary to ensure good ventilation in the room. Be sure to use protective equipment, including gloves and goggles.
It is worth highlighting solvent and white spirit among suitable products.
How to remove alkyd-based paint from plastic
It is recommended to use ammonia. White alcohol or thinner will also work. It is enough to apply the selected composition to the desired area, leave for a while and rinse.
It is recommended to use ammonia.
How to remove water-based paint from plastic
Fresh marks can be removed with soapy water. If you need to remove old paint, then you should first soak the area in water, then in a soap solution. Special professional washes are also suitable. It is necessary to select a composition that matches a specific type of paint.
Fresh marks can be removed with soapy water.
How to remove watercolor or gouache paint from plastic
These types of paint compounds are easier to remove than the previous ones. It is enough to use laundry soap. Standard detergent will do. If the desired result was not achieved the first time, it is worth repeating the procedure several times. It is important that the soap composition is suitable for both fresh and old marks.
It is enough to use laundry soap.
Cleaning a stretch ceiling
Removing water-based emulsion stains from a stretch ceiling is carried out only with a soap solution. To do this, it is not necessary to use solid soap, because both liquid and washing powder are suitable. But, in order to avoid an unknown chemical reaction, it is better not to combine several detergents.
Soak a cloth or dishwashing sponge in the prepared solution, then simply scrub the surface of the ceiling with gentle, slow movements. This cleaning method can also be used if the stretch ceiling structure is made of fabric.
Selection of solvent
Most types of plastic withstand exposure to mineral solvents well. There are several effective paint removers. It is worth understanding each method.
Most types of plastic withstand exposure to mineral solvents well.
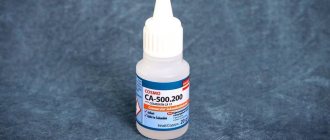
How to remove with acetone
The composition is used in combination with ammonia. First, acetone is applied to a napkin and the surface is treated with it. Ammonia is applied to a sponge and covered with plastic on top. Leave for a couple of minutes and wash off.
The composition is used in combination with ammonia.
Wash
When working with the remover, be sure to use a respirator and gloves. It is recommended to organize good ventilation in the room in advance. The wash is poured into a suitable container and the plastic is placed there for several hours. To increase efficiency, the surface is treated with a brush to remove paint residues.
If the plastic cannot be immersed in a container, the remover is applied to it with a brush. The main thing is that the liquid does not dry out.
When working with the remover, be sure to use a respirator and gloves.
How to remove brake fluid
The immersion method is used. The brake fluid is poured into a container, the plastic is immersed in it for 30 minutes. The remaining paint is removed with a brush. You can also apply brake fluid to the problem area with a rag.
The immersion method is used.
"Mole"
Helps not only deal with blockages, but also paint coating. Just cover the desired area with it and leave for 30 minutes. The dissolved paint is removed with a brush.
Helps not only deal with blockages, but also paint coating.
Methanol
The plastic is either immersed in methanol or the surface is coated with the composition. It is recommended to keep the composition for a maximum of 15 minutes. The substance is caustic. Be sure to use gloves and a respirator. Additionally, organize good ventilation in the room.
It is recommended to keep the composition for a maximum of 15 minutes.
Degreaser, white alcohol
The composition is applied to the surface and left for 15 minutes. Remove with a brush. Finally, the surface is washed with clean water.
The composition is applied to the surface and left for 15 minutes.
Pollution in the bathroom of an apartment where a small child lives
Sometimes the housewife is faced with such a problem as drawings with felt-tip pens, pencils and ballpoint pens on the plastic panels of the bathroom.
The following recipe will help in this case:
- For cleaning, a sulfur match head is used, which is soaked briefly in water.
- All contaminated areas are treated with this paste, after which they must be left for some time until traces of the handle disappear.
- The sulfur is washed off with a regular soap solution.
And if children accidentally found a solution of brilliant green and not only got dirty themselves, but also smeared the walls in the bathroom, you can use a bleaching agent.
But for colored surfaces, the test is first carried out in an inconspicuous place. Having selected the desired concentration of the product, you can safely wash away the dirt with this solution.
Paint removal technology
The dye removal procedure consists of several stages. They start with chemical exposure. The plastic is treated with the selected composition. You can immerse it in the substance or apply the product with a sponge, rag, or rag.
Then the mechanical stage begins. When paint swells from exposure to chemicals, it moves away from the surface of the plastic. Using a brush, traces of the dye are removed. Finally, remove the remaining chemical composition with clean water.
The dye removal procedure consists of several stages.
Causes of yellowing of plastic surfaces
Any white plastic will turn yellow over time. Under the influence of ultraviolet radiation, many substances are destroyed, including polyvinyl chloride. If the product is made from low-quality material, the process will go faster, as the dye and plasticizer evaporate.
Besides this, there are a number of other reasons:
- Low-quality window structures made using complex technology. They consist of more than a dozen components that are responsible for the reliability and color of the product. Manufacturers want to reduce the cost of the product, so they save on mixture stabilizers and violate production technology;
- Savings when creating plastic using white pigments of zinc oxide, titanium dioxide or lead. This raw material gives the product a white tint. Because of this, a yellowish tint begins to appear on the products after two to three years;
- Light aging of material. It contains light stabilizers based on benzophenone or benzotriazole. Because of this, exposure to ultraviolet rays slows down. The process of yellowing of windows facing south will go faster than on the shady side;
- Terms of Use. Being near a highway and the influence of weather are also considered unfavorable factors. Due to temperature changes, the chemical and physical qualities of the material change. Cracks form and the color changes. This usually applies to budget PVC windows;
- Wrong care. Some housewives make too much effort when caring, which negatively affects the product. Yellowing occurs due to solvents, strong alkali, acid;
- Cigarette smoke and grease fumes in the dining area. These marks can be removed using detergents.
Important. When buying plastic windows, it is better to choose trusted manufacturers
The price will be a little higher, but the white color will remain for a long time. Usually the warranty period is 30-40 years, but even GOST standards allow that the shade may change during this time. Windows purchased from unscrupulous manufacturers often cannot be whitened. If low-quality plastic turns yellow, the process is irreversible.
Many people do not recommend purchasing windows from China and Turkey. It is necessary to check the quality certificate, which proves the reliability of the product. In the absence of this document, there is no need to take risks. In this case, the quality of the windows is usually low and you will soon have to make a new purchase.
Yellowed plastic looks untidy and dirty
Nothing helps - what to do?
If chemical compounds do not cope, you should turn to silicone sealant. When it turns out to be useless, only radical methods remain. To do this, use sandpaper, various knives and blades. Mechanical paint removal may damage the surface.
If chemical compounds do not cope, you should turn to silicone sealant.
Possible difficulties
Difficulties arise when searching for an answer to the question of how to wash products of non-standard shapes. The surface relief does not allow the use of common cleaning methods. Liquid glass (an aqueous alkaline solution of sodium silicates) helps solve the problem. It loosens the decorative layer, which is then removed mechanically.
If this does not help, scrape off the old coating with a blade, knife or sandpaper. Hardened paint is often removed along with the top layer of plastic. A radical cleaning method may render the item unusable.
Recommendations from experts
It is necessary to select a suitable product taking into account the type of plastic and the type of paint with which it is coated. Work with chemicals is carried out only with products that protect the skin, respiratory tract and eyes. Do not rub the surface excessively to avoid damaging it. When cleaning electrical appliances with a plastic case, it must be disconnected from the network in advance. After cleaning, a minimum of 2 hours must pass before the equipment is reconnected to the network.
Work with chemicals is carried out only with products that protect the skin, respiratory tract and eyes.
The listed methods can effectively remove traces of paint from a plastic surface. But as a result of careless handling, it can be damaged. To prevent this from happening with a special plastic product, it is recommended to consult a specialist and select professional products.
Useful tips
- To reduce the cost of effort and time in the process of removing water-based paint, you need to apply all of the above tips from experts, since amateur efforts can lead to damage to expensive materials.
- Apply water to the paint in small areas, as it is impossible to clean the entire wall at once. Softened paint that you have already treated may dry out again before the process is complete.
- If during work paint accidentally gets on furniture, clothes or carpets, it must be wiped off immediately. Delay may cause difficulties during cleaning in the future.
- If paint gets on clothes, use paper and water. The solvent should be used only in extreme cases.
The best remedy for dirt and grease on kitchen facades is regular maintenance
Regardless of the characteristics of the finishing of MDF facades, any of them cannot withstand frequent washing with aggressive preparations: the appearance deteriorates; Moisture and even more grease get into scratches and damage. As a result, the facades of the set lose their luster, gradually deteriorating and subsequently requiring repair or replacement.
Experienced housewives have long concluded that there is no better product than regular dishwashing detergent.
To wash the facades of kitchen furniture with dishwashing detergent, it should be diluted a little in water, obtaining enough foam for a soft surface treatment. This method is applicable to any coating, since it does not destroy the material or scratch it.
In order to clean furniture from frozen drops of grease, you first need to apply foam to the contaminated areas of the facades for a while, and then, preferably with the hard side of a new sponge, wash the kitchen. If the doors of the set are covered with gloss, then you should not put much effort into pressing the sponge on the surface - even it may leave barely noticeable scratches. But matte furniture should be washed just as carefully.
The photo shows cleaning matte facades. We recommend wearing rubber gloves when washing the headset.
If the set is not washed at all for a long time, then the layer of dirt and grease will be difficult to remove with a simple product. To care for kitchen furniture in this case, you will have to purchase special household chemicals, but you need to choose pastes or gels, the composition of which is applicable for each specific type of facade.
How to clean plasticine from clothes. Removing residual marks on clothes
In most cases, after exposing the fabric to high or low temperatures, it is possible to get rid of only the bulk of the plasticine. A stain consisting of dyes, fat and small particles of the substance remains on the fabric.
To solve the problem of how to remove plasticine from clothes, you should use:
- laundry soap;
- baking soda;
- ammonia;
- vegetable oil and dishwashing detergent;
- kerosene;
- industrial stain remover.
Laundry soap
You will need a bar of laundry soap. Approximately 1/3 of the part should be grated and the shavings should be dissolved in warm water to form a rich foam. You need to dip the item into the liquid and additionally treat the stain with soap. After 30 minutes, the stain must be rubbed with a toothbrush and washed.
Laundry soap is suitable for cleaning any material, but it is better not to use it on dark or brightly colored products. Items made from delicate fabrics should not be rubbed too hard.
Soda
Let's figure out how to clean plasticine from clothes with soda. The item should be soaked in water with soap or powder. Next, pour baking soda onto the dirty area, rub lightly with a brush and leave for 30 minutes. Finally, the stain should be brushed again and the item of clothing should be washed.
This method works best in combination with the previous one. It is desirable that the water temperature be about 60 °C, which means that synthetics and “capricious” fabrics cannot be cleaned this way.
Ammonia
Ammonia easily copes with many stains on natural fabrics. It will also help in the fight against plasticine.
Sequence of actions to remove stains:
- Add 10 drops of ammonia to 200 ml of water.
- Soak cotton wool in the liquid and wipe the mark until it disappears.
- Rinse the item under running water to get rid of the unpleasant odor.
- Wash in a suitable mode.
If the stain is very large, it is worth preparing several liters of solution, combining ammonia and water in the indicated proportions. You need to soak the item in this liquid for 30 minutes, then rub the stain, rinse and wash.
Tip: When using ammonia, be sure to ventilate the room and dry things in the fresh air.
Vegetable oil and dish soap
When figuring out how to remove plasticine stains from clothes, it makes sense to resort to vegetable oil and dish soap. This method is one of the most effective among those that can be used at home. It is suitable for any fabric.
Algorithm of actions:
- Soak a cotton pad in oil. Rub the stain with it for several minutes. The oil must react with the fats that make up the plasticine and dissolve it.
- After the stain disappears, apply dishwashing detergent to the greasy mark. Leave for 30-60 minutes.
- Carry out washing as usual.
Kerosene
Kerosene easily removes plasticine stains. You should soak a rag in it and rub the dirt
It is important to rinse the item of clothing thoroughly under running water and wash it with powder and conditioner separately from other items to get rid of the specific smell. Before use, it is advisable to test the product on an inconspicuous area of clothing.
Industrial stain removers
Stain removers that have shown their effectiveness in combating traces of plasticine are “Antipyatin”, Vanish, “Pre-cleaning Spray” from Amway. The products must be used according to the instructions indicated on the packaging. As a rule, you need to apply a small amount of the drug to the stain, wait 15-20 minutes, and then wash the product with the addition of powder and stain remover.
Industrial preparations have a fairly aggressive composition. It is advisable to prevent them from coming into contact with the skin. Hands should be protected with rubber gloves.
Repair of deep cracks
How to remove scratches on a bumper with your own hands if they created dents or damaged not only the paint, but also the plastic.
For those who scratched the bumper in this way, there is the following repair algorithm:
- Work begins by removing the damaged part and thoroughly cleaning it of dirt.
- Next, the entire area is treated with a grinding wheel, and hard-to-reach places with sandpaper (two pieces), everything is wiped with a dry cloth and degreased.
- Then a special fiberglass tape must be glued to the surface of the bumper.
- The next step is to mix a special automotive putty and thickener. Once you have achieved a homogeneous mass, the mixture is evenly applied with a special device onto the already glued tape in one layer and sanded; for these purposes it is better to use a grinding wheel at low speeds.
- Everything is wiped with a dry cloth and a new layer is applied, which is cleaned in the same way as the first, after drying.
- Next, the damaged surface must be primed. In this case, the soil is also applied in two layers, first the first, it dries, and then the second.
- The primed surface should be lightly sanded with sandpaper and wiped with a dry cloth.
- After this, the entire bumper begins to be painted with selected paint from a spray bottle. This process is no different from the one described above for repairing medium cracks.
- The final touch is polishing the surface, but before that the bumper must dry well in a warm place without draft or wind.
IMPORTANT. Some experts recommend first applying one layer of primer to the damaged surface, and then applying putty and covering it all again with primer
In fact, this method will also help get rid of the crack, but it will take more time.
If a car enthusiast scratches the bumper, how to remove scratches is described above. There is nothing complicated about this, you just need to follow certain instructions and do it slowly.