Hot-stamped vinyl wallpaper is considered elite-class wallpaper when it comes to vinyl coverings. Their peculiarity is a more labor-intensive production process. Thus, the vinyl coating receives an embossing effect during heat treatment. This expensive procedure allows you to obtain a higher density and better composition. This allows you to clean the surface of the wallpaper with detergents after gluing.
Hot-stamped wallpaper can be glued even in new houses, because... Shrinkage is not a problem for such wallpaper.
Hot-stamped wallpaper is highly wear-resistant to various mechanical impacts and those that pets can exert.
The special strength of the material makes it an ideal solution for houses that have just been put into operation. Such wallpaper will not suffer from cracks due to shrinkage of the house.
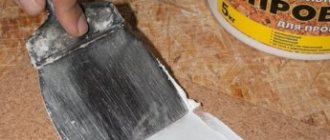
Paper-based wallpaper adhesive
Vinyl adhesives are usually supplied dry, but some companies also produce ready-made solutions in sealed packaging.
Their adhesives are suitable for fixing such heavy fabrics as foamed and embossed wallpaper.
The basis of most vinyl wallpaper adhesives are modified starch esters. The glue optimally saturates the paper base and dries quite slowly.
This allows you to remove the glued sheet if it is placed incorrectly and re-glue it without applying a new layer of glue.
The best adhesives are the brands Quelyd, Henkel, KLEO, Metylan.
- Their advantages include:
- rapid, complete dissolution of dry mixtures;
- possibility of storage (up to 10 days);
- sliding properties of the adhesive layer (convenient for correct positioning of the canvas);
Possibility of using as a primer;
long shelf life (up to four years, sometimes with the wording “no expiration date”).
Naturally, all glues are absolutely harmless. Additional advantages of some brands include special coloring additives that facilitate the process of gluing wallpaper “at the joint”.
First step: preparing the walls
Before gluing any wallpaper, you need to carry out preparatory work, sometimes tedious, but still necessary. The procedure is as follows:
- Remove old coverings. Sometimes the previous wallpaper is difficult to remove completely, but in the case of wallpaper material with a paper base, this is not as critical as for non-woven wallpaper.
- If the wall has strong differences, level them using putty. Smaller defects will help hide dense wallpaper with a relief pattern.
- Prime the walls. For this, the following composition options are used:
- diluted wallpaper glue;
- a special mixture intended for surface treatment before gluing;
- universal primer.
USEFUL INFORMATION: How to properly hang ceiling wallpaper
Note! Careful priming of walls is especially important for concrete and wooden bases, which tend to absorb glue strongly.
Before moving on to the next step, be sure to wait until the primer has completely dried.
Advantages and disadvantages
Hot stamping wallpaper has many advantages:
- Moisture resistant. This means that such wallpaper can be used indoors without fear of high humidity. They are suitable for both the kitchen and the hallway. In addition, they can be cleaned with a regular sponge and treated with homemade gel-like household chemicals, which is very convenient and practical.
- This is one of the most durable wallpapers. Depending on the base, they have a service life of 7 years (for paper wallpaper) to 15 years for non-woven wallpaper. If you are not a fan of change in environment, this option is definitely worth considering.
- Not exposed to the negative effects of sunlight. Even the most saturated shades will not fade under ultraviolet radiation.
- If temperature changes and directed thermal effects (heating by various radiators) are possible in your home, then hot-stamped vinyl wallpaper will withstand such loads and will not deteriorate its appearance and quality.
- This coating is easy to glue to any materials - concrete, plaster, wood. High adhesive properties contribute to a strong and long-lasting connection to the wall or ceiling.
- Another important factor in choosing a wall covering is the ability to maintain thermal and sound insulation. In this case, foamed volume vinyl copes with this function perfectly. For noisy city apartments, this will be a big plus in interior decoration.
- If we consider vinyl contact or inhibitor coatings, then due to their thick and dense structure they can correct wall unevenness and minor flaws.
- The texture of vinyl wallpaper is very diverse. They can easily replace much more expensive analogues with imitation of various coatings: fabric, brick, wood. At the same time, the appearance will not be inferior to the original.
The disadvantages include:
- The porous structure of polyvinyl chloride and the embossed pattern make the wallpaper amenable to mechanical action. Therefore, if you have animals with sharp claws in your house, small children, or children's vehicles are stored in the hallway, it is better to give preference to other types of wallpaper.
- Vinyl is an unnatural material. This is his most negative quality. Therefore, there is no need to talk about the environmental friendliness of coatings made from it. Even the cellulose base does not add safety to use. The walls in your premises will not be able to breathe with such wallpaper.
- Silk-screen printing, due to its thinness and fragility, is only suitable for well-prepared, flat surfaces.
- Due to the impermeability to moisture and air, only dry walls should be covered with wallpaper. If moisture gets between the wallpaper and the wall, it will not be able to evaporate, and this will lead to the formation of mold. Rooms with vinyl coverings must be frequently and thoroughly ventilated.
- The issue of price is ambiguous. Paper-based vinyl wallpaper is very inexpensive. Silk-screen printing is slightly cheaper than vinyl contact and inhibitor wallpaper. The price tag starts from 400 to 600 rubles per roll.
Advantages and disadvantages
Attention:
Embossed fabrics are made from different combinations of materials and have different properties. Each category has its own pros and cons.
Pros and cons of duplex paper materials:
| pros | Minuses |
|
|
Pros and cons of vinyl:
| pros | Minuses |
|
|
Pasting embossed duplex wallpaper
Gluing embossed wallpaper is the most crucial moment. Firstly, it is necessary to thoroughly and sufficiently saturate the base with glue so that it evenly adheres to the wall.
Secondly, when smoothing the canvases, special care must be taken so as not to smooth out the relief - the main decoration of this type of wallpaper, and not to damage the wet, loose top layer
It is best to apply glue to the substrate using a 300 mm wide paint roller with a pile length of 5-7 mm. This length ensures penetration of the glue into the recesses of the relief, at the same time, does not result in an excess of glue on the surface of the wallpaper backing. Be sure to have a paint brush made of soft natural bristles (hair) 70-100 mm wide on hand. which applies glue to the edges that the roller did not grab.
Immediately after applying the glue, the canvas is folded from the edges to the center so that the edges of the wallpaper meet 2/3 of the length of the strip. The wallpaper, folded with the glue-coated side facing inward, can be rolled into a loose roll. This way they will take up less space.
Exposure (impregnation time) with glue can range from 5 to 30 minutes. You cannot keep paper sheets coated with glue for a long time. They will “go limp” and begin to tear when aligned on the wall. In addition, with wallpaper heavily impregnated with glue, it is almost impossible to preserve the relief.
The first strip should be glued from the window, focusing on a building level with a length of at least 1000 mm or a plumb line. You should not make a mark on the wall or draw a vertical line with a pencil. Dry paint on a plumb thread can stain the edge of the wallpaper or subsequently show through the light pattern.
I smooth it exclusively in the direction of the embossing structure, which is located along the canvases.
It is better if the edges do not fit tightly to the wall, peel them off and coat them with additional glue with a brush.
When gluing “heavy” wallpaper, apply glue to both the canvas and the wall, using a roller before gluing each subsequent strip.
After pressing the canvas to the wall, immediately use a sharp retractable knife to cut off all excess along the floor, above the openings of windows, doors, and around heating pipes before gluing the next strip. Loosely fitting paper wallpaper warps when drying, and it is very difficult to eliminate such peelings.
Drying time for thick embossed wallpaper can range from 24 to 72 hours. During this time, all windows in the room should be closed to avoid drafts.
Marking and cutting
Measure the height of the wall. Roll out the roll with the wrong side up and make a mark on it corresponding to the measurement. Cut into several strips of the desired length.
Measure and cut the required length of wallpaper
Advice!
If the ceiling or floor is uneven, then when cutting it is worth adding another 5-10 cm to the height of the wall, this will help to accurately glue the strips. When cutting wallpaper with a pattern, you need to take into account the tolerance. Add a value from 5 to 30 cm to the length of the wall and cut the wallpaper into appropriate pieces.
Making markings on the wall
Marking the walls will help you glue the wallpaper as smoothly and neatly as possible. You need to draw a vertical line from the ceiling (a plumb line, a laser level and a video will help) and measure a segment from it equal to the width of the canvas. Repeat the required number of times.
Advice!
Wallpaper should be applied correctly away from the window, especially if it is done overlapping.
This way the joints will be less noticeable visually.
Wallpaper gluing scheme
Preparation for gluing
Wallpapering
Paper wallpaper is a fairly simple material to work with, which is not difficult to handle even if you have no pasting experience and alone. But first, it is necessary to properly prepare the surfaces to be finished: dust, remnants of whitewash and old wallpaper, etc. will not allow the gluing to be completed properly, and defects in the rough finishing will immediately appear on the front side of the canvas.
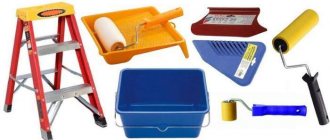
To hang paper wallpaper you will need:
- roller or brush;
- wallpaper brush;
- tracer;
- plumb line;
- construction knife;
- sponge;
- container for glue;
- wallpaper table;
- ladder;
- roulette;
- long ruler;
- wallpaper glue.
Wallpapering tool
Having collected everything you need, you can begin preparatory work. They are performed in the following order:
- Removing old wallpaper, whitewash and peeling plaster
Old wallpaper can be removed very easily if you first scratch it and moisten it with a soapy solution using a sponge. It is most convenient to work with a metal spatula. Those areas that come off poorly will have to be moistened again.
- Removing paint residues
Oil paint or enamel is removed using coarse sandpaper. Water-based emulsion and whitewash, similar to old wallpaper, are first soaked in a soap solution and then removed with a spatula.
- Elimination of defects in pasted surfaces
For high-quality gluing of paper wallpaper, it is necessary to carefully plaster all the cracks and smooth out any unevenness on the walls or ceiling, after which they should be cleaned using a plaster mesh.
- Primer
Before wallpapering, the surface of the walls and ceiling must be primed. This will ensure normal adhesion of the glue and prevent the formation of air bubbles under the wallpaper.
- Cleaning
After completing the preparatory work, the room must be wet cleaned. This will avoid contamination of the new wallpaper during the cutting process.
Overlapping wallpapering technology
In order for paper wallpaper to be glued end-to-end correctly, it is necessary to strictly adhere to the required technology. In this case, you first need to take care of proper preparation of the base. If this point is violated, then all further work will go down the drain.
To start gluing paper wallpaper, you need to prepare the base and tools. The materials you should take care of are the following:
- Paper canvases. Such material can be selected taking into account the required color and density. The main thing is that it is a very high quality and safe material. In addition, choose products with a long service life. On the packaging you can find information that indicates the environmental safety of the wallpaper. You can also ask the seller for a certificate, which should confirm the quality and safety of the wallpaper.
- Glue for canvases. Here you need to be very careful, since it is the glue that will determine how long this finish will last you and whether there will be yellow spots on the surface of the canvas. It would be nice if the paper wallpaper and glue were from the same manufacturer. Of course, you can choose another glue, but make sure that it matches the wallpaper you have chosen.
A set of tools for wallpapering
In addition to materials, you will need to stock up on the following tools:
- bowl for preparing glue;
- a ladder or table so that you can properly glue the wallpaper at the top;
- to distribute the glue over the wallpaper and the wall surface, you need to use a paintbrush, which will allow you to evenly distribute the composition over the surface;
- a special spatula and a rubber-based roller will serve to level the surface.
If all preparatory measures have been completed, then you can proceed directly to the process of butt gluing. The sequence of actions is as follows:
Prepare the base, level the walls and remove all defects. For these purposes, it is worth using putty, which is carefully applied to the wall. After this, be sure to treat the wall with a primer. Thanks to him, it is possible to achieve a strong adhesion of the wallpaper to the surface. If necessary, the primer is applied a second time, and the corners are carefully processed. Preparing the glue should be done right before you glue the paper wallpaper. To prepare the composition correctly, use the instructions on the package. Now it’s worth figuring out how to properly glue paper sheets end-to-end.
These measures should be carried out very carefully, since such coatings are very weak. Apply the adhesive to a sheet of wallpaper, wait a couple of minutes for the glue to absorb
Now you can start gluing the canvases. Moreover, it is necessary to glue from top to bottom, and then carefully smooth the canvas. To ensure that the sheets are attached correctly and evenly, it is necessary to draw vertical lines every 2 meters. You can actually make them using a level. When paper webs contain a design or pattern, the strips must be aligned according to the pattern before gluing. The joint must be strong and neat. You can achieve a similar effect if you use a rubber roller. This completes the end-to-end wallpapering process. If you do everything correctly and accurately according to technology, the resulting finish will serve you for a long time. It is very important to maintain the beauty of the wallpaper by caring for it from time to time.
Types of paper wallpaper
It is necessary to distinguish between paper-based wallpaper and ordinary paper wallpaper. The top layer of paper-based wallpaper is made of various materials - vinyl, fabric, velor, etc. The vinyl coating prevents air exchange in the room.
Paper wallpapers are made entirely of paper. There are no films or other coatings on them. Chemicals are found only in the paint that is used to apply the design to the wallpaper.
Single-layer wallpaper - simplex has the lowest cost compared to all types of wallpaper. The wallpaper is very thin; such wallpaper is produced only in Russia. Single-layer wallpaper quickly gets wet when working with it, and clearly follows the relief of the wall - every grain will be noticeable.
The advantage of simplex is that with the help of such wallpaper you can cheaply and quickly update the interior of a room. For apartments that are for rent, this is the most suitable option. Simplex can also be glued overlapping - the seams will not be very noticeable. With this gluing option, the wallpaper is glued away from the window.
Duplex wallpaper is made from two layers of paper. Duplex is a denser wallpaper than simplex. Thanks to two layers of paper, the wallpaper has a textured or smooth surface that is resistant to wet frills. The relief surface hides the roughness of the walls.
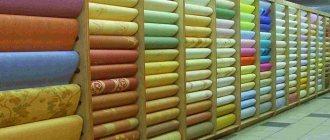
In stores you will find a wide selection of paper wallpaper colors.
The Mogilev factory produces two-layer embossed wallpaper for painting. A roll of wallpaper is 15 m long, which reduces waste.
When decorating children's rooms, a good option is paper wallpaper for the walls. The price of the wallpaper allows you to re-paste it after two to three years. Light colors and funny drawings will help make the children's room cozy. Interesting paper wallpaper for children's rooms is produced by the British studio Harlequin. Children's paper wallpaper for walls. Photo.
The disadvantage of paper wallpaper is that it is not resistant to stains; wallpaper fades over time and loses the brightness of the pattern.
When covering a room with paper wallpaper, a good addition to the decor are paper flowers on the wall, made from thin paper, or cut out from wallpaper of a different color.
Historical fact
The history of the use of wallpaper dates back more than three centuries. Then fabric was nailed to the ceilings and walls, covering cracks and crevices and creating a certain amount of illumination in the rooms. Leather was widely used, which has not lost its relevance today, even if not everyone can afford leather wallpaper on the walls of their home.
The first paper coverings, which became the ancestors of duplex wallpaper, were made in China in the first half of the 2nd century. n. e. They were made from rice paper and were brightly colored with images of people and animals.
Return to contents
Preparation for sticker
An important advantage of wallpaper over other types of finishing is its universal use. Wallpaper strips can be used to glue plasterboard ceilings, concrete surfaces, multi-level structures made of plywood and OSB boards
The only obligatory condition is that the ceiling must be smooth, free from flaws, cracks and significant differences in height within the same plane. It is recommended to remove the previous coating as much as possible, since the presence of old paint and plaster affects the adhesion of the ceiling-glue-wallpaper connection.
What does the preparatory stage include:
- The first rule of builders - the house must shrink - can be skipped if the property has been in operation for more than one year.
- Furniture must be removed from the premises, carpets and other interior items must be removed.
- It is necessary to close windows and doors so that there are no drafts, and shade the windows from bright sunlight.
- Electrical equipment, hoods, air conditioners, ventilation systems should be turned off, and socket boxes should be removed.
- Assess the condition of the ceiling - cracks and floor joints need to be caulked and puttied, and several layers of primer applied.
Related article: How to glue non-woven wallpaper - features and rules for high-quality gluing
For preparatory and pasting work, the following tools and materials are needed: stepladder (table, chair), brush, roller, clean rag, bucket of glue, tape measure and utility knife. If the ceiling has to be caulked and puttied, you will need a trowel, a spatula and a primer brush. Preparation of the base is a prerequisite for high-quality wallpapering.
Concrete
Ceiling decoration is not limited to choosing and gluing wallpaper. If the base is concrete, you need to check the condition of the surface after removing the previous coating from it. If possible, tear off old wallpaper, then moisten it generously with water and scrape off the paper-adhesive mass, carefully prying off the strips with a spatula or knife.
Painted concrete ceilings (which is rare) are removed from the old coating mechanically and using special removers for the appropriate type of paint. If it is waterproof and holds very tightly, you can leave the ceiling as is. The remaining putty is removed and such areas are cleaned with sandpaper. Remove lime or chalk whitewash by washing it with water.
Before gluing wallpaper to the ceiling, all cracks and seams on the concrete surface are sealed with fresh gypsum putty. It is recommended to lay a serpyanka mesh first. Microcracks and joints of walls and ceilings are rubbed with starting putty, allowed to dry and sanded with sandpaper. To perfectly level the surface, apply a finishing mixture 1-2 mm thick. After the preparatory work, the ceiling is swept away from dust and primed for good adhesion of the glue. The primer can be applied with a brush or roller in two or more layers, making strokes perpendicular to each other.
From plasterboard
The best option for wallpapering is ceiling structures made of plasterboard. Correctly installed sheets have a flat surface without differences in height. The only inconvenience is that you need to seal the seams between the sheets.
How to do it:
- Choose a suitable gypsum-based composition, for example, produced by Knauf.
- Prepare the solution in the specified proportion and seal the joints and places where the sheets are attached - the screw heads.
- If the cardboard base of the plasterboard material has a light shade, there is no need to completely putty the surface.
Before gluing the ceiling wallpaper, the drywall is treated with a layer of primer. One application is enough so that the material does not get too wet and does not begin to delaminate.
OSB or plywood
In wooden houses, OSB boards or plywood are used to form a flat ceiling surface. Wood materials are quite suitable for wallpaper. Preparation of the base comes down to sealing seams and joints. Particle boards must be treated with starting and then finishing putty. There is no need to completely putty plywood structures; it is enough to cover the seams and apply a layer of primer after drying.
After preparing the base, the strips are cut taking into account the direction of gluing perpendicular to the wall with the window. A small margin is left on each canvas for even cutting. Before gluing paper wallpaper to the ceiling, the canvas must be coated with glue. The composition is applied in different ways - chaotically, perpendicularly, in zigzags. The most common option is to apply glue to the central part of the canvas and distribute it to the edges of the strip. The edge of the panel is folded over 30 cm and the part coated with glue is placed on the main strip, which is folded like an accordion and glued to the ceiling.
Technology and rules of gluing
The gluing procedure is simple: the strips with applied glue are pressed tightly against the plane of the wall, it is very important to prevent the appearance of bubbles and unevenness. Vinyl wallpaper is glued using a special compound
Installation is done end-to-end; it is strictly forbidden to glue vinyl overlapping, they are dense, the seams will be visible, which is unacceptable
Vinyl wallpaper is glued using a special compound. The installation is done end-to-end; gluing vinyl overlapping is strictly prohibited, they are dense, the seams will be visible, which is unacceptable.
How to start?
The process must begin with preparing the workplace. You cannot lay sheets on top of old ones; you should thoroughly prepare the surface of the wall and only then start smearing.
An important detail: a lot depends on the room in which the wallpaper will be located. It is not recommended to use embossed wallpaper for the kitchen due to high humidity.
The texture actively accumulates microparticles and the sheets quickly fade.
For the kitchen, smooth wallpaper that can be easily wiped with a damp sponge is best suited.
How to paste wide wallpaper?
Wide meter sheets are still a rarity, but this format, in fact, is no different from regular sizes. The advantage is that the number of joints between sheets is noticeably reduced, gluing is easier, and labor costs are noticeably less.
Advantages:
- the price is noticeably lower;
- less labor costs;
- easier to adjust seams.
Flaws:
- there are difficulties during installation, especially for beginners;
- Even the smallest deformations of the wall can interfere with work.
If the room is of non-standard dimensions, certain difficulties arise in fitting.
Pasting on corners
Two canvases should not be combined together in the corner area. The sheet should be overlapped at the corner with an allowance of no more than five centimeters.
All joints are pressed tightly against the surface, only then can they be securely glued.
Gluing yourself in the corner with an overlap is not very difficult, even wallpaper with a pattern:
- markings are applied;
- a vertical line is correctly applied, which is located from the corner at the same distance as the width of the roll;
- Glue is applied to the wall, and a layer of glue of the same width is applied to the inside of the canvas;
- the canvas is glued;
- the second canvas is glued on top with an overlap.
After the second sheet is glued, the surface should be carefully rolled with a rubber roller to avoid air pockets that may appear under the wallpaper.
Butt or overlap?
Butt gluing with trimming and pattern selection is technologically simple: the method makes it possible to create a wallpaper joint in the corner that is almost invisible, but if the wallpaper has large patterns, then this technology is not suitable.
In order to mount them overlapping, you should use a special glue that will be applied to the very edges of the canvas. The first sheet is processed, the canvas is mounted with an overlap of up to 2 centimeters.
Wallpapering must begin from the corner. First you should make detailed markings: how the sheet will “lay down”. On the wall at the top of the corner, an indentation of no more than two centimeters is made beyond the width of the wallpaper and then a mark is placed. Then the level is lowered and a vertical line is drawn. It will be a kind of beacon along which the sheets will be aligned during work.
-How to glue the seams?
When working, special attention should be paid to the joints. They must be well processed: it is unacceptable for air to penetrate under the surface, otherwise after a short time “bubbles” will form in these areas and they will lag behind the wall
When installing wallpaper yourself, you definitely need a companion and a high stepladder. The partner will:
- feed sheets;
- support the canvas;
- press the canvas with a brush.
To prevent air from remaining under the wallpaper, press it against the wall during installation from the center to the edge. Uneven wallpaper residues at the bottom are carefully removed using a special construction knife.
Covering the ceiling
Before gluing wallpaper to the ceiling, you need to examine its surface.
Should be embroidered and puttied again:
- cracks;
- chips;
- unevenness.
All ceiling defects will have to be leveled so that the angle with the walls and ceiling is exactly ninety degrees. After the work is completed, it will be necessary to prime the surface with a special primer that penetrates deeply into the surface.
If there is a high percentage of moisture in the room, then another priming will be necessary with a special composition that eliminates mold and mildew.
Markings are made on the ceiling according to the width of the sheet and glue is applied, and the surface of the wallpaper is carefully leveled with a roller.
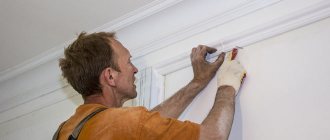
After the sheets are glued, you should wait a couple of days and therefore glue the baseboards and borders
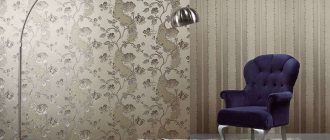
Design solutions for the use of embossed wallpaper in the interior
- Silkscreen printing will look great in living rooms and bedrooms. Moreover, the size of the room does not matter. The main thing is to successfully choose the pattern and color of the material.
- Bright silk-screen wallpaper is suitable for bright rooms - the glare of the sun's rays will highlight their beauty.
- If the room is dominated by artificial lighting, then it is better to choose embossed wallpaper in pastel colors.
- In large rooms you can use wallpaper with large figures and scenes.
- You can choose embossed wallpaper to suit any style of room, due to the fact that they imitate textures well: wood, brick, paint, tile.
- Don't limit yourself to one type of wallpaper. The combinations look very interesting. So, for a room in a high-tech or loft style, a combination of wood relief and brick is suitable. And for a retro style, you can choose wallpaper with a pattern that imitates plaster and painting.
- Walls covered with embossed wallpaper in a patchwork style will look fresh and unusual. To do this, you need to use different types of wallpaper, cut into shreds. Such a heterogeneous motley “patchwork blanket” on the wall will decorate a child’s room or living room in a country style.
[media=https://www.youtube.com/watch?v=PrcPzN2I_2o]
Peculiarities
Paper wallpapers have been widely used in interior design for a very long time, but they do not lose their popularity. Thanks to progressive developments, now this modern high-quality coating is sometimes not inferior to other types of finishing materials.
Their main difference is that they have a low cost. The base made of natural material (cellulose) gives the wallpaper the ability to pass air. That’s why they are often recommended for decorating children’s rooms.
But paper is not at all capable of contacting water, so it is better not to use them in rooms with high humidity.
There are several varieties of cardboard finishing.
By the number of layers the wallpaper is:
- Simplex (one layer). They are less strong and therefore the cheapest. They also have a smooth texture;
- Duplex (multilayer). They are stronger than single-layer ones, adhere well, but require more composition. Using them you can solve the problem with imperfections on the walls.
- Unbalanced - under no circumstances should they be used in rooms with high humidity. And if you get them dirty, then there’s nothing you can do about it;
- Washable (have a top layer of protection). They can be used in the kitchen, but it is still better not to use them in the bathroom. Care and cleaning – treatment with a damp cloth.
According to texture, paper wallpapers are divided into:
- Smooth. In most cases, this is ordinary simplex wallpaper ;
- Embossed. The coating consists of two layers, has a relief and volume imparted by pattern embossing;
- Foam wallpaper is also multi-layered. Acrylic is applied between two layers of paper and heated, causing it to become foamy and increase the strength of the wallpaper. Acrylic products with spraying fascinate with the beauty and variety of relief patterns;
- Wallpaper with shavings. The shavings between the layers of paper as a result of pressing give a relief surface, such wallpaper does not lose its naturalness;
- For painting. This is a textured wallpaper that is supposed to be painted;
- Wallpaper with a paper layer. In this case, paper is combined with other materials - interlining, fabrics, cork and veneer. The properties of the coating can vary greatly depending on the second material.
Choosing glue
Glue is one of the main materials in the process of decorating wallpaper. It must be selected in accordance with the recommendations of the wallpaper manufacturer. Sold in powder form and mixed with water to a medium-thick consistency. It is better not to store ready-made formulations for a long time.
In the case when you need to combine paper coverings with other types, so as not to select and mix several types of glue, you can purchase a universal one.
But its composition is full of chemical additives. Therefore, it is better not to use it unless necessary. Non-woven glue is also suitable for paper. But a thin coating can be deformed by a heavy solution.
The required amount of composition can be determined based on the recommendations on the packaging. It is usually indicated how many square meters a box or bag of mixture is designed for.
Selection, preparation and application of wallpaper glue
Lightweight, quick-drying glue for paper wallpaper. Preparation of wallpaper glue:
- 5-7 liters of water are poured into a pre-prepared container;
- the water is shaken and the dry adhesive mixture is poured into the resulting whirlpool;
- the resulting mass must be thoroughly stirred and then left for some time to swell.
Thickened wallpaper glue should be uniform. If you find lumps, they can be easily eliminated by re-stirring the mass.
Ready-to-use adhesive mass
The glue should be applied evenly to the back side of the wallpaper, distributing it over the entire surface. It is most convenient to use a roller for this. After applying the glue, you need to wait 5-7 minutes so that it is well absorbed by the paper web.
If the glue accidentally gets on the front side of the wallpaper during application, it must be removed with a damp sponge. You shouldn’t put too much effort into this – it’s better to use more water. This will preserve the structure and color of the front surface.
Gluing the fabric with a roller
Some types of wallpaper glue have special additives that reduce its setting time. Therefore, before cooking, you must carefully read the instructions, otherwise you will face unpleasant surprises in the form of a composition that thickens too quickly.
Materials and tools
Before wallpapering, you need to stock up on all the necessary tools:
- roulette;
- construction pencil;
- paper knife;
- level or plumb line;
- roller and glue container;
- bucket and device for stirring the composition;
- a small paint brush for applying glue to hard-to-reach areas;
- brush or cloth for smoothing wallpaper;
- ladder.
It is worth mentioning a modern development - wallpaper backing. This is a rolled material consisting of three layers: in the middle there is foamed polyethylene, and the two outer layers are made of non-woven fabric, paper or cork. And the type of covering paper must be selected based on the required properties. If you want to decorate a room where there will be excessive humidity, it is better not to use paper backing. And cork is the most environmentally friendly.
There are many advantages to using such a layer: it levels the base, can hide minor imperfections in the walls, increases sound insulation and retains heat better. to glue wallpaper and it becomes more durable. But it can only be used for dense, thick wallpaper, since thin ones can show through it.
The surface of the walls must be prepared before work. This is done using the priming method. A special composition is applied, with the help of which the glue will better perform its task and fewer defects will occur.
How to prepare a room for wallpaper renovation
When you are going to refresh the walls in your house with new paper wallpaper, the first condition is to get rid of all traces of the old coating.
Important! If the wall is lumpy and has cracks, you definitely need to level everything with putty, plaster, and finally apply a primer so that the new decoration lies evenly and lasts a long time. And if a dense embossed duplex can still smooth out some unevenness, cheap paper wallpaper will not forgive you for frivolity
Then you need to stock up on everything you need to cover the walls. You will definitely need:
- sharp scissors or a special wallpaper knife;
- pencil, plumb line with a piece of chalk or level, long ruler;
- a wide brush for applying glue and a thin brush for joints;
- plastic wallpaper spatula;
- a small paint roller and several pieces of clean, dry cotton cloth;
- damp sponge;
- a bucket for glue and the glue itself;
- stepladder or stool (depending on the height of the ceilings);
- several old newspapers;
- glue for paper wallpaper, how to choose it, we wrote in the last issue.
The room in which you plan to hang paper wallpaper should be draft-free (close all windows and vents, no fans), without power, the floor should be dry and clean. It is better to spread the strips and spread them with glue on laid paper or other material so as not to smear the floor.
Tools you may need for the job
Door and window openings
It is best to remove the platbands while gluing. If this is not possible, when leveling the wallpaper, fit it as tightly as possible to the outer edge of the casing, press it with a wide spatula, and cut it with a construction knife.
It’s good if there is a small gap between the wall and the platband, then you can leave a small allowance and tuck it under the platband. The easiest way to make the window opening look neat is to cover the joint between the slope and the wall with a plastic corner.
After completing all of the above steps, the room will be transformed! All that remains is to install the baseboards, bring in the furniture, and you can celebrate your housewarming party!
Second step: selecting the optimal set of tools
To hang vinyl wallpaper on a paper base, you should prepare equipment and materials from the following list:
- Rolls in the right quantity.
- Suitable wallpaper glue.
- Container for diluting the composition.
- A roller with a fur coat + a wide brush + a narrow one for applying glue to the wallpaper.
- Plastic spatula, wide and narrow pressure rollers (one for the main one, the other for joints).
- Old newspapers or plastic wrap.
- A sharp knife with a retractable blade (construction knife or large stationery knife).
- Pencil, ruler, plumb line or level, tape measure for marking stripes on the wall.
- Sponge or cloth to remove excess glue.
A few words about glue. For vinyl canvases on a paper backing, you need to use not the usual composition for paper wallpaper, but a special, more durable one designed for vinyl. This is especially true for heavy varieties, such as hot-stamped wallpaper. It is desirable that the composition contains an antifungal additive. You can also use PVA, which provides excellent adhesion of the canvas to the wall. However, in this case, the wallpaper will stick “tightly” and will be difficult to remove in the future.
Why duplex is better than simplex
Simplex is a single-layer paper coating. This type of material is no longer produced in the West, and domestic manufacturers are actively switching to producing exclusively two-layer fabrics. But you can still find them in stores.
Single-layer types are short-lived, quickly fade, tear even with minor mechanical stress, and with a modest range of colors, the designs are unclear. When wet, they begin to stretch out, which complicates their sticking. But due to their specific consumer qualities, they are often used to decorate rooms with increased environmental safety requirements - for bedrooms and children's rooms.
Duplex, thanks to the functional separation between the layers, is free from these disadvantages. The layer that serves as the base ensures reliable adhesion of the canvas to the walls. It does not stretch and does not allow glue to penetrate the decorative layer. The two-layer construction has good density, which makes installation easier and also allows you to veil most wall defects. Additional processing of the outer layer with various substances makes it possible to obtain a fabric with the required qualities.
Vinyl wallpaper on paper basis
Before starting the review, it is necessary to clarify that with full compliance with the technological process in production, full compliance with all necessary quality and safety standards can be guaranteed.
Professionals advise purchasing products from manufacturers with many years of experience; they are guaranteed to have a quality certificate for all products.
Main types
According to the degree of relief, these wallpapers are divided into several types:
- Smooth vinyl is the easiest option. Easy to use and stick.
- Hard vinyl - allows you to imitate any coating - fabric, plaster or just paint. At the same time, the material is quite resistant to various types of damage.
- Foamed vinyl has a textured structure and high density, which allows you to hide imperfections on wall surfaces. Ideal for use in bathrooms and kitchens.
- Silk-screen printing is stunningly beautiful wallpaper made with the addition of silk threads and having a characteristic shine.
Advantages of paper-based vinyl wallpaper
- Relatively low cost, the reason for this is ordinary paper, which is taken as a basis. This type of wallpaper differs from others at a fairly affordable price and is available to any consumer.
- They can be glued even without removing the previous coating, but only under one condition - if the old wallpaper is kept tightly to the wall over the entire area. The paper base does not transmit light and it is for this reason that preparing the base for this type of wallpaper is much easier than, for example, vinyl-based wallpaper.
- This type of wallpaper, especially at the corners of various protrusions or irregularities, can be tightened (if necessary). Professionals say that this wallpaper option is the most optimal for uneven walls, which is why they are so popular. Especially if all the work on gluing the walls is carried out independently.
- A great convenience is that the glue must be applied directly to the sheets. The walls do not need to be pre-coated with glue.
- Even the most demanding and fastidious customers will be able to choose the version of vinyl wallpaper that they like.
- The surface of this wallpaper has a high level of moisture resistance and is easy to clean. This is what helps keep the room clean.
- Possibility of use in rooms with variable humidity levels.
- Over time, such wallpaper can be repainted, which can also be considered an advantage. The main thing is to choose the paint to your liking, and over time you can change the interior without re-pasting the wallpaper.
- The width of the rolls is standard - 53 cm. This makes it possible to paste walls with the least amount of seams and labor costs. This directly affects the appearance of the walls.
Some disadvantages
One of the significant disadvantages is that when applying glue, the paper base can get wet, and if you stretch it too much, it can tear
All work on gluing walls must be carried out with extreme care, special attention must be paid to those sheets that were previously smeared with glue. The longer the sheets of glue remain, the more likely they are to tear. Carefully monitor the amount of glue applied to the edges
If there is not enough glue, the wallpaper will not stick well or will peel off after some time. If there is a lot of glue, then it should be removed immediately, because the composition can get on the surface of the wallpaper and will certainly contaminate it. Carefully press and smooth each sheet against the wall. The initial level of adhesion of wallpaper to the wall is significantly lower than that of other types of wallpaper. Low level of vapor permeability, but this factor does not cause any harm to health. You just need to ventilate the room a little more often than usual.
Peculiarities
Paper wallpapers have been widely used in interior design for a very long time, but they do not lose their popularity. Thanks to progressive developments, now this modern high-quality coating is sometimes not inferior to other types of finishing materials.
Their main difference is that they have a low cost. The base made of natural material (cellulose) gives the wallpaper the ability to pass air. That’s why they are often recommended for decorating children’s rooms.
But paper is not at all capable of contacting water, so it is better not to use them in rooms with high humidity.
There are several varieties of cardboard finishing.
By the number of layers the wallpaper is:
- Simplex (one layer). They are less strong and therefore the cheapest. They also have a smooth texture;
- Duplex (multilayer). They are stronger than single-layer ones, adhere well, but require more composition. Using them you can solve the problem with imperfections on the walls.
- Unbalanced - under no circumstances should they be used in rooms with high humidity. And if you get them dirty, then there’s nothing you can do about it;
- Washable (have a top layer of protection). They can be used in the kitchen, but it is still better not to use them in the bathroom. Care and cleaning – treatment with a damp cloth.
According to texture, paper wallpapers are divided into:
- Smooth. In most cases, this is ordinary simplex wallpaper;
- Embossed. The coating consists of two layers, has a relief and volume imparted by the method of embossing the pattern;
- Foam wallpaper is also multilayer. Acrylic is applied between two layers of paper and heated, as a result it becomes foamy and increases the strength of the wallpaper. Acrylic products with spraying fascinate with the beauty and variety of relief patterns;
- Wallpaper with shavings. As a result of pressing, the shavings between the layers of paper give a relief surface; such wallpaper does not lose its naturalness;
- For painting. This is a textured wallpaper that involves applying paint;
- Wallpaper with a cardboard layer. In this case, paper is combined with other materials - interlining, fabrics, cork and veneer. The characteristics of the coating may vary greatly depending on the second material.
What is suitable for non-woven wallpaper?
For non-woven fabric, glue of a special composition is used.
Non-woven wallpaper has a dense structure and a bright pattern that will not fade over time even in the kitchen.
Its texture is thick, uniform, and does not interact with dyes in any way. The consumption of solution for gluing non-woven wallpaper is economical. It is required approximately 2 times less than conventional adhesive.
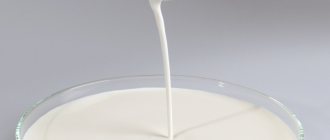
The adhesive for such a base is made from modified starch and is sold in the form of dry mixtures that are easily diluted with ordinary cool water. The process of preparing the composition is extremely simple; there are instructions on the packages.
Rules for preparing glue:
- Cool water is poured into the mixing container and stirred with a clean wooden stick to form a funnel.
- The dry mixture is carefully poured into the resulting funnel, the glue is continued to be stirred until a homogeneous mixture is obtained without lumps or traces of the dry component.
After the glue is prepared, you need to leave it in the container for about 3-10 minutes, stirring occasionally. This allows you to obtain a solution that is homogeneous in composition; it will be perfectly applied to the wall without forming drips. Drying will be uniform, the wallpaper will not wrinkle or peel. The time for using the composition may vary; it must be indicated on the packaging.
Selecting the surface
The walls may be in different states, and it is not always possible to immediately proceed to pasting. Putting a sticker on old wallpaper is not the best idea. The previous layers must be painstakingly removed, since you cannot be sure whether they were glued properly or whether the new ones will peel off along with them. The sketch of the old coating may appear through the new one, or the old seams will be visible.
Previously, it was considered a good solution to cover the wall with newspapers earlier, and then place the wallpaper later. This option is not acceptable for the above reasons.
Trying to save time on renovations in new buildings, some people try gluing wallpaper onto the plaster. But this option will not give the best result either. Plastered walls will absorb an unlimited amount of glue due to their own loose structure, and the new coating may simply fall off. On old plaster, it is also necessary to remove all bulges and remnants of materials from its surface, sand it until smooth and apply finishing putty and primer, and then finish the wall with new material.
What to do if the wall is painted. In this case, everything depends on the applied composition. If the paint was water-based, then you can glue wallpaper onto it, having previously primed it. Other compounds will need to be removed. But this process is very labor-intensive. Therefore, in order to apply wallpaper over paint, you can sand the surface to roughen it and apply a primer so that the glue adheres better to the wall.
Indoor partitions can be built from fiberboard or plasterboard. These materials are also used to level walls in private and old houses with large imperfections and curvature. Ordinary wallpaper be glued to drywall if it is previously treated with putty and primer. The inscriptions may appear differently, the color of the sheets may appear, the adhesion will not be perfect, and the wallpaper will come off. In the case of fiberboard, processing is also required. Plus, the partitions are mounted using screws. As follows, huge compounds are formed. So that neither they nor the heads of the screws are visible through the wallpaper, at the initial step it is necessary to apply preliminary putty.
The concrete base requires complete preparatory surface treatment, otherwise its black color and multiple imperfections will be visible through the paper.
Production development and description of embossed wallpaper
Embossed wallpaper is a type of wallpaper with a textured surface. Quite often, under embossed wallpaper, two-layer paper wallpaper is assumed, the top layer of which has undergone special processing.
Embossed wallpaper got its name thanks to the technological process that is used to develop such wallpaper. Depending on the base of the material, when making a relief pattern, dry, wet, hot or chemical embossing can be used.
Development of production of embossed wallpaper includes the following stages:
- Performing intaglio printing. Good printing allows you to transfer narrow color transitions onto paper, creating the illusion of the reality of the image.
- Product lamination. The wallpaper base (inner layer) is glued to the top layer with special glue.
- Embossing. Glued wallpaper in a wet state is passed through an active (upper) metal shaft and a passive (lower) cardboard shaft. The profile of the upper shaft determines the texture of the finished product.
- The paper strips are firmly fastened together, and the surface of the wallpaper receives a suitable texture.
- Drying the product.
- The material is passed through special trays, where the wallpaper is cut into strips of suitable length.
- Roll forming and packaging.
Embossed wallpaper is considered more measured (low stretch when applying glue) and stronger than cardboard wallpaper
At the moment, embossed wallpaper is made not only on a thick cardboard base, but also on non-woven fabric; polyvinyl chloride treatments are used, which improve the performance properties of the finishing material. The technology for creating such wallpaper differs from that discussed above.
Overlap or butt?
Paper wallpaper can be glued in 2 ways: by laying the sheets on top of each other with a gap or by joining them together. Economical thin wallpaper can be glued overlapping each other. In most cases, they already have an edge. The overlap method will also help correct minor unevenness and depressions in the walls. Overlapping gluing is used in new buildings and wooden houses, as there is a risk of shrinkage, distortion and the appearance of defects on the surfaces. If the base of the wall has significant flaws, and the wallpaper chosen is languid and embossed, then you should abandon this technique.
The method of gluing wallpaper by joining is somewhat more difficult than the previous one. After all, the connections should be without cracks, completely even and careful. In case of very precise joining, you will get a beautiful and uniform surface. If the wall has a significant curvature, then it must be leveled in advance to avoid unsightly gaps in the wallpaper.
Step-by-step description of the work
This process has many subtleties. You will have to deal with joints, gluing in corners, and finishing the ceiling will require some effort on your part. But you can certainly cope with all these troubles.
Surface preparation
- You should not glue new wallpaper onto old ones: over time, both layers may fall off. Remove old finishes from the wall and repair defects. Don't expect that vinyl wallpaper is opaque and will perfectly hide all the stains on the walls. It is better to achieve a completely monochromatic coating.
Be sure to remove old wallpaper from the wall
Fill uneven areas and prime the walls
Preparing glue and wallpaper
- Immediately cut the roll into panels of the required length. To do this, use a tape measure and measure the height of the walls. If the wallpaper has an embossed pattern or a repeat pattern (repeating areas), be sure to take into account the need for alignment at the joints. Number the cut pieces of wallpaper so as not to mix them up during the gluing process.
Do not try to cut holes in the wallpaper in the places where switches and sockets will be located - they may not line up. It is better to do this when the wallpaper is pasted and slightly dry.
Cut the roll of wallpaper into sheets of the required length, coat them with glue and let them soak
Another feature of vinyl wallpaper is that when gluing it, you don’t have to apply glue to the wall; just treat the panel.
After the glue has been applied, fold the sheet with the coated side inward and leave for a few minutes so that the wallpaper is well saturated.
Leave the sheets in this position for a few minutes
Preparing and applying glue - video
Wallpapering process
It is at this stage that you will need an assistant. It is much more convenient if one person cuts and prepares the wallpaper, and the second person glues the canvases to the wall on a stepladder.
- Gently press the panel to the base of the wall, and go over it thoroughly with a roller to force out the air. Move the roller from the center towards the edges and from top to bottom. Immediately remove excess glue with a cotton rag.
Carefully press the wallpaper to the wall with a roller, remove excess glue with a clean rag
If you did not remove the baseboards before work, be careful with excess wallpaper
Do not forget that vinyl wallpaper on a paper base must dry for at least 2 days after gluing. All this time, the optimal temperature (from 15 to 20 degrees Celsius) should be maintained in the room and there should be no drafts. Violation of these conditions may lead to the appearance of bubbles on the surface of the wallpaper.
You may encounter some difficulties when installing vinyl wallpaper in corners. There are two common ways to deal with this problem:
- You can glue the wallpaper overlapping, but this method is applicable if it is plain or has a small and inconspicuous pattern. Place the panel on the adjacent wall by about 1 cm and cover the overlap with the adjacent sheet.
Gluing vinyl wallpaper in corners
A method of gluing a corner with a deeper overlap will allow you to achieve an ideal result.
Butt wallpaper technology
There are only two ways to hang wallpaper: overlap and butt. Only very thin paper wallpapers are glued with an overlap or processing is done in the corners. This method wastes a large amount of material, and, as a rule, overlapping fabrics stand out too much at the joints. Therefore, it is preferable to choose the second method.
To create a beautiful decorative wallpaper covering as a result, we follow this scheme:
The finished wallpaper is smeared with glue from the center to the edges, very carefully so that there are no dry spots left. Important! When processing, the glue should not get on the front side of the wallpaper. After the wallpaper is greased, you need to fold the canvas in half, thereby allowing it to be even better saturated with the mixture. Wallpaper manufacturers indicate the period of time for impregnation on the packaging, so you need to soak for as long as written and for each canvas this figure should be the same
This stage determines how neatly the joints will fit together and what the finished coating will look like. The canvas must be glued to the wall from top to bottom exactly along the previously drawn line. You need to start pasting from the window. Important! If there are pieces left that are unnecessary, you can cut them off with a very sharp knife only after the wallpaper is completely dry.
The wallpaper is smoothed with a special wallpaper spatula, and excess glue is removed with a soft, clean cloth or sponge. You need to use a spatula from the middle to the edges of the canvas so that excess air comes out.
After one canvas has been glued, you can prepare the next one, following the already familiar algorithm. It is applied end-to-end with the first one to form an invisible seam. Under no circumstances should the wallpaper overlap each other. As soon as the canvas is glued and passed with a spatula, you need to use a special roller to go along the seam in order to press it even more firmly to the wall.
To properly wallpaper the walls end-to-end, you need to take into account external factors. This is the air temperature in the room, which should be no more than 20 degrees. It is also necessary to close the windows and doors in the room so that drafts do not interfere with the drying of the glued canvases. Direct sunlight also does not have a very favorable effect on freshly hung wallpaper.
Types of wallpaper "duplex"
Duplex paper wallpapers are usually divided into three categories:
- Smooth - usually with a pre-applied pattern;
- Embossed - with relief of varying depths, they can be either pre-painted (with a pattern) or intended for painting;
- Wallpaper for painting is always unpainted, with a top layer treated with water-repellent compounds. It can be either embossed or smooth.
The “heaviest” ones are embossed. To glue them, use glue labeled “for heavy wallpaper.” Such adhesive compositions are available in the line of all well-known manufacturers of wallpaper adhesives: Quelid, Kleo, Metylan, Pufas, Exlusive and the Russian “Moment” (manufactured using German technology). In the absence of the above, you can glue on CMC or Bustilat.
Embossed paper “duplex” has the peculiarity of stretching when soaked in glue.
Another feature is that it peels off under its own weight after drying in cases where it is glued to poorly prepared walls.
How to glue
Duplex paper wallpaper is glued using the same method as any other wallpaper on a cardboard base. But it is necessary to take into account that Germany makes heavy material for which they use special glue.
In addition to glue, the following tools will be required for work:
Pasting paper wallpaper
- knife;
- roller;
- level or plumb line;
- spatula for cleaning walls;
- glue brush.
Also, this material can peel off under its own weight after drying if they are glued to a poorly prepared surface.