How does this happen
Tinting can be carried out in two ways - independently or using special equipment. In the first case, you can save time and get the job done without wasting time traveling to special centers. The second option allows you to achieve a more accurate shade when you need to accurately match the color to an already painted wall.
How to choose the right colors
To find a suitable palette, you should consider the following nuances:
- You can choose a color using a special catalog, which is available in every store that sells paint and varnish products.
- Depending on the lighting, the color of the coating after mixing with the color may differ. For example, a shade will look different at home than in a store.
- Don't mix a lot of paint at once. First, a small amount is made and tested on the wall. This way, the exact ratio of color and paint material for the selected shade is revealed.
- If the room is bright, choose a synthetic pigment. Under artificial lighting, colors containing organic substances will look better.
The chosen palette for the walls depends on the size of the room and the degree of illumination. The color scheme of the surface should be harmoniously combined with the background of the floor covering and furniture. If the floor is made in brownish shades, then the color for the walls can be beige. With a green-blue floor covering, the walls are decorated in yellowish or golden tones.
The range of wall coverings can be bright and rich. Rich colors are known to lift your spirits. Among them are ocher, lush green, golden or brown shades (next photo). It is worth remembering that blue tones become faded in evening light.
A room painted in a light palette will visually become more spacious.
There are three types of colors:
- cool shades: green, purple and blue;
- warm: yellow, orange and red;
- neutrals: black and white.
When choosing a specific color, it is worth considering that adhesive solutions lighten after drying, while water-dispersed and oil solutions darken.
Is it possible to use color for dyeing?
Theoretically, the color can be used for application to small surfaces, but its use for painting large areas is irrational. There are two reasons for this:
- Difficulty in application due to high density;
- finding the product in a small container;
- high concentration.
As a result, using color as an independent unit leads to excessively high costs. If you really use such a liquid, for drawing some individual details.
Mixing technique
First you need to determine: how much paint will you need? When mixing by hand, there is always a human factor, and ninety-nine percent out of a hundred, the second time you mix, you will get a different color than the first time. In order to avoid such troubles, be sure to carry out calculations by determining the proportions of the paint. It will be better if there is something left over rather than trying to guess the initial shade again.
Before applying color to the wall, you need to prepare it
It is important to follow the rules here so as not to make mistakes.
To begin with, you can make a sample that will help determine the desired color and will not allow you to spoil the entire volume. This is done like this: mix 100 ml of paint in a small container, then add a few drops of pigment. You can add it with a syringe; this method will allow you to determine the number of drops and see when the mixture acquires the desired color. When you reach it, write down the number of drops somewhere so as not to keep it in your head.
The next step is to see how the color will look on the wall. It is worth considering that on the surface it may be slightly different than in the container. To check, select a small section of the wall and paint with the resulting mixture. Wait until everything is completely dry. Look at it in different lighting, taking as a basis the one that usually prevails in the apartment. If the color is suitable, you can continue working.
By the way, this is one of the advantages of hand-painting. You can prepare a small amount of paint and save a lot of money.
To obtain a significant volume, take a plastic or enamel bucket. Water-based paint is poured into it and mixed by hand or with a construction mixer. Add a little water to get a milky consistency. Next, make a color solution. This is where calculations come in handy again.
If, according to the notes for the sample, you used 10 drops of one color and 6 of another per 100 ml, then to paint the entire wall you need to reduce the base by 20%. For 1000 ml you should take not 100 and 60 drops, respectively, but 80 and 48.
The resulting color solution is added in small portions to the paint bucket. Applying it to the wall is exactly the same as applying the sample. In this case, haste is inappropriate. The time spent will definitely pay off with a result that is pleasing to the eye.
Painting walls with color is not such a complicated process, as this article confirms. The most important thing is to approach the stages of painting work correctly and carefully. Each stage is a special and independent process, which has its own technology. Some little things may seem insignificant, but you shouldn’t give up on them. When renovating an apartment, every little detail is necessary and important.
Criterias of choice
The main difficulty for many is how to choose the right color for subsequent dilution with the main volume of paint. To avoid mistakes, you need to focus on the following criteria:
- Capacity. It is optimal if the product has a narrow neck that allows you to dispense the product.
- Manufacturer. Russian products differ little in quality from foreign ones, and you can save on price. But here it is important that the paint manufacturer and color scheme match.
- Type of base paint. Most colors are intended for the preparation of water-based compositions. There are other options, but they are less common.
- Color. The final shade largely depends on the lighting in the room, so it is better to mix a small amount, evaluate the result, and then prepare all the paint.
- Range. It’s a big plus when the manufacturer provides a special card that allows you to choose the appropriate shade. It is advisable to clarify the availability of such a choice in advance.
- Type of pigment element. They are organic and synthetic based. For rooms with bright light, it is better to choose the second option, because it is not afraid of UV rays. In the case of artificial lighting, natural pigment looks better, with greater saturation and better colors.
Colors and their meaning in design
Brown
The cozy, rich dark brown color will make you curl up and fall asleep. It creates an atmosphere of forest and magic. Sunny brown will take on the most unusual shapes at different times of the day.
Red
Red increases energy levels at home. This shade is quite intense. Choosing this wall paint color is intuitive and personal.
Yellow
Yellow notes capture happiness and are associated with sunlight. This is an excellent option for the kitchen, dining room, and bathroom, where this color will give you good health. In the hall, small corners, yellow will look welcoming.
Orange
Orange is used to create excitement and enthusiasm. It looks great in the gym, where you need to release anger and negative emotions.
Violet
The combination of purple shades is always the richest, but at the same time quite sophisticated. As an accent, it gives depth to the scheme.
Green
Green is the best soothing color for the eyes. The colors combine from refreshing blue, invigorating golden, delicate light green: they suit any corner of the house.
Blue
Blue colors reduce the number of heartbeats, are considered relaxing, and are recommended for bedrooms and bathrooms. The pastel palette of the house is milky blue and can highlight the warm notes of furniture and fabrics. In living rooms and large kitchens we select bright blues and azure.
Neutral
They go out of fashion and come back again; their advantage lies in their versatility and flexibility. Black is rarely used, mainly as an accent. Experts believe that black is essential in every corner of the home. This shade adds depth to the setting.
Do you want to feel romantic and calm? A light warm or cool palette will help with this. How to choose a wall paint color to bring peace and a cozy atmosphere? Give the space a buttery, golden feel—like the kitchen. Need to feel calm and balanced? Make everything out of notes of moss and sage. What if your energy and bright personality are overflowing? Transform with rich colors.
You don't have to spend a lot of money to remodel the exterior of your home. With a little pigment and a lot of imagination, you can easily change everything by using the right combination of colors to paint the surface. You can feel the way you want with the help of a brush and imagination, because choosing the color of the walls is not such a difficult task.
Breeding rules
To prepare the paint, find a clean bucket (plastic or metal). Pour the required amount of paint into it and mix everything well to the desired consistency. This can be done using a drill attachment or by hand. If the paint is too thick, add thinner.
In the next step, prepare the coloring composition. To prepare it, do the following:
- pour 100 ml of paint;
- add color to it;
- mix everything until you get the desired shade.
Pour the prepared mixture into the main mass in small portions and mix. If foam appears when stirring, wait until the liquid settles until it disappears.
How to mix paint correctly
The mixing technique involves performing several steps:
- Decide on the amount of material needed; it’s better to prepare more than there won’t be enough later.
- It is best to start choosing a color for the walls by making a sample.
- A sample is a small amount of the desired color of paint for painting walls. It is prepared in a small container in which a few drops of color are added to 100 mg of paint. By stirring, you get the desired shade.
- If you know how many drops you added to get the required color, then recalculating the entire volume, you will get the required amount of color.
- At the next stage, you need to check how the resulting color scheme looks on the wall. The color of the finished paint does not always match the color of the tint on the wall.
- The applied paint must dry. The resulting surface should be viewed under the lighting that prevails in the room.
- The choice of paint color for the walls should correspond to the design objectives, the lighting of the room, and fit organically into the interior.
- The next step is getting the right amount of paint. Knowing the amount of color per 100 ml, it is easy to recalculate the need for the required amount of paint.
- Constantly stirring the paint, add color in a thin stream.
We must remember! Adding color to various paints is done strictly in a given ratio. The color should be mixed in one container.
How to paint: step by step instructions
After preparing the paint using a color scheme, you can begin painting the surface. Follow these steps:
- Prepare the walls. Level the surfaces and remove defects with putty. After drying, treat the wall with putty and prime it in one or two layers.
- Prepare the color and paint (how to do this is discussed above).
- Apply paint using a roller. It is desirable that the pile has a size of 1.5 to 1.8 cm. For work, use a special container and a brush. Before adding paint to the bath, stir the paint well to maintain evenness of color.
- Proceed from the corner of the room (window side). Use a brush to treat the corner, and then the surface at a distance of 50-100 mm from the corner part. Apply the strips vertically so that there is overlap. When painting wallpaper, the work is done joint to joint.
- Wait for the paint to dry. This takes about 4-5 hours, but the exact information should be on the paint container. New layers are applied after the previous one has completely dried.
Acrylic paints
Acrylic wall paint is made from acrylic resins with the addition of additives that give the paint special properties:
- By adding latex, the paint is given properties that allow it to withstand high humidity.
- Using paint you can hide various irregularities up to 1 mm in height.
- Metal, glass, concrete, wood, and plastic are painted with acrylic paints.
- Acrylic wall paint is odorless and dries quickly.
How to choose acrylic paint for walls
Acrylic paint is available for various purposes:
- We need paint to paint interior spaces and create a fashionable interior.
- In order to paint a picture, it is preferable to choose artistic acrylic. This paint is easily diluted with water, which allows you to obtain different consistencies. After drying, this type of paint changes color and becomes darker.
- For painting glass, paint that is resistant to light and does not change its properties when heated is suitable.
- It is best to paint wood, glass, walls, and stone with acrylic paints, which have low fluidity and durability.
- There are acrylic paints for fabrics too. True, not every fabric can be dyed.
- Acrylic paints intended for indoor use are best suited for painting walls. A wide palette of colors for walls allows you to create an amazing interior.
Useful tips
When using color in the process of painting walls, it is important to adhere to a number of recommendations. Let's highlight the main points:
- priming the putty surface is mandatory, but there is no need to apply a primer to the wallpaper;
- before adding color to the main part, it must be mixed with 100 ml of paint, and only then poured into the total mass;
- gloves must be used for work;
- stir the paint periodically to achieve uniform composition;
- Before use, roll out the roller, namely, dip it in paint and roll it over the corrugated surface;
- do a paint test on some invisible area to look at the shade;
- use a roller to paint the corner near the ceiling;
- When applying stripes, be sure to overlap to avoid gaps.
When following the rules discussed above, there are no difficulties with the use of color, and the finished room has the expected appearance. The main thing is not to lose sight of even minor nuances, because they can affect the result.
Features of diluting water-based emulsion
In the painting process, many people prefer water-based paints due to their environmental friendliness, wide range of uses and affordable prices. But novice builders are often interested in how to dilute this composition to achieve the desired result. Regardless of the type of room, this stage cannot be neglected, because the quality and appearance of the finished surface depends on it.
The need for dilution is determined by the composition of the water-based paint. Its main element is water, which after application is absorbed and evaporates. To check the thickness, open the paint container. If it is liquid, let the product stand in the air for a while.
When to dilute
The relevance of dilution can be assessed as follows:
- Visual assessment. Excessive thickness can be seen after opening the jar. In this case, add water or solvent to the composition, then mix the liquid with a brush or a clean/thin wooden stick. If the paint does not drain from it when you remove the stick, continue thinning.
- The severity of application. Open up the paint and try applying it to a small area. If difficulties arise, the layer is excessively thick and viscosity, it is necessary to dilute the liquid. This is especially true if a spray gun is used for work. Such equipment has a very thin output, so the coloring composition must be liquid.
- Improper storage. If the lid has not been properly closed or the paint has been stored longer than expected, it may dry out. To restore its qualities, it is necessary to add a solvent. This will help in situations where the paint has not completely cured.
How to use water
As a rule, ordinary water is used to obtain the desired consistency, because a water emulsion is made on its basis. But keep in mind that the liquid used must meet the following characteristics:
- room temperature - when working inside the facility;
- 2-3 degrees higher than the outside temperature - during outdoor work;
- no impurities.
The best solution would be to buy distilled water at a construction market or auto store and then bring it to the desired temperature. As a last resort, you can boil ordinary tap water and let it settle.
Proportions
Before diluting, pay attention to the label and manufacturer's recommendations. Most often, the latter gives recommendations on the correct preparation of the composition. The difficulty is that there is no single rule for dilution, because everything depends on the current situation. Sometimes adding water is not necessary at all.
Experts recommend applying paint to a small part of the wall, and then proceeding with dilution. It is important to consider the following points:
- the total dilution percentage is no more than 10% of the paint volume;
- primer layer - 5-8%;
- second layer - up to 3%.
No dilution is carried out during finishing processing.
Shelf life
Before buying water-based emulsion, look at the shelf life. If it runs out, it is better to give preference to more “fresh” paint. In this case, the remaining material can be saved and used for further finishing.
You cannot pour the remaining tinted paint into a common jar, because this can affect the properties of the composition and its color. It's better to have a separate container.
If the work is performed by a hired worker, monitor the dilution process. Some artists make the paint very liquid to simplify the application task, but the final quality deteriorates.
Pay special attention to the choice of solvent. It should be suitable specifically for your type of paint. If you use liquid for water-based emulsion, for example, for oil paint, negative consequences are possible.
Breeding rules
To reduce the consistency of the paint, you must have a container of sufficient volume, for example, a plastic bucket, and a drill with a mixing attachment. The general algorithm of actions is as follows:
- Pour the coloring composition into the container.
- Gradually add water and mix the finished liquid well.
- Stir the mixture until lumps are completely removed.
After achieving the required thickness, apply paint to the desired area and evaluate the result for drips, evenness of the layer and other parameters.
How to tint paint yourself
How to dilute paint colors
The tinting process is a step-by-step adherence to technology:
- Preparing containers of the required volume - the container must be cleaned of dust and thoroughly wiped with drops of water.
- Pre-tinting is a mixture of a small amount of base and a few drops of color. This stage is necessary to determine the exact proportions to obtain the desired shade.
- Painting a small area - Once dry, this area will show how the paint looks on the wall and identify any adjustments that may need to be made.
- Mixing the full volume of paint and further painting the entire room.
Combination of shades by color scheme
Thus, when the primary colors are initially mixed, a triad of green, orange and purple colors is obtained. Secondary and subsequent mixing produces a variety of color options from light to dark shades.
Using the color wheel involves various techniques:
- Monochromatic type - involves the selection of shades of the same color, varying in degree of intensity. As a result, the interior turns out to be monochrome, which presents certain difficulties in choosing accessories that should not stand out from the general range.
- Complementary combination - creates compositions from diametrically opposite secondary shades on a circle (red + turquoise, purple + yellow-green, green + burgundy). To avoid the effect of a too bright interior, one color is used as the main color, the second as an accent.
- Harmonious type - building a color scheme on one main color, two supporting colors and black or white. There are two options for a harmonious type of color combination:
- Triad (classical of equidistant shades, analog of neighboring colors, contrasting of shades opposite to the main one).
- A rectangular four-color scheme (consisting of pairs of complementary shades, for example, a beige base with brown, emerald and blue accents).
How to paint without streaks
Most often, a roller is used to apply paint. It is simple, convenient, affordable and used by professionals. With its help, you can treat large areas and ensure uniform coverage of the surface with paint.
Additional advantages:
- ease of application;
- ease of paint distribution;
- possibility of using different attachments;
- minimal risk of lint loss, etc.
Dyeing technology
When using a tool, pay attention to the paint application technology. The most popular way is in the form of the letter “W”. Its peculiarity is that vertical stripes overlap each other, which allows you to cover a large surface and avoid illegal areas.
The second method is the use of the “squares” method, when the surface is conditionally divided into equilateral figures. After this, they are painted one by one and combined into a single palette with horizontal stripes. When choosing a technique, you need to take into account the characteristics of the incidence of light from the window.
How to choose a roller
Before doing the job, it is important to choose the right roller. The main attention should be paid to the nozzle - the type of pile. There are several options available here:
- Foam rubber. Suitable for water/adhesive based compounds.
- Velours. Provides a smooth surface, used for painting ceilings and applying the finishing layer. Suitable for applying oil paints and water-based emulsions.
- Polyamide. A universal solution. They absorb and transfer paint well and are easy to clean.
- Fur. They differ in pile length and do a good job of painting over defects on the wall. There are artificial and natural. Allows you to work without splashes and ensures the application of a uniform layer even on difficult surfaces.
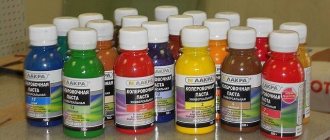
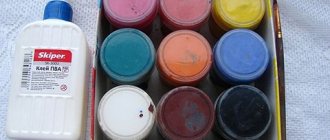
What is color
Kohler is a paint that has a particularly rich color. It is used to obtain the required shades of various paints: alkyd, latex, oil, water-dispersed, etc. A wide variety of colors for painting walls allows you to obtain paint of any shade.
Using color
The color is organically used when painting facades and decorating interiors.
Tinting techniques are especially in demand among people with a rich imagination.
The use of color allows you to create complex shades of paint. Such paints are not sold in stores; they cannot be made using a tinting machine. The color is used when added to various paints. It is added to latex, adhesive, and water-dispersed paints.
For example: only by hand can you get the color of currant or orange juice.
How to choose the right color
The color is available in two versions:
- with organic pigments;
- with inorganic pigments.
Color made from natural pigments has a more saturated color, but will quickly deteriorate when exposed to sunlight.
Inorganic color is very resistant to fading, but has a less saturated color and a small color gamut. There are specifics to choosing paint for a room.
As a rule, the color comes in the form of:
- powders;
- solutions;
- pasta.
The best way to select colors for painting walls is to do it yourself. It will be cheaper, and you can get the color you planned. By manually preparing the paint, you have a wider range of colors for the walls.
You can entrust the selection of colors for the walls to a special machine. They are available in large hardware stores. However, the resulting paint may not provide accurate color reproduction.
How to paint correctly
After choosing a tool, you can proceed to coloring. But here you need to know how to paint walls correctly. This point depends on the type of paint used.
Water emulsion
For such compositions, a pile or velor roller is more suitable. The latter has low absorbency and is optimal for small spaces. The pile option is more expensive, but it lasts longer and can be used for various tasks: finishing and painting work. The length of the pile can be selected taking into account the tasks at hand.
Enamel
It is used to achieve a glossy effect, so it is important to prepare the surface for painting. It should be perfectly smooth. In addition, the roller itself should not leave air bubbles or lint. It is advisable to use a wide tool with natural wool bristles.
Silicate composition
It is important here that the roller collects and transfers an identical volume of paint in different stripes. Otherwise, the discrepancy in thickness will be noticeable. The optimal solution would be to use a synthetic tool and a tray with a grooved area to remove excess paint.
Other types of paints
If you have difficulties choosing a roller for a certain type of coloring composition, you can contact the consultants in the store. It’s a good idea to look at the instruction manual, which may also contain information of interest. For example, rollers with a synthetic “coat” are more suitable for applying latex paint, but when using alkyd compounds, a brush is needed.
Design options
Plain walls are chosen for discreet interiors; such walls serve as a neutral canvas for expressing style in pieces of furniture and accessories.
Painting in two different colors
Painting walls in two different colors serves as a rational technique to visually enlarge a room, change the perception of the geometry of asymmetrical walls, or simply focus on one wall. One wall can be painted with two different colors.
Painting in different colors (more than two)
Painting with several colors in the same range or a combination of contrasting colors will become an independent decoration in the interior. This could be stripes, vertical or horizontal separation of walls, or painting all 4 walls in different colors. Within one room, it is better to make one color the main one, and leave the remaining 2-3 colors as auxiliary ones.
In the photo, one of the walls is painted in three colors with uneven stripes using a geometric technique using masking tape.
Stencils
You can make your own designs using stencils and templates by cutting them out of paper and attaching them to the wall. You can also draw boundaries for the design using masking tape glued to the dried base color.
Striped design
Stripes of paint stretch or expand walls and change the perception of a room depending on the location, color and frequency of the stripes.
Patterns and ornaments
Suitable for a child’s room, you can draw a house, a fence, trees, ethno ornaments, monograms on the walls of the child’s bedroom interior.
They can be organized or chaotic, created with a brush on wet walls.
Cracks or craquelure effect
They are created using acrylic painting and craquelure varnish; the more varnish, the deeper the cracks. When applying, the roller must be held vertically so that the cracks are uniform.
In the photo, the accent wall of the bedroom is made using the technique of cracked paint with a backing that matches the tone of the walls.
Under the brick
An imitation of brick can be made using plaster on a lined wall and traced seams along the wet material. After the plaster has dried, apply 2 layers of paint.
Painting with squares
Can be done using templates or masking tape. Squares can be plain or colored, of different sizes and positions on the wall.
Texture design
It is created by painting walls with textured paint, which contains acrylic particles and starch. It comes in dry and liquid states, and can also be tinted. Apply with a regular or textured roller. For interior design, special textured paint for interior work is suitable.
Gradient and ombre
Suitable for visually enlarging the ceiling if the dark color near the floor fades into white. A gradient or smooth transition of color can be horizontal or vertical, with a transition to the adjacent wall. It is created with 2 or more colors, where at the junction of the colors, using a dry roller or brush, the dark color is stretched onto the light area in one direction.
The photo shows a partition wall painted using the ombre technique with a smooth, smoky transition of gray to white closer to the ceiling.
Using a textured roller or sponge
Effects using a textured roller or sponge are made on a uniformly painted wall, creating the effect of watercolor, bark beetle, waves, cracks, velor or mosaic.
painting
Artistic painting using ethnic techniques, depicting a view of nature, animals and reproductions will become an individual feature of the interior with wall painting.
Design with moldings or panels
Creates the effect of niches or furniture facades, adding volume. Molding can be colored or white, made of wood, duropolymer, or gypsum.
How to avoid streaks and streaks
Despite following the basic rules, beginners often fail to complete the task and leave streaks/streaks on the wall. To avoid such problems, follow these simple tips:
- Check the quality of the pile in the store. It should not be pulled out of the fixing part.
- Calculate drying time correctly. Stains and stripes often appear at joints when the master did not have time to process the entire surface in a certain time.
- There should be no traces of corrosion or paint on the metal part of the roller, and the cylinder itself should rotate smoothly and without “play”.
Remember that painting walls is a responsible process. To achieve the desired effect, it is important to adhere to technology and follow certain rules. In addition to taking into account the tips discussed above, choose the right paint. The following choices are available here:
- Water emulsion. A practical option. It is not afraid of dust and is easy to clean.
- PVA paints. They get dirty quickly, are suitable for ceilings, and are afraid of water.
- Oil and alkyd compositions. Dries quickly and is resistant to mechanical damage. But because of the smell they are used for external work.
- Latex paints are not afraid of mechanical stress and adhere well to the surface. Used for treating plastered walls and wallpaper.
- Acrylic resins. They serve for a long time and are resistant to fading. Used in the kitchen and bathroom.
- Silicone. They are resistant to moisture, vapor permeable, durable and have a long service life. Used for finishing facades and interior walls/ceilings.
- Decorative paints. They allow you to realize different ideas in creating an interior. The result depends on the thickness and application characteristics.
Water-based paints
Water-based paints are especially popular. Paints of this type are an emulsion consisting of water, polymer particles and coloring pigments.
Water-based wall paint has no toxic odor and is environmentally friendly. It adheres firmly to the surface to be painted, does not crack, and is highly resistant to fading. It doesn't take long to dry completely.
The price of water-based paints is significantly lower than their analogues.
Basically, the choice of water-based paint for walls depends on the client’s taste and preferences. The main disadvantage of this type of paint is that it does not apply to already painted surfaces.
Types of water-based paints
Water-based paints include:
- silicone;
- silicate;
- mineral;
- acrylic paint.
Water-based paints , as a rule, have a standard color: white. To obtain the desired color, you cannot do without tinting. A varied palette of wall paint colors is achieved by mixing paints of different colors with your own hands.
Silicone paints are more expensive than other water-based paints. The main advantage of this type of paint is that it breathes and is vapor permeable. This paint can be applied to a damp surface. The paint allows you to hide irregularities up to 2 mm.
Silicate paint consists of diluted liquid glass in a water emulsion. It absorbs excess moisture and releases it when the humidity in the room decreases. The paint is great for outdoor use.
Mineral paint is prepared on the basis of cement or slaked lime. It is used to paint concrete, brick, and plaster surfaces. It is resistant to sunlight, precipitation, and chemicals.
Acrylic paints are especially popular
What tools are needed?
To paint walls, you need to prepare a tool. To work you will need:
- Roller. Differs in the type of cylinder. For example, the polyamide version boasts a long service life and uniform application. Fur allows you to save paint, but sometimes they leave lint on the wall. Velor ones apply an even layer, but have a high consumption. Fabric ones can splash the composition.
- Plastic pallet.
- Sanding block for surface grinding.
- Brush. Used to treat hard-to-reach places.
- Masking tape. For sealing surfaces that do not need to be painted.
- Film. Needed to protect furniture and floors from paint.
Features of painting walls made of different materials
Each material used to build a house has its own characteristics, porosity and features. Before you paint the walls correctly, you need to know the application features of each material.
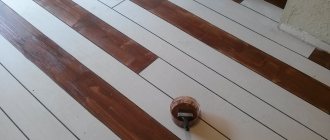
Tree
Typically, the structure of wood is not hidden under paint, treating it with stain or other impregnations. If you need to treat a wall made of wood, then choose a breathable paint that allows steam to pass through. The tree breathes itself, controlling the level of humidity, so this parameter is indispensable. The technology of finishing walls for painting requires preliminary priming of the surface.
Brick
Before painting, such walls are cleaned with water. A week later, when the water is completely dry, the surface is primed. The paint and varnish material can be applied directly to the brick itself. Interior acrylic or alkyd paint is used.
Note! The seams can be emphasized with a different color using a brush. The work requires perseverance and patience.
Concrete
Feature in the porous structure. All paint will penetrate deeply, and consumption will increase. Before painting the concrete, the surface is primed with a deep penetration compound. It is cleaned, all cracks are eliminated. Then latex or epoxy paint is applied.
Wallpaper
The option is convenient, since the walls can be repainted at any time. The walls are painted with water-based paint. It is water based and has no solvents.
Drywall
Painting the walls is possible after puttingtying the surface, sanding and applying a layer of primer. Acrylic or silicone paint is used for interior work. It is plastic and will provide a protective film.
Plaster
Walls to be painted require preparation. The surface is smooth, clean and dry. The chips are cleaned and compacted. Paint is applied to plaster using a roller; 2 layers are needed. All pores are filled as much as possible.
Preparing the premises
Before you start painting, it is important to prepare the room. Do the following:
- Remove the curtains.
- Move all the furniture to the center of the room and cover it with film.
- Cover windows, doors and other elements with the same film, and then secure with masking tape. They will also cover the hatches and baseboards.
- Turn off the power supply circuit breakers.
- Remove the covers of switches and sockets, and then cover the electrical parts with masking tape.
- Remove heating radiators. First close the valves, unscrew the nuts and drain the water into a specially prepared pan.
After completing the above work, proceed to painting work.
Video “Painting walls. Useful tips”
The video tells you which color is suitable for a certain room in a house or apartment. Useful advice is provided by experts in the construction industry.
We recommend that you read
Stencils for painting walls - a unique decor tool
Recommendations for choosing a roller for painting walls
Design options for painting walls in the hallway
Preparing walls and tools
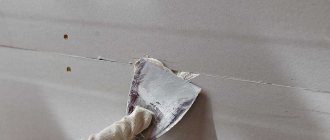
Before painting, prepare the surface and remove any cracks/imperfections. Remove wallpaper if it has been applied. Cover severe defects with putty or gypsum mortar, and after drying, treat everything with sandpaper.
After drying, prime the surface with a composition matching the paint shade or use a gray liquid to reduce paint consumption. When processing wooden surfaces, treat them with a special impregnation to protect them from rotting.
Before using the roller, place it in soapy liquid, rinse and dry.
Emulsion paints
There is no unpleasant odor when working with the composition; other types of materials can be applied to the resulting surface. Emulsion paints are a homogeneous composition of antiseptic, thickener, fillers and latex. This dispersion, after drying, forms a durable, uniform coating.
Acrylic color is used for painting walls in apartments in rooms with low humidity. Does not change color when exposed to sunlight. The latex type is abrasion resistant and will hide small surface cracks. It can be used for painting wallpaper and plaster.
Rules for applying paint
It was already noted above how to properly apply paint with a roller to avoid streaks. The main thing is to follow the application technique, namely, move from bottom to top or vice versa, as well as move vertically. The sequence of actions is as follows:
- pour paint into the tray;
- wet the roller and spread the paint over the pile;
- paint from the window.
Try not to press too hard on the roller, act smoothly and make sure that there are no gaps.
For convenience, divide the surface into squares. To calculate the side of a geometric figure, multiply the width of the tool by five. Next, divide the square into five stripes and color the 2nd and 5th, and then the 4th, 1st and 3rd. On the second layer the sequence is different - 3rd, 1st, 4th, 5th and 2nd stripe. When applying the next layer, change the direction of movement of the roller. After coloring one square, move on to the next.
Additional tips:
- to conditionally divide the squares into strips, use masking tape;
- when applying the first layer, use a roller with a longer pile, and then with a shorter one (0.6-0.7 cm);
- apply paint in a thin layer;
- move on to the second wall after completing work on the first;
- If paint gets on wood, immediately remove it with a sharp knife or spatula.
Techniques and methods for properly painting walls (with photos)
There are different ways to paint walls, which have their own advantages and disadvantages. The technique of painting walls by spraying is considered one of the fastest, neatest and most economical painting methods. It can be used to paint objects of almost any shape, including those that are difficult to paint with a brush or roller. Spraying is also great for painting flat surfaces, as this method allows you to get a perfectly smooth, thin layer of paint. To cover small areas, you will only need to purchase an air sprayer - an airbrush, which is a container equipped with a pumping and spraying system. A more advanced and powerful type of spraying equipment are electric spray guns. They provide high productivity and excellent quality of work produced.
Proper painting of walls includes spray recommendations. When painting the surface of a wall using the spray method, apply the paint with quick but smooth movements from side to side, in no case stopping or letting the stream concentrate at one point. The airbrush should be held strictly perpendicular to the wall. The paint used in this case is less thick than conventional paints intended for application by brush or roller, so if you spray too thick a layer, drops will quickly form, flowing down and disrupting the uniformity of the color.
To paint small surfaces, you can use aerosol paints in cans. Their advantages include versatility (suitable for painting a wide variety of surfaces), no need to configure and adjust the tool, low price and a wide range of colors.
The following are various wall paints in the photo:
Cleaning the instrument
The final step is to clean the instrument. To do this, squeeze the paint roller out, rinse it and dry it. If a water-based composition was used, the water can be drained into the sewer. In other cases, gasoline or another solvent will be required, so you cannot drain the liquid into the toilet or sink.
If you need to pause while working, place the roller in the bag and close it tightly. Alternatively, use cling film. This method is suitable for a break of no more than two to three hours.
Rinse brushes and tray in warm water. In the future, the brush will need to be placed in warm water for preparation. If you don’t want to wash the tray, wrap it in foil or a bag.
Using color
There are two ways to mix colors with a white base: manually and using a program. The first option is more suitable for mixing a small amount of paint.
You can mix the paint anywhere; the color is introduced into the base in portions to achieve the desired shade.
- In order to color a large amount of base, it is better to use a program coloring method, since when mixing manually, the shades will differ from the initial one, and it is impossible to achieve a uniform color.
- Programmatic coloring of the base allows you to achieve one tone with several colors. The program calculates the use of color and white base exactly to 1 gram. This way the color is identical, bright, and saturated.
- It is not advisable to purchase a computer system with hardware for home use.
To color a white base by hand, it is better to use an intense, liquid color. For program coloring it is better to use a thick color paste.
The advent of colors made a huge breakthrough in the field of design. The use of colors allows builders and designers to bring a wide variety of design solutions to life.
To do this, you don’t need to look for ready-made paint with the most suitable color. You can make the required color yourself.