PVA glue is a universal composition that has become very popular for use both in office supplies for gluing various objects, and when performing various finishing works to strengthen primers, dilute wallpaper glue and putties.
First you need to understand what PVA glue is. This is a liquid substance of polyvinyl acetate (vinyl acetate polymer) in solution with water, the addition of plasticizers and special components, which forms a familiar adhesive solution for gluing many materials.
To find out how long PVA glue takes to dry, you need to, first, remember that this composition has a large number of varieties that behave completely differently when working.
The time it takes for the substance to dry is influenced by a number of factors, from the type of surface to the air temperature in the room. This process can take from a few minutes to a whole day. To achieve the desired result quickly, you should carefully prepare for the gluing process. Let's look into all the intricacies.
Main characteristics
PVA glue is a special thick mixture that has a characteristic odor reminiscent of a type of alcohol. In essence, it is a dispersion of PVAD, plasticizers and a number of other additives. It is safe to say that this composition is completely harmless to human skin.
Of course, there are brands of glue that contain auxiliary ingredients, and they cannot be called completely safe. In most cases, these are specific solutions that have a specific purpose for special types of activities. As a rule, most manufacturers produce ordinary PVA glue, the so-called “universal” one, which does not contain potentially dangerous components.
Holtzky's blog article Tips for gluing wood
Invented in 1912 in Germany, PVA went from being a curiosity to a widely used and well-known glue within a couple of years. This happened thanks to two main characteristics: non-toxicity and versatility. Today, the composition continues to be improved and new brands are being produced; PVA glue is acquiring new properties. Therefore, it makes sense to tell in more detail where and how this adhesive material is used, why it is unique and how it is produced.
What types of PVA glue are there?
As mentioned above, this mixture can be used to connect almost all surfaces. It is used both by schoolchildren when performing office work, and by builders for gluing wallpaper, joining parts, priming, etc.
Let's take a closer look at each individual type of PVA:
- “Household” - it is used in cases where it is necessary to glue non-woven wallpaper, paper or vinyl based. This adhesive is also used for wooden and concrete bases that have been previously plastered.
- “PVA super (M)” - it can be used not only in the domestic sphere from vapor-permeable materials. With its help you can paste not only wallpaper, but for example linoleum. The yellowish super product does not contain any foreign additives, and its frost resistance lasts about 6 cycles at a temperature of -40 °C.
- “Universal” - it can be used for gluing combined surfaces. It is ideal for gluing linoleum, carpet, serpyanka, cardboard, metal, glass. The product can also be used for gluing laminated paper decorative plastic to chipboard, fiberboard, and MDF materials.
- “Construction” - it includes different types of mixtures that are used in construction. So, for example, if the composition is carpentry, then it is most effectively used for wooden surfaces. There is also parquet glue that is specially designed for it.
- “Stationery” - it is actively used for joining paper, photographic paper, and cardboard. It is most often purchased by schoolchildren, for example, if they need to glue puzzles into a picture. The downside of this substance is its low resistance to low temperatures and moisture.
- “Extra E” - used to work with materials made from vapor-permeable raw materials that do not require special technology for operation and future operation. For example, with plywood, fiberboard, cardboard, wood, paper, and also added to plaster, putty mixtures, etc.
- “PVA dispersion” - used as an additional ingredient in construction mixtures, which are used in many industries, in the shoe industry, for the repair of furniture, in water-dispersed paints, printing, for gluing paper and in the production of cardboard packaging, as well as carpentry work .
If the solution has expired, this is not a problem. Just shake the jar a few times and you can start using it, but there will be a loss in quality.
Composition and existing modifications
The glue, consisting of 95% PVA, has a characteristic, recognizable odor. The remaining percentage is filled with various plasticizing additives. They are designed to speed up the setting time and give it strength. But it is the additives that will determine how long the glue will take to dry. In addition, first-grade and premium-grade adhesives are available on sale.
And one brand of glue from different manufacturers will not necessarily be absolutely identical in the number and names of additives. Modifications of PVA glue determine its purpose. It happens:
- Household , which is used in repair work for attaching wallpaper to walls.
- PVA-K , that is, stationery, gluing paper and cardboard sheets. Not very resistant to moisture and sub-zero temperatures.
- PVA-MB is frost-resistant and versatile. Can serve as a carpenter's glue, joining fabrics, porcelain, tiles, ceramics, plastic and many other materials.
- PVA-M Super also bonds everything from paper products to wood, metal and leather.
What affects the drying time of PVA glue?
The drying time of the product is influenced by many factors. Regardless of the fact that the manufacturer indicates on the container with the composition the approximate drying time of PVA glue. All these indicators are relative.
Also on the packaging you can find detailed information under what conditions the final hardening of the glue takes place. For example, this can happen at a temperature of 20-24 ° C, with air humidity not exceeding 60%. Accordingly, it is rarely possible to achieve similar ratios at home. Therefore, the specified 24 hours will not be enough to completely dry the product.
Factors influencing drying:
- Temperature. If the room is warm, the glue will begin to harden faster. At low temperatures, on the contrary, the drying time will increase. In this case, the adhesive properties and adhesion quality will deteriorate.
- Area of surfaces required for gluing. The larger it is, the longer the drying process will take.
- Mechanical impact. If you exert increased pressure and press the bases tightly together, the hardening time will be shortened.
- Cleanliness of the base. If the base of the objects being glued is cleared of grease, dirt and dust, the product will dry much faster.
- Thickness of the applied layer. If it is thin, the mixture will dry much faster. However, some surfaces, such as porous wood, will require a thicker layer of glue, as the product will be absorbed into them abundantly.
- Texture. If the surface of the base is flat and smooth, it will take a long time to dry. The porous surface absorbs moisture well, which will result in the PVA glue drying faster.
- The product contains 95% polyvinyl acetate, and the remaining 5% are special additives that help improve the quality of the product. Depending on the type of glue chosen, this ratio may vary, which also affects the drying time.
- Type of mixture. If the glue composition is marked “Super” and “Moment”, then it will dry in a matter of seconds. One of the disadvantages of the product is that there simply will not be time to correct the position of the parts being glued together.
Product quality. The original PVA solution will dry as quickly as possible than the craft. Therefore, purchase this mixture only exclusively in specialized construction stores.
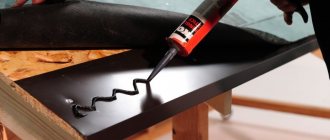
The type of wood you glue also matters
Wood can be divided into two types: coniferous and deciduous. Coniferous wood (such as pine boards) grows quickly and has a porous structure. This means that they absorb glue more easily and stick together faster. Often the clamps can be removed sooner. Hardwood grows slower and is much denser as a result, so the glue takes longer to penetrate and dry. Wood glues are equally effective on both types of wood, but it is especially important to ensure full cure for hardwoods.
Recommendations for applying glue
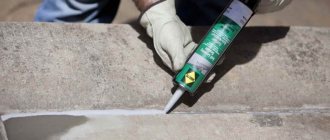
Working with PVA is not difficult at all. The instructions clearly indicate that you can glue a certain type of composition and how to use it correctly. But, as with any other work, the surface must be prepared and carefully processed. It must be clean and dry, so it is cleaned of dirt and dust.
For example, if you plan to apply the product to smooth, even walls, then they are treated with fine-grained sandpaper, this will improve the quality of adhesion. And if you will be gluing wallpaper on a rough base, then it should be thoroughly primed in advance. You can find out how long it takes for the primer to dry from our review.
It is important, regardless of the type of paste, to follow simple recommendations:
- The product is applied to the coating that will gradually (slowly) absorb it, that is, less loose.
- To treat thin wallpaper, applying one layer of solution is enough, and for thick coatings you will need two.
- If the composition needs to be applied pointwise, use a specially designed nozzle. If it is not available, you can use improvised items, such as a syringe without an attachment needle or a regular pipette.
- If the coating has a large area, then for application you can use a good lint-free roller, a brush, or, in extreme cases, a sponge. You need to coat it starting from the middle and slowly moving towards the edges.
- To remove air bubbles, you need to place a clean sheet of paper on the coating and carefully smooth out the resulting irregularities through it with a rubber roller or just your palm.
- If possible, it is advisable to place the glued products under a press to ensure greater reliability.
Important! For gluing paper products, it is recommended to purchase the so-called “archival” PVA composition. It does not contain acids, and the paper will not show yellowness after a couple of years.
Decoding
PVA glue contains 95% polyvinyl acetate. In addition to the main ingredient, the product may contain in different percentages:
- dioctyl sebacenate (DOS);
- dibutyl phthalate;
- various types of plasticizers;
- esters;
- preservatives;
- glycerin or oils;
- acetone;
- tricresyl phosphate;
- additives that stabilize the composition;
- water.
Depending on the main purpose of the adhesive, the composition of the adhesive may also include the following ingredients:
- styrene;
- defoamers that increase adhesion;
- nitro compounds;
- glass and metal chips;
- cellulose.
Product requirements:
- homogeneity of the mixture;
- high strength and elasticity of seams;
- resistance to temperature changes;
- inertness when exposed to air;
- non-toxic;
- harmless to humans.
Drying time for PVA glue
Drying process on paper
Surely everyone has wondered how to glue paper to paper? So this mixture is used extremely often by those who planned to glue paper products. The mixture dries in approximately 10-15 minutes, sometimes within half an hour. Apply glue to the paper surface in a small and even amount. Otherwise, it will make the paper wavy and slow drying.
How long does it take for PVA glue to dry on wood?
When gluing a wooden surface, PVA glue dries within 24 hours. However, the mixture will acquire its properties 7 days after application. It will become as monolithic as possible and resistant to moisture.
Be sure to press down on the bases to be glued, otherwise the wood will simply absorb all the moisture, begin to swell, and the result of gluing will be negative. If you need to seal a small crack, the mixture should be mixed with sawdust. In this case, the drying time will be from two to three hours.
Drying on fabric
It is not uncommon to hear the question of what is better and how to glue fabric to fabric? We can immediately say that with such work the mixture takes a long time to dry, about 6 hours. This is due to the fact that the fabric absorbs moisture. When gluing, the bases should be pressed against each other for several hours.
Working with plastic
Plastic things are fragile, so they often break. The plastic parts do not stick together well. Poor adhesion is explained by the structure of the material. There are few large pores on the surface of the plastic, which significantly reduces its adhesion. In industrial conditions, parts of plastic are welded. To solve everyday problems, you can use PVA.
Before gluing, the individual parts must be washed and dried. The adhesive mixture is applied to both surfaces in a thin layer, it must be allowed to dry. Then it is applied again, but only to one of the planes. After application, the parts are connected and compressed until completely dry.
Some masters consider it possible to simplify the process. It is advised to apply the solution to one side and press. In this case, re-application is not necessary. When working with plastic, you can use universal PVA or superglue. They dry quickly, which greatly simplifies the process.
Working with glass
PVA can be used to glue glass. Before the process, you need to clean the glass, apply an adhesive to it, which should dry a little. After drying, the parts are connected and pressed tightly against each other. There should be no air bubbles left between the parts; air will damage the strength of the seam. After hardening, PVA polymerizes and becomes completely transparent. To obtain a durable seam, gluing is carried out at a temperature of at least 150 degrees.
How to significantly speed up the drying process?
PVA glue, according to the manufacturer's instructions, dries naturally in about 24 hours. But sometimes a logical question arises: how to quickly dry a fake made on its basis. To do this, place the item in a warm and dry place. For example, in winter you can place the product near the radiator.
You will also need to use the following simple and tricky methods:
- Press the bases of the objects to be glued tightly together. To do this, you can use books, as well as the leg of a table or chair.
- Use heat. You can influence the mixture using a hairdryer or a heated lamp. The temperature during this process should not exceed 100 °C.
- The composition must be applied evenly over the entire surface area.
- The parts to be glued must be thoroughly cleaned and degreased (white alcohol, acetone, etc. will do). This will help speed up the gluing process.
Today on the market there are many brands from different manufacturers, which contain completely different components, which also significantly affects the drying period. Therefore, before purchasing, it is recommended that you pay attention to the instructions in the instructions that come with the kit inside the package or are located on the back of the bottle.
This is what it means to have hands in the wrong place. (Balls of thread)
I decided to take a chance and make some. although my heart told me that I was no craftswoman. I wanted to give some beauty to my daughter’s room.
I did everything according to the instructions.
Materials and tools for spider web balls: - Balloon (for a smaller volume, you can take finger pads, which are sold at the pharmacy); -Threads (any kind will do: regular threads for sewing, floss, iris, wool for knitting); -Glue (PVA, silicate, stationery); - Kinder surprise egg; -Needle, scissors; -Vaseline (you can use thick cream or oil); -For decoration: beads, feathers, beads, sparkles, semolina or powdered sugar.
Instructions for making a ball of thread:
-Inflate the balloon to the required size. -Lubricate the ball with Vaseline to make it easier to detach from the glued threads later. -We make two holes opposite each other in the Kinder Surprise egg with a hot needle. -Pour glue into the egg. -We thread a thread through the holes using a needle; when pulled through the egg, the thread will be wetted with glue. -Tie the thread to the ball and begin to wind it around the ball like a regular ball. Make sure that the thread is well wetted with glue. -You can wind as much as you want, but not very little. If there is not enough thread, the ball may not hold its shape. -When winding is finished, secure the end of the thread with a knot and hang the ball wrapped in thread to dry. There is no need to rush, it is necessary that the glue dries thoroughly and becomes hard enough. This may take 1-2 days. -When the glue has completely dried and hardened, carefully blow off the ball. The ball can be peeled off using a pencil with an eraser at the end. The ball can simply be pierced with a needle in several places and quietly deflated. Very carefully remove the ball from the inside. If the threads have moved, move them back into place. -You can decorate the resulting web balls using beads, beads, feathers, and ribbons. You can create a snow effect: moisten the ball with glue and dip it in semolina or powdered sugar. You can use threads of different colors, then you get a very beautiful weave.
I wound threads around the ball, they dried out, but the ball stuck to them so much that I couldn’t pull it out. girls. Can anyone tell me what I did wrong? why did this happen? Has anyone made something similar to this beauty?
The birth of wonderful spider web balls
I have already tried the tips from this article, I would have continued but I ran out of threads with glue))))) I am sharing with you)))))) today I will make Christmas trees from threads, there is a photo below, I want one))) maybe you will be inspired ))
Types of creativity: Nitography Difficulty: low Working time: 2 hours
Greetings, masters and craftswomen!
In this topic, I want to share with you my experience in making thread balls and photographs taken using this technique of my work, as well as those found on the Internet.
Materials and tools that we will need:
— Balloon (for smaller volumes, use finger pads, which are sold in pharmacies; for larger volumes, inflatable balls);
— Threads (any kind is suitable: regular threads for sewing, floss, iris, wool for knitting);
— Glue (PVA, silicate, stationery);
— Vaseline (you can use thick cream or oil);
— For decoration: beads, feathers, beads, sparkles, semolina or powdered sugar, etc.
Step-by-step instructions on how to make a ball from threads:
1. Inflate the balloon to the desired size. Wrap a spare thread around the tail of the ball
10 cm - for the future loop, on which the ball will subsequently be hung to dry.
2. Lubricate the surface of the ball with Vaseline to make it easier to detach from the glued threads later.
3. Soak the threads with glue. When using threads of different colors, very beautiful weaves are obtained.
There are several ways:
- Pour the glue into some container that is convenient for you to work with, and soak the threads in it for 5-10 minutes. Dilute PVA glue with water (1:1) before soaking, as it is too thick. Make sure that the threads do not get tangled when soaking.
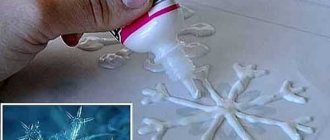
- Take a tube of glue and use a hot needle to make two holes in it opposite each other. Thread a thread through the holes using a needle (when pulled through the tube, the thread will be smeared with glue). Instead of a bottle of glue, you can take a Kinder Surprise egg, or another small plastic bottle, for example, a medicine bottle or the same silicate glue, and pour the glue into it.
- Wind the dry thread around the ball (skip step 4 and go straight to step 5), and then thoroughly saturate it with glue using a brush or sponge.
4. Secure the end of the thread soaked in glue to the ball (to secure the thread to the inflatable ball, you can use adhesive tape, tape, or protective tape). Then randomly wrap the thread around the entire surface of the ball, like a ball - each turn in the opposite direction. If the threads are thick, make fewer turns; if the threads are thin, wind them more tightly. Hold the threads in your hands with a slight tension, and also make sure that the thread is well wetted with glue. If the can runs out of glue, refill it.
5. After winding, leave again a long tail for the loop, winding it again on the tail of the ball, cut the thread and hang the ball wrapped in threads to dry. Dry the ball thoroughly for 1-2 days - the finished cocoon should be hard. Do not try to speed up the process by hanging the balloon next to a heating device - the rubber from which balloons are made does not like this, and the hot air may burst the balloon. An indispensable thing for drying is a clothes dryer with clothespins. You can dry several balls on the dryer at once, and they will not stick together.
6. When the glue has completely dried and hardened, the balloon must be removed from the web craft.
There are two ways:
1. Peel the ball off the web using a pencil with an eraser at the end. Carefully pierce the ball with a needle in several places and remove it or what is left of it.
2. Untie the knot that tied the balloon and it will gradually deflate. This method is mainly practiced when, instead of a balloon, you used an inflatable ball as the basis for winding.
7. Glue the finished cobweb balls together with a hot gun, pressing the gluing area slightly inward. The balls can also be sewn together, but this is not easy, because the balls become very strong and hard when dry.
8. Decorate the resulting design with beads, beads, feathers, braid, ribbons, artificial flowers, or any other materials at hand. Cover with paint. To do this, take a can of paint and go out onto the balcony or into the yard. With a slight movement of your hand, direct the colorful streams towards the balls awaiting a miraculous transformation. Create a snow effect: moisten the balls with glue and dip them in semolina or powdered sugar. Spray the ball with glitter hairspray. Don't expect much shine, but light sparkles are guaranteed.
small BIG tricks:
To prevent the table from getting dirty during the wrapping process, it is better to lay something plastic on it, not paper - everything will stick to the paper. Plastic coasters for hot dishes are suitable. If not, you can use a document corner made of thick plastic. The bottom seam is cut off, the folder is unbent and straightened, and it turns into a universal tool for saving the table from glue, paint and other creative deposits. In extreme cases, polyethylene is suitable for protecting the workplace.
Instead of glue, you can use sugar syrup or paste. Recipe for making paste: 4 teaspoons of starch per glass of cold water, mix thoroughly and bring to a boil.
Instead of thread, you can take thin copper wire and wind it around the ball in the same way.
To prevent glue from leaking through the hole in the floss tube, place a thin needle on the end of the floss and poke a piece of tape through it. Pull the thread in the opposite direction and firmly glue this tape to the jar. Thus, through a small hole in the electrical tape, the glue will not wet the thread so abundantly and will stop randomly dripping from the thread onto the table and clothes.
Useful life hack
As the author of this article, I can give one practical piece of advice that I have used many times when replacing slate over large areas. Unsuccessfully driven nails or screws leave extra holes, which do not greatly affect the aesthetic appearance, but threaten to spoil the functionality of the slate covering.
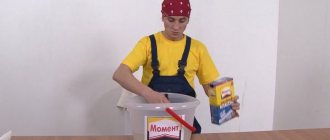
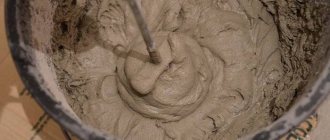
In such cases, I dilute M400 cement in a small volume with ordinary white PVA glue until it becomes a homogeneous paste. Not very liquid, but not thick either, as it sets within 30 minutes. I cover the holes, it’s cheap and cheerful, and there’s no need to invent anything. Keeps for many years. If you tint, the leaks won't last forever until the slate "rots."
PVA glue is a truly unique product. Although they first learned about it at the beginning of the last century, today it is actively used for various purposes. Modern manufacturers in Russia and abroad are constantly trying to improve adhesives in order to offer the consumer something more interesting and profitable, and they are doing it quite well.
Even more functionality of the product is given by the possibility of its use both independently and in combination with additional components and modifiers that improve properties.